Since the 2.0 SDK was opened by hongsoft, our company has used the hongsoft SDK in the face recognition access control application due to the characteristics of free and offline use. The recognition effect is good, so we pay more attention to the official dynamics of the hongsoft SDK. Recently, ArcFace 3.0 SDK version was launched, which really made a big update.
-
Feature comparison supports comparison model selection, including life photo comparison model and witness comparison model
-
Recognition rate and anti attack effect are significantly improved
-
Eigenvalues are updated, and face database needs to be re registered after upgrading
-
Face detection supports both full angle and single angle
-
A new way of image data input is added
In the process of V3.0 access, it is found that it is difficult to use the new image data structure. This paper will introduce the image data structure and its use from the following points
-
SDK interface changes
-
Image data structure
-
The function of step length
-
OpenCV image data structure converted to hongsoft image data structure
I. SDK interface changes
When accessing the ArcFace 3.0 SDK, it is found that asfdetectfaceex, ASFFaceFeatureExtractEx, ASFProcessEx and ASFProcessEx? IR are newly added. This group of interfaces uses lpasf? Imagedata structure pointer to transfer image data. Take the face detection interface as an example, and the specific interface comparison is as follows:
Original interface:
MRESULT ASFDetectFaces(
		MHandle				hEngine,							// [in] engine handle
		MInt32				width,								// [in] picture width
		MInt32				height,								// [in] image height
		MInt32				format,								// [in] color space format
		MUInt8*				imgData,							// [in] picture data
		LPASF_MultiFaceInfo	detectedFaces,						// [out] detected face information
		ASF_DetectModel		detectModel = ASF_DETECT_MODEL_RGB	// [in] reserved field. The current version can use the default parameter
		);
New interface:
MRESULT ASFDetectFacesEx(
		MHandle				hEngine,							// [in] engine handle
		LPASF_ImageData		imgData,							// [in] picture data
		LPASF_MultiFaceInfo	detectedFaces,						// [out] detected face information
		ASF_DetectModel		detectModel = ASF_DETECT_MODEL_RGB	// [in] reserved field. The current version can use the default parameter
		);
Compared with the original interface, the new interface replaces the original interface by passing in lpasf ﹣ imagedata image data structure pointer.
II. Image data structure
The new image data structure introduces the concept of step pi32Pitch.
Step definition: the number of bytes in the row after image alignment.
2.1 data structure of hongruan image
Definition of image structure:
typedef LPASVLOFFSCREEN LPASF_ImageData;

typedef struct __tag_ASVL_OFFSCREEN
{
	MUInt32	u32PixelArrayFormat;
	MInt32	i32Width;
	MInt32	i32Height;
	MUInt8*	ppu8Plane[4];
	MInt32	pi32Pitch[4];
}ASVLOFFSCREEN, *LPASVLOFFSCREEN;
The introduction of the image data structure in the official document of hongsoft:
| type | Variable name | describe |
|---|---|---|
| MUInt32 | u32PixelArrayFormat | Color format |
| MInt32 | i32Width | Image width |
| MInt32 | i32Height | Image height |
| MUInt8* | ppu8Plane | image data |
| MInt32 | pi32Pitch | Image step size |
2.2 OpenCV image data structure
OpenCV provides two common image data structures, IplImage and Mat.
IplImage image data structure
typedef struct _IplImage
{
    int  width;             /* Image width in pixels.                           */
    int  height;            /* Image height in pixels.                          */
    char *imageData;        /* Pointer to aligned image data.         */
    int  widthStep;         /* Size of aligned image row in bytes.    */
    ...  //Other fields are not shown here. Interested partners can view the header file in opencv
}
IplImage;
Mat image data structure
| attribute | Explain |
|---|---|
| cols | Number of columns of matrix (image width) |
| rows | Number of rows of matrix (image height) |
| data | A pointer of type uchar. The Mat class is divided into two parts: the matrix header and the pointer to the matrix data part. Data is the pointer to the matrix data. |
| step | Number of bytes in the line after image alignment |
III. function of step length
Through the above description, we can see that OpenCV and rainbow soft algorithm library have introduced the concept of image step size for image data structure. Here we will learn about image step size.
-
OpenCV will do image alignment when reading pictures
As shown in the following figure, an image with the size of 998x520 is still 998x520 and the color format is BGR24 after using OpenCV to read the image data. However, the image step size is not 998 * 3, but 1000 * 3. The right side is filled with 2 pixels. Opencv makes four byte alignment of the image. The internal algorithm of hongsoft SDK calculates the step size through the incoming image width, which will cause deviation. Image The data is disordered, and it is almost impossible to detect the face.

- The importance of step size Just by subtracting these pixels, why can't the face be detected? As mentioned before, step size can be understood as the number of bytes in the row after image alignment. If there is a deviation in the reading of the first row of pixels, the reading of subsequent pixels will also be affected.
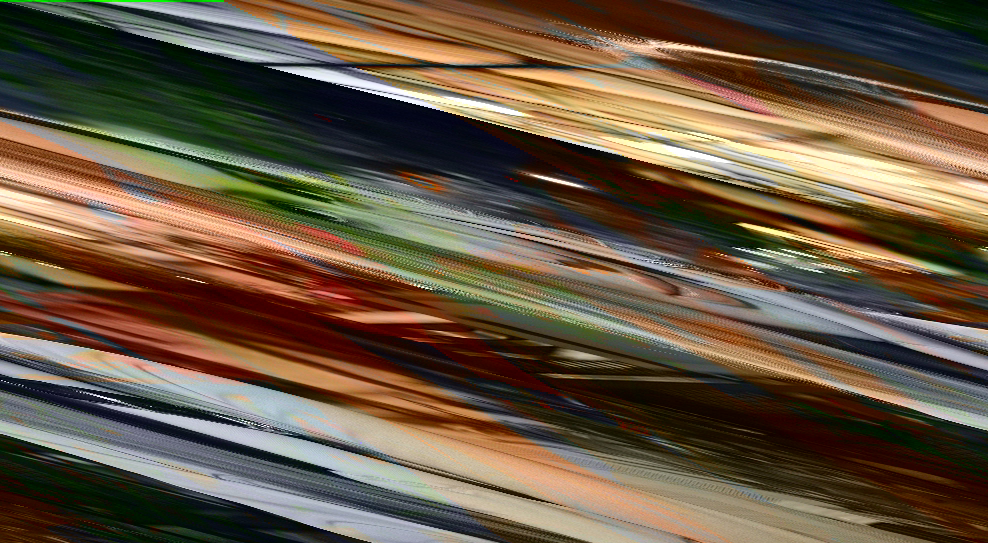
The following is the result of parsing an image with a size of 1000x554 in asynchronous length:
| Analysis in steps of 1000 | Analysis in steps of 996 |
|---|---|
 |
 |
We can see that for an image, if we use the wrong step size to parse, we may not be able to see the correct image content.
Conclusion: the problem of high byte alignment can be effectively avoided by introducing image step size.
IV. OpenCV image data structure converted to hongsoft image data structure
At present, OpenCV library is generally used by C/C + + developers to encode and decode images. Here, we will introduce how to convert OpenCV into hongsoft's image data structure. The official document of hongsoft states that seven color formats are supported. We will list the conversion methods of seven color formats.
-
The image read by OpenCV is generally in BGR24 format. The following methods can be used for image data structure conversion.
-
If the original image is an infrared image, the image needs to be converted to asvl ﹣ PAF ﹣ gray format (there are also examples in the official website document), and then the following methods are used for conversion.
IplImage to ASVLOFFSCREEN
int ColorSpaceConversion(MInt32 format, IplImage* img, ASVLOFFSCREEN& offscreen)
{
	switch (format)		//Original image color format
	{
	case ASVL_PAF_I420:
		offscreen.u32PixelArrayFormat = (unsigned int)format;
		offscreen.i32Width = img->width;
		offscreen.i32Height = img->height;
		offscreen.pi32Pitch[0] = img->widthStep;
		offscreen.pi32Pitch[1] = offscreen.pi32Pitch[0] >> 1;
		offscreen.pi32Pitch[2] = offscreen.pi32Pitch[0] >> 1;
		offscreen.ppu8Plane[0] = (MUInt8*)img->imageData;
		offscreen.ppu8Plane[1] = offscreen.ppu8Plane[0] + offscreen.i32Height * offscreen.pi32Pitch[0];
		offscreen.ppu8Plane[2] = offscreen.ppu8Plane[0] + offscreen.i32Height * offscreen.pi32Pitch[0] * 5 / 4;
		break;
	case ASVL_PAF_YUYV:
		offscreen.u32PixelArrayFormat = (unsigned int)format;
		offscreen.i32Width = img->width;
		offscreen.i32Height = img->height;
		offscreen.pi32Pitch[0] = img->widthStep;
		offscreen.ppu8Plane[0] = (MUInt8*)img->imageData;
		break;
	case ASVL_PAF_NV12:
		offscreen.u32PixelArrayFormat = (unsigned int)format;
		offscreen.i32Width = img->width;
		offscreen.i32Height = img->height;
		offscreen.pi32Pitch[0] = img->widthStep;
		offscreen.pi32Pitch[1] = offscreen.pi32Pitch[0];
		offscreen.ppu8Plane[0] = (MUInt8*)img->imageData;
		offscreen.ppu8Plane[1] = offscreen.ppu8Plane[0] + offscreen.pi32Pitch[0] * offscreen.i32Height;
		break;
	case ASVL_PAF_NV21:
		offscreen.u32PixelArrayFormat = (unsigned int)format;
		offscreen.i32Width = img->width;
		offscreen.i32Height = img->height;
		offscreen.pi32Pitch[0] = img->widthStep;
		offscreen.pi32Pitch[1] = offscreen.pi32Pitch[0];
		offscreen.ppu8Plane[0] = (MUInt8*)img->imageData;
		offscreen.ppu8Plane[1] = offscreen.ppu8Plane[0] + offscreen.pi32Pitch[0] * offscreen.i32Height;
		break;
	case ASVL_PAF_RGB24_B8G8R8:
		offscreen.u32PixelArrayFormat = (unsigned int)format;
		offscreen.i32Width = img->width;
		offscreen.i32Height = img->height;
		offscreen.pi32Pitch[0] = img->widthStep;
		offscreen.ppu8Plane[0] = (MUInt8*)img->imageData;
		break;
	case ASVL_PAF_DEPTH_U16:
		offscreen.u32PixelArrayFormat = (unsigned int)format;
		offscreen.i32Width = img->width;
		offscreen.i32Height = img->height;
		offscreen.pi32Pitch[0] = img->widthStep;
		offscreen.ppu8Plane[0] = (MUInt8*)img->imageData;
		break;
	case ASVL_PAF_GRAY:
		offscreen.u32PixelArrayFormat = (unsigned int)format;
		offscreen.i32Width = img->width;
		offscreen.i32Height = img->height;
		offscreen.pi32Pitch[0] = img->widthStep;
		offscreen.ppu8Plane[0] = (MUInt8*)img->imageData;
		break;
	default:
		return 0;
	}
	return 1;
}
Mat to ASVLOFFSCREEN
int ColorSpaceConversion(MInt32 format, cv::Mat img, ASVLOFFSCREEN& offscreen)
{
	switch (format)   //Original image color format
	{
	case ASVL_PAF_I420:
		offscreen.u32PixelArrayFormat = (unsigned int)format;
		offscreen.i32Width = img.cols;
		offscreen.i32Height = img.rows;
		offscreen.pi32Pitch[0] = img.step;
		offscreen.pi32Pitch[1] = offscreen.pi32Pitch[0] >> 1;
		offscreen.pi32Pitch[2] = offscreen.pi32Pitch[0] >> 1;
		offscreen.ppu8Plane[0] = img.data;
		offscreen.ppu8Plane[1] = offscreen.ppu8Plane[0] + offscreen.i32Height * offscreen.pi32Pitch[0];
		offscreen.ppu8Plane[2] = offscreen.ppu8Plane[0] + offscreen.i32Height * offscreen.pi32Pitch[0] * 5 / 4;
		break;
	case ASVL_PAF_YUYV:
		offscreen.u32PixelArrayFormat = (unsigned int)format;
		offscreen.i32Width = img.cols;
		offscreen.i32Height = img.rows;
		offscreen.pi32Pitch[0] = img.step;
		offscreen.ppu8Plane[0] = img.data;;
		break;
	case ASVL_PAF_NV12:
		offscreen.u32PixelArrayFormat = (unsigned int)format;
		offscreen.i32Width = img.cols;
		offscreen.i32Height = img.rows;
		offscreen.pi32Pitch[0] = img.step;
		offscreen.pi32Pitch[1] = offscreen.pi32Pitch[0];
		offscreen.ppu8Plane[0] = img.data;
		offscreen.ppu8Plane[1] = offscreen.ppu8Plane[0] + offscreen.pi32Pitch[0] * offscreen.i32Height;
		break;
	case ASVL_PAF_NV21:
		offscreen.u32PixelArrayFormat = (unsigned int)format;
		offscreen.i32Width = img.cols;
		offscreen.i32Height = img.rows;
		offscreen.pi32Pitch[0] = img.step;
		offscreen.pi32Pitch[1] = offscreen.pi32Pitch[0];
		offscreen.ppu8Plane[0] = img.data;
		offscreen.ppu8Plane[1] = offscreen.ppu8Plane[0] + offscreen.pi32Pitch[0] * offscreen.i32Height;
		break;
	case ASVL_PAF_RGB24_B8G8R8:
		offscreen.u32PixelArrayFormat = (unsigned int)format;
		offscreen.i32Width = img.cols;
		offscreen.i32Height = img.rows;
		offscreen.pi32Pitch[0] = img.step;
		offscreen.ppu8Plane[0] = img.data;
		break;
	case ASVL_PAF_DEPTH_U16:
		offscreen.u32PixelArrayFormat = (unsigned int)format;
		offscreen.i32Width = img.cols;
		offscreen.i32Height = img.rows;
		offscreen.pi32Pitch[0] = img.step;
		offscreen.ppu8Plane[0] = img.data;
		break;
	case ASVL_PAF_GRAY:
		offscreen.u32PixelArrayFormat = (unsigned int)format;
		offscreen.i32Width = img.cols;
		offscreen.i32Height = img.rows;
		offscreen.pi32Pitch[0] = img.step;
		offscreen.ppu8Plane[0] = img.data;
		break;
	default:
		return 0;
	}
	return 1;
}
Illustrate with examples
The example in hongsoft official website document is quoted here, but the above image format conversion method is used.
//opencv way to cut pictures
void CutIplImage(IplImage* src, IplImage* dst, int x, int y)
{
	CvSize size = cvSize(dst->width, dst->height);//Area size
	cvSetImageROI(src, cvRect(x, y, size.width, size.height));//Set source image ROI
	cvCopy(src, dst); //Copy image
	cvResetImageROI(src);//When the source image is used up, clear the ROI
}
IplImage* originalImg = cvLoadImage("1280 x 720.jpg");

//The image is cropped and the width is aligned with four bytes. If the image can be aligned with four bytes, this step can be avoided
IplImage* img = cvCreateImage(cvSize(originalImg->width - originalImg->width % 4, originalImg->height), IPL_DEPTH_8U, originalImg->nChannels);
CutIplImage(originalImg, img, 0, 0);

//Image data is introduced in the form of structure, which is more compatible with higher precision image
ASF_MultiFaceInfo detectedFaces = { 0 };
ASVLOFFSCREEN offscreen = { 0 };
//IplImage to ASVLOFFSCREEN
ColorSpaceConversion(ASVL_PAF_RGB24_B8G8R8, img, offscreen);
if (img)
{
    MRESULT res = ASFDetectFacesEx(handle, &offscreen, &detectedFaces);
    if (MOK != res)
    {
        printf("ASFDetectFacesEx failed: %d\n", res);
    }
    else
    {
        // Print face detection results
        for (int i = 0; i < detectedFaces.faceNum; i++)
		{
			printf("Face Id: %d\n", detectedFaces.faceID[i]);
			printf("Face Orient: %d\n", detectedFaces.faceOrient[i]);
			printf("Face Rect: (%d %d %d %d)\n",
				detectedFaces.faceRect[i].left, detectedFaces.faceRect[i].top,
				detectedFaces.faceRect[i].right, detectedFaces.faceRect[i].bottom);
		}
    }

    //Release image memory. Here is just face detection. If feature extraction and other processing are needed, it is unnecessary to release image data so early
    cvReleaseImage(&img);
}
cvReleaseImage(&originalImg);
Personal summary: through research, it is found that the old interface of V3.0 SDK can also be used normally, and the new interface has better image compatibility for higher byte alignment.
Demo is available. Hongsoft face recognition open platform download