-
Introduction to hibernate01 of SSH and SSM Learning and Environment Construction
- Introduction to hibernate
- II Necessary Environment
-
Basic configuration of three projects
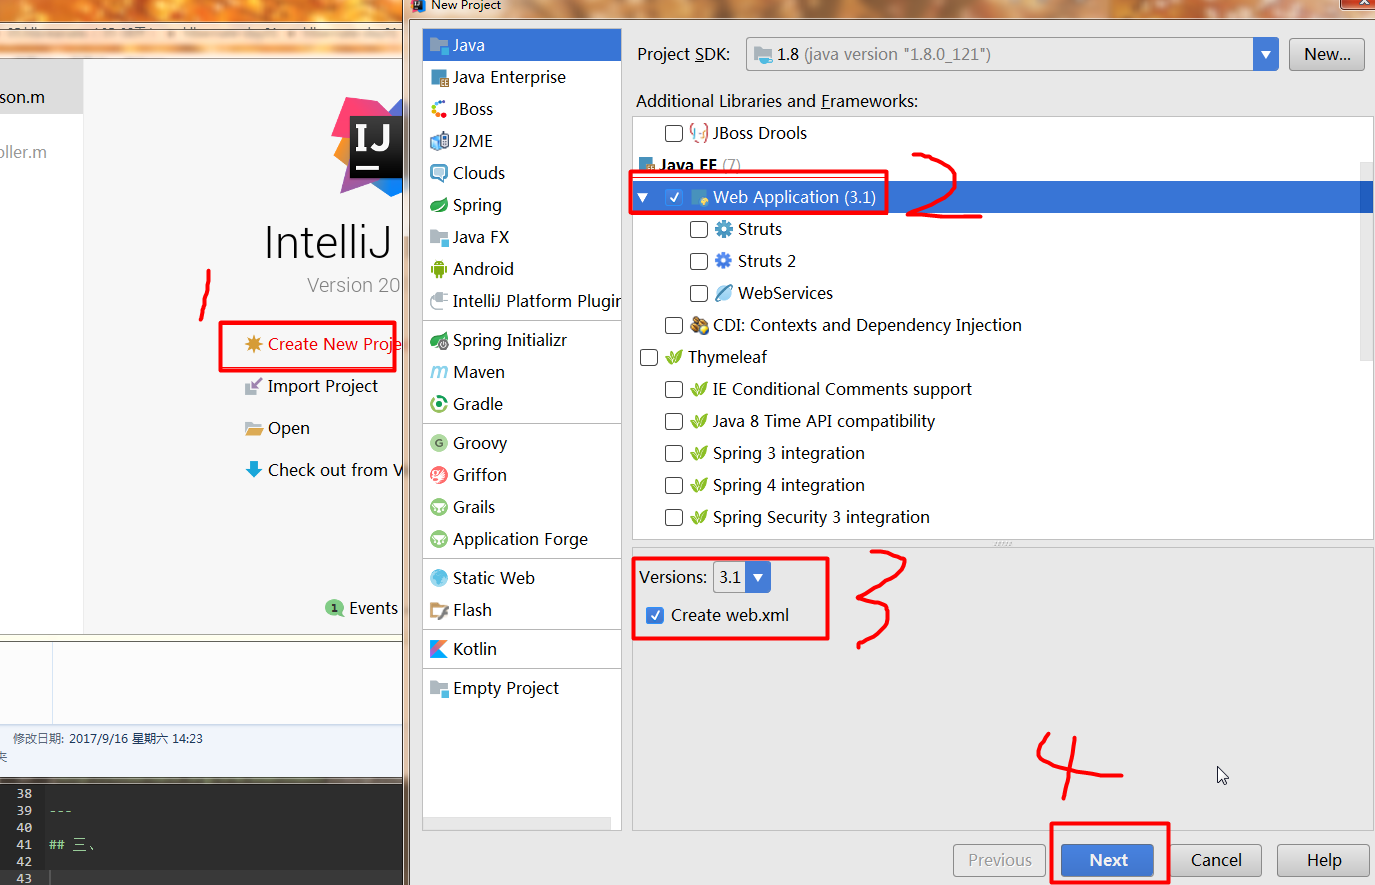
- 1 Create a project
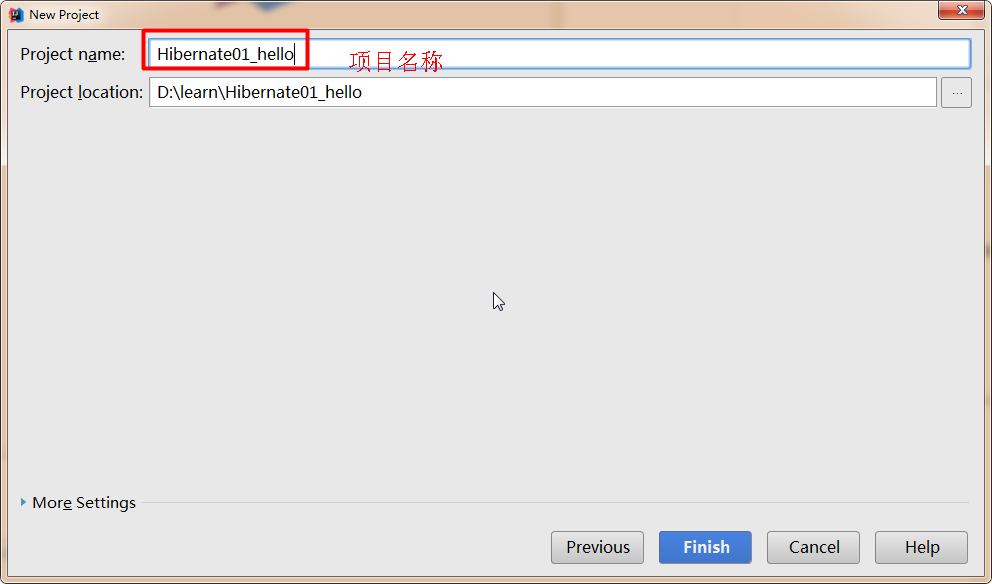
- 2 Fill in the project name
- 3 Create classes and lib directories
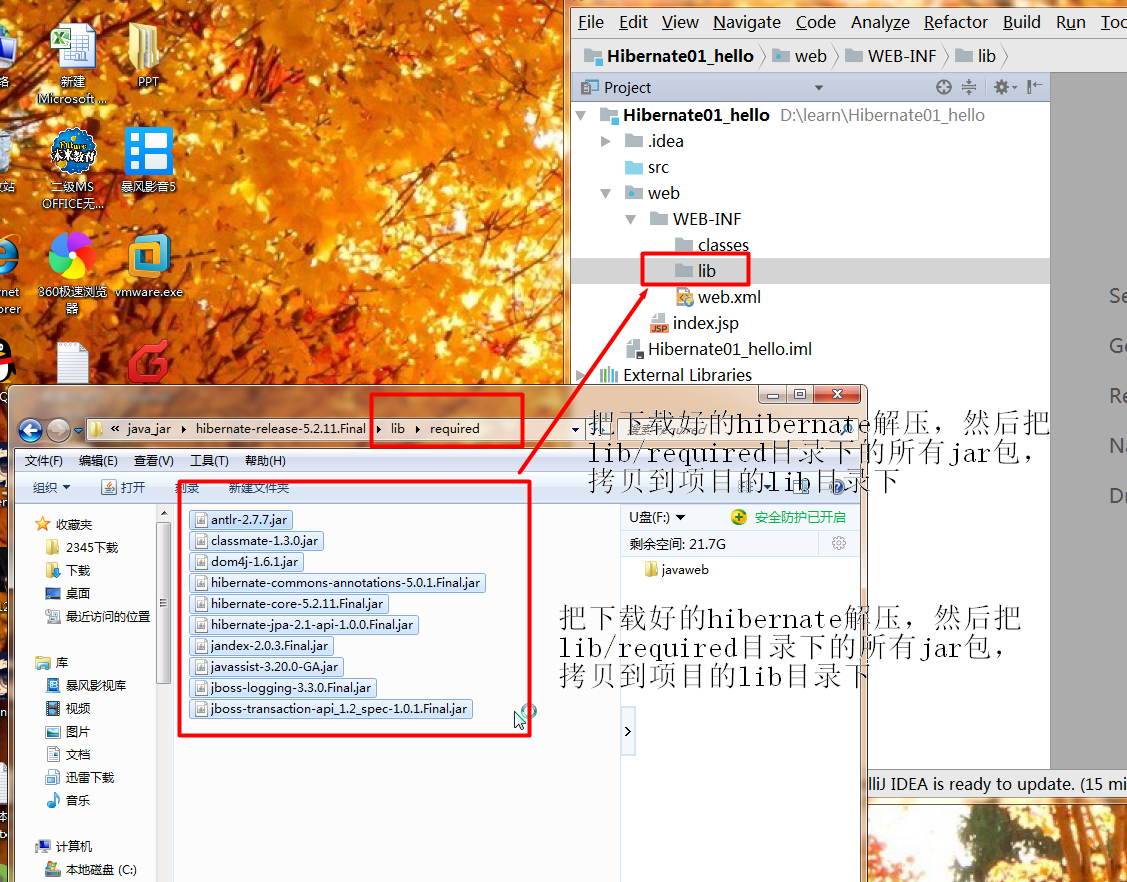
- 4 Import hibernate package
- 5 Open the configuration of the current project
- 6. Create the lib of the project
- 7 Select jar packages
- 8 Modify the added libraries name
- 9 Configure the output path of the class
- 10 Adding lib dependencies
- 11 Click Configuration
- 12 Add Tomcat
- 13 Change the name
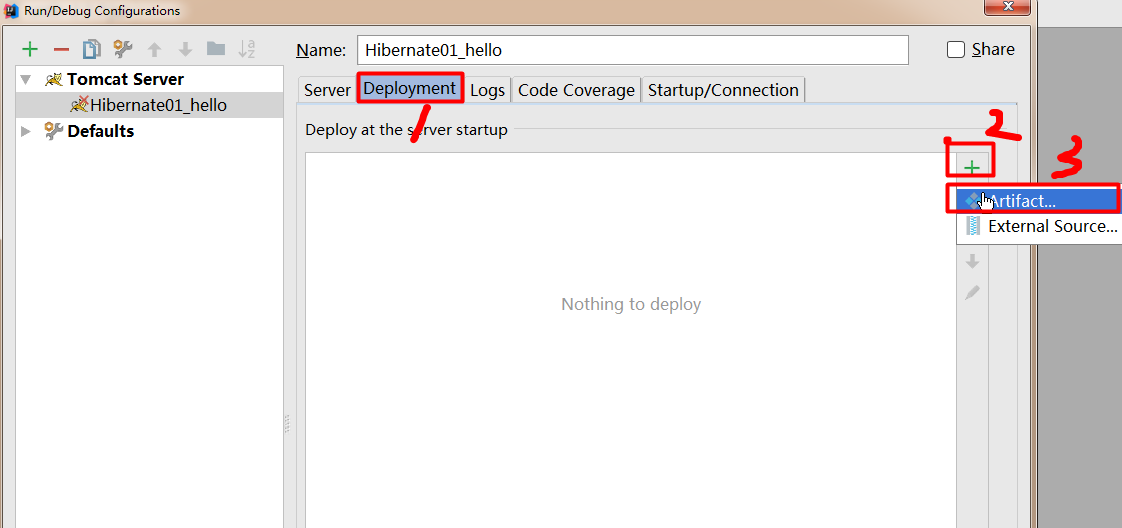
- 14 Add Artifacts
- 15 Change access path
- Basic configuration of four Hibernate s
hibernate01 of SSH and SSM Learning: Introduction and Environment Construction
Introduction to hibernate
Hibernate is a high-performance object-relational persistent storage and query service, which follows the open source GNU Lesser General Public License (LGPL) and can be downloaded free of charge. Hibernate focuses not only on mapping from Java classes to database tables, but also on mapping from Java data types to SQL data types. It also provides data query and retrieval services.
This tutorial will show you how to use Hibernate to develop database-based Web applications in a simple way.
II. Required Environment
2.1 Development Tools
We need to use this framework and have our own development tools, such as eclipse, idea, etc. I use idea. The download address is as follows
https://www.jetbrains.com/idea/
2.2 Database
Since it is the operation of the database, then we should need the database. You can use MS SQL Server, Oracle, MySql. I use MySql.
MySql download address
https://dev.mysql.com/downloads/windows/
2.3 hibernate
Since we want to learn hibernate, it must be necessary.
hibernate download address
http://hibernate.org/orm/downloads/
2.4 junit (not required)
This unit test package is used for testing when we write code. For our convenience of testing, plus this package, it is not necessary. Using junit.jar also requires importing hamcrest-core.jar
III. Basic Configuration of Projects
You can also create it without my own way. You can create it online.
Create the first hibernate example using Intellij IEDA
3.1 Create Projects
3.2 Fill in the Project Name
3.3 Create classes and lib directories

3.4 Import hibernate package
3.5 Open the configuration of the current project

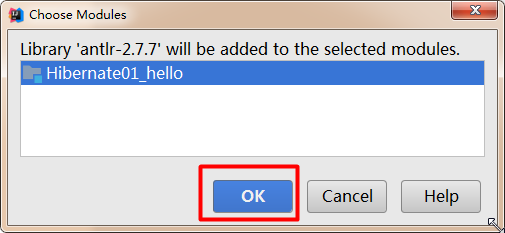
3.6 Create the lib of the project
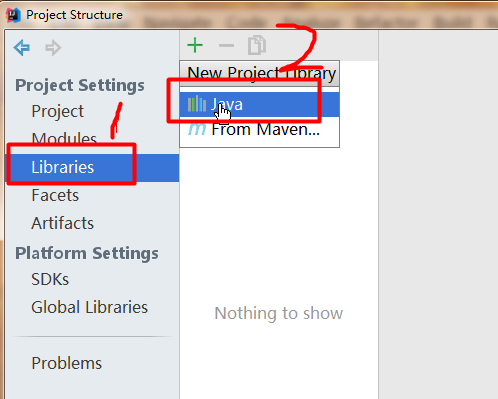
3.7 Select jar packages

3.8 Modify the added libraries name
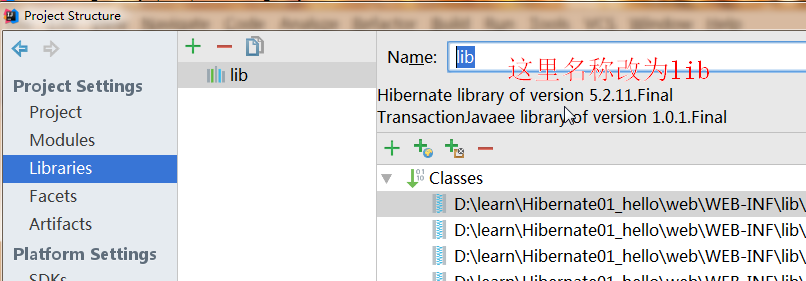
3.9 Configure the output path of. class

3.10 Adding lib dependencies

3. 11 Click Configuration

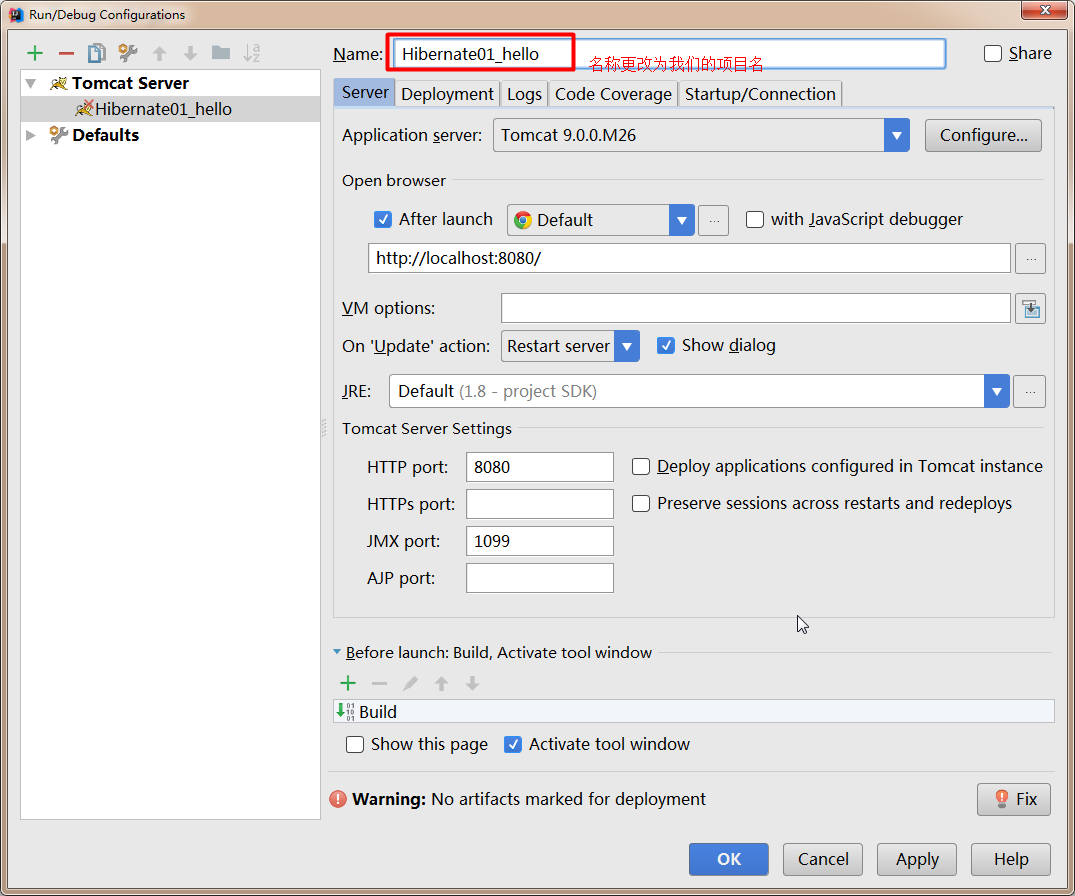
3. 12 Add Tomcat

3. 13 Change the name
3. 14 Add Artifacts
3. 15 Change access paths

IV. Basic configuration of Hibernate
The above steps basically completed our configuration, so now let's do a hibernate.
4.1 Create our package
Create our package com.qwm.hilbernate01 under src
4.2 Create User Classes
Under the com.qwm.hilbernate01 package, create the User class as follows (if you define your own constructor, you must add it as an empty constructor)
package com.qwm.hilbernate01;
/**
 * @author: qiwenming
 * @date: 2017/9/16 0016   19:19
 * @description:
 * User class
 */
public class User {
    private int id;
    private String name;
    private int age;

    public User() {
    }

    public User(String name, int age) {
        this.name = name;
        this.age = age;
    }

    public int getId() {
        return id;
    }

    public void setId(int id) {
        this.id = id;
    }

    public String getName() {
        return name;
    }

    public void setName(String name) {
        this.name = name;
    }

    public int getAge() {
        return age;
    }

    public void setAge(int age) {
        this.age = age;
    }
}
4.3 Create user.hbm.xml
Under the com.qwm.hilbernate01 package, create the file user.hbm.xml, which is configured as follows
<?xml version="1.0" encoding="UTF-8"?>
<!DOCTYPE hibernate-mapping PUBLIC
        "-//Hibernate/Hibernate Mapping DTD 3.0//EN"
        "http://www.hibernate.org/dtd/hibernate-mapping-3.0.dtd">
<hibernate-mapping>
    <class name="com.qwm.hilbernate01.User">
        <id name="id">
            <!--id Self increment-->
            <generator class="increment"></generator>
        </id>
        <property name="name"/>
        <property name="age"/>
    </class>
</hibernate-mapping>
4.4 Create hibernate.cfg.xml
Create the hibernate.cfg.xml file under src as follows
<!DOCTYPE hibernate-configuration PUBLIC
        "-//Hibernate/Hibernate Configuration DTD 3.0//EN"
        "http://www.hibernate.org/dtd/hibernate-configuration-3.0.dtd">
<hibernate-configuration>
    <session-factory>
        <!--MySql Database Driver-->
        <property name="hibernate.connection.driver_class">com.mysql.jdbc.Driver</property>
        <!--data base-->
        <property name="hibernate.connection.url">jdbc:mysql://localhost:3306/htest</property>
        <!--User name-->
        <property name="hibernate.connection.username">root</property>
        <!--Password-->
        <property name="hibernate.connection.password">xm123456</property>
        <!--Database dialect-->
        <property name="hibernate.dialect">org.hibernate.dialect.MySQL5Dialect</property>
        <!--Automatically create tables-->
        <property name="hibernate.hbm2ddl.auto">update</property>

        <!--Import User To configure-->
        <mapping resource="com/qwm/hilbernate01/user.hbm.xml"/>

    </session-factory>
</hibernate-configuration>
4.5 Import Junit package
If you use the Junit test, add the following packages
junit.jar

hamcrest-core.jar
4.6 Create the HelloTest class
Under the package com.qwm.hilbernate01, create the class HelloTest.java to test our hibernate
package com.qwm.hilbernate01;

import org.hibernate.Session;
import org.hibernate.SessionFactory;
import org.hibernate.Transaction;
import org.hibernate.boot.MetadataSources;
import org.hibernate.boot.registry.StandardServiceRegistry;
import org.hibernate.boot.registry.StandardServiceRegistryBuilder;
import org.junit.Test;

/**
 * Test one
 */
public class HelloTest {

    /**
     * Test one
     */
    @Test
    public void testUser1(){
        // 1. configuration
        StandardServiceRegistry registry = new StandardServiceRegistryBuilder().configure("hibernate.cfg.xml").build();
        // 2. Getting Session Factory
        SessionFactory factory = new MetadataSources(registry).buildMetadata().buildSessionFactory();
        // 3. Open Session
        Session session = factory.openSession();
        // 4. Open things
        Transaction t = session.beginTransaction();
        // 5. Creating Objects
        User user = new User("wiming",19);
        // 6. Object persistence
        session.persist(user);
        // 7. Submission
        t.commit();
        // 8. Close Session
        session.close();
        System.out.println("Create success");
    }
}
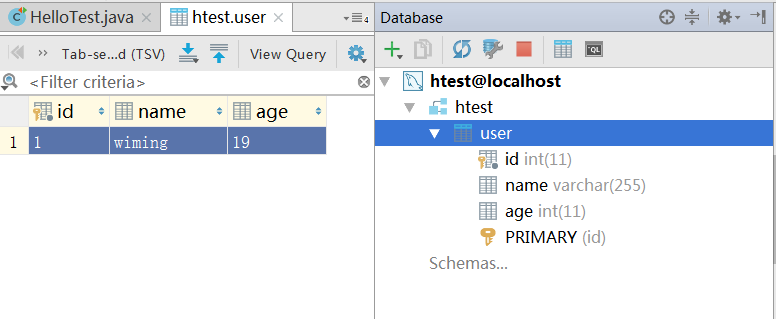
4.7 Check the tables in our database
as follows