Preface
Domain name from 2020 to the end of February mflyyou.cn After a three-year renewal, it only expires in 2024-4, so Google decided to build a personal website. Google changed one of its favorite themes, hexo matery modified, and then changed its content.
Please observe the specific effect of Blog Zhang Panqin's blog
Outline of this article
- How to use hexo and how to change the theme template
- Alicloud server, build nginx, configure nginx cache
- Baidu, Google seo optimization, so that your site can be searched
- Ali oss as image server
- CDN accelerates the first screen rendering
- One click deployment of shell script to nginx directory, upload the required static resources to oss
Hexo introduction
hexo will parse the markdown syntax to generate the corresponding html, and the theme is the css style.
My own hexo GitHub After cloning, yarn install installation depends on. hexo s local preview effect.
If you use npm to install the dependency package, please remove yarn.lock first, and then install npm. I have downloaded the. npmrc configuration dependency package from Taobao image under the project.
Root is the project root path.
# Local Preview
hexo s

# According to the configuration file and topic, generate the html content from the markdown file under root / source /
hexo g

# Clear the content generated by hexo g in root/public
hexo clean

# Push the locally generated url link to Baidu and let Baidu crawl the content to index
hexo d

# Generate the markdown file in root / source /? Post according to the title name
hexo new post Title Title
Configuration friend chain
root/source/_post/friends.json configures the friend chain.
Configuring music
Root / source / _post / music.json configures the music list.
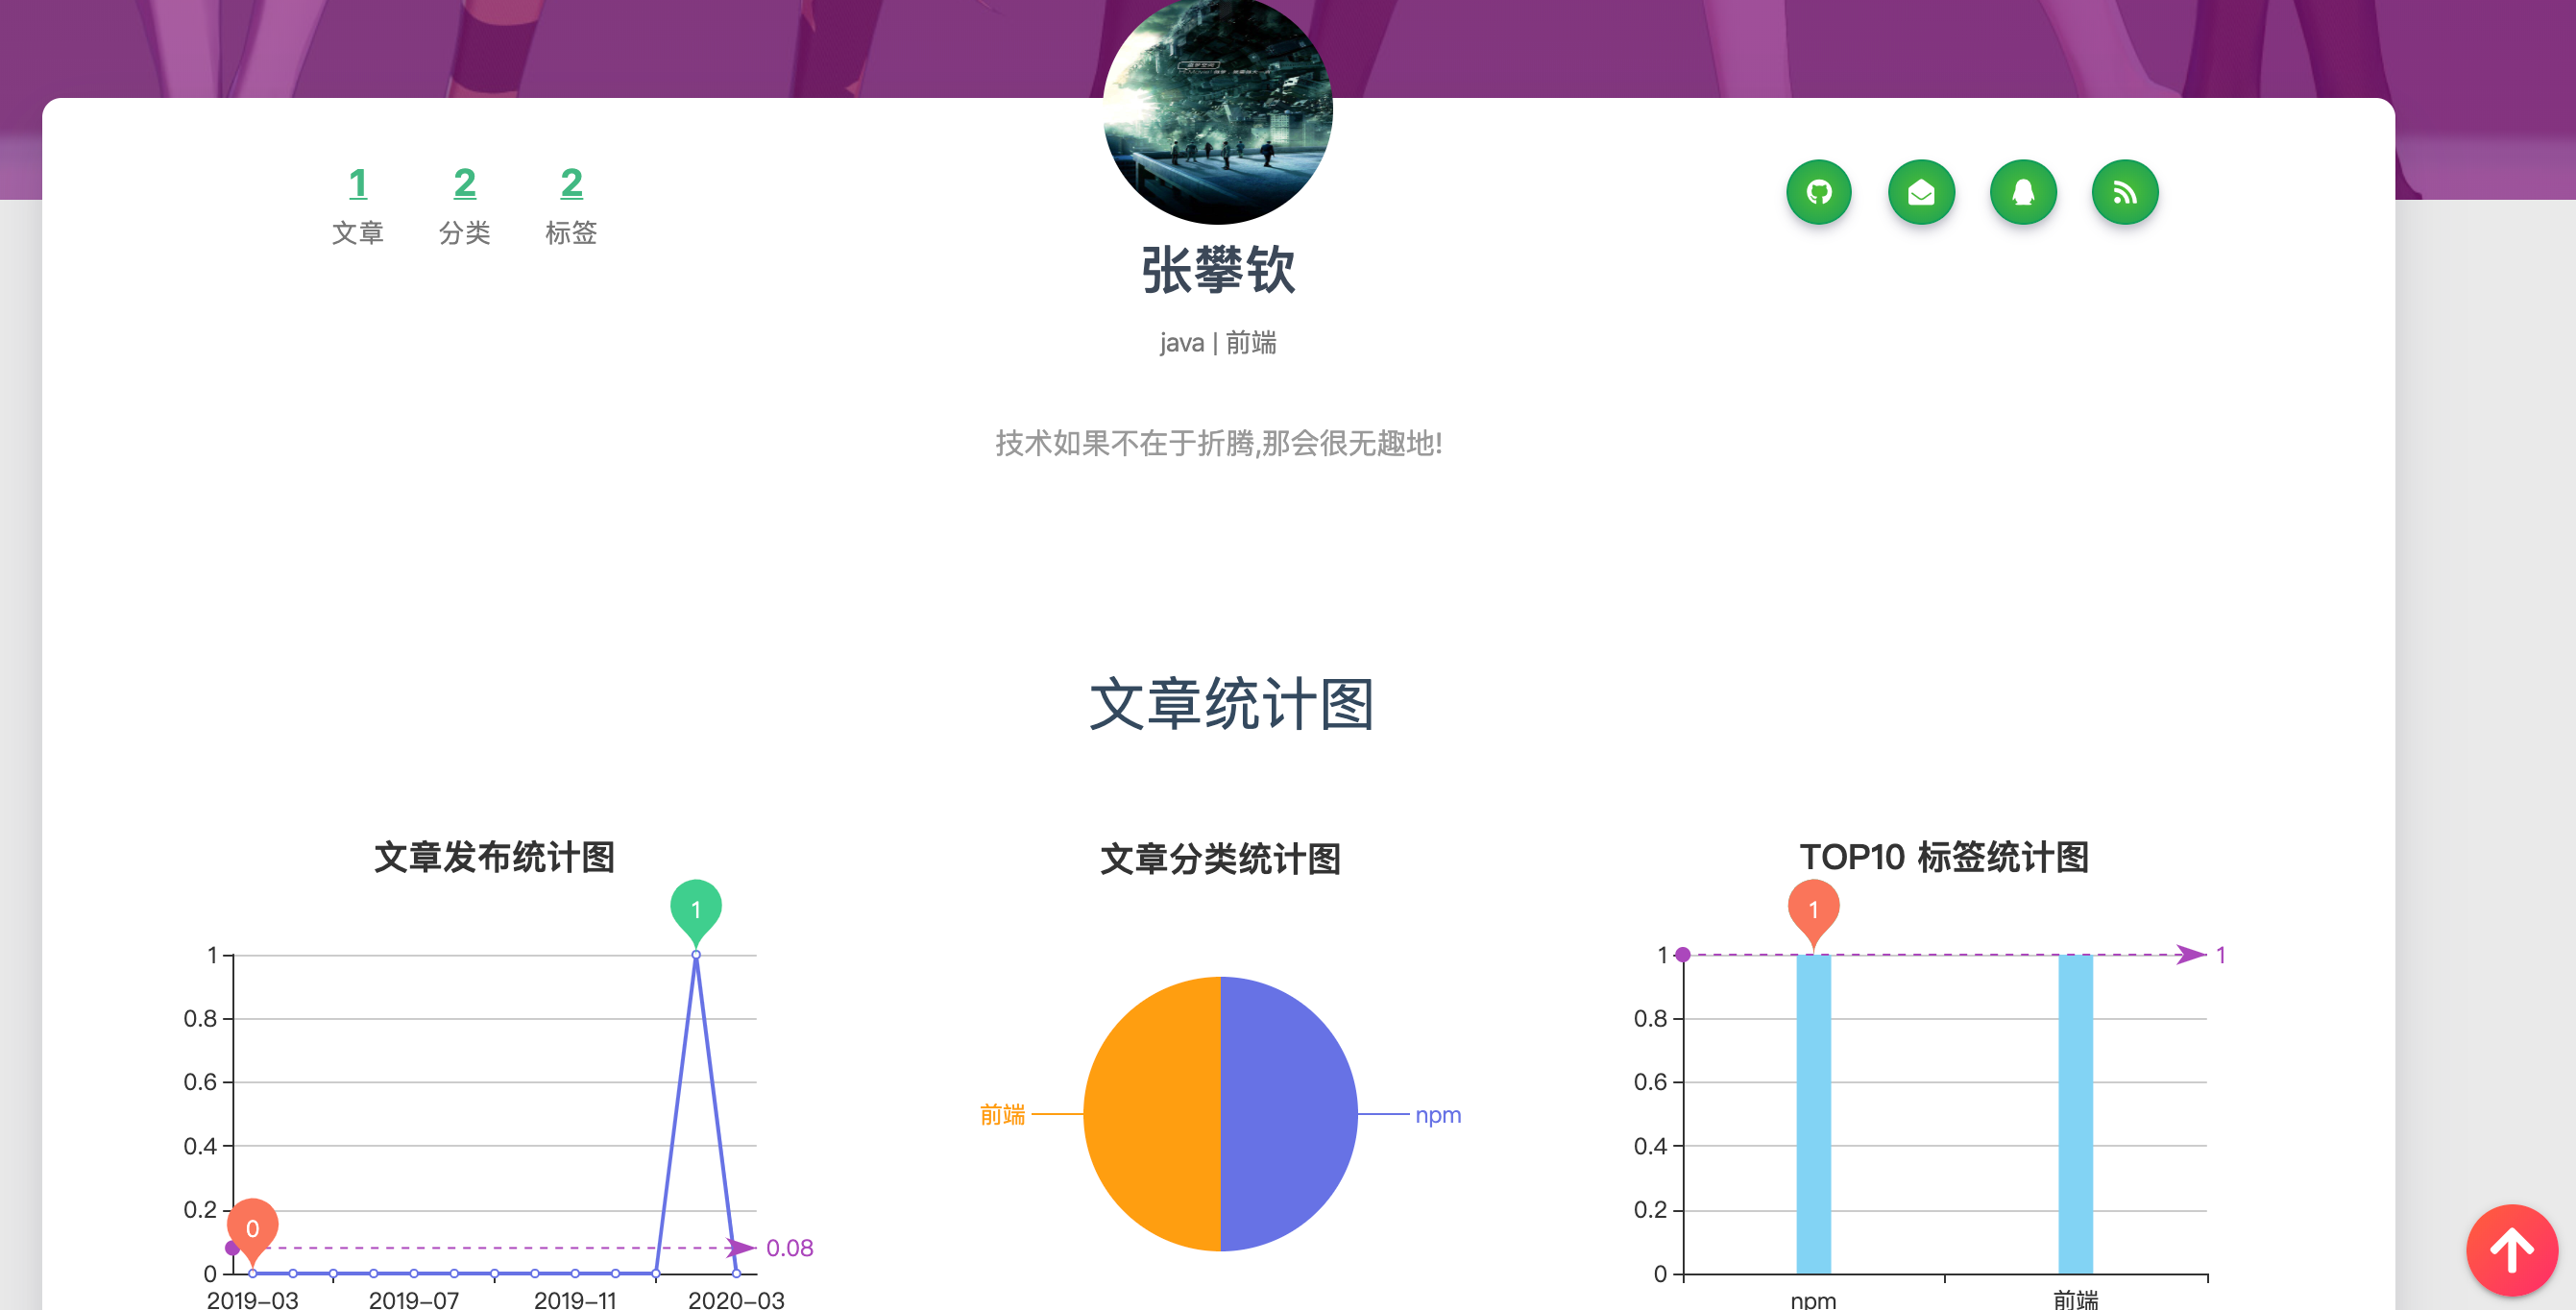
Navigation - about
root/source/about/index.md configure personal information.
Navigation - message
root/source/contact/index.md configure message display information.
Navigation - label / classification / archive
The above configuration information is configured in the markdown file of the document, and then the above navigation content will be generated according to the information.
---
# Name
title: {{ title }}
# Article date
date: {{ date }}
# Is it displayed in the list of recommended articles on the page
top: false
# Whether to rotate on the homepage
cover: false
# Check the password of the article, sha256 8d969eef6ecad3c29a3a629280e686cf0c3f5d5a86aff3ca12020c923adc6c92
password:
# Article directory
toc: true
# Statistical articles
mathjax: true
# Abstract
summary:
# Article Tags
tags:
# Article classification
categories:
# The document is associated with a picture. You can configure the url. If it is not configured, it will automatically select one from the feature images property of the theme configuration file
img:
---
The content at the front of the document md file will be used to generate label classification archive content.
root/_config.yml is the configuration file of hexo.
root/themes/_config.yml is the theme configuration file.
I add comments in the configuration file, and I can understand them basically. I will focus on several important functions.
gitalk configuration
Basic and this gitalk readme
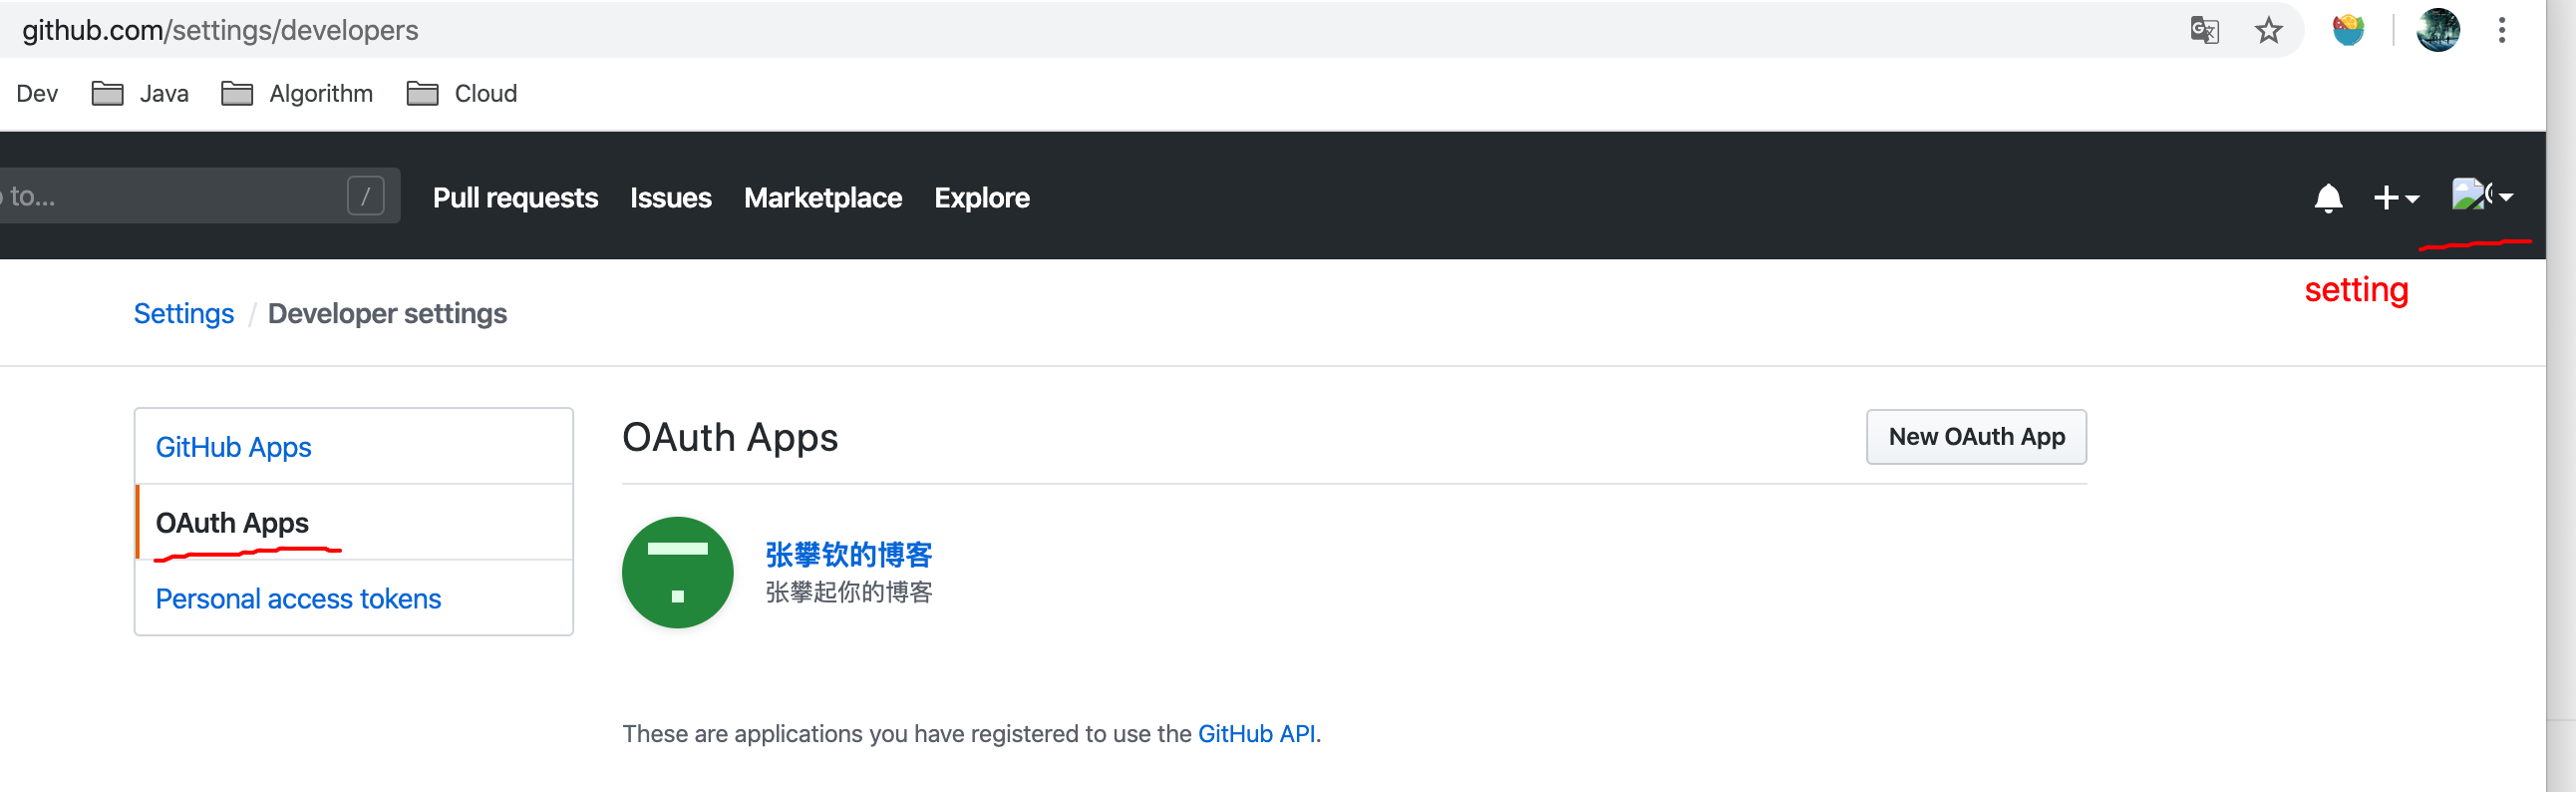
Create a public warehouse as your blog message, which is based on the functions provided by the issue under github warehouse.
Click the app you applied for to view the configuration information of gitalk
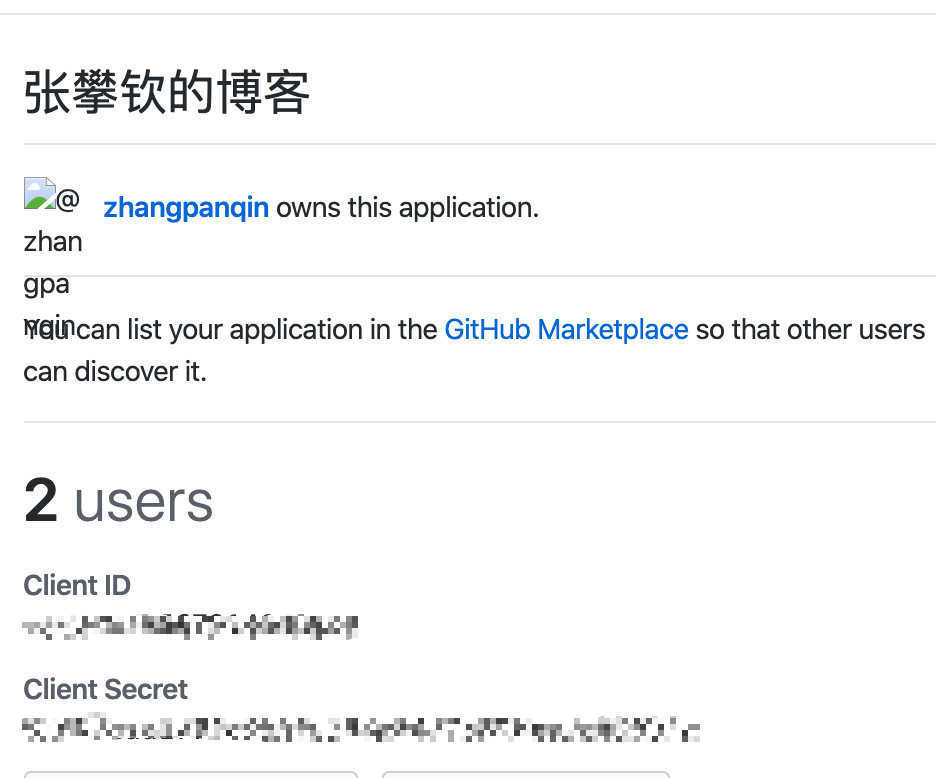
< font color = Red > note that the configuration information of gitalk should not be disclosed < / font >
# Configuration of Gitalk comment module, which is not activated by default
gitalk:
  enable: true
  # Configure your user name
  owner: zhangpanqin
  # Configure a public warehouse to store chat records.
  repo: hexo-gitalk
  oauth:
  	# Fill in the Client ID you applied for
    clientId:
    # Fill in Client Secret
    clientSecret:
  # Configure your user name
  admin: zhangpanqin
valine
gitalk needs to log in to github, and valine does not need to log in to leave a message.
Official website application account
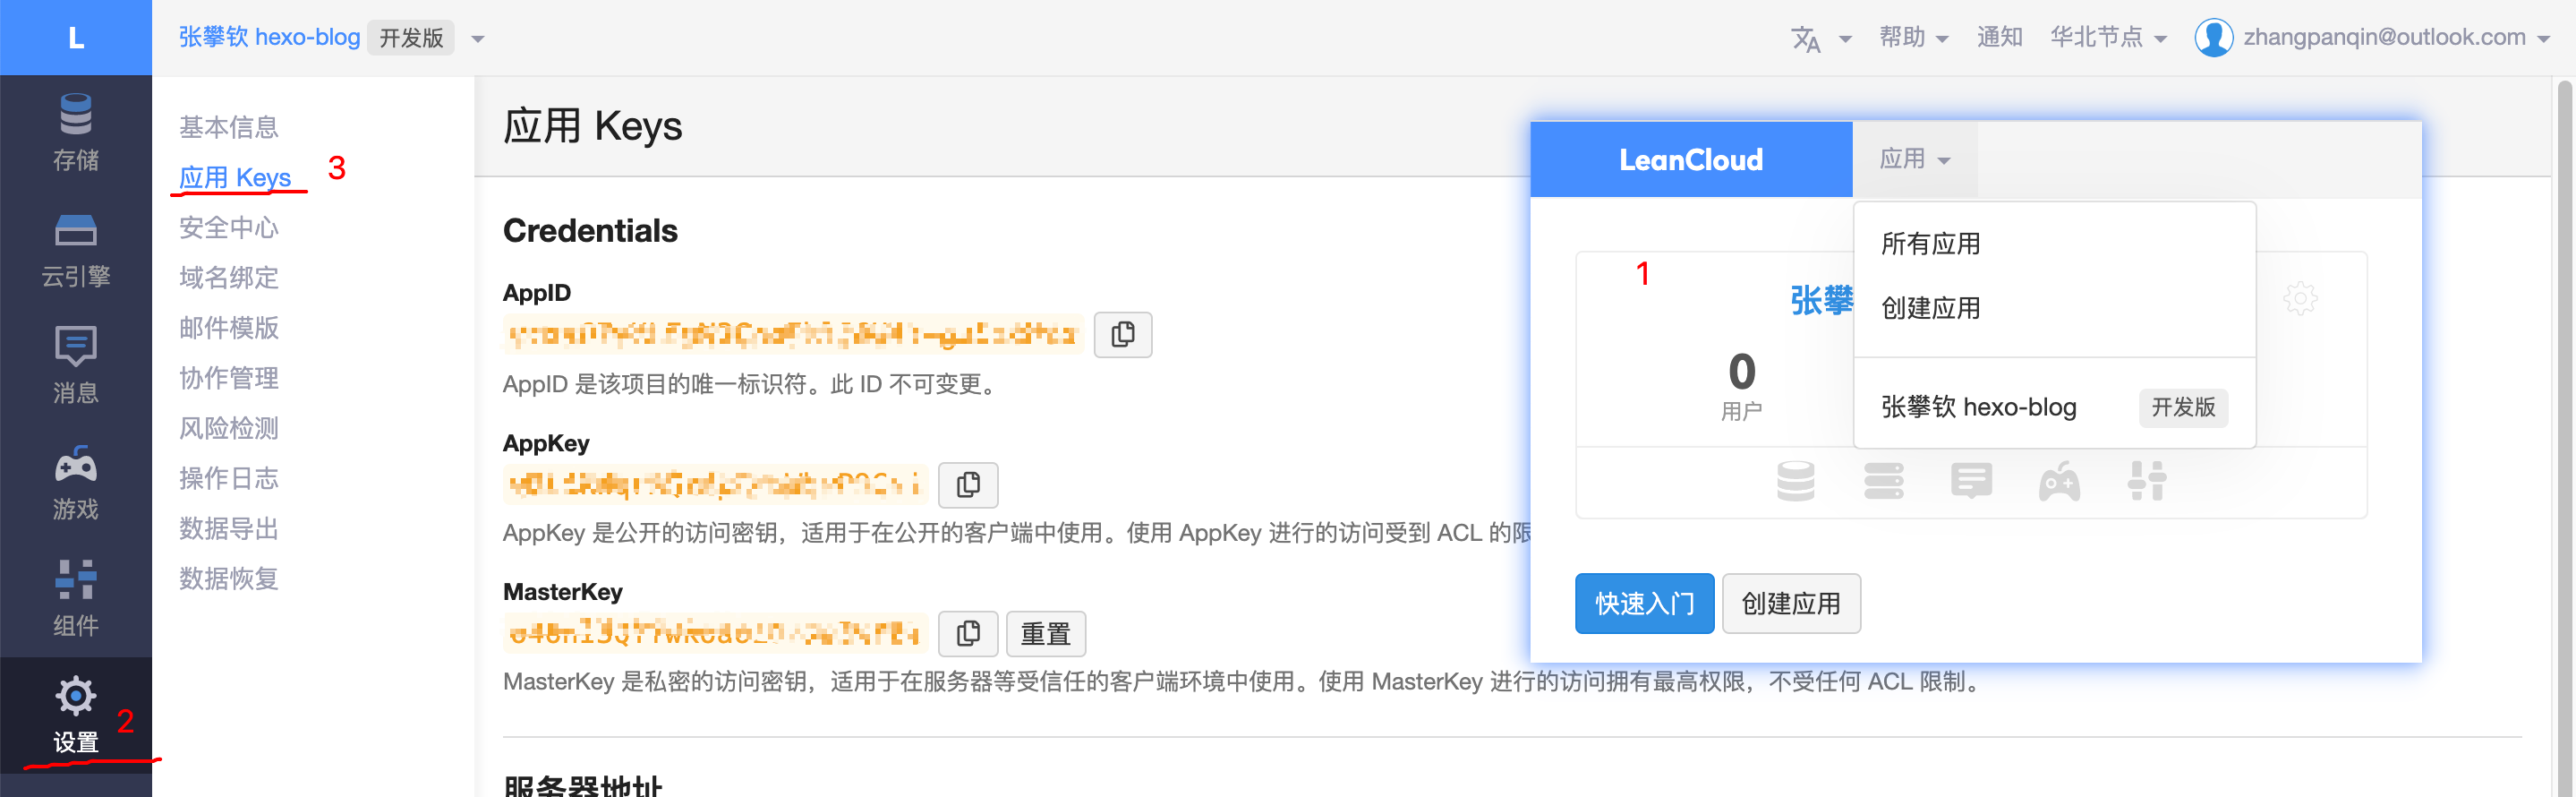
Apply for an account, first create your own application, and then configure the ApplD and AppKey to the theme file. < font color = Red > note that the configuration information of valine should not be disclosed < / font >
valine:
  enable: true
  appId:
  appKey:
  notify: false
  verify: false
  visitor: true
  avatar: 'mm' # Gravatar style : mm/identicon/monsterid/wavatar/retro/hide
  pageSize: 10
  placeholder: 'just go go' # Comment Box placeholder
  background: /medias/comment_bg.png
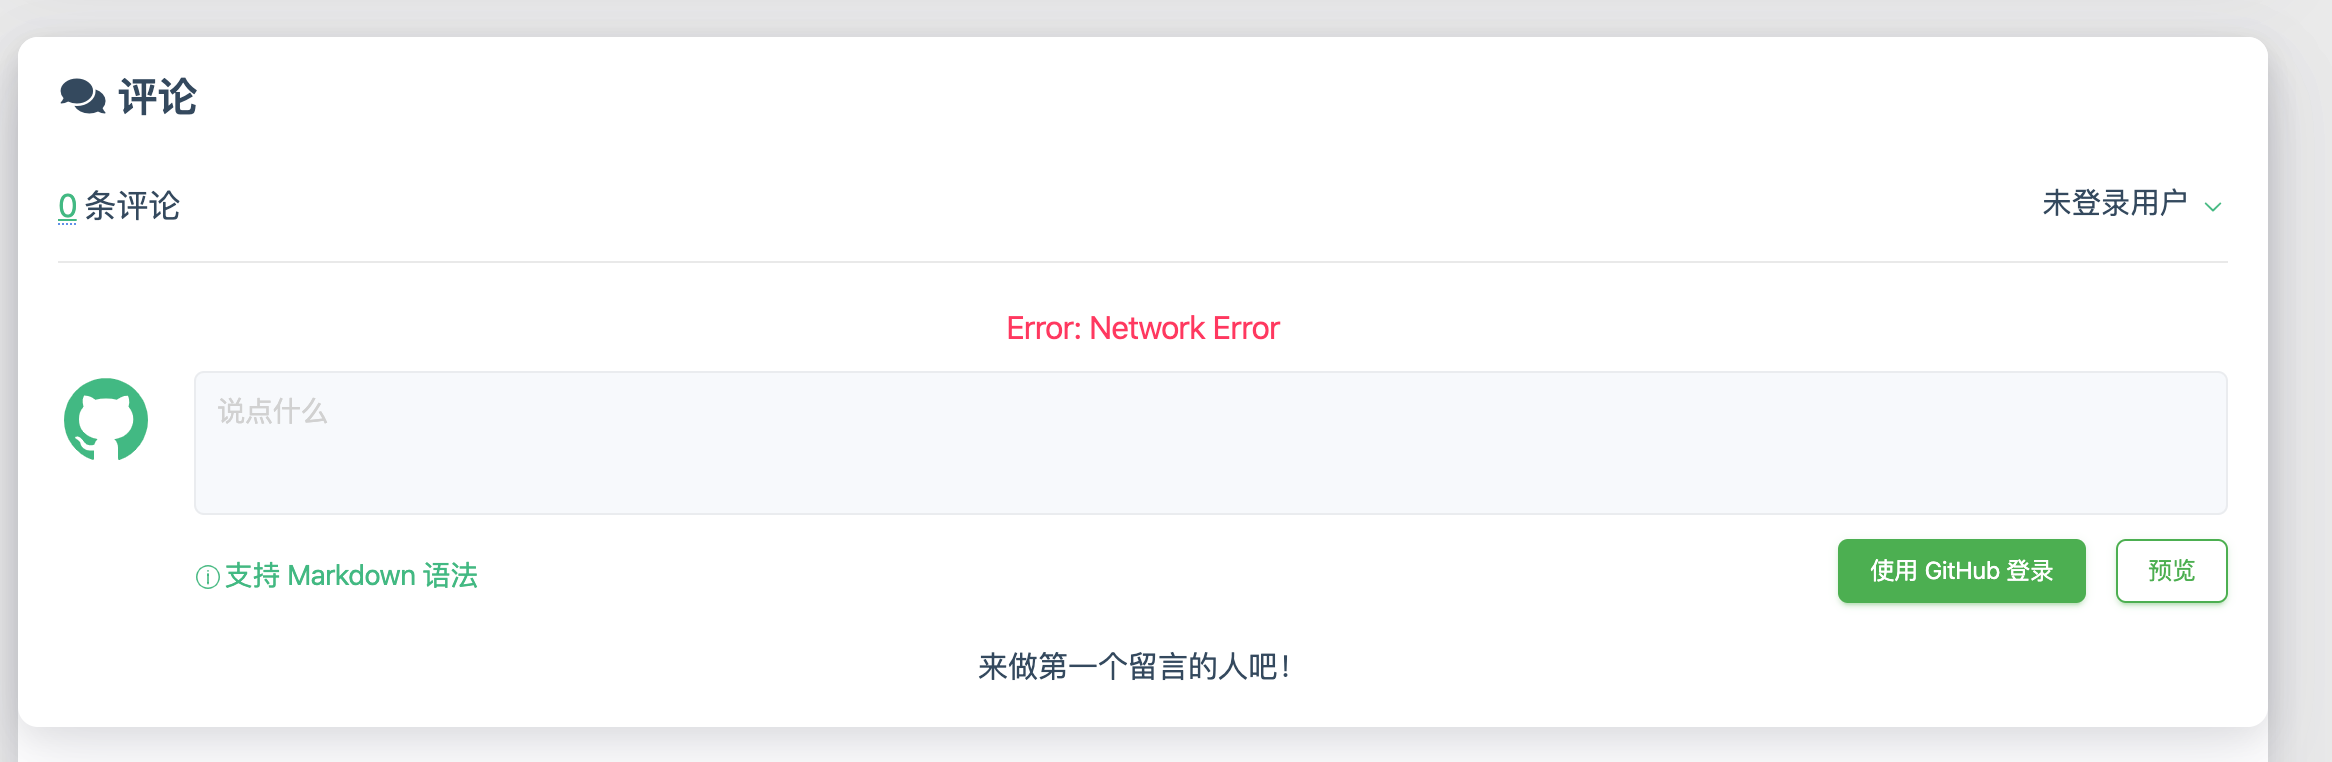
valine comments as follows

No garlic statistics
You can show your site visits and visitors in the footer, but it will slow down the page loading, I closed it.
# No statistics of website (http://busuanzi.ibruce.info/), display is closed for website loading speed
busuanziStatistics:
  enable: false
  totalTraffic: true # Total traffic
  totalNumberOfvisitors: true # Total number of passengers
Page resource configuration pre path
In previous versions, resources can only load resources under the current website. Now you can configure the path prefix. Putting static css,js library and image resources on ali oss, and then using cdn acceleration can improve the rendering speed of the first screen. When debugging locally, the configuration url is empty
# Static resource prefix path
jsDelivr:
    url:
Extension modification
root/themes/matery/layout is a template file. You can modify html and css, and the syntax of the template is very simple. When you read several templates, you can basically learn.
Static resource location
root/themes/matery/source is the static resource location. You can put these resources on oss and accelerate them through cdn.
deploy
Based on the above steps, you can preview hexo s locally, and we will deploy it to the server.
Alibaba cloud buys a server. I installed the cenos 7.7 system.
Create a new user
For security, do not use root to operate your remote server.
Create a new user in Alibaba cloud console, and use the user to operate the remote server later.
# Creating a hexo user
adduser hexo

# Change the password of hexo
passwd admin12345

# Give hexo sudo command permission

# Run under root to modify the writability of the file
chmod  700 /etc/sudoers

# /Fill rabbitmq all = (all) passwd: all in etc/sudoers file
# Drop down in the file and find root all = (all) all
# Add under the above found for easy maintenance
admin ALL=(ALL)      PASSWD:ALL

# After permission is given, modify the file / etc/sudoers to read-only
chmod  400 /etc/sudoers
Configure ssh
After you configure ssh, you only need to.
# mflyyou.cn is your server
ssh mflyyou.cn
# Generate secret key
ssh-keygen -o -t rsa  -b 4096 -c "Description of generating secret key pair"

# Specify the path when generating the secret key / users / zhangpanqin /. SSH / mflyyou? Server? Rs.pub

# copy the public key to the server. hexo is the user ip to log in later. It is your remote server ip
ssh-copy-id -i /Users/zhangpanqin/.ssh/mflyyou_server_rs.pub hexo@id

# Pay attention to that user
# Or log in to the server and copy the contents of the public key to ~ /. SSH / authorized_


# Verify that the login is the private key corresponding to the public key
ssh -T /Users/zhangpanqin/.ssh/mflyyou_server_rs hexo@ip
Configure login information
~/.ssh/config
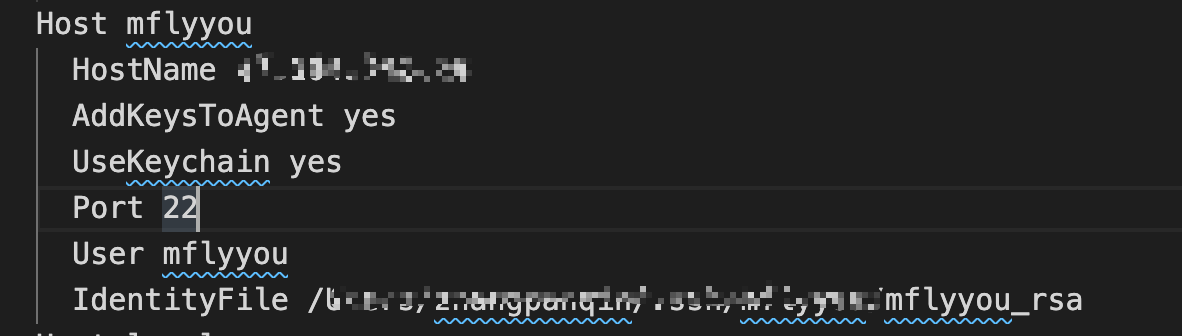
After the Host is configured with an alias, ssh mflyyou will find the ip login corresponding to the HostName.
User configuration corresponding user
IdentityFile configure the corresponding private key file
After that, you can ssh mflyyou to log in.

Install nginx
The default website directory is: / usr/share/nginx/html
The default configuration file is: / etc/nginx/nginx.conf
The directory of the custom configuration file is / etc/nginx/conf.d/
# Configure startup
sudo systemctl enable nginx
sudo systemctl stop nginx
sudo systemctl start nginx
sudo systemctl restart nginx
# View nginx operation status
sudo systemctl status nginx

# Check if the configuration file is configured correctly
sudo nginx -t

# Reload profile
sudo nginx -s reload
Modify profile
/etc/nginx/nginx.conf configure cache
user nginx;
worker_processes auto;
error_log /var/log/nginx/error.log;
pid /run/nginx.pid;
# Load dynamic modules. See /usr/share/doc/nginx/README.dynamic.
include /usr/share/nginx/modules/*.conf;

events {
    worker_connections 1024;
}

http {
    log_format main '$remote_addr - $remote_user [$time_local] "$request" '
    '$status $body_bytes_sent "$http_referer" '
    '"$http_user_agent" "$http_x_forwarded_for"';

    access_log /var/log/nginx/access.log main;

    sendfile on;
    tcp_nopush on;
    tcp_nodelay on;
    keepalive_timeout 65;
    types_hash_max_size 2048;
    proxy_hide_header X-Powered-By;
    proxy_hide_header Server;

	# Open gzip
    gzip on;

    # The smallest file with gzip compression enabled; files smaller than the set value will not be compressed
    gzip_min_length 1k;

    # gzip compression level 1-10
    gzip_comp_level 2;

    # The type of file to compress.

    gzip_types text/plain application/javascript application/x-javascript text/css application/xml text/javascript application/x-httpd-php image/jpeg image/gif image/png;

    # Whether to add variety: accept encoding in http header? It is recommended to enable
    gzip_vary on;


    include /etc/nginx/mime.types;
    default_type application/octet-stream;
   include /etc/nginx/conf.d/*.conf;


    server {
        listen 80 default_server;
        listen [::]:80 default_server;
        server_name _;
        root /usr/share/nginx/html;
        server_tokens off;
        # Load configuration files for the default server block.
        include /etc/nginx/default.d/*.conf;

        location / {
        }

        location ~* \.(html|xml)$ {
            access_log off;
            add_header Cache-Control no-cache;
        }

        location ~* \.(css|js|png|jpg|jpeg|gif|gz|svg|mp4|mp3|ogg|ogv|webm|htc|woff2|ico|woff|ttf)$ {
            # As above, all requests ending in. css/.js /
            access_log off;
            # 10 d
            add_header Cache-Control "public,max-age=864000";
        }
        error_page 404 /404.html;
        location = /40x.html {
        }

        error_page 500 502 503 504 /50x.html;
        location = /50x.html {
        }
    }
}
It mainly adds html and xml to use negotiation cache, and other static resources use strong cache. Open gzip.
Cache control is http 1.1 about cache configuration, with the highest priority.
Add header cache control "public, Max age = 864000" configures strong cache.
Static resources are almost unchanged, and all are strongly cached. When accessing, in the configured Max age, as long as the browser has a cache, it can take it directly without asking the server. If there is no cache, access the server
Add header cache control no cache; configure negotiation cache.
html and xml files are generated, which may change every time. Configure the negotiation cache. Ask the server if there is any change for each visit. If there is no change, go to the cache, and take the change from the server.
The deployment is based on the above parts. But the beauty is that the card is still loaded for the first time. In order to solve this problem and make it easy to upload pictures when writing markdown, I bought an oss and cdn directly. The cost of oss and cdn will be less than 100 per year.
< font color = Red > if you don't know what oss and cdn are, it is recommended to deploy them directly to Alibaba cloud server < / font >
Alibaba cloud server promotion
Ali oss
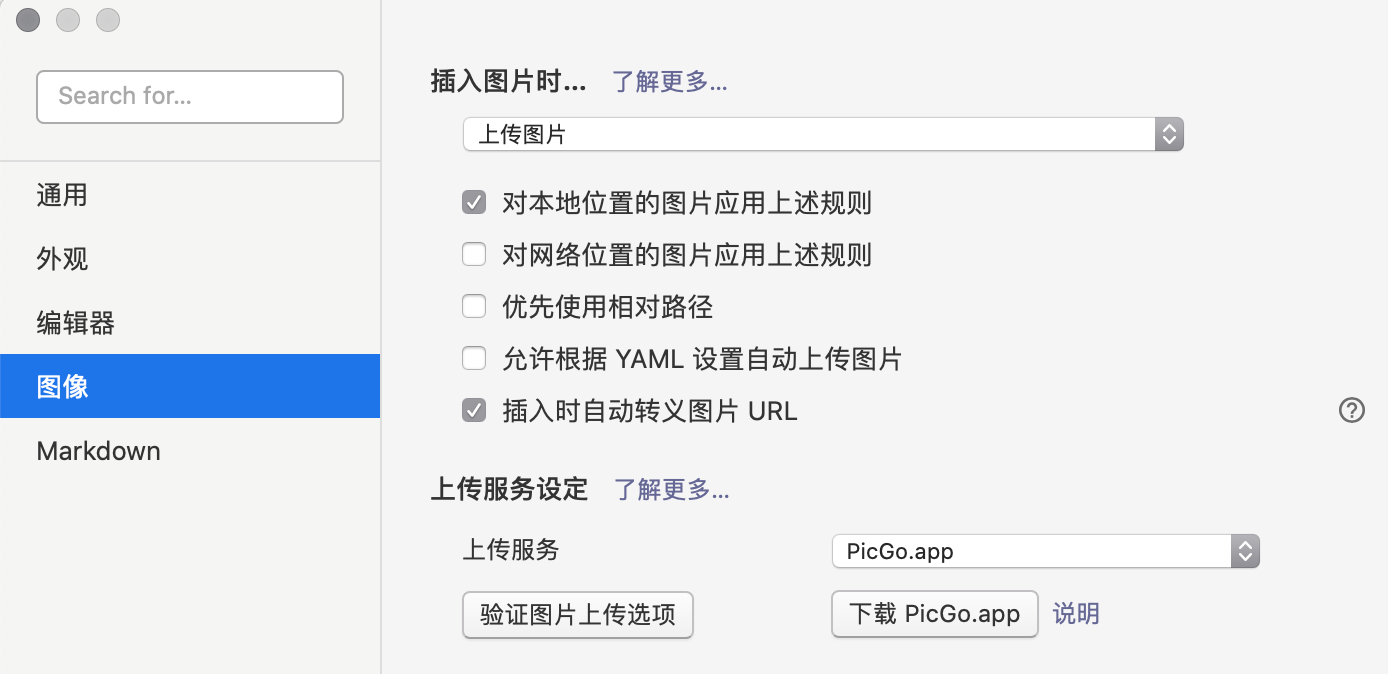
The reason why I bought oss is that it's easy to upload pictures when writing articles with typora. It's OK to configure the alioss picture bed on Picgo.
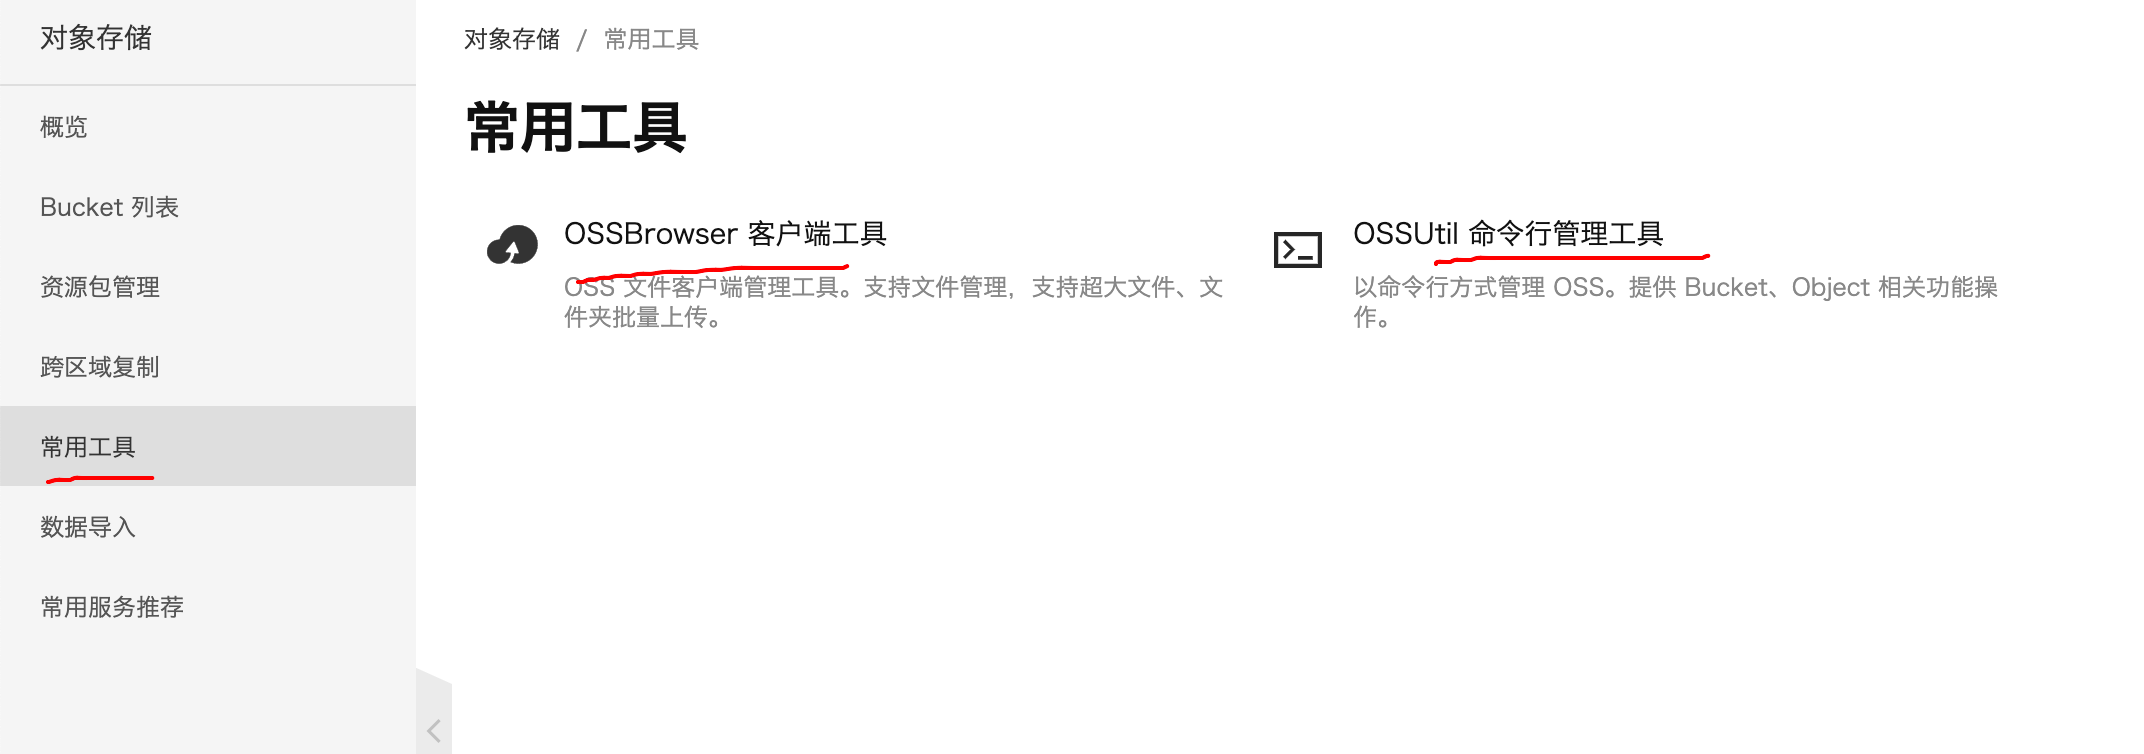
oss provides graphic upload and script upload. With the shell, you can upload static resources to oss and html to nginx.
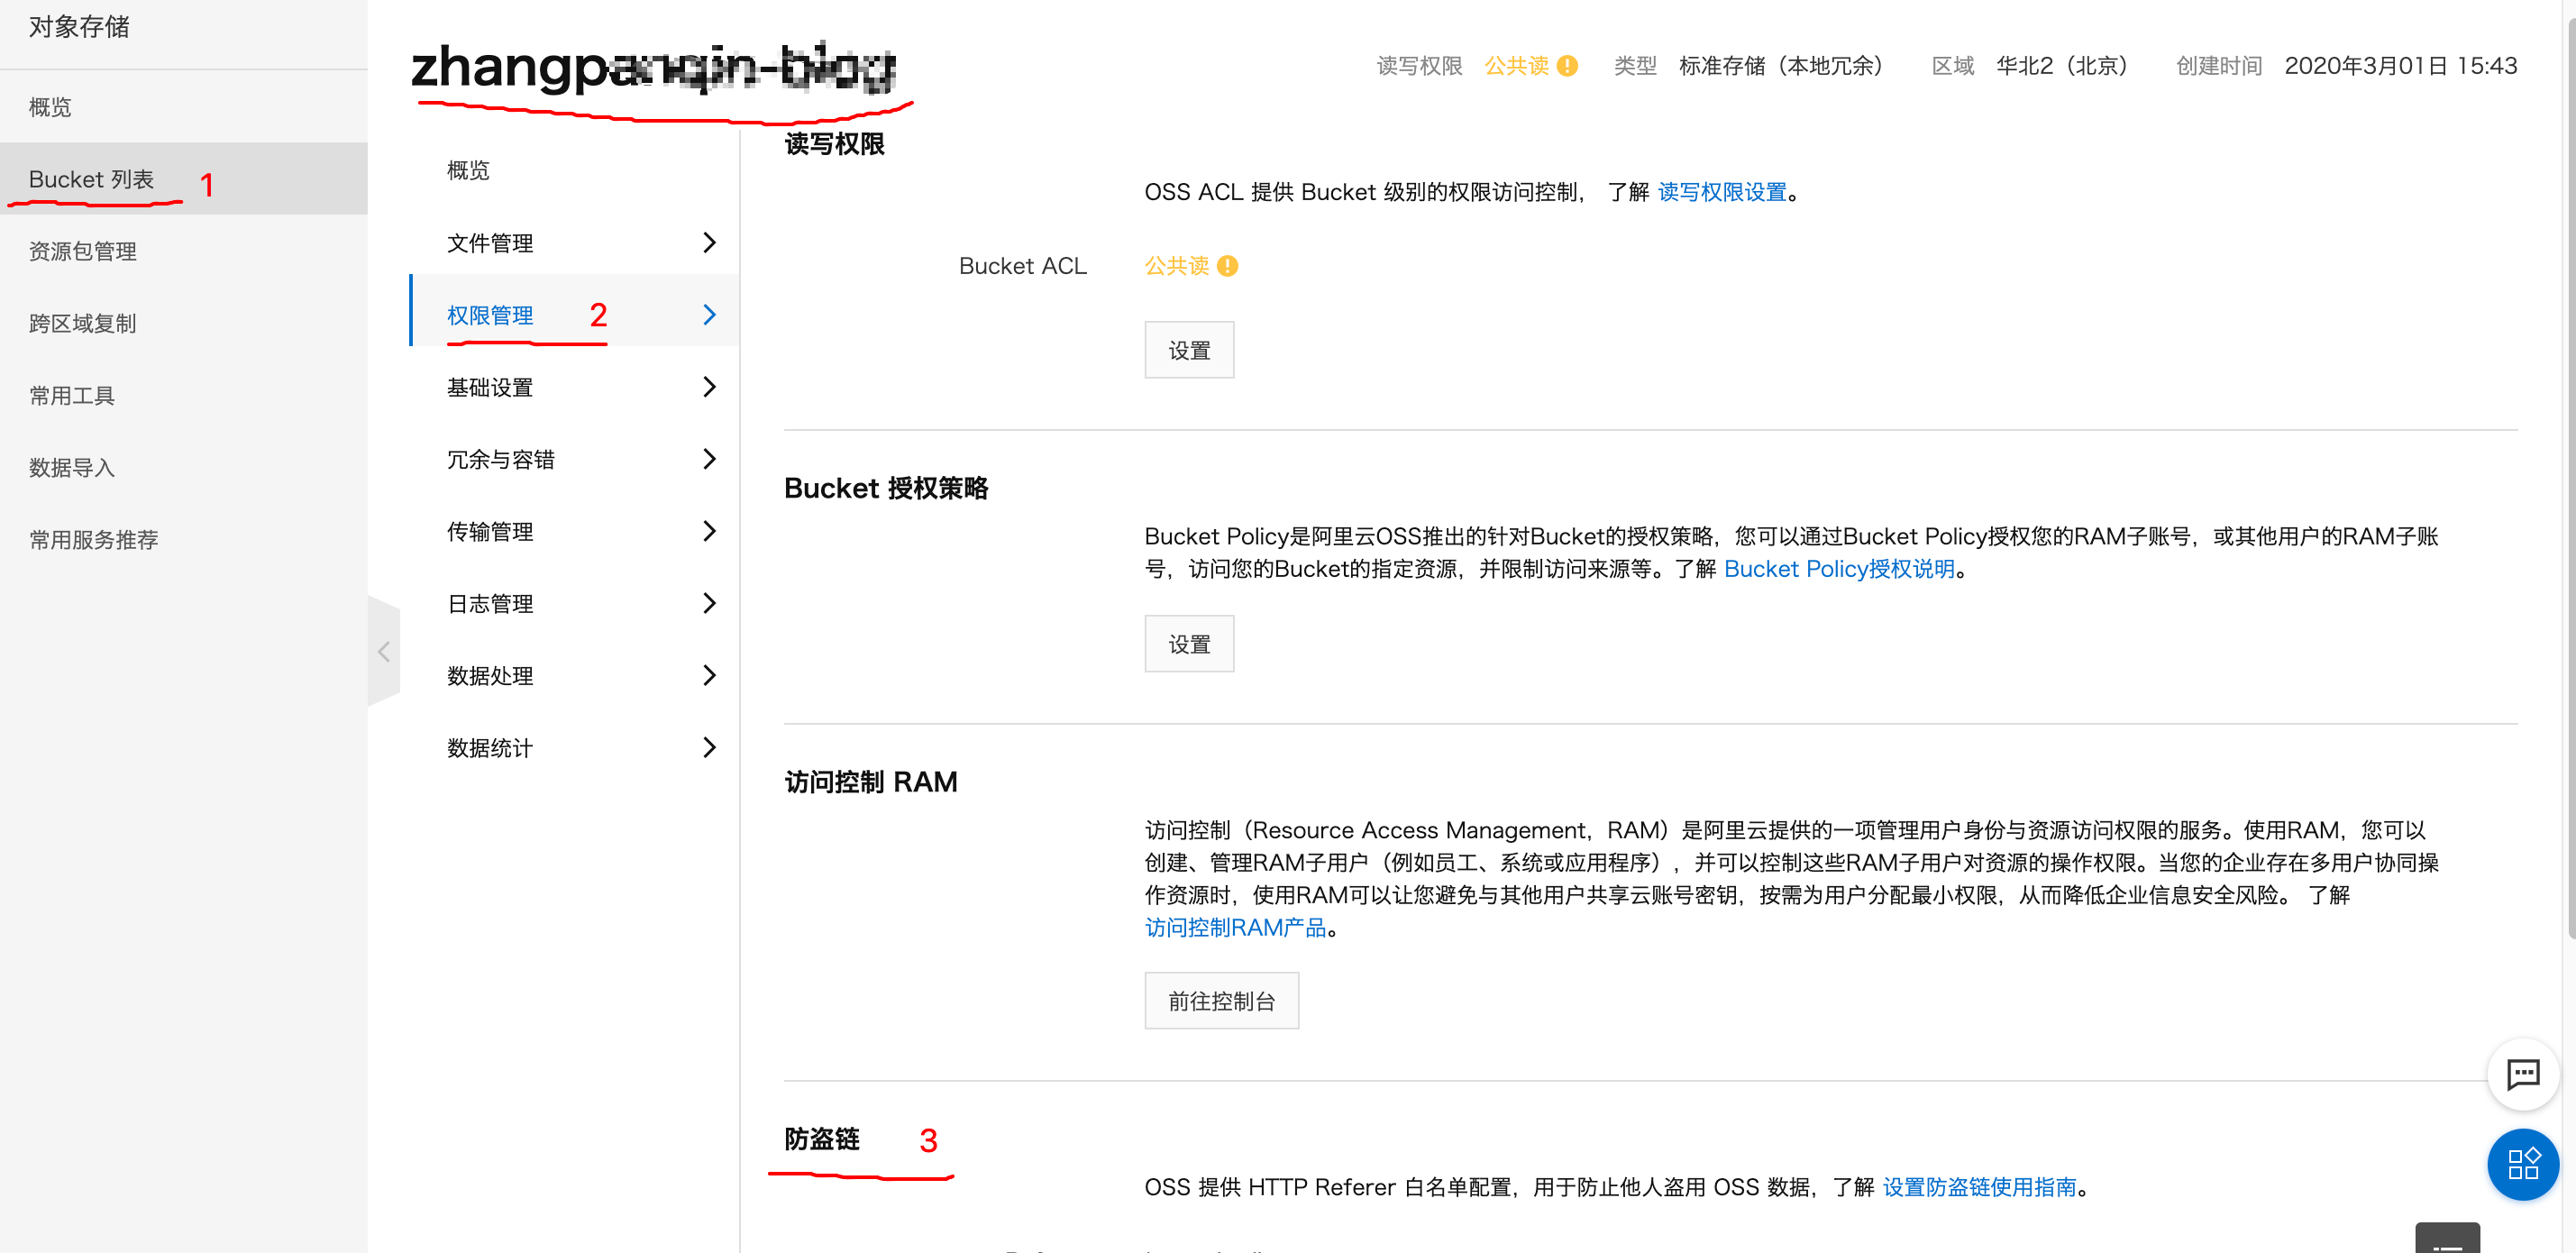
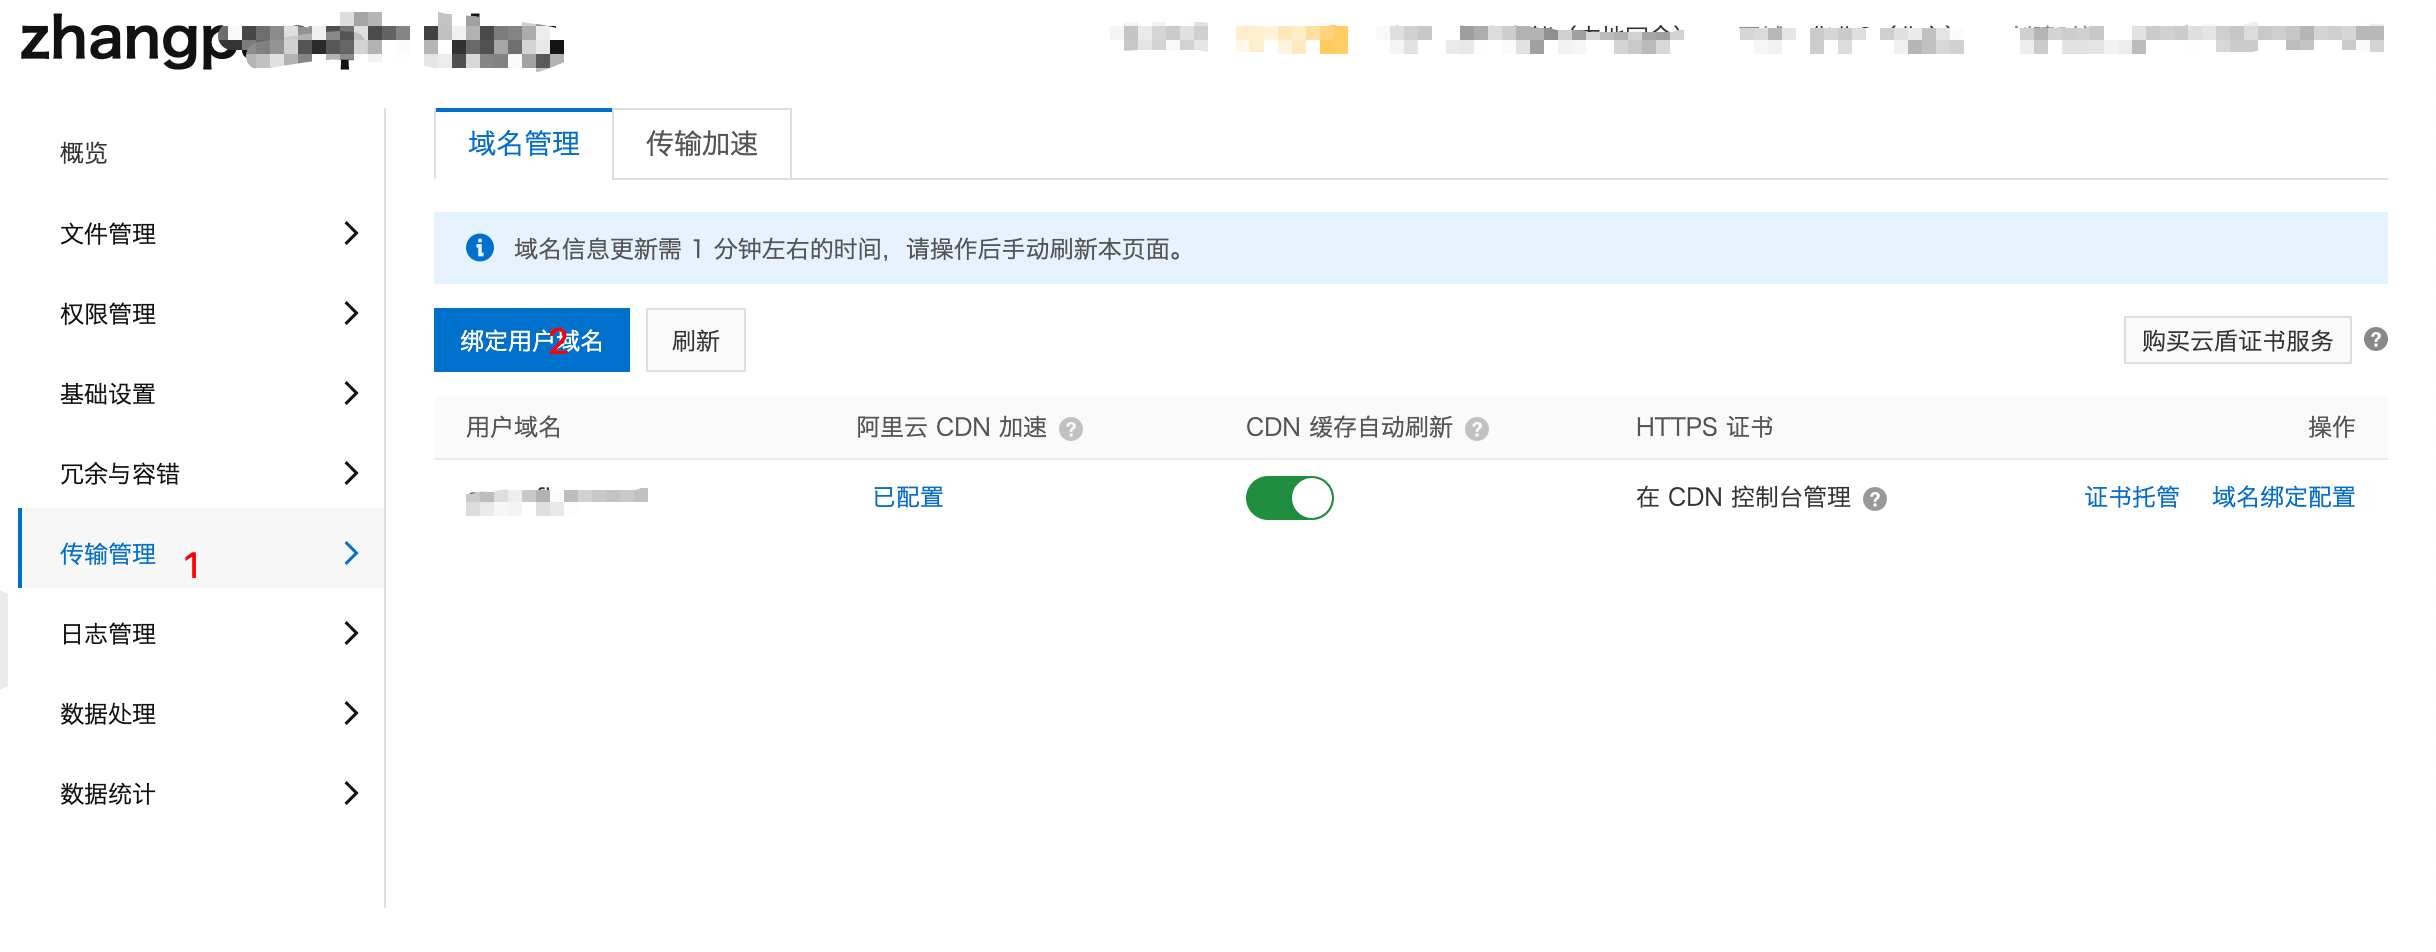
Do not forget to set up the anti-theft chain after creation.
Then turn on cdn acceleration in the transmission management option below, cdn selects traffic billing, 20 yuan 100g. oss Internet access traffic will be charged (no more than 100 yuan a year). If you want to save money, you can buy the same area as your alicloud server, and then let the access go to the intranet.
CDN

You can understand the edge script syntax by reading the official guide of Alibaba, and add it according to your own needs. For example, to add a watermark to an image, all requests will be added with access parameters on oss, so that all images have a watermark effect.
You can also source traffic back to your alicloud server through the back to source configuration, and < font color = Red > CDN back to source oss is also charged. </font>
SEO
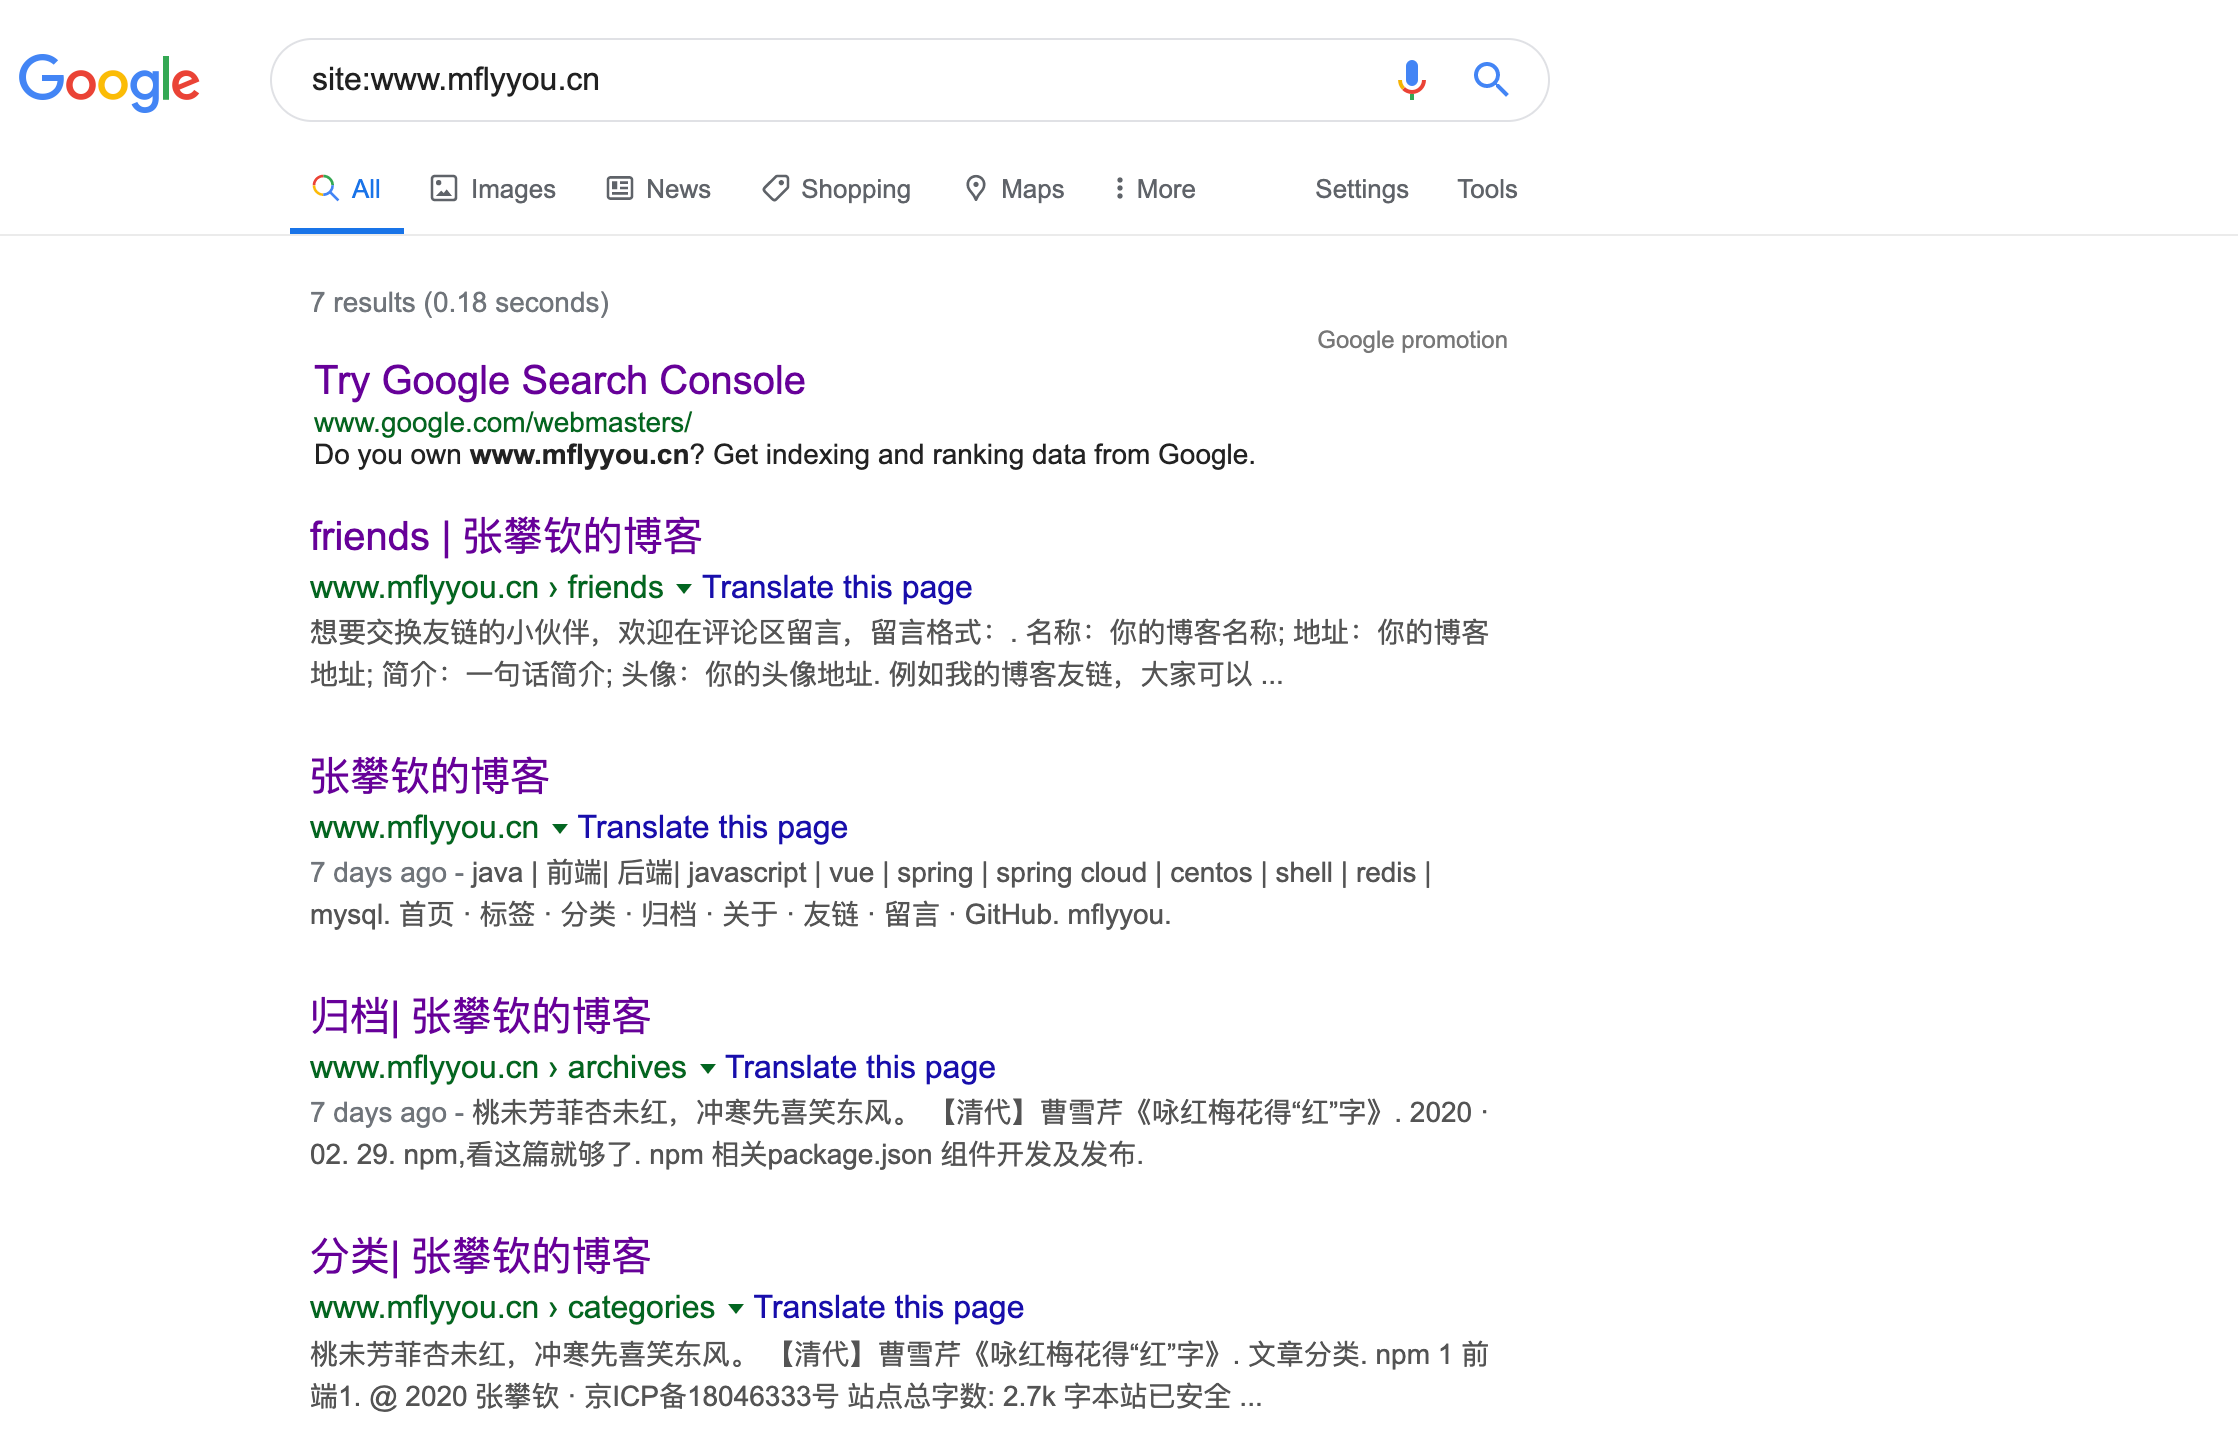
Submit your link, let Baidu Index
Submit your link
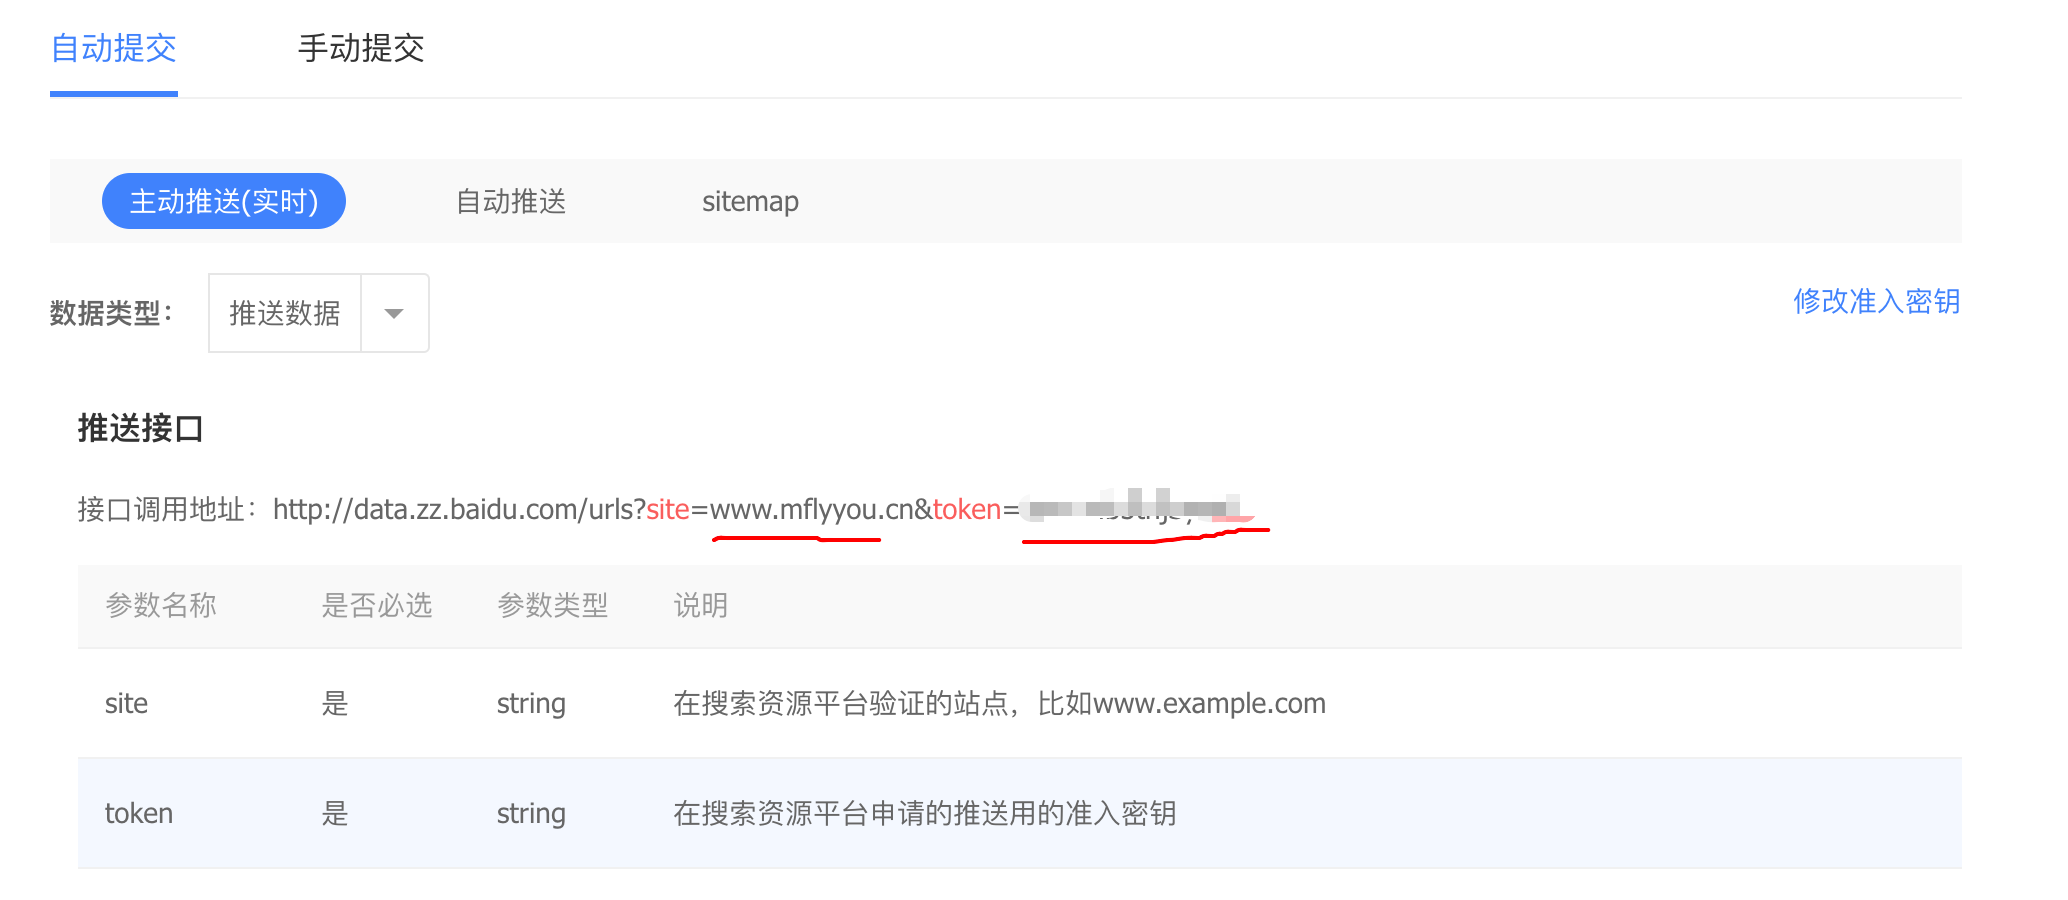
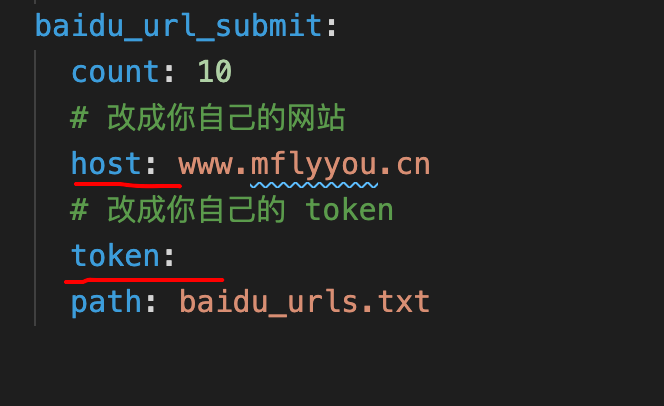
In roo/_config.yml, set site to host and token to token. hexo d will push the link to Baidu. My script, deploy.sh, will be pushed automatically.
Automatic push will push Baidu when you visit the link, just configure it.
# Push the links you need to make Baidu Index
baiduPush: true
Baidu analysis
<img src="http://oss.mflyyou.cn/blog/20200307114721.png?author=zhangpanqin" alt="image-20200307114720921" style="zoom:50%;" />
Fill in the above id
baiduAnalytics:
    enable: true
    # Baidu analysis id
    id:
google Analytics
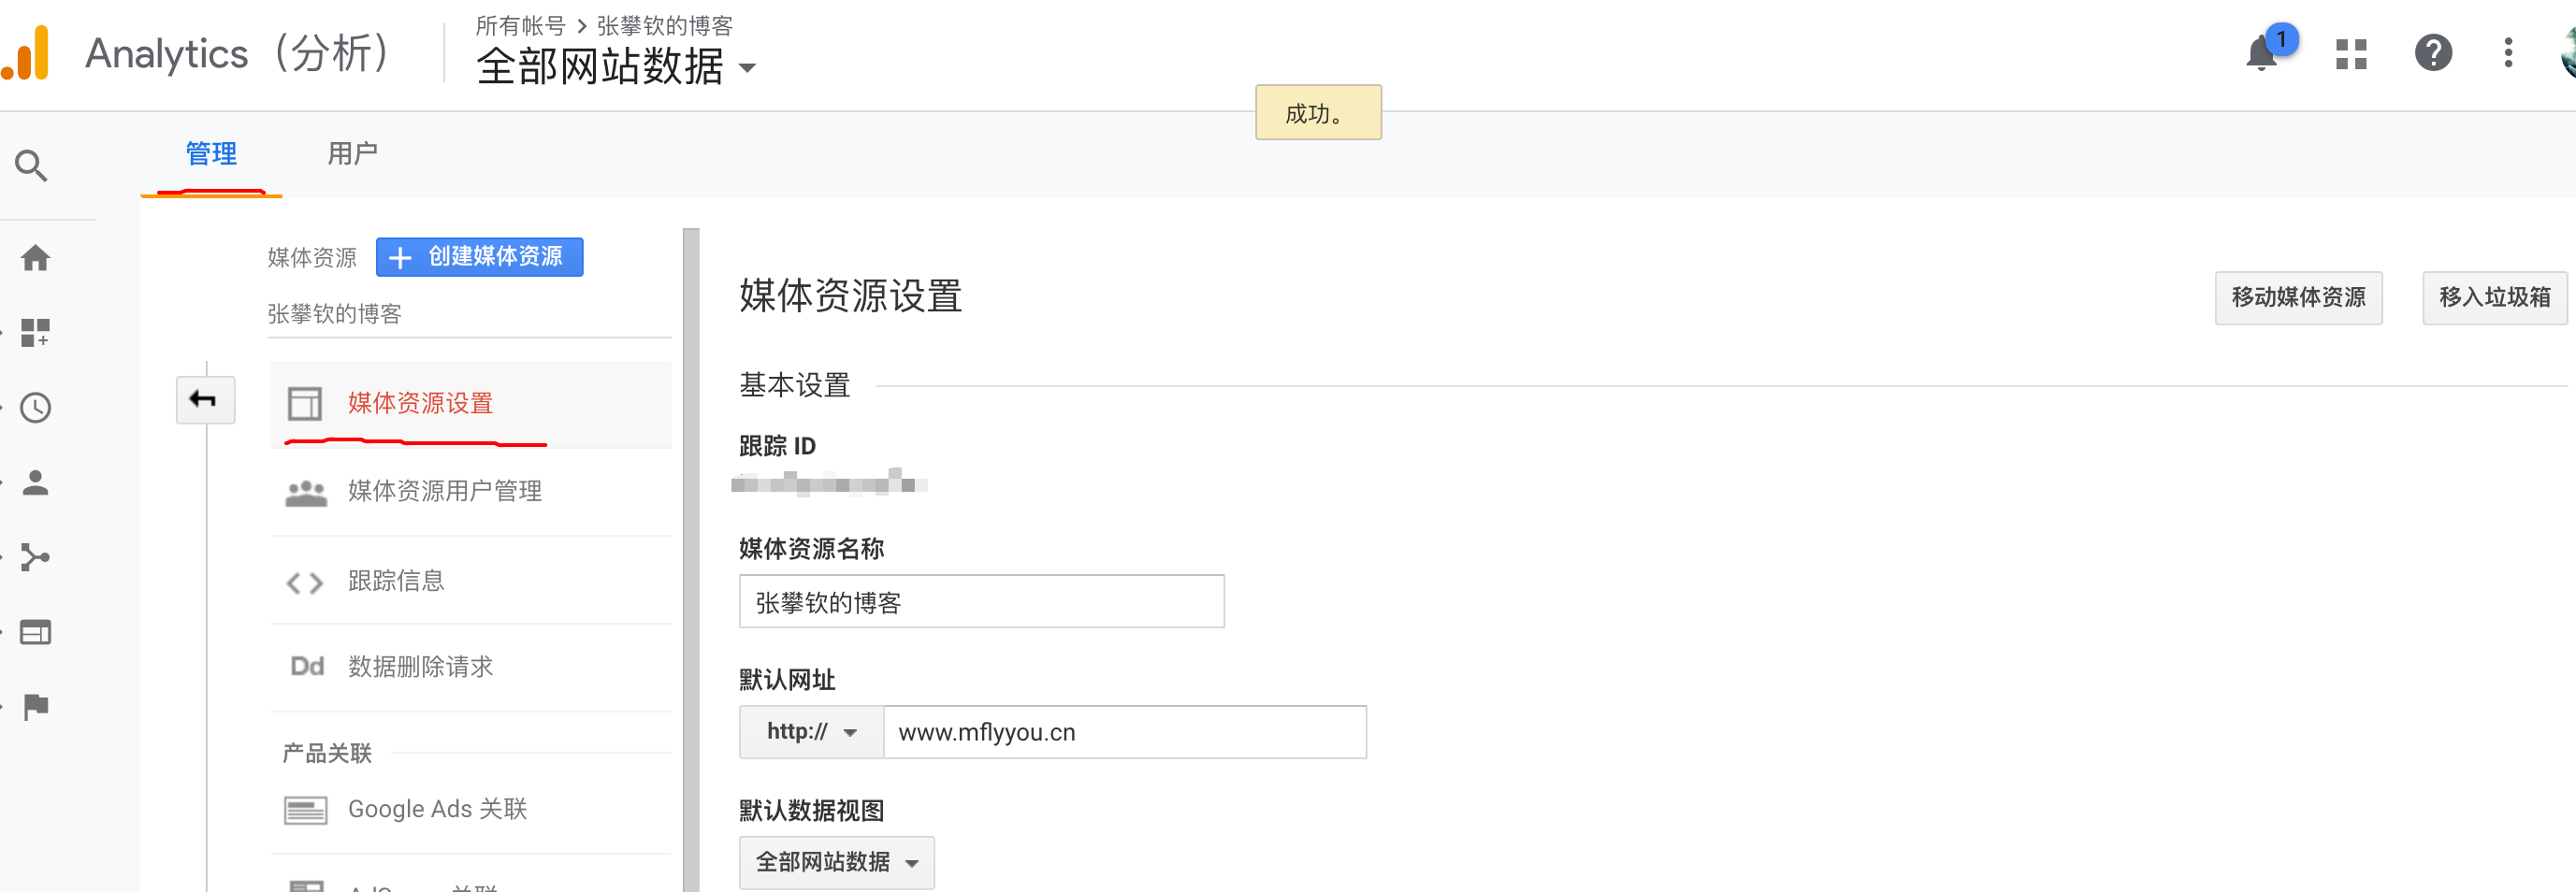
Configure the trace id to the topic profile
googleAnalytics:
  enable: true
  # Fill in your id after Google analyzes the configuration application
  id:
Add your website address in search console so that google can crawl your website content index.
<img src="http://oss.mflyyou.cn/blog/20200307115742.png?author=zhangpanqin" alt="image-20200307115742082" style="zoom:50%;" />
Submit your site map and let google know which pages to crawl.
After the above configuration is completed, you will see the following effects in a few days. Baidu is slower, I haven't moved for 10 days.
Script one click deployment website
BASE_DIR=$(
    cd $(dirname $0)
    pwd
)
# Enter the project path
cd ${BASE_DIR}

yarn run build
hexo d
if [ $? != 0 ]; then
    echo "Construction failure,Sign out"
    exit -1
fi

# Copy themes/matery/source under the project path to oss, and replace your own oss bucket name with bukect

/Users/zhangpanqin/app/oss/ossutilmac64 cp -rf ${BASE_DIR}/themes/matery/source oss://bukect --meta=Cache-Control:public,max-age=2592000

if [ $? != 0 ]; then
    echo "upload oss fail,Sign out"
    exit -1
fi

public=${BASE_DIR}/public

if [ -d ${public} ]; then
    scp -rp ${public}/* User name@ip:/usr/share/nginx/html/
    echo "Deployment success"
else
    echo "${public} Non-existent,Deployment failure"
fi
I wrote my own shell script and have been using it.
You only need to configure your bucket and oss configuration file. You will be prompted to configure the secret key when you run ossutilmac64.
The user name must be configured with ssh to modify your own ip.
Chmod 744. / deploy.sh then makes the script file executable.
Thank
I modified the effect I wanted based on hexo theme mattery and hexo mattery modified.
Feeling open source hexo theme hexo-theme-matery
Thanks for Weiyang's open source contribution hexo-matery-modified , which saves me a lot of time.
This article is composed of Zhang Panqin's blog A literary creation. It can be reprinted and quoted freely, but it needs to be signed by the author and indicate the source of the article.
If you are reprinted to WeChat official account, please add the author's official account number 2. WeChat official account name: Mflyyou