I. Pre-conditions
Hadoop runs on JDK and needs to be pre-installed. The installation steps are as follows:
Configuration of Secret-Free Login
The communication between Hadoop components needs to be based on SSH.
2.1 Configuration Mapping
Configure ip address and host name mapping:
vim /etc/hosts
# Increase at the end of the file
192.168.43.202  hadoop001
2.2 Generating Public and Private Keys
Execute the following command line to generate public and private keys:
ssh-keygen -t rsa
3.3 authorization
Enter the ~/.ssh directory, view the generated public key and private key, and write the public key to the authorization file:
[root@@hadoop001 sbin]#  cd ~/.ssh
[root@@hadoop001 .ssh]# ll
-rw-------. 1 root root 1675 3 Month 1509:48 id_rsa
-rw-r--r--. 1 root root  388 3 Month 1509:48 id_rsa.pub
# Write the public key to the authorization file
[root@hadoop001 .ssh]# cat id_rsa.pub >> authorized_keys
[root@hadoop001 .ssh]# chmod 600 authorized_keys
III. Hadoop(HDFS) Environment Construction
3.1 Download and Unzip
Download the Hadoop installation package, here I downloaded the CDH version, the download address is: http://archive.cloudera.com/cdh5/cdh/5/
# decompression
tar -zvxf hadoop-2.6.0-cdh5.15.2.tar.gz
3.2 Configuring environment variables
# vi /etc/profile
Configure environment variables:
export HADOOP_HOME=/usr/app/hadoop-2.6.0-cdh5.15.2
export  PATH=${HADOOP_HOME}/bin:$PATH
Execute the source command so that the configured environment variables take effect immediately:
# source /etc/profile
3.3 Modify Hadoop configuration
Enter the ${HADOOP_HOME}/etc/hadoop/ directory and modify the following configuration:
1. hadoop-env.sh
# JDK installation path
export  JAVA_HOME=/usr/java/jdk1.8.0_201/
2. core-site.xml
<configuration>
    <property>
        <!--Appoint namenode Of hdfs Communication Address of Protocol File System-->
        <name>fs.defaultFS</name>
        <value>hdfs://hadoop001:8020</value>
    </property>
    <property>
        <!--Appoint hadoop Directory for storing temporary files-->
        <name>hadoop.tmp.dir</name>
        <value>/home/hadoop/tmp</value>
    </property>
</configuration>
3. hdfs-site.xml
Specify copy coefficients and temporary file storage locations:
<configuration>
    <property>
        <! - Since we build a stand-alone version here, the copy coefficient of the specified dfs is 1 - >.
        <name>dfs.replication</name>
        <value>1</value>
    </property>
</configuration>
4. slaves
Configure the host name or IP address of all subordinate nodes. Since it is a stand-alone version, specify the local machine.
hadoop001
3.4 Close Firewall
Failure to close the firewall may result in inaccessibility to access Hadoop's Web UI interface:
# View firewall status
sudo firewall-cmd --state
# Close the firewall:
sudo systemctl stop firewalld.service
3.5 Initialization
The first time you start Hadoop, you need to initialize it and go into the ${HADOOP_HOME}/bin/directory to execute the following commands:
[root@hadoop001 bin]# ./hdfs namenode -format
3.6 Start HDFS
Enter the ${HADOOP_HOME}/sbin/ directory and start HDFS:
[root@hadoop001 sbin]# ./start-dfs.sh
3.7 Verify that the startup is successful
Way 1: Execute jps to see if the NameNode and DataNode services have been started:
[root@hadoop001 hadoop-2.6.0-cdh5.15.2]# jps
9137 DataNode
9026 NameNode
9390 SecondaryNameNode
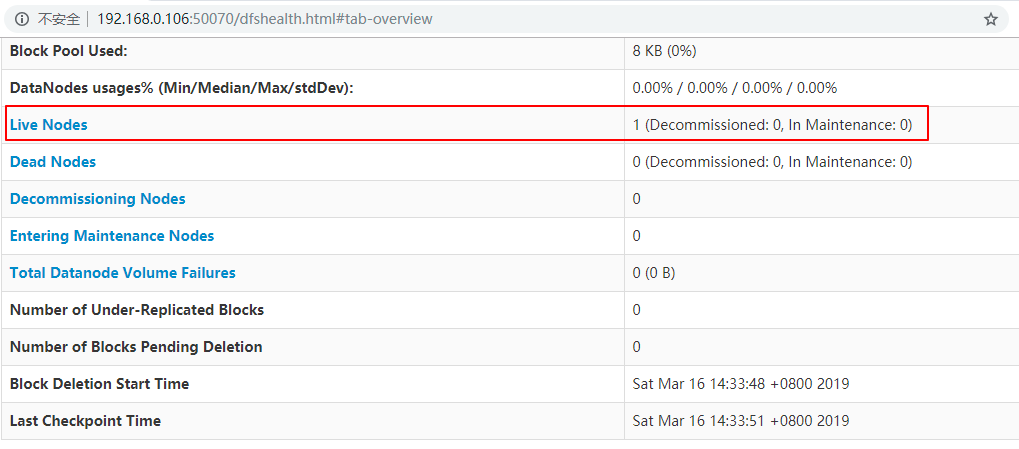
Mode 2: View the Web UI interface, port 50070:

IV. Hadoop(YARN) Environment Construction
4.1 Modify configuration
Enter the ${HADOOP_HOME}/etc/hadoop/ directory and modify the following configuration:
1. mapred-site.xml
# If there is no mapred-site.xml, copy a sample file and modify it
cp mapred-site.xml.template mapred-site.xml
<configuration>
    <property>
        <name>mapreduce.framework.name</name>
        <value>yarn</value>
    </property>
</configuration>
2. yarn-site.xml
<configuration>
    <property>
        <! -- Configure ancillary services running on NodeManager. You need to configure mapreduce_shuffle to run MapReduce on Yarn. >
        <name>yarn.nodemanager.aux-services</name>
        <value>mapreduce_shuffle</value>
    </property>
</configuration>
4.2 Startup Services
Enter the ${HADOOP_HOME}/sbin/ directory and start YARN:
./start-yarn.sh
4.3 Verify that the startup is successful
Way 1: Execute the jps command to see if the NodeManager and ResourceManager services have been started:
[root@hadoop001 hadoop-2.6.0-cdh5.15.2]# jps
9137 DataNode
9026 NameNode
12294 NodeManager
12185 ResourceManager
9390 SecondaryNameNode
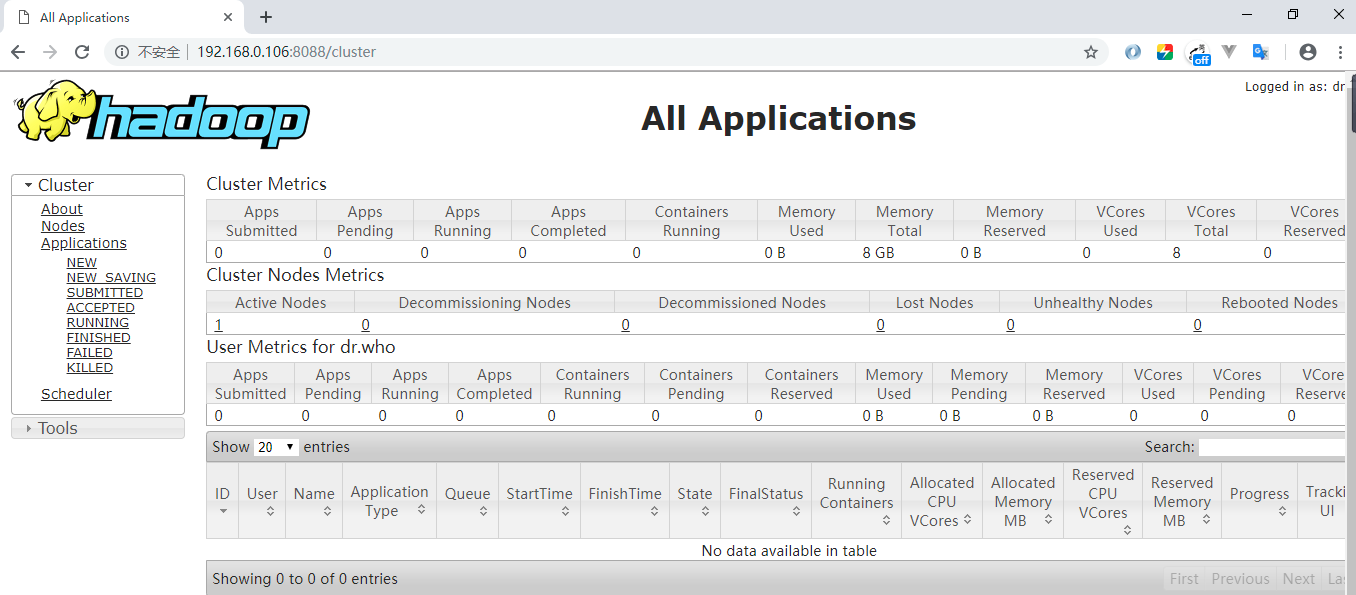
Mode 2: View the Web UI interface, port number 8088:

For more big data series articles, see the GitHub Open Source Project: Introduction Guide to Big Data