SpringSecurity
- Safety should be considered at the beginning
- Function permissions, access permissions and menu permissions all require certain rules to configure security rules
Remember several classes:
- WebSecurityConfigurerAdapter: custom Security policy
- AuthenticationManagerBuilder: custom authentication policy
- @Enable WebSecurity: enable WebSecurity mode
The two main goals of Spring Security are "authentication" and "authorization" (access control).
Authentication
Authentication is about verifying your credentials, such as user name / user ID and password, to verify your identity.
Authentication is usually done by user name and password, sometimes in combination with authentication factors.
Authorization
Authorization occurs after the system successfully verifies your identity, and will eventually grant you full access to resources (such as information, files, databases, funds, locations, almost anything).
This concept is universal, not just in Spring Security.
Environment configuration
- Create a basic web environment
- A thymeleaf template is enough
<!--Import next thymeleaf template engine-->
<dependency>
    <groupId>org.thymeleaf.extras</groupId>
    <artifactId>thymeleaf-extras-java8time</artifactId>
</dependency>
<dependency>
    <groupId>org.thymeleaf</groupId>
    <artifactId>thymeleaf-spring5</artifactId>
</dependency>
- It can also be used as a launcher to import the template engine
<!--Import next thymeleaf template engine--><!--thymeleaf-->
<dependency>
    <groupId>org.springframework.boot</groupId>
    <artifactId>spring-boot-starter-thymeleaf</artifactId>
</dependency>
- This is a view parser required for page Jump
spring:
  thymeleaf:
    cache: false
# Turn off the cache of thymeleaf
- Remember to close the cache of thymeleaf in yaml
- Write a corresponding page Jump under the spring controller test
import org.springframework.stereotype.Controller;
import org.springframework.web.bind.annotation.PathVariable;
import org.springframework.web.bind.annotation.RequestMapping;
@Controller
public class RouterController {
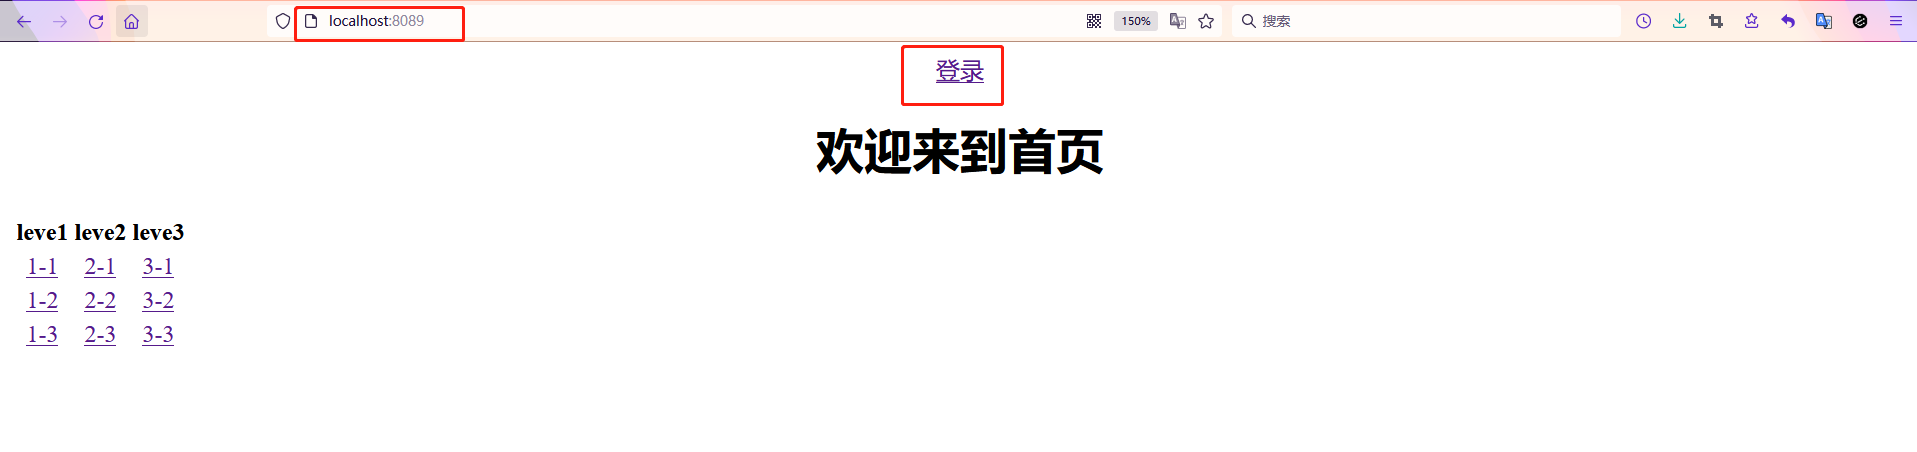
@RequestMapping({"/","/index"})
public String index(){
return "index";
}
@RequestMapping("/tologin")
public String toLogin(){
return "views/login";
}
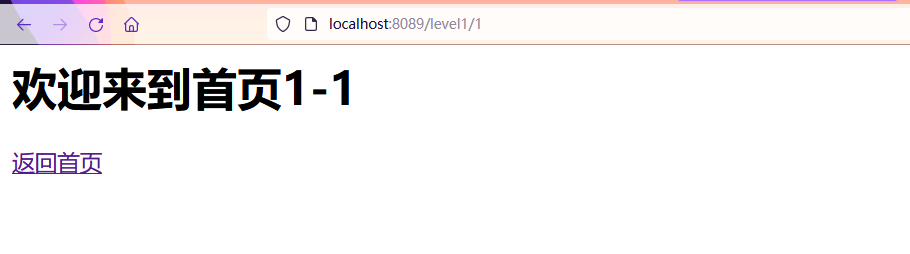
@RequestMapping("/level1/{id}")
public String level1(@PathVariable ("id") int id){
return "views/level1/"+id;
}
@RequestMapping("/level2/{id}")
public String level2(@PathVariable ("id") int id){
return "views/level2/"+id;
}
@RequestMapping("/level3/{id}")
public String level3(@PathVariable ("id") int id){
return "views/level3/"+id;
}
}
- There are also corresponding web pages under configuration
Configure spring security
Import the package of spring security first
<dependency>
    <groupId>org.springframework.boot</groupId>
    <artifactId>spring-boot-starter-security</artifactId>
</dependency>
Configure SpringSecurity configuration class
import org.springframework.security.config.annotation.web.builders.HttpSecurity;
import org.springframework.security.config.annotation.web.configuration.EnableWebSecurity;
import org.springframework.security.config.annotation.web.configuration.WebSecurityConfigurerAdapter;
/**
* SpringSecurity Configuration class
*/
@EnableWebSecurity
public class SecurityConfig extends WebSecurityConfigurerAdapter {
//Adding @ EnableWebSecurity and inheriting WebSecurityConfigurerAdapter means that the configuration class is taken over by Spring
/**
* Here you choose to override the Http related classes
*/
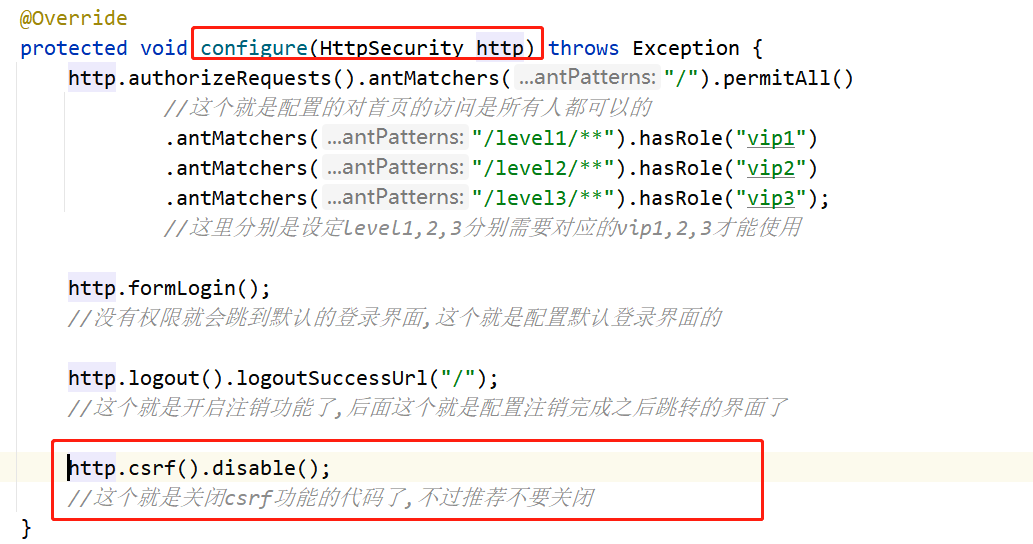
@Override
protected void configure(HttpSecurity http) throws Exception {
http.authorizeRequests().antMatchers("/").permitAll()
//This is the configuration. Everyone can access the home page
.antMatchers("/level1/**").hasRole("vip1")
.antMatchers("/level2/**").hasRole("vip2")
.antMatchers("/level3/**").hasRole("vip3");
//Here, the corresponding VIP1, 2 and 3 are required to set levels 1, 2 and 3 respectively
http.formLogin();
//If you don't have permission, you will jump to the default login interface. This is how to configure the default login interface
}
}
- This is a simple configuration class for spring security
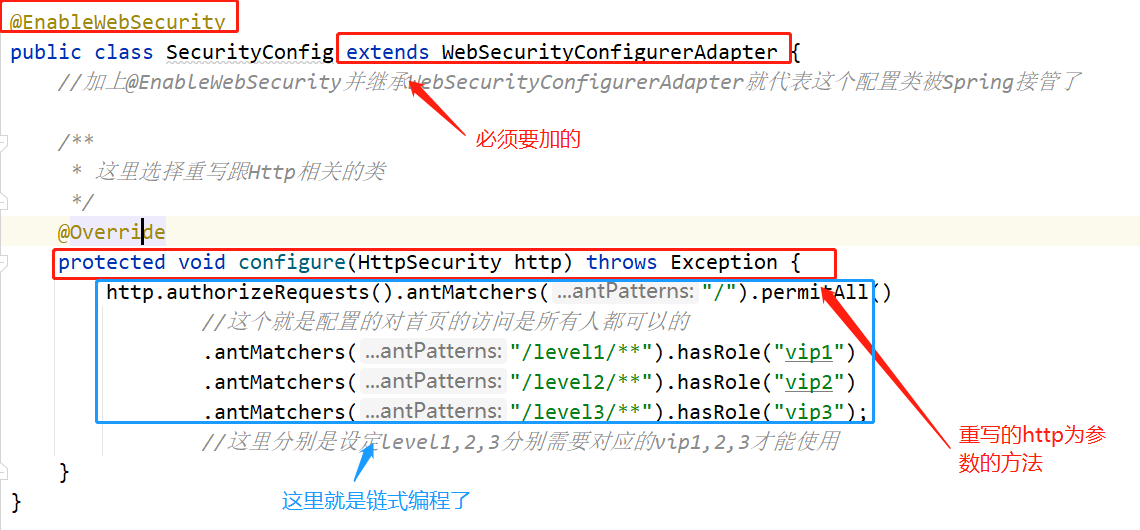
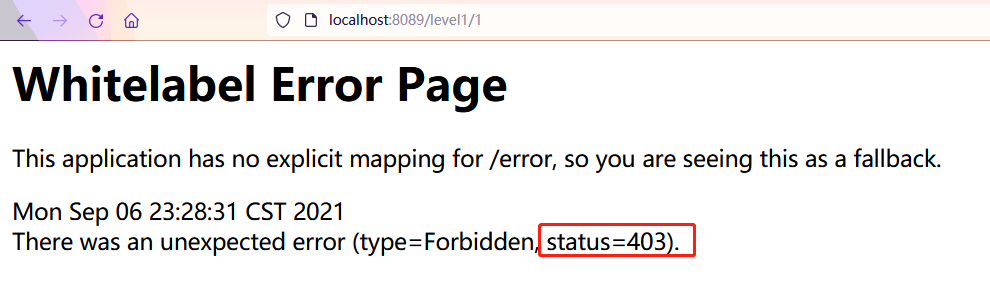
- You can see that if the corresponding page configured here does not have permission, it will directly report 403 no permission error
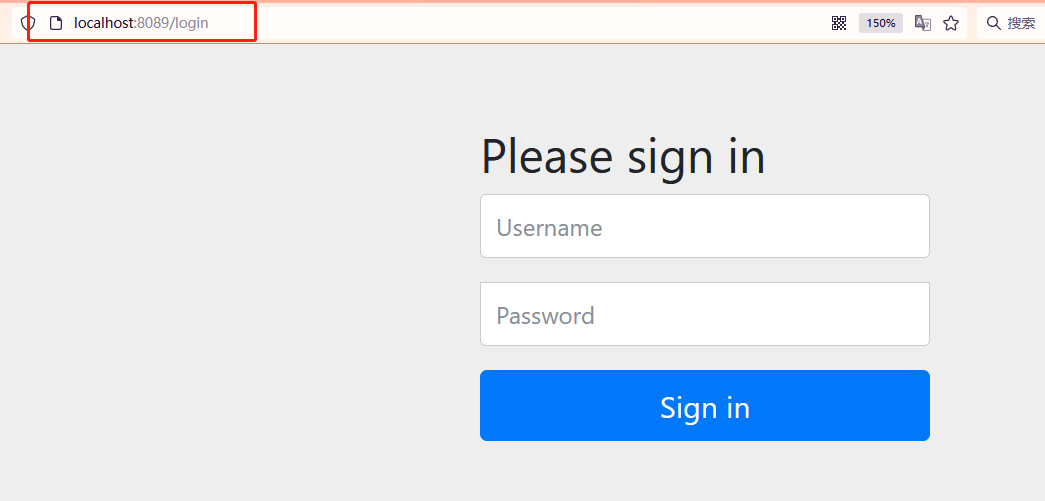
- You can also jump to an official login page

- But add such a configuration
Configure corresponding permission roles
- Be familiar with this, as well as the native spring security
/**
 *     This is the class corresponding to authentication
 */
@Override
protected void configure(AuthenticationManagerBuilder auth) throws Exception {
    auth.inMemoryAuthentication()
            .withUser("lin").password(new BCryptPasswordEncoder().encode("123456")).roles("vip3","vip2","vip1")
            .and()
            .withUser("xie").password(new BCryptPasswordEncoder().encode("123456")).roles("vip1")
            //This is to configure some basic user roles
            //Here, if you want to configure user roles, you need to use and() to splice
            .and()
            .passwordEncoder(new BCryptPasswordEncoder());
             //However, please note that the password here needs to be encrypted, otherwise it will report 500 without encryption error after logging in
}
- Override the configure method based on the above configuration class
- It corresponds to the configuration of permission roles and the corresponding password encryption processing
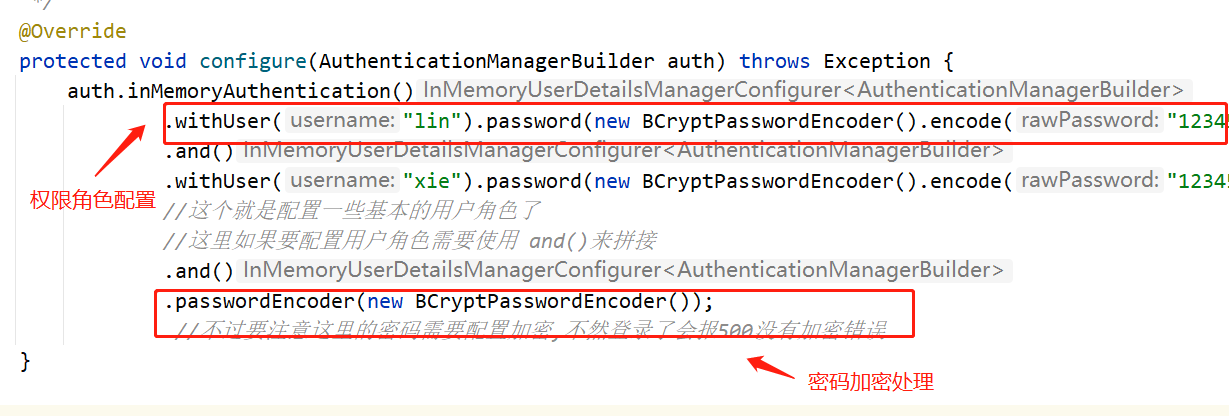
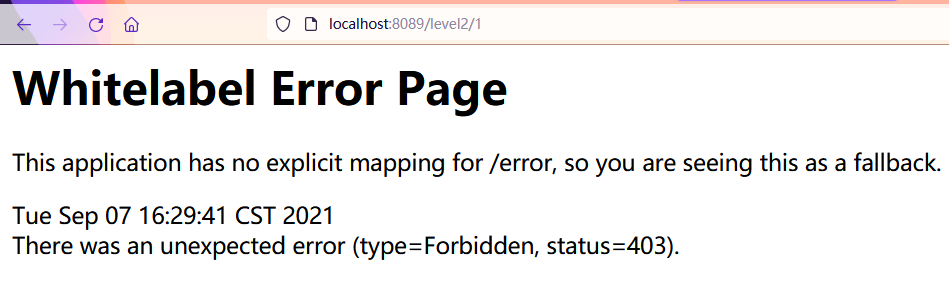
- You can see that if there is no corresponding configured role here, an error 403 will be reported
Implementation of logout function
- This is much simpler
- Add http.logout() to the previous method with HTTP as the parameter to enable the logout function
/**
 * Here you choose to override the Http related classes
 */
@Override
protected void configure(HttpSecurity http) throws Exception {
    http.authorizeRequests().antMatchers("/").permitAll()
            //This is the configuration. Everyone can access the home page
            .antMatchers("/level1/**").hasRole("vip1")
            .antMatchers("/level2/**").hasRole("vip2")
            .antMatchers("/level3/**").hasRole("vip3");
            //Here, the corresponding VIP1, 2 and 3 are required to set levels 1, 2 and 3 respectively

    http.formLogin();
    //If you don't have permission, you will jump to the default login interface. This is how to configure the default login interface

    http.logout();
    //This is to enable the logoff function
}
- Then click the corresponding logout button in the front-end interface configuration
<a th:href="@{/logout}">cancellation</a>
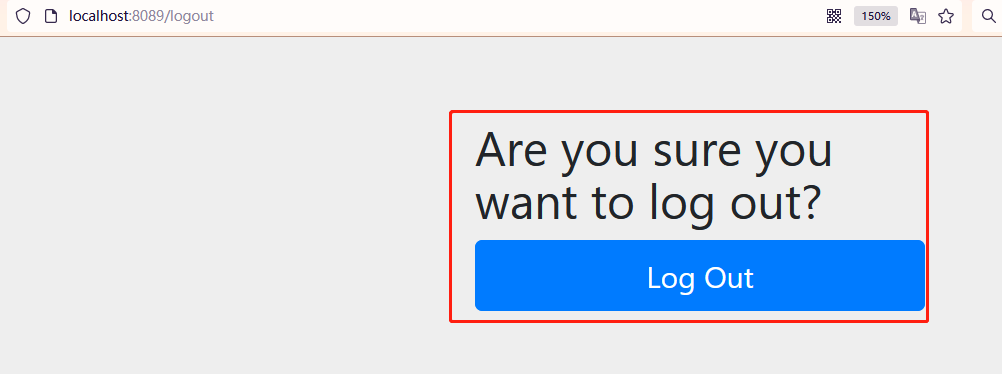
- In this way, click logout after configuration, and you will jump to here
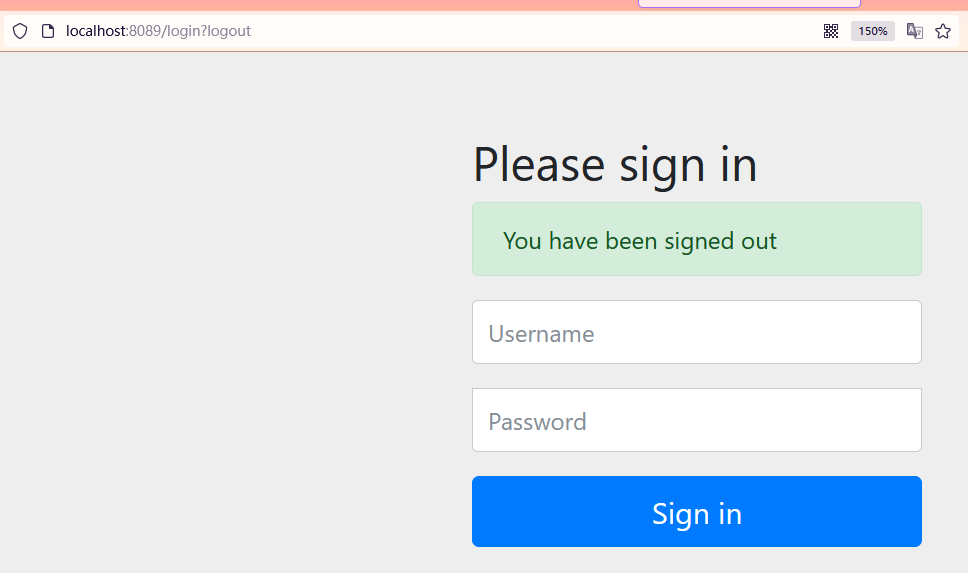
- However, after logging out, you will jump to the login interface
- If you need to jump to the home page, you need to configure this content
http.logout().logoutSuccessUrl("/");
//This is to enable the logoff function. The following is the interface to jump after configuring logoff
- In this way, after the logout is completed, we will jump to our homepage / index.hml
Front end interface shielding
- This requires importing an integration package of thymeleaf and security
<!--Import SpringSecurity and thymeleaf Consolidation package for-->
<dependency>
    <groupId>org.thymeleaf.extras</groupId>
    <artifactId>thymeleaf-extras-springsecurity5</artifactId>
    <version>3.0.3.RELEASE</version>
</dependency>
- Then, to use, you need to configure the namespace on the corresponding html interface
<html lang="en" xmlns:sec="http://www.thymeleaf.org/thymeleaf-extras-springsecurity5">
<!--Here is the imported namespace-->

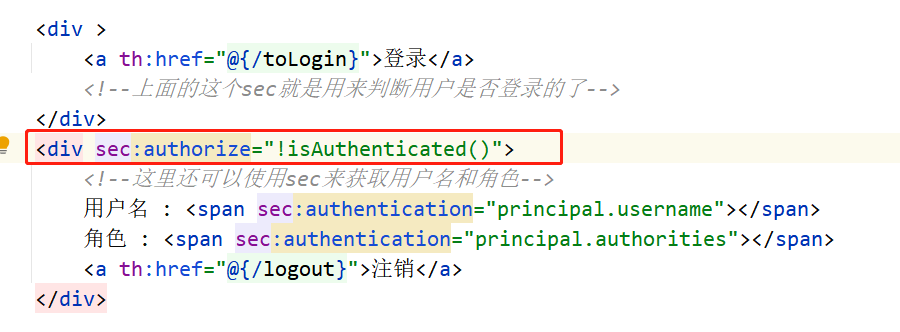
- This format is generally used to use this namespace
<div sec:authorize="!isAuthenticated()">
    <a th:href="@{/toLogin}">Sign in</a>
    <!--This one above sec It is used to judge whether the user logs in-->
</div>
<div sec:authorize="isAuthenticated()">
    <a th:href="@{/logout}">cancellation</a>
</div>

- You can see here that if you log in, it is the logout button
- If there is no login, the login button is displayed
CSRF configuration
This is about website attack
Generally speaking, our spring security is automatically turned on. To turn it off, we need to add this to the configuration class we configured before
http.csrf().disable();
//This is the code to turn off the csrf function, but it is recommended not to turn it off
<!--<a th:href="@{/logout}">cancellation</a>-->
<!--This logout method is not very safe-->
<form method="post" th:action="@{/logout}">
    <input type="hidden" th:name="${_csrf.parameterName}" th:value="${_csrf.token}" />
    <input type="submit" value="cancellation">
</form>
- So use this method to log off the security point
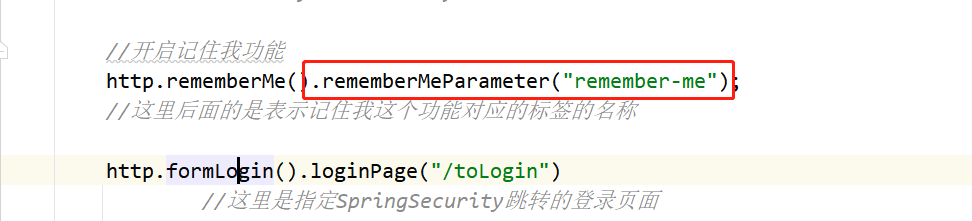
Remember my function implementation
//Enable remember me function
        http.rememberMe().rememberMeParameter("remember-me");
        //What follows here is the name of the tag corresponding to my function
- It's the familiar configuration class. Just add such a paragraph
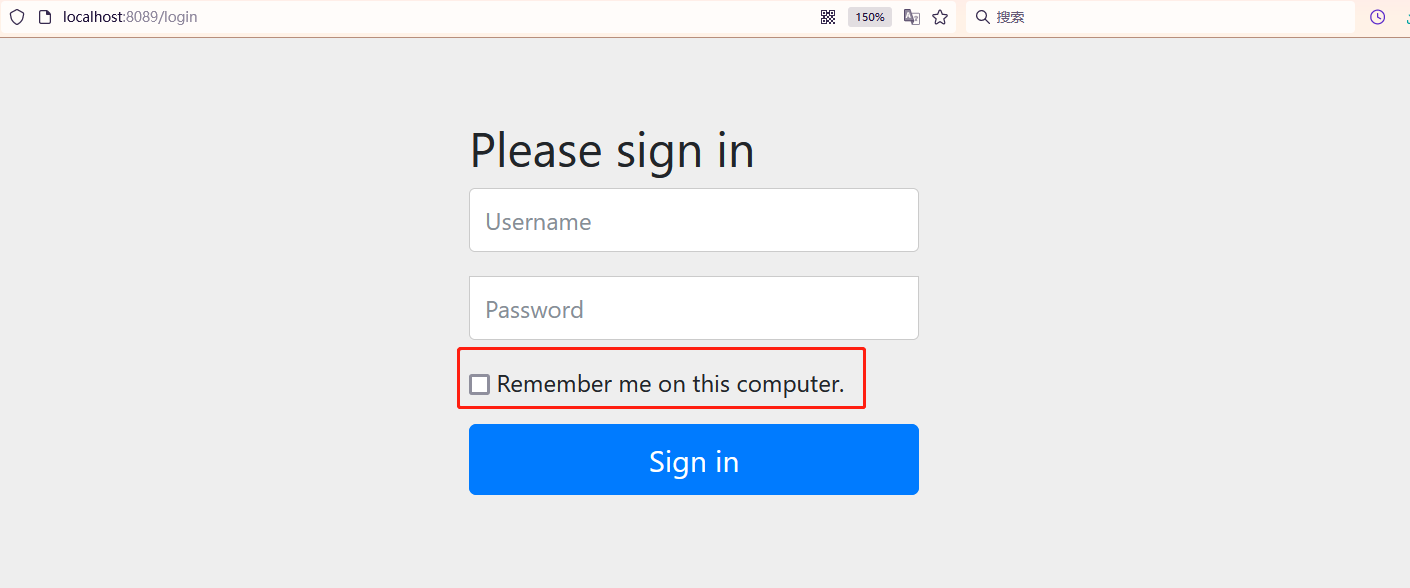
- Remember to clear the cache first, otherwise the display unit will display this
- This is implemented through cookie s, which are saved for 2 weeks by default
- If you use a custom page, you don't need to add
- The following paragraph is used to define the key value of the submitted form
Configure custom login interface
- Or is it familiar to modify the original configuration class
- Using the in http
//http.formLogin();
//If you don't have permission, you will jump to the default login interface. This is how to configure the default login interface

http.formLogin().loginPage("/toLogin")
        //This is the login page for specifying the spring security jump
        .loginProcessingUrl("/forLogin")
        //Here is the url that specifies the user name and password submitted after spring security login
        .usernameParameter("user")
        //This is the name of the user name tag that specifies the submission
        .passwordParameter("pwd");
        //This is the label that specifies the password to submit
//This is the configuration. The page under the customized page path is the login interface
- These can be written after the formLogin configured by us
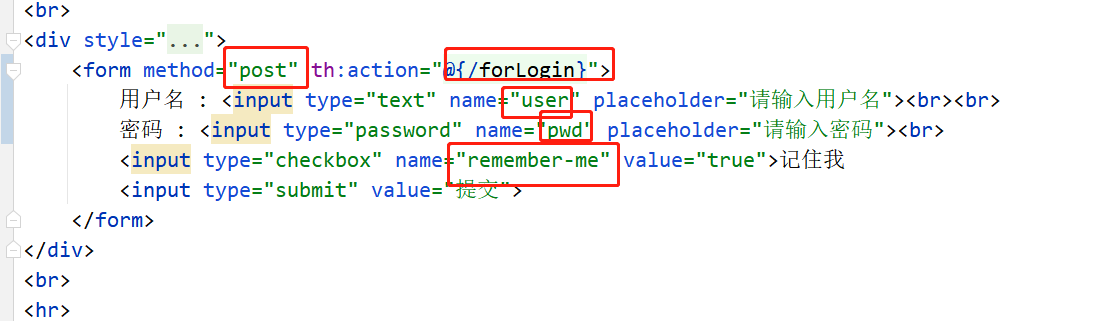
<form method="post" th:action="@{/forLogin}">
    user name : <input type="text" name="user" placeholder="enter one user name"><br><br>
    password : <input type="password" name="pwd" placeholder="Please input a password"><br>
    <input type="checkbox" name="remember-me" value="true">Remember me
    <input type="submit" value="Submit">
</form>
- The login form looks like this
summary
- Start pilot package
<dependency>
    <groupId>org.springframework.boot</groupId>
    <artifactId>spring-boot-starter-security</artifactId>
</dependency>
- Then write the configuration class
import org.springframework.security.config.annotation.authentication.builders.AuthenticationManagerBuilder;
import org.springframework.security.config.annotation.web.builders.HttpSecurity;
import org.springframework.security.config.annotation.web.configuration.EnableWebSecurity;
import org.springframework.security.config.annotation.web.configuration.WebSecurityConfigurerAdapter;
import org.springframework.security.crypto.bcrypt.BCryptPasswordEncoder;

/**
 * SpringSecurity Configuration class
 */
@EnableWebSecurity
public class SecurityConfig extends WebSecurityConfigurerAdapter {
    //Adding @ EnableWebSecurity and inheriting WebSecurityConfigurerAdapter means that the configuration class is taken over by Spring

    /**
     * Here you choose to override the Http related classes
     */
    @Override
    protected void configure(HttpSecurity http) throws Exception {
        http.authorizeRequests().antMatchers("/").permitAll()
                //This is the configuration. Everyone can access the home page
                .antMatchers("/level1/**").hasRole("vip1")
                .antMatchers("/level2/**").hasRole("vip2")
                .antMatchers("/level3/**").hasRole("vip3");
                //Here, the corresponding VIP1, 2 and 3 are required to set levels 1, 2 and 3 respectively

        http.logout().logoutSuccessUrl("/");
        //This is to enable the logoff function. The following is the interface to jump after configuring logoff

        //http.csrf().disable();
        //This is the code to turn off the csrf function, but it is recommended not to turn it off

        //Enable remember me function
        http.rememberMe().rememberMeParameter("remember-me");
        //What follows here is the name of the tag corresponding to my function

        //http.formLogin();
        //If you don't have permission, you will jump to the default login interface. This is how to configure the default login interface

        http.formLogin().loginPage("/toLogin")
                //This is the login page for specifying the spring security jump
                .loginProcessingUrl("/forLogin")
                //Here is the url that specifies the user name and password submitted after spring security login
                .usernameParameter("user")
                //This is the name of the user name tag that specifies the submission
                .passwordParameter("pwd");
                //This is the label that specifies the password to submit
        //This is the configuration. The page under the customized page path is the login interface
    }

    /**
     *     This is the class corresponding to authentication
     */
    @Override
    protected void configure(AuthenticationManagerBuilder auth) throws Exception {
        auth.inMemoryAuthentication()
                .withUser("lin").password(new BCryptPasswordEncoder().encode("123456")).roles("vip3","vip2","vip1")
                .and()
                .withUser("xie").password(new BCryptPasswordEncoder().encode("123456")).roles("vip1")
                //This is to configure some basic user roles
                //Here, if you want to configure user roles, you need to use and() to splice
                .and()
                .passwordEncoder(new BCryptPasswordEncoder());
                 //However, please note that the password here needs to be encrypted, otherwise it will report 500 without encryption error after logging in
    }
}
- complete