1: Introductory case
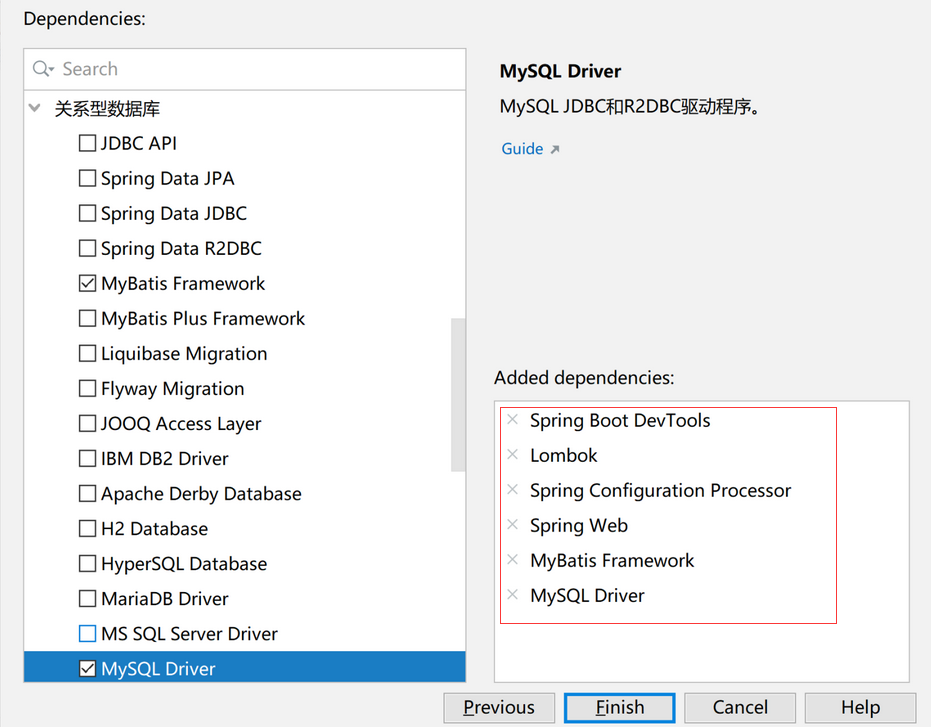
1: First create a new module = = > set the Java version to 8 = = > find the following components, check and Finish
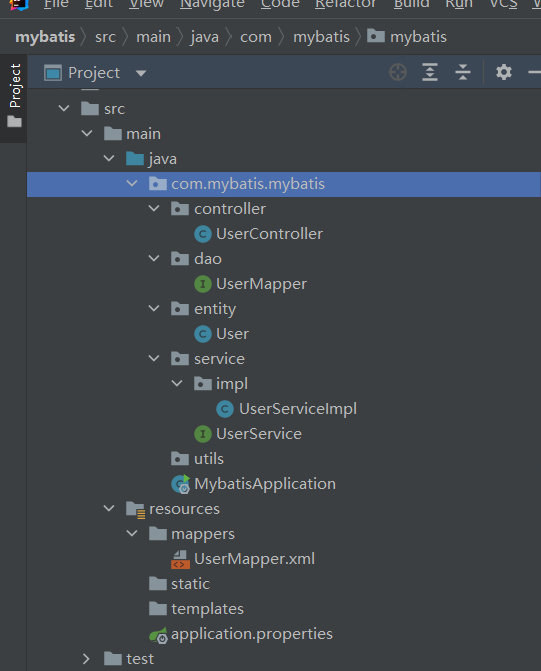
2: Write the structure as shown in the following figure
-
controller layer
UserController class
package com.mybatis.mybatis.controller; import com.mybatis.mybatis.entity.User; import com.mybatis.mybatis.service.UserService; import org.springframework.beans.factory.annotation.Autowired; import org.springframework.stereotype.Controller; import org.springframework.web.bind.annotation.RequestMapping; import org.springframework.web.bind.annotation.ResponseBody; import java.util.List; @Controller public class UserController { @Autowired UserService userService; @RequestMapping("getusers") @ResponseBody public List<User> findAllUser(){ return userService.findAllUser(); } } -
dao layer
UserMapper class
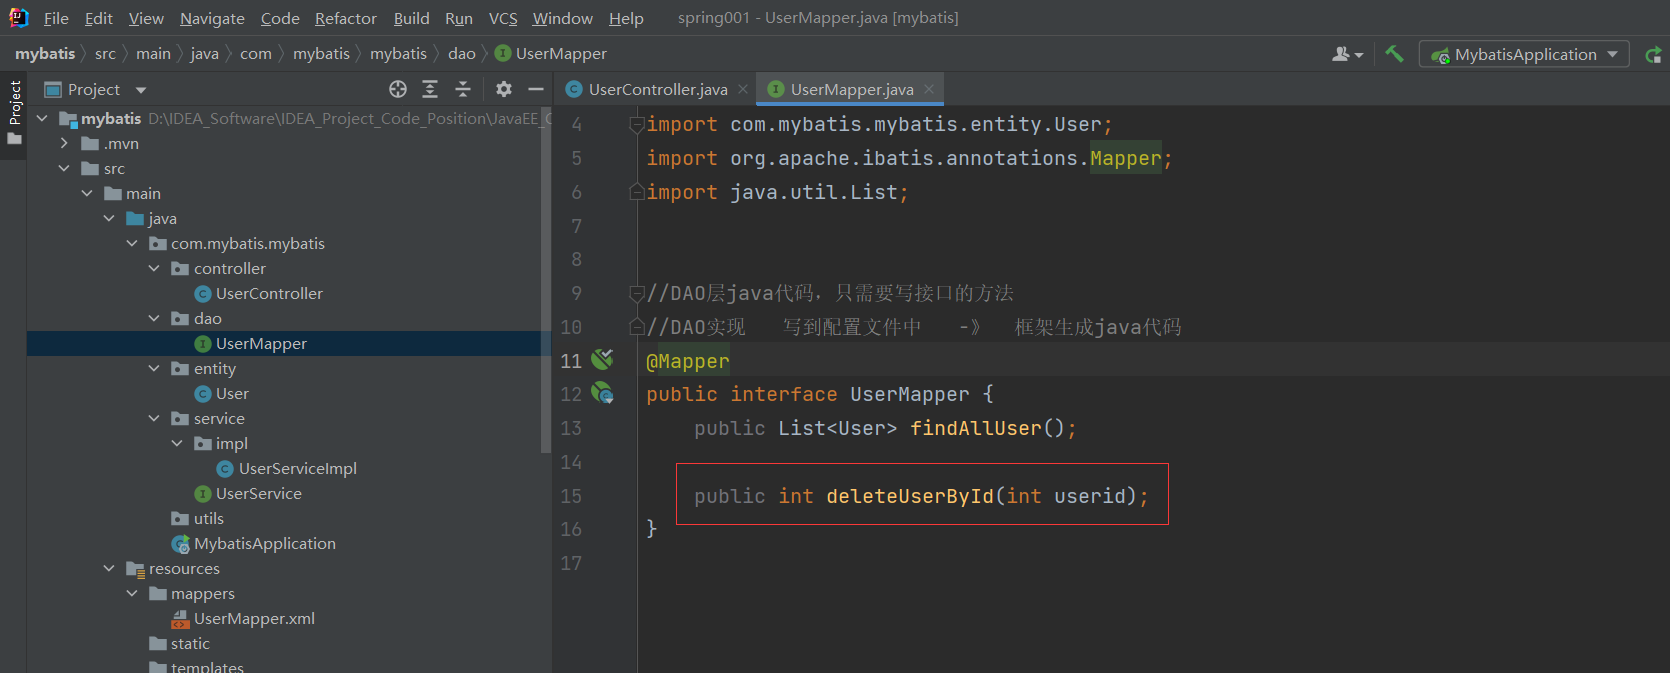
package com.mybatis.mybatis.dao; import com.mybatis.mybatis.entity.User; import org.apache.ibatis.annotations.Mapper; import java.util.List; //DAO layer java code only needs to write interface methods //The DAO implementation is written to the configuration file - the framework generates java code @Mapper public interface UserMapper { public List<User> findAllUser(); } -
entity layer
User class
package com.mybatis.mybatis.entity; import lombok.Data; @Data public class User { private int id; private String name; private int age; } -
service layer
UserServiceImpl class
package com.mybatis.mybatis.service.impl;

import com.mybatis.mybatis.dao.UserMapper;
import com.mybatis.mybatis.entity.User;
import com.mybatis.mybatis.service.UserService;
import org.springframework.beans.factory.annotation.Autowired;
import org.springframework.stereotype.Service;

import java.util.List;

@Service
public class UserServiceImpl implements UserService {

    @Autowired
    UserMapper userMapper;

    @Override
    public List<User> findAllUser() {
        return userMapper.findAllUser();
    }


}
UserService class
package com.mybatis.mybatis.service;

import com.mybatis.mybatis.entity.User;

import java.util.List;

public interface UserService {
    public List<User> findAllUser();

}
3: Create a new mappers folder under resource and create UserMapper.xml
<?xml version="1.0" encoding="UTF-8"?>
<!DOCTYPE mapper PUBLIC "-//mybatis.org//DTD Mapper 3.0//EN" "http://mybatis.org/dtd/mybatis-3-mapper.dtd">
<mapper namespace="com.mybatis.mybatis.dao.UserMapper">
<!--    select Identification query method   id identification UserMapper The name of the method in the interface-->
<!--    resultType  Represents the type of the return value of the method. If it is a collection type, only the object type in the given collection is required-->
    <select id="findAllUser"  resultType="com.mybatis.mybatis.entity.User">
        select * from user
    </select>
</mapper>
4: Modify application.properties
If alicloud's agent is used when creating a new project, there will be automatically generated code (which also needs to be modified) under this file
Others may not. You can add the following code
# apply name
spring.application.name=mybatis
# Application service WEB access port
server.port=8080
# Database driver:
spring.datasource.driver-class-name=com.mysql.cj.jdbc.Driver
# Data source name
spring.datasource.name=defaultDataSource
# Database connection address
spring.datasource.url=jdbc:mysql://localhost:3306/mybatis?serverTimezone=UTC
# Database user name & password:
spring.datasource.username=account number
spring.datasource.password=password
#The following is for MyBatis mapping
#Specifies the Mapper file for Mybatis
mybatis.mapper-locations=classpath:mappers/*xml
#Specify the entity directory for Mybatis
mybatis.type-aliases-package=com.mybatis.mybatis.entity
# Print some logs and mybatis print SQL statements
logging.level.com.mybatis.mybatis=debug
Modify the account and password of the corresponding database, and modify the accessed database name and file path to their own local settings.
Finally, run MybatisApplication and enter the browser for input http://localhost:8080/getusers The data will be displayed.
2: Introduction case optimization
Modification of annotations
Modify the annotation of the Controller layer
-
@Modify the Controller to @ RestController,
@RestController = @Controller + @ResponseBody
After writing this, you don't need to add a @ ResponseBody for each interface
Modify the interface findAllUser queried in the Controller layer
-
Modify @ RequestMapping("getusers") to @ PostMapping("getusers")
@The function of RequestMapping is very comprehensive. It will automatically generate various interfaces including GET,HEAD,POST and so on
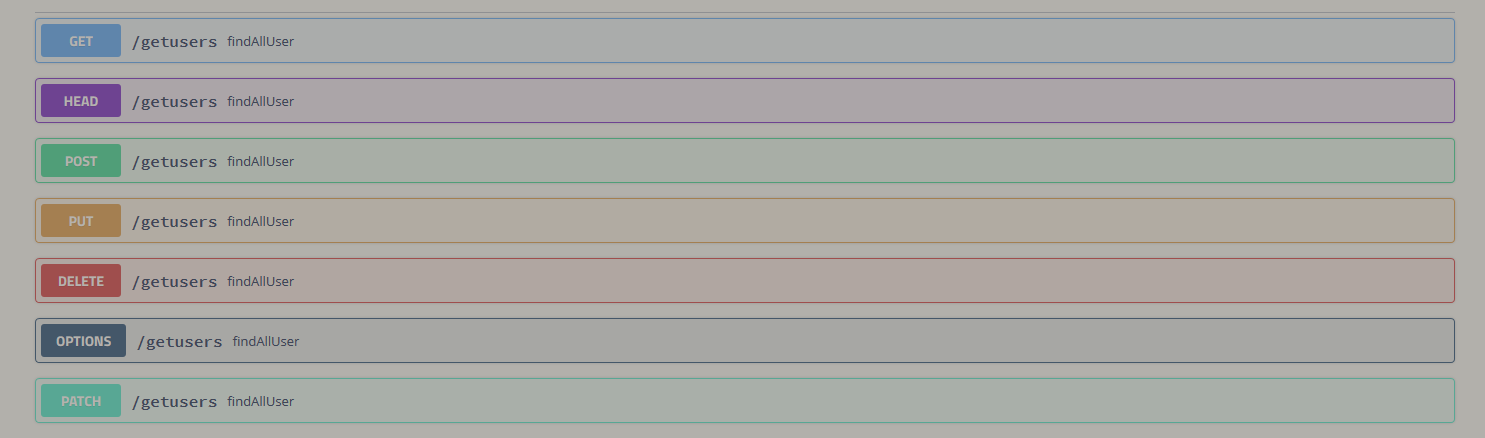
But in fact, it can be simplified. For example, we only need to use POST in query
Add delete function
- Add deletion method in dao layer
Add the corresponding sql delete statement in UserMapper.xml
<!--   id  Is the name of the method   parameterType Is a parameter of the method   resultType Is the return value -->
<!-- If there are basic types among the three, they can be omitted(Below parameterType Can be omitted)  -->
    <delete id="deleteUserById" parameterType="Integer">
        delete from user where id=#{userid}
    </delete>
-
Add code in the service layer
UserService
public int deleteUserById(int userid);
UserServiceImpl
@Override public int deleteUserById(int userid) { return userMapper.deleteUserById(userid); } -
Add code in controller layer
UserController
    @GetMapping("deleteUserById/{userid}")
//    @RequestMapping("deleteUserById/{userid}")
//    @ResponseBody
    public int deleteUserById(@PathVariable int userid){
        return userService.deleteUserById(userid);
    }
During the test, directly enter localhost:8080/deleteUserById/3 in the address bar (3 is the corresponding id to be deleted)
Add new functions
-
The code of dao layer and service layer is omitted, just like the above
-
New in UserMapper.xml
<insert id="addUser" parameterType="com.mybatis.mybatis.entity.User">
    insert into user (name,age) values (#{name},#{age})
</insert>
- controller layer added
@PostMapping("addUser")
public int addUser(@RequestBody User user){
    return userService.addUser(user);
}
In this way, the write interface has been written, but in fact, it is inconvenient to detect, so we need to use Swagger tool to facilitate detection.
Use of Swagger
- Add new dependency in pom.xml
<!--swagger2-->
<dependency>
    <groupId>io.springfox</groupId>
    <artifactId>springfox-swagger2</artifactId>
    <version>2.8.0</version>
</dependency>
<dependency>
    <groupId>io.springfox</groupId>
    <artifactId>springfox-swagger-ui</artifactId>
    <version>2.8.0</version>
</dependency>
- Add a new Swagger2 class in the utils folder
package com.mybatis.mybatis.utils;

import org.springframework.context.annotation.Bean;
import org.springframework.context.annotation.Configuration;
import springfox.documentation.builders.ApiInfoBuilder;
import springfox.documentation.builders.PathSelectors;
import springfox.documentation.builders.RequestHandlerSelectors;
import springfox.documentation.service.ApiInfo;
import springfox.documentation.spi.DocumentationType;
import springfox.documentation.spring.web.plugins.Docket;
import springfox.documentation.swagger2.annotations.EnableSwagger2;

@Configuration
@EnableSwagger2
public class Swagger2 {

@Bean
public Docket createRestApi() {
    return new Docket(DocumentationType.SWAGGER_2)
            .apiInfo(apiInfo())//Call the apiinfo method to create an apiinfo instance, which contains the information displayed on the document page
            .select()
            .apis(RequestHandlerSelectors.basePackage("com.mybatis.mybatis.controller"))
            .paths(PathSelectors.any())
            .build();
}

//Build api document details function
private ApiInfo apiInfo() {
    return new ApiInfoBuilder()
            //Page title
            .title("Spring Boot Swagger2 structure RESTful API")
            .termsOfServiceUrl("http://www.github.io/")
            .version("1.0")
            .description("API describe")
            .build();
}
}
- Add a @ Api(tags = "user class") annotation on the controller layer and a location with @ RestController
Then visit http://localhost:8080/swagger-ui.html # / you can enter swagger, find the new interface, click try it out, write the json data you want to add in the middle edit box (the format should be corresponding), and then click Execute to add data in the database correctly.
Finally, you can add a modification function, which is highly similar to the newly added code. The code in UserMapper.xml is as follows, and the codes of other layers are not listed
<update id="updateUser" parameterType="com.mybatis.mybatis.entity.User">
    update user set name = #{name},age = #{age} where id = #{id}
</update>