Learning objectives
- Master the concept of API and Web API
- Master the common way of calling API provided by browser
- Can develop common page interaction functions through API
- Be able to use search engine to solve problems
1. Web API
Introduction to Web API
The concept of API
API (Application Programming Interface) is a pre-defined function, which aims to provide the ability of application program and developers to access a set of routines based on a certain software or hardware without accessing the source code or understanding the details of internal working mechanism.
- Any development language has its own API
- Characteristic input and output (I/O) of API
- How to use the API (console.log())
It can be understood that webapi is a method or a tool
The concept of Web API
A set of APIs (BOM and DOM) provided by browser to operate browser functions and page elements
The Web API here refers to the API provided by the browser (a set of methods). The Web API has other meanings in later lessons.
Master the common way of calling API provided by browser
Explanation of API on MDN website
Composition of JavaScript
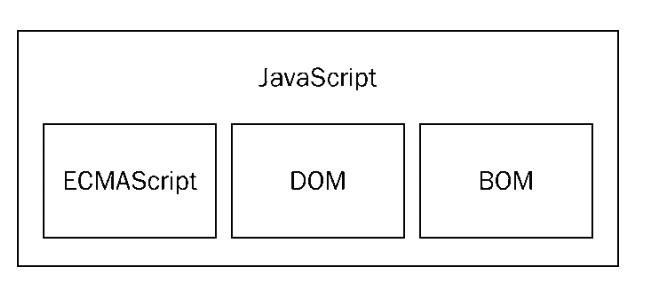
ECMAScript - the core of JavaScript
Defined the javascript syntax specification
The core of JavaScript describes the basic syntax and data type of the language. ECMAScript is a set of standards, which defines that the standards of a language are independent of the specific implementation
BOM - browser object model
A set of API for operating browser functions
You can operate browser windows through BOM, such as pop-up box, control browser jump, obtain resolution, etc
DOM - Document Object Model
A set of API for operating page elements
DOM can regard HTML as a document tree, and the nodes on the tree can be operated through the API provided by Dom
DOM
The concept of DOM
Document Object Model (DOM) is a standard programming interface recommended by W3C to deal with extensible markup language. On the web page, the objects that organize the page (or document) are organized in a tree structure. The standard model used to represent the objects in the document is called dom. The history of Document Object Model can be traced back to the "browser war" between Microsoft and Netscape in the late 1990s. In order to survive in JavaScript and JScript, both sides gave browsers powerful functions on a large scale. Microsoft has added a lot of exclusive things in the web page technology, including VBScript, ActiveX, and Microsoft's own DHTML format, which makes many web pages unable to display normally using non Microsoft platforms and browsers. DOM is a masterpiece that was brewed at that time.
DOM is also called document tree model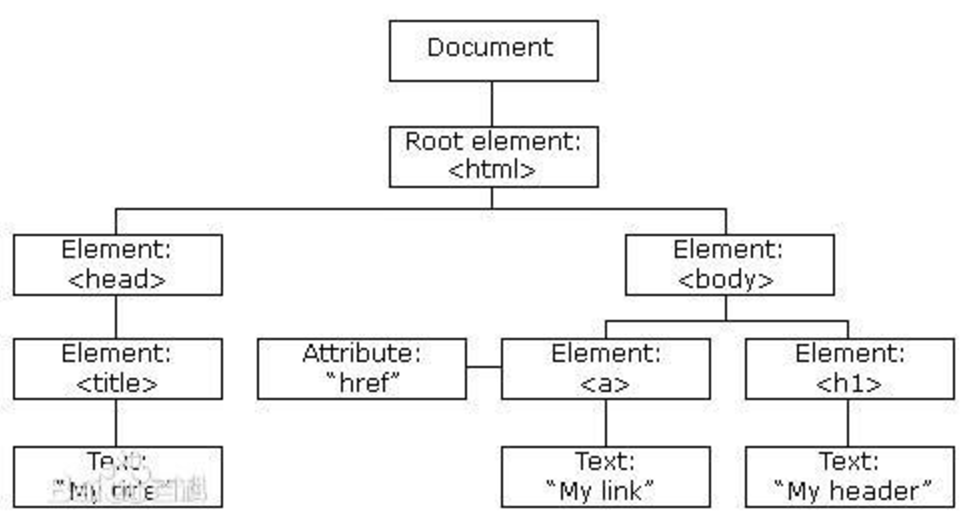
- Document: a web page can be called a document
- Node: all content in a web page is a node (label, attribute, text, comment, etc.)
- Elements: labels in web pages
- Attributes: attributes for labels
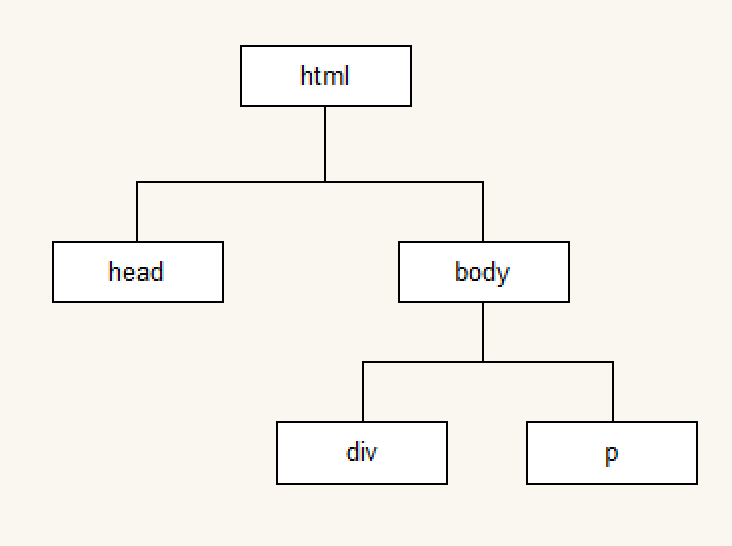
Simulate document tree structure
function Element(option) {
  this.id = option.id || '';
  this.nodeName = option.nodeName || '';
  this.nodeValue = option.nodeValue || '';
  this.nodeType = 1;
  this.children = option.children || [];
}

var doc = new Element({
  nodeName: 'html'
});
var head = new Element({
  nodeName: 'head'
});
var body = new Element({
  nodeName: 'body'
})
doc.children.push(head);
doc.children.push(body);

var div = new Element({
  nodeName: 'div',
  nodeValue: 'haha',
});

var p = new Element({
  nodeName: 'p',
  nodeValue: 'paragraph'
})
body.children.push(div);
body.children.push(p);

function getChildren(ele) {
  for(var i = 0; i < ele.children.length; i++) {
    var child = ele.children[i];
    console.log(child.nodeName);
    getChildren(child);
  }
}
getChildren(doc);
Common operations of DOM
- Get elements
- Creating elements dynamically
- Operate on an element (set its properties or call its methods)
- Event (when to do the corresponding operation)
Example: any image can be used, and the name is optional.
<!doctype html>
<html lang="en">
<head>
	<meta charset="UTF-8">
	<title>Document</title>
</head>
<body>
<!--html Code-->
<input type="button" value="Display effect" id="btn"/>
<script>
	//You can get the button first, and then register the event

	//The ultimate click button pop-up dialog code
	//Get this element from the document based on the value of the id attribute
	var btnObj=document.getElementById("btn");
	//For the current button element (object), register click event and add event handler
	btnObj.onclick=function () {
		alert("Glory of Kings");
	};
</script>
</body>
</html>
<!DOCTYPE html>
<html>
	<head>
		<meta charset="UTF-8">
		<title></title>
	</head>
	<body>
		<input type="button" value="Display effect" id="btn" />
		<img src="img/cangjingkong.jpg" alt="Ha-ha" title="Bitter"/>
		<script>
			document.getElementById("btn").onclick=function(){
				//Returns a pseudo array
				var imObjs=document.getElementsByTagName("img");
				imObjs[0].alt="modify";
				imObjs[0].title="Success";
			};
		</script>
	</body>
</html>
Example 2:
First create a js file:
/*
Return the corresponding label element according to the id attribute value
@param ID id Value of property, of type string
@returns{Element}Element object
*/
function my$(id){
	return document.getElementById(id);
}
To reference it in an html file:
<!DOCTYPE html>
<html>
	<head>
		<meta charset="utf-8">
		<title></title>
	</head>
	<body>
		<input type="button" value="May I take your order?" id="btn">
		<select name="" id="ss">
			<option value="1">Celery</option>
			<option value="2">Greens</option>
			<option value="3">Chinese cabbage</option>
			<option value="4" id="op1">Laver</option>
			<option value="5">radish</option>
		</select>
		<script src="js/common.js">

		</script>
		<script>
			my$("btn").onclick=function(){
				//Click the button to select the dish
				my$("op1").selected=true;
			};
		</script>
		<textarea name="" id="tt" rows="30" cols="10">
			Someone asked the wise:
			Master, what do you think is the happiest way?
			Answer: don't argue with fools.
		</textarea>
	</body>
</html>
Example 3: js file uses the same
Click the button to set the style of div:
<!DOCTYPE html>
<html>
	<head>
		<meta charset="utf-8">
		<title></title>
	</head>
	<body>
		<input type="button" value="Set style" id="btn"/>
		<div id="dv"></div>
		<script src="js/common.js"></script>
		<script>
			//Click the button to change the width, height and background color of the div
			my$("btn").onclick=function(){
				my$("dv").style.width="300px";
				my$("dv").style.height="200px";
				//In general, this attribute in css is written in multiple words. When DOM is operated in js code, remove - and then
				// The first letter of a word can be capitalized
				my$("dv").style.backgroundColor="deeppink";
			}
		</script>
	</body>
</html>
Example 4: the display and hiding of div are realized by class style
<!DOCTYPE html>
<html>
	<head>
		<meta charset="utf-8">
		<title></title>
		<style>
			.cls{
				width: 300px;
				height: 200px;
				background-color: yellow;
				border: 2px solid red;
			}
		</style>
	</head>
	<body>
		<input type="button" value="Set style" id="btn"/>
		<div id="dv"></div>
		<script src="js/common.js"></script>
		<script>
			//Set div style
			my$("btn").onclick=function(){
				//When DOM is operated in js code, set the class style of the element. Instead of class keyword, use className
				my$("dv").className="cls";
			};
		</script>
	</body>
</html>
Example 5: web switch light
<!DOCTYPE html>
<html>
	<head>
		<meta charset="utf-8">
		<title></title>
		<style>
			.cls{
				background-color: black;
			}
		</style>
	</head>
	<body id="bd">
		<input type="button" value="open/Turn off the lights" id="btn" />
		<script src="js/common.js">

		</script>
		<script>
			my$("btn").onclick=function(){
				//Get body tag
				document.body.className=document.body.className!="cls"?"cls":"";
			};
		</script>
	</body>
</html>
2. Get page elements
Why get page elements
After the above example, we know that if we want to operate a certain part of the page (show / hide, animation), we need to obtain the corresponding elements of that part before we can carry out subsequent operations
Get element by id
var div = document.getElementById('main');
console.log(div);

// The data type obtained is HTMLDivElement, and the objects are all of type
// HTMLDivElement <-- HTMLElement <-- Element  <-- Node  <-- EventTarget
Note: due to the uniqueness of id name, some browsers support using id name directly to access elements, but it is not a standard way and is not recommended.
Get elements by tag name
var divs = document.getElementsByTagName('div');
for (var i = 0; i < divs.length; i++) {
  var div = divs[i];
  console.log(div);
}
Note that the return value is a pseudo array
Get elements by name*
var mains = document.getElementsByClassName('main');
for (var i = 0; i < mains.length; i++) {
  var main = mains[i];
  console.log(main);
}
Get elements from selector
var text = document.querySelector('#text');
console.log(text);

var boxes = document.querySelectorAll('.box');
for (var i = 0; i < boxes.length; i++) {
  var box = boxes[i];
  console.log(box);
}
summary
master
	getElementById()
	getElementsByTagName()
understand
	getElementsByName()
	getElementsByClassName()
	querySelector()
	querySelectorAll()
3. incident
Event: trigger response mechanism
The Event interface represents any Event that occurs in the DOM, some user generated (such as a mouse or keyboard Event), while others are generated by the API.
Three elements of the event
- Event source: element triggering (being) event
- Event type: trigger method of event (such as mouse click or keyboard click)
- Event handler: Code (in function form) to execute after an event is triggered
Basic use of events
var box = document.getElementById('box');
box.onclick = function() {
  console.log('The code will be there. box Execute after being clicked');
};
case
- Click the button to pop up the prompt box
- Click the button to change the style of the element
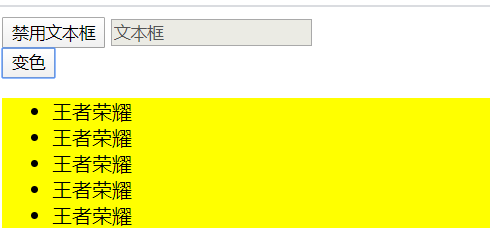
Key example 1: disable the text box and change the background color of the list
<!DOCTYPE html>
<html>
	<head>
		<meta charset="utf-8">
		<title></title>
	</head>
	<body>
		<input type="button" value="Disable text box" id="btn"/>
		<input type="text" value="Textbox" id="txt"/>
		<br>
		<script>
			//First, get the button according to the id, register the click event for the button, and add the event handling function
			document.getElementById("btn").onclick=function(){
				//Get the text box according to the id and set the disabled property
				document.getElementById("txt").disabled=true
			};
		</script>

		<input type="button" value="Discoloration" id="btn2"/>
		<ul id="uu">
			<li>Glory of Kings</li>
			<li>Glory of Kings</li>
			<li>Glory of Kings</li>
			<li>Glory of Kings</li>
			<li>Glory of Kings</li>
		</ul>
		<script>
			document.getElementById("btn2").onclick=function(){
				document.getElementById("uu").style.backgroundColor="yellow";
			};
		</script>
	</body>
</html>
Key example 2:
<!DOCTYPE html>
<html>
	<head>
		<meta charset="utf-8">
		<title></title>
	</head>
	<body>
		<script>
			//Click hyperlink to pop up dialog box
			//Prevent hyperlink jump: return false
			function f1(){
				alert("Be ordered.");
				return false;
			}
		</script>
		<a href="http://Www.baidu.com "onclick =" return f1() "> Baidu</a>

		<!-- The second way of writing -->
		<a href="http://Www.baidu.com "id =" AK "> Baidu</a>
		<script type="text/javascript">
			document.getElementById("ak").onclick=function(){
				alert("It's been ordered again.");
				return false;
			};
		</script>
	</body>
</html>
Key example 3:
Pictures required:

<!DOCTYPE html>
<html>
	<head>
		<meta charset="utf-8">
		<title></title>
	</head>
	<body>
		<a href="img/1.jpg" id="ak"><img src="img/1-small.jpg" ></a>
		<img src="" id="big">
		<script src="js/common.js"></script>
		<script >
			//Click the small picture, and the large picture will be shown below
			//Click hyperlink
			my$("ak").onclick=function () {
				my$("big").src=this.href;
				return false;//Stop jumping
			};
		</script>
	</body>
</html>
Key example 4:
Pictures required:


<!DOCTYPE html>
<html>
<head lang="en">
  <meta charset="UTF-8">
  <title></title>
  <style type="text/css">
    body {
      font-family: "Helvetica", "Arial", serif;
      color: #333;
      background-color: #ccc;
      margin: 1em 10%;
    }

    h1 {
      color: #333;
      background-color: transparent;
    }

    a {
      color: #c60;
      background-color: transparent;
      font-weight: bold;
      text-decoration: none;
    }

    ul {
      padding: 0;
    }

    li {
      float: left;
      padding: 1em;
      list-style: none;
    }

    #imagegallery {

      list-style: none;
    }

    #imagegallery li {
      margin: 0px 20px 20px 0px;
      padding: 0px;
      display: inline;
    }

    #imagegallery li a img {
      border: 0;
    }
  </style>
</head>
<body>

<h2>
  //Beauty Gallery
</h2>

<ul id="imagegallery">
  <li><a href="img/1.jpg" title="Beauty A">
    <img src="img/1-small.jpg" width="100" alt="Beauty 1"/>
  </a></li>
  <li><a href="img/2.jpg" title="Beauty B">
    <img src="img/2-small.jpg" width="100" alt="Beauty 2"/>
  </a></li>
  <li><a href="img/3.jpg" title="Beauty C">
    <img src="img/3-small.jpg" width="100" alt="Beauty 3"/>
  </a></li>
  <li><a href="img/4.jpg" title="Beauty D">
    <img src="img/4-small.jpg" width="100" alt="Beauty 4"/>
  </a></li>
</ul>


<div style="clear:both"></div>
<!--Show large-->
<img id="image" src="img/placeholder.png" alt="" width="450"/>
<p id="des">Choose a picture</p>
<script src="js/common.js"></script>
<script>
	//Click the a tag to give the attribute value of the a tag to the src attribute with the id of image
	//Assign the value of the title attribute of a to the p tag with id des
	//Get all a tags from ul
	var aObjs=my$("imagegallery").getElementsByTagName("a");
	//Loop through all a Tags
	for (var i=0;i<aObjs.length;i++) {
		//Register click events for each a tag
		aObjs[i].onclick=function  () {
			//Assign src value to tag with id of image
			my$("image").src=this.href;
			//Assign a value to the p tag
			my$("des").innerText=this.title;
			//Block hyperlink jump
			return false;
		}
	}
</script>
</body>
</html>
Design sketch: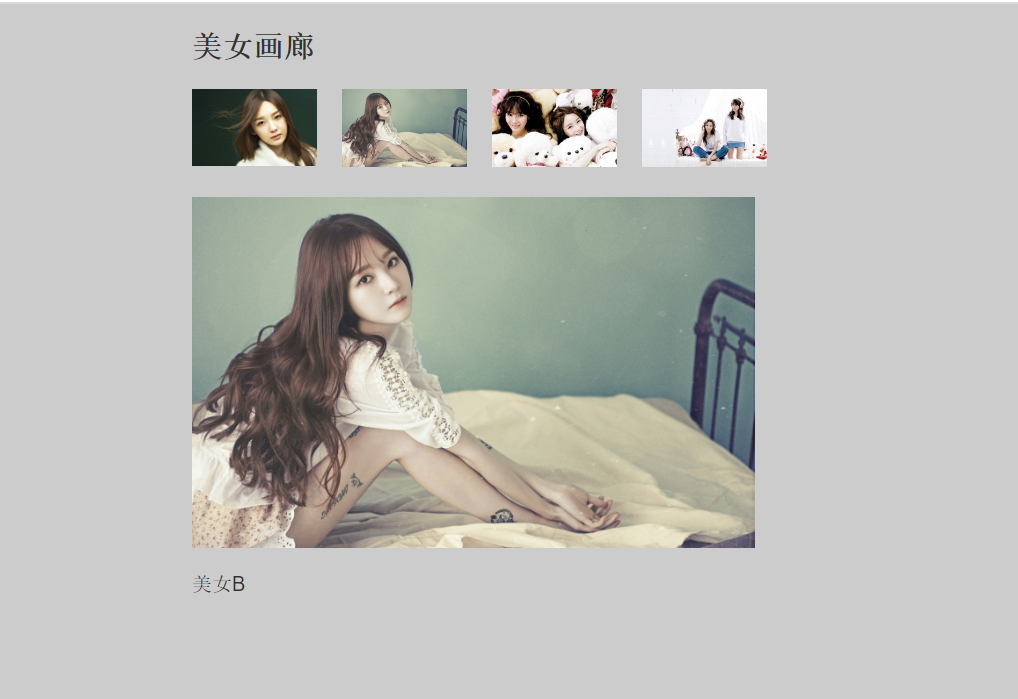
Key example 5:
<!DOCTYPE html>
<html>
<head>
<meta charset="utf-8">
<title></title>
</head>
<body>
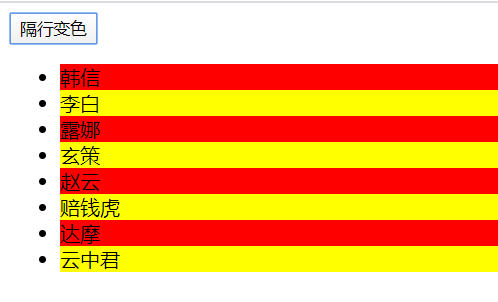
<input type="button" value="Interlacing discoloration" id="btn">
<ul id="uu">
<li>Hanxin</li>
<li>Li Bai</li>
<li>Luna</li>
<li>Mysterious policy</li>
<li>Zhao Yun</li>
<li>Money losing tiger</li>
<li>Damo</li>
<li>Yun Zhong Jun</li>
</ul>
<script src="js/common.js">
</script>
<script>
//Click the button, odd red even yellow
my$("btn").onclick=function () {
//Get all li Tags
var list=my$("uu").getElementsByTagName("li");
//ergodic
for (var i=0;i<list.length;i++) {
//If it's even
if(i%2==0){
list[i].style.backgroundColor="red";//Why is it red? Isn't it odd red or even yellow? Don't forget, arrays start at 0.
}else{//If it's an odd number
list[i].style.backgroundColor="yellow";
}
}
};
</script>
</body>
</html>
However, there are too many for loop codes, which are not concise. We optimize:
for (var i=0;i<list.length;i++) {
					// //If it's even
					// if(i%2==0){
					// 	list[i].style.backgroundColor="red"; / / why is it red? Isn't it odd red or even yellow? Don't forget, arrays start at 0.
					// }else {/ / if odd
					// 	list[i].style.backgroundColor="yellow";
					// }

					// Optimization:
					list[i].style.backgroundColor=i%2==0?"red":"yellow";//Ask if it's even. If it's red, it's yellow
				}
Key example 6:
<!DOCTYPE html>
<html>
	<head>
		<meta charset="utf-8">
		<title></title>
		<style>
			ul{
				cursor: pointer;
			}
		</style>
	</head>
	<body>
		<ul id="uu">
			<li>Hanxin</li>
			<li>Li Bai</li>
			<li>Luna</li>
			<li>Mysterious policy</li>
			<li>Zhao Yun</li>
			<li>Money losing tiger</li>
			<li>Damo</li>
			<li>Yun Zhong Jun</li>
		</ul>
		<script src="js/common.js">

		</script>
		<script>
			//Two events: mouse in and mouse out
			//Get all li Tags
			var list=my$("uu").getElementsByTagName("li");
			for(var i=0;i<list.length;i++){
				//Register entry events for mouse
				list[i].onmouseover=function  () {
					this.style.backgroundColor="pink";
				};
				//Register exit event for mouse
				list[i].onmouseout=function  () {
					//Restore default color
					this.style.backgroundColor="";
				};
			}
		</script>
	</body>
</html>

Key example 7: Show hidden QR code
Pictures required:

<!DOCTYPE html>
<html>
<head lang="en">
  <meta charset="UTF-8">
  <title></title>
  <style>
    .nodeSmall {
      width: 50px;
      height: 50px;
      background: url(img/bgs.png) no-repeat -159px -51px;
      position: fixed;
      right: 10px;
      top: 40%;
    }
    .erweima {
      position: absolute;
      top: 0;
      left: -150px;
    }
    .nodeSmall a {
      display: block;
      width: 50px;
      height: 50px;
    }
    .hide {
      display: none;
    }

    .show {
      display: block;
    }
  </style>


</head>
<body>
<div class="nodeSmall" id="node_small">
  <a href="#">
  <div class="erweima hide" id="er">
    <img src="img/456.png" alt=""/>
  </div>
</div>
<script src="js/common.js"></script>
<script>
	//Get a label for mouse to enter
	//Get the first a tag of the outermost div first
	var aObj=my$("node_small").getElementsByTagName("a")[0];
	//Register mouse access for a
	aObj.onmouseover=function  () {
		my$("er").className="erweima show";
	};
	//Sign up for a to leave
	aObj.onmouseout=function  () {
		my$("er").className="erweima hide";
	};
</script>


</body>
</html>

Key example 8:
<!DOCTYPE html>
<html>
	<head>
		<meta charset="utf-8">
		<title></title>
	</head>
	<body>
		<input type="button" name="" id="btn" value="Display effect" /><br/>
		<input type="text" value="Hello" name="name1"><br/>
		<input type="text" value="Hello" name="name2"><br/>
		<input type="text" value="Hello" name="name1"><br/>
		<input type="text" value="Hello" name="name3"><br/>
		<input type="text" value="Hello" name="name1"><br/>
		<input type="text" value="Hello" name="name1"><br/>

		<script src="js/common.js"></script>
		<script>
			<!-- Click the button to change all name Attribute value is name1 In the text box of value Attribute value -->
			my$("btn").onclick=function(){
				//Get the element through the name attribute value, mainly because the form label has name
				var inputs=document.getElementsByName("name1");
				for(var i=0;i<inputs.length;i++){
					inputs[i].value="I'm fine";
				}
			};
		</script>
	</body>
</html>
Key example 9:
<!DOCTYPE html>
<html>
	<head>
		<meta charset="utf-8">
		<title></title>
		<style>
			div{
				width: 200px;
				height: 50px;
				background-color: green;
				margin-top: 10px;
			}
			.cls{
				background-color: yellow;
			}
		</style>
	</head>
	<body>
		<p>The king</p>
		<p class="cls">glory</p>
		<span class="cls">Li Bai</span>
		<span>Hanxin</span>
		<div class="cls">QQ</div>
		<div>WeChat</div>
		<input type="button" name="" id="btn" value="Display effect" />
		<script src="js/common.js">

		</script>
		<script>
			//Click the button to set the background color of the cls style label to red
			my$("btn").onclick=function  () {
				//Get elements based on the name of the class style
				var objs=document.getElementsByClassName("cls");
				for(var i=0;i<objs.length;i++){
					objs[i].style.backgroundColor="red";
				}
			};
		</script>
	</body>
</html>
Get element summary
<!DOCTYPE html>
<html lang="en">
<head>
  <meta charset="UTF-8">
  <title>$Forever 24 k Pure handsome $</title>

</head>
<body>

<script src="common.js"></script>
<script>
  /*
  *
  * Get the element according to the value of id attribute, and an element object is returned
  * document.getElementById("id Value of attribute ');
  *
  * Get the element according to the tag name, and return a pseudo array containing multiple DOM objects
  * document.getElementsByTagName("Label name ');
  *
  * Some browsers do not support the following
  *
  * Get the element according to the value of the name attribute. The returned array is a pseudo array containing multiple DOM objects
  * document.getElementsByName("name Property)
  * Get the element according to the name of the class style, and return a pseudo array containing multiple DOM objects
  * document.getElementsByClassName("Class style name ")
  * Get the element according to the selector and return an element object
  * document.querySelector("Selector name ');
  *
  * According to the selector to get the element, a pseudo array is returned, in which multiple DOM objects are saved
  * document.querySelectorAll("Name of selector ")
  *
  *
  * */

  document.querySelector()


</script>
</body>
</html>
4. Attribute operation
Properties of form elements
href,title,id,src,className
var link = document.getElementById('link');
console.log(link.href);
console.log(link.title);

var pic = document.getElementById('pic');
console.log(pic.src);
Case study:
Click the button to switch the picture in img tag

Click the button to show the hidden div
- innerHTML and innerText
    var box = document.getElementById('box');
    box.innerHTML = 'I am the text.<p>I will be born a label</p>';
    console.log(box.innerHTML);
    box.innerText = 'I am the text.<p>I will not generate as a label</p>';
    console.log(box.innerText);
- HTML escape character
" "
' '
& &
< lt; / / less than
>& gt; / / greater than
Space & nbsp;
© ©
- The difference between innerHTML and innerText
- Compatibility processing of innerText
<!DOCTYPE html>
<html>
	<head>
		<meta charset="utf-8">
		<title></title>
		<style>
			div{
				width: 200px;
				height: 150px;
				border: 2px solid red;
			}
		</style>
	</head>
	<body>
		<input type="button" name="" id="btn" value="Set value" />
		<div id="dv">Glory of Kings</div>

		<script src="js/common.js"></script>
		<script>
			//To set the text content in the tag, you should use the tetxContext property, which is supported by Google, Firefox, and not supported by IE8.
			//To set the text content in the tag, the innerText property should be used, which is supported by Google, Firefox and IE8.
			//If this property is not supported in the browser, the type of this property is undefined
			//Judge whether the type of this property is undefined, and then know whether the browser supports it
			//So write compatible code

			//Set any text content in the middle of any label
			function setInnerText(element,text){
				//Determine whether the browser supports this property
				if (typeof element.textContent=="undefined") {//I won't support it
					element.innerText=text;
				}else{//This property is supported
					element.textContent=text;

				}
			}

			//Get the text content in the middle of any label
			function getInnerText (element) {
				if (typeof element.textContent=="undefined") {
					return element.innerText;
				}else{
					return element.textContent;
				}
			}
			//test
			my$("btn").onclick=function  () {
				console.log(getInnerText(my$("dv")));
				setInnerText(my$("dv"),"Glory King")
			};


			//Click the button to set the text content in the div
			// my$("btn").onclick=function  () {
			// 	//To set the text content in the middle of the label, use the tetxContext property
			// 	my$("dv").textContent = "this is a div tag";
			// 	my$("dv").innerText = "ah div";

			// 	//Get the text content in the middle of the label
			// };
		</script>
	</body>
</html>
The difference between innerText and innerHTML: js file reference is the same as before, which is very convenient.
<!DOCTYPE html>
<html>
	<head>
		<meta charset="utf-8">
		<title></title>
		<style>
			div{
				width: 300px;
				height: 200px;
				border: 2px dotted red;
			}
		</style>
	</head>
	<body>
		<input type="button" id="btn" value="Display effect" />
		<input type="button" id="btn2" value="Display effect acquisition" />
		<div id="dv">
			<p>This is a p</p>
			//This is div.
		</div>

		<script src="js/common.js">

		</script>

		<script>
			//Set up
			my$("btn").onclick=function  () {
			// 	my$("dv").innerText = "ha ha"; / / set text
			// 	My $("DV"). InnerText = "< p > this is a p-tag < / P >"; / / code to set the html tag
			//If innerText is mainly used to set the text, setting the label content has no label effect
			//innerHTML can set the text content. Its main function is to set the new html tag content in the tag. It has the tag effect.

			my$("dv").innerHTML="<p>This is a p Label</p>";
			//Conclusion: if you want to set label content, use innerHTML, want to set text content, innerText or textContent, or innerHTML, it is recommended to use

			};
			//Obtain
			my$("btn2").onclick=function  () {
				//Can get the text content of the label
				// console.log(my$("dv").innerText); tag not available
				console.log(my$("dv").innerHTML);//innerHTML is the real way to get all the content in the middle of the tag. The text can be obtained.
			};
			//When getting: innerText can get the text content in the middle of the tag, but if there is a tag in the tag, the inner tag's
			  // Text content can also be obtained


			  //Conclusion:
			  //If you want to (get) tags and content, use innerHTML
			  //If you want to set the tag, use innerHTML
			  //To set the text, use innerText, innerHTML, or textContent
		</script>
	</body>
</html>
Form element properties
-
value is used to get the content of most form elements (except option)
-
Type to get the type of input tag (input box or check box, etc.)
-
disabled property
-
checked check box select Properties
-
selected drop-down menu select Properties
case -
Assign a value to the text box to get the value of the text box
-
Click button to disable text box
-
Search text box
-
Check whether the user name is 3-6 digits and the password is 6-8 digits. If not, highlight the text box
-
Set check in drop-down box
-
All in the opposite direction
Custom attribute action
- getAttribute() gets the attribute in the label row
- setAttribute() sets the attribute in the label row
- Removeaattribute() removes the attribute in the label row
- Difference from element. Attribute: the above three methods are used to obtain any inline attribute.
Example:
<!DOCTYPE html>
<html>
	<head>
		<meta charset="utf-8">
		<title></title>
		<style >
			ul{
				cursor: pointer;
			}
		</style>
	</head>
	<body>
		<!-- Point to who, show his ranking -->
		<ul id="uu">
			<li score="1">Li Bai</li>
			<li score="2">Hanxin</li>
			<li score="3">Luna</li>
			<li score="4">Sun Shang Xiang</li>
			<li score="5">angel</li>
		</ul>
		<script src="js/common.js"></script>
		<script>
			//html tags do not have their own properties to store rankings.
			//So, let's customize this property

			//Get all li Tags
			var list=document.getElementsByTagName("li");
			for (var i=0;i<list.length;i++) {
				list[i].onclick=function  () {
					// alert(this.score); / / this can't work
					alert(this.getAttribute("score"));
					//Add a custom attribute to the html tag. If you want to get the value of this attribute, you need to use getAttribute (the name of the custom attribute) to get the value of this attribute
				};

			}
		</script>
	</body>
</html>
Custom attribute action:
<!DOCTYPE html>
<html>
	<head>
		<meta charset="utf-8">
		<title></title>
		<style >
			ul{
				cursor: pointer;
			}
		</style>
	</head>
	<body>
		<!-- Click who to show his ranking -->
		<ul id="uu">
			<li>Li Bai</li>
			<li>Hanxin</li>
			<li>Luna</li>
			<li>Sun Shang Xiang</li>
			<li>angel</li>
		</ul>
		<script src="js/common.js"></script>
		<script>
			//Get all the li tags, and dynamically add custom properties and values for each tag
			//Get the value of the custom attribute of the tag when clicking
			//Obtain the ul tag according to the id, and
			var list=my$("uu").getElementsByTagName("li");
			//Cyclic traversal
			for (var i=0;i<list.length;i++) {
				//Add custom attributes for each li first
				//list[i].score=i+1; / / in this way, the custom attribute is on the DOM object, not in the tag
				list[i].setAttribute("score",i+1);

				//Click each li tab to display the corresponding custom attribute values
				list[i].onclick=function  () {
					alert(this.getAttribute("score"));
				};
			}
			//Summary: set custom attribute: setAttribute("attribute name", "attribute value")
			//Get the value of the custom attribute: getAttribute("the name of the attribute")
		</script>
	</body>
</html>
Remove custom properties:
<!DOCTYPE html>
<html>
	<head>
		<meta charset="utf-8">
		<title></title>
		<style>
			div{
				width: 200px;
				height: 100px;
				background-color: yellow;
			}
			.cls{
				background-color: green;
			}
		</style>
	</head>
	<body>
		<input type="button" name="" id="btn" value="Remove custom properties" />
		<div id="dv" score="10" class="cls">

		</div>
		<script src="js/common.js"></script>
		<script>
			//Remove custom attribute: removeaattribute ("the name of the attribute")
			//Click the button to remove the custom attribute of the element
			my$("btn").onclick=function  () {
				//Remove the class style of an element
				// my$("dv").removeAttribute("score");

				// my$("dv").className="";
				//This kind of "remove" has no value, but the property is not clean.

				my$("dv").removeAttribute("class");//Remove native properties

			}
		</script>
	</body>
</html>
Style operation
- Styles set using style are displayed in label lines
var box = document.getElementById('box');
box.style.width = '100px';
box.style.height = '100px';
box.style.backgroundColor = 'red';
-
Be careful
The property type of setting width, height and position through style property is string, and px is required
Class name operation
Modifying the className property of a tag is equivalent to directly modifying the class name of the tag
var box = document.getElementById('box');
box.className = 'clearfix';
case
- Switch lamp
- Click button to change color
- Picture switching QR code case
- The currently entered text box is highlighted
- Click the button to change the size and position of the div
- List interlaced color change, highlight
- Jingdong commodity exhibition
- tab switch
Comprehensive case
<!DOCTYPE html>
<html>
<head lang="en">
  <meta charset="UTF-8">
  <title></title>
  <style>
    * {
      margin: 0;
      padding: 0;
    }

    ul {
      list-style-type: none;
    }

    .box {
      width: 400px;
      height: 300px;
      border: 1px solid #ccc;
      margin: 100px auto;
      overflow: hidden;
    }

    .hd {
      height: 45px;
    }

    .hd span {
      display: inline-block;
      width: 90px;
      background-color: pink;
      line-height: 45px;
      text-align: center;
      cursor: pointer;
    }

    .hd span.current {
      background-color: purple;
    }

    .bd li {
      height: 255px;
      background-color: purple;
      display: none;
    }

    .bd li.current {
      display: block;
    }
  </style>

</head>
<body>
<div class="box" id="box">
  <div class="hd">
    <span class="current">Sports</span>
    <span>entertainment</span>
    <span>Journalism</span>
    <span>comprehensive</span>
  </div>
  <div class="bd">
    <ul>
      <li class="current">I'm the sports module</li>
      <li>I am the entertainment module</li>
      <li>I'm the news module</li>
      <li>I am the integrated module</li>
    </ul>
  </div>
</div>
<script src="common.js"></script>
<script>

  //Get the outermost div
  var box=my$("box");
  //It's the first div in it
  var hd=box.getElementsByTagName("div")[0];
  //It's the second div in it
  var bd=box.getElementsByTagName("div")[1];
  //Get all li Tags
  var list=bd.getElementsByTagName("li");//=================================
  //Get all span Tags
  var spans=hd.getElementsByTagName("span");
  //Loop through, add click event
  for(var i=0;i<spans.length;i++){
    //Save the index in the span tab before clicking
    spans[i].setAttribute("index",i);//================================
    spans[i].onclick=function () {
      //First, all span class styles are removed
      for(var j=0;j<spans.length;j++){
        spans[j].removeAttribute("class");
      }

      //Second, the currently clicked span application class style
      this.className="current";
      //Get the stored index value when being clicked
      //alert(this.getAttribute("index"));
      var num=this.getAttribute("index");//==============================

      //Get all the li tags. Hide all the li tags first
      for(var k=0;k<list.length;k++){
        list[k].removeAttribute("class");
      }
      //The corresponding li label of the currently clicked span is displayed
      list[num].className="current";
    };
  }

</script>


</body>
</html>
summary
This is the end of this period.

