👇
👉🚔 Jump straight to the end 🚔 👈 ——> Receive exclusive fan benefits 💖
☝️
👻 Last two blog posts Nanny tutorial HTML 20000 word note summary [suggestions collection] (Part I) and Nanny tutorial HTML 20000 word note summary [suggestions collection] (Part II) After being read by many friends, many friends wrote to me privately - urging me to publish CSS and JavaScript versions~ 👻
😬 Not long ago, I just released the CSS Version (two articles at the top and bottom), and you all sent a private letter urging me to release the JavaScript version! (wry smile) since my friends are so enthusiastic about learning, I can't live up to you! Therefore, the blogger worked hard all night to produce the JavaScript Version (the length is too long, no accident, there will be a total of three ~) 😬
😜 In these three blog posts, the blogger led his friends to seriously learn the necessary knowledge related to JavaScript (formerly livescript) - if the HTML we talked about in the last two articles is used to define what content is in the web page, then JavaScript is used to dynamically control the page. 😜

Part I: getting to know JavaScript
- What is JavaScript?
JavaScript, formerly known as livescript, is a dynamically typed, weakly typed, prototype based scripting language.
It is a scripting language used in conjunction with HTMl. (you can't run JS files alone!!!)
Note: don't think about it! It has nothing to do with Java. At most, the syntax looks a little like it. Don't think about it!! - Functions of JavaScript:
- Page effects
- Front back interaction
- Background development (node)
- Where is JavaScript written?
- In the Script tag
- Inside the external js file
Tips:
| Interpretive language: it does not need to be compiled. It will be compiled and run only when you run your code, that is, it will be compiled automatically every time you run it. (JavaScript is an interpreted language) |
| Compiled language: compiled into machine language at one time. |
(1) Where is JS written?
- Write it in the script tag;
- Write it in the external js file, and then import it;
(this effect is very intuitive, so there is no effect demonstration ~)
<!DOCTYPE html>
<html lang="en">
<head>
<meta charset="UTF-8">
<title>First acquaintance JS</title>
</head>
<body>
<!--It is suggested that JS Write in body Bottom of (like below, close to) body The end tag is called body At the bottom of the page), because these are executed when the page is loaded js event!-->
<!--The first way to use: write in Script Inside the label-->
<script>
// Let the page pop up a 123
alert("123");
</script>
<!--The second method of use: written on the outside js File, and then import.-->
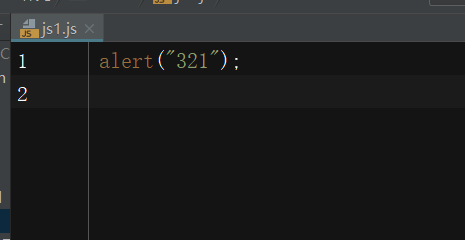
<script src="js1.js"></script>
</body>
</html>
- Write directly in the label
<!DOCTYPE html>
<html lang="en">
<head>
    <meta charset="UTF-8">
    <title>First acquaintance JS</title>
</head>
<body>

<!--The third way to use it: write it directly in the label-->
<button onclick="add()">I'm the button</button>

<script>
    //add is the function name. Note that this is different from the normal write event!
    function add() {
        alert(123);
    }
</script>

</body>
</html>
js file contents are:
(2) JS some notes:
- Strictly case sensitive;
- Add a semicolon after each line of complete statement (does it feel like C, ha ha ~);
- Variable names cannot use keywords, reserved words (such as char, byte) and numbers;
- Code should be indented to ensure readability (this is a little nonsense, but I still want to mention ~).
(3) JS method for obtaining and modifying elements:
| Little knowledge: element is the label in the page. Element is the label, and label is the element. The two are one thing. |
<!DOCTYPE html>
<html lang="en">
<head>
    <meta charset="UTF-8">
    <title>JS Get element</title>
</head>
<body id="by1">

<p id="p1" class="p2" name="p3">I am a paragraph</p>

<script>

    // Note: JS can only give one element event at a time, not multiple at the same time!!!
    // Therefore: among the first four methods to obtain elements, only id does not need to add subscript, because id is unique, which can ensure that only one element can be given events at a time
    // However, the other three methods of obtaining elements through class, tag name and name attribute should be subscripted, because these are not unique!!


    // The first way to get elements: get elements by id
    var p11 = document.getElementById("p1");       //var: keyword defining variable name; p11: variable name
    // console.log(p11);            When you print P11 on the console of the browser page, you can find that P11 is the P element (including the text content). [operate by yourself and observe the effect ~]
    // innerText: the method of modifying content in JS innerHTML is also the method of modifying content
    p11.innerText = "I'm not a paragraph";

    var by11 = document.getElementById("by1");
    console.log(by11.innerHTML);        //You will find that both innerHTML and innerText methods get the content, so you can modify the obtained content.
    console.log(by11.innerText);        //However, innerHTML will get all the content (including text and corresponding tags); But innerText will only get the text content.
                                        //So innerHTML can change the text and label at the same time; But innerText can only change the text!!!

    // The second method to obtain elements: there are two methods to obtain elements through class:
    var p11 = document.getElementsByClassName("p2")[0];  //The first method of adding subscripts: Note: subscripts must be added, even if there is only one element to be modified. Subscripts start from 0
    p11.innerText("I'm not a paragraph  Class");                  //The second method of subscribing. p11[0].innerText()

    // The third way to get elements: get elements by tag names
    var p11 = document.getElementsByTagName("p")[0];
    p11.innerText = "I'm not a paragraph";

    //The fourth way to get elements: get elements through the attribute value of name, which is generally used for input.
    var p11 = document.getElementsByName("p3")[0];
    p11.innerText = "I'm not a paragraph";

    // The fifth way to get elements: there are two ways to get elements through CSS selectors:

    // First: only one can be obtained through the CSS selector document.querySelector(). Multiple selectors can be the same (for example, with a class selector, the class attribute values of multiple tags are the same)
    // However, this method will only get the first one (the code is executed from top to bottom), so it will not report an error.
    // Add subscript to specify the following tags with the same class attribute value. This method is useless. On the contrary, it will make this method ineffective.
    var p11 = document.querySelector(".p2");        //Note: pseudo class selectors and pseudo elements are not supported
    p11.innerText = "I'm not a paragraph Baa Baa";

    // Second: get all through CSS selector document.querySelectorAll(). However, JS can only give one element event at a time, so we have to add subscripts again!
    var p11 = document.querySelectorAll(".p2")[0];
    p11.innerText = "I'm not a paragraph"

</script>

</body>
</html>
Part II: simple events
<!DOCTYPE html>
<html lang="en">
<head>
    <meta charset="UTF-8">
    <title>Simple event</title>
</head>
<body>

<button id="btn1">I'm the button</button>

<select name="address" id="address">
    <option value="1">1</option>
    <option value="2">2</option>
    <option value="3">3</option>
    <option value="4">4</option>
</select>

<script>
    // Get element
    var btn = document.getElementById("btn1");
    // First: the focus of the mouse click event!
    btn.onclick = function(){
        alert(123);
    }

    // Second: double click event of the mouse. To display this effect, you need to annotate the click event above~
    btn.ondblclick = function () {
        alert(321);
    }

    // If the click event and double-click event are set for an element at the same time, no matter who is above or below, the click event takes precedence, and the double-click event is no longer executed

    // Third: slide the mouse into the event focus!
    btn.onmouseenter = function (ev) {
        btn.innerText = "Button"
    }

    // Fourth: slide the mouse out of the event focus!
    btn.onmouseleave = function (ev) {
        btn.innerText = "I'm a button"
    }

    // Fifth: window transformation can be used to judge whether the window changes and determine the scale value of the change.
    window.onresize = function (ev) {
        console.log("Window change");      //On the browser console, you zoom in and out of the browser window, and you will find that the number of changes will increase
    }

    // Sixth: the change drop-down box can be used for provincial linkage (when you select a value in the drop-down box of the first level Province, the drop-down box of the second level city will become the drop-down box of the corresponding province and city)
    var add = document.getElementById("address");
    add.onchange = function (ev) {
        console.log("The drop-down box has changed");   //On the browser console, when you click an option in a drop-down box, you will find that the number of changes increases with the number of clicks.
                                     // However, the maximum number of times is the number of options in your drop-down box. When it is exceeded, the number of clicks will not increase.
    }

</script>
</body>
</html>
Extension: listening events:
<!DOCTYPE html>
<html lang="en">
<head>
    <meta charset="UTF-8">
    <title>Listening events</title>
</head>
<body>
<button id="btn1">Click the button</button>

<script>
    var btn = document.getElementById("btn1");
    // If you want to click the event like this, click the button twice. But no, only the click event below will be executed
    // btn.onlick = function () {
    //     console.log(1);
    // };
    // btn.onclick = function () {
    //     console.log(2);
    // };

    // Not above. Introduce a new method and use to listen for events!!!

    // By listening to events, you can assign multiple events to an element at the same time, and all of them will be executed
    // Set a listening event and add a listening event to the element (click event).
    btn.addEventListener("click",function () {
        console.log(1)
    });
    btn.addEventListener("click",function () {
        console.log(1)
    })

</script>

</body>
</html>
Part III: modify style
(1) JS modify style
<!DOCTYPE html>
<html lang="en">
<head>
    <meta charset="UTF-8">
    <title>modify style</title>
    <style>
        div{
            width: 100px;
            height: 100px;
            background-color: red;
        }
    </style>
</head>
<body>

<div></div>

<script>
    var box = document.getElementsByTagName("div")[0];
    box.onclick = function () {
        // Format: Obj.style [variable] = variable name 	 Note that this is for variables and is applied in the question!
        //Format: Obj.style. Style = "style content" 	 This is for constants, as shown below
        box.style.width = "200px";
        box.style.height = "200px";
        box.style.backgroundColor = "blue"
    }
</script>
</body>
</html>
(2) JS operation tag properties
<!DOCTYPE html>
<html lang="en">
<head>
    <meta charset="UTF-8">
    <title>JS Action label properties</title>
</head>
<body>

<div id="div1"></div>

<script>
    // Note: label attributes are divided into two types: legal attributes (especially class) and user-defined attributes (including legal attributes and user-defined attributes)

    var box = document.getElementById("div1");
    //The first: legal attribute: class below is the addition, deletion, modification and query of the legal attribute of the JS operation tag!!!
    box.className = "div2";              //When the class attribute does not exist in the tag, add
    box.className = "div3";              //When the class attribute exists in the tag, change it

    console.log(box.className);         //Query the attribute value you want to view on the browser console

    box.removeAttribute("class");       //Delete. You can find that the class attribute has disappeared on the browser console


    // The second: custom attributes. The following is the addition, deletion, modification and query of JS operation tag custom attributes!!!
    box.setAttribute('name',"div2");         //increase
    box.setAttribute("name","div3");         //change

    console.log(box.hasAttribute("name"));   //check

    box.removeAttribute("name");             //Delete

</script>
</body>
</html>
Part IV: data types
<!DOCTYPE html>
<html lang="en">
<head>
    <meta charset="UTF-8">
    <title>data type</title>
</head>
<body>

<!--Tips: JS Is a weak type!-->
<!--Weak type: when declaring variables, it is not necessary to define data types;-->
<!--Strong type: when declaring variables, data types need to be defined.-->


<script>
    // Basic data type:
    // number
    var a = 123;
    console.log(typeof a);          //In the console, see that the variable a is of type number.
    // character string
    var b = '123';
    console.log(typeof b);          //string
    // Boolean
    var c = true;
    console.log(typeof c);          //boolean
    // Undefined
    var d;
    console.log(typeof d);          //undefined
    // empty
    var e = null;                   //null belongs to an object, called an empty object.
    console.log(typeof e);          //Note: after typeof operator is applied to null type, the result is object. Reason: null type is referenced as an empty object.


    // Object data type:
    // object
    var f = [1,23,4];
    console.log(typeof f);          //object

    var g = {name : "china",age : 5000};
    console.log(typeof g);          //object

</script>
</body>
</html>
👇🏻 You can follow your operation by clicking - > below official account 👇🏻 The official account is back to the first article of JS, which will give you the notes of the MD. If you are not sincere, please don't bother me. Official account can be drawn from CSDN, which will bring you into the technology exchange group.