1, Front end development mode before 2016:
1. Can write HTML + CSS + JavaScript, can develop front-end
2. If you need to beautify the page style, drag a bootstrap
3. You need to operate the DOM or initiate an Ajax request, and then drag a jQuery
4. To quickly realize the effect of web page layout, drag a Layui
Current front-end development mode:
1. Modularization (js modularization, css modularization, resource modularization)
2. Componentization (reuse existing UI structure, style and behavior)
3. Standardization (division of directory structure, coding standardization, interface standardization, document standardization, Git Branch Management)
4. Automation (automated build, automated deployment, automated testing)
2, Front end engineering solutions
1. Early front end engineering solutions:
1.1,grunt( https://www.gruntjs.net/ )
1.2,gulp( https://www.gulpjs.com.cn/ )
2,
Current mainstream front-end engineering solutions:
2.1,webpack( https://www.webpackjs.com/ )
2.2,parcel( https://zh.parceljs.org/ )
3, Basic use of webpack
3.1,
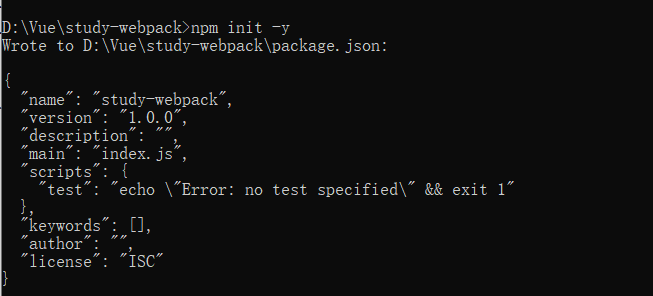
Create a new project blank directory and run the npm init – y command to initialize the package management configuration file package.json
3.2. Create a new src source code directory
3.3. Create SRC - > index.html homepage and Src - > index.js script file
3.4. Initialize the basic structure of the home page
3.5 run the npm install jquery – S command to install jQuery
3.6. Import jQuery through ES6 modularization
//Use ES6 import syntax to import jQuery
import $ from 'jquery'
4, Basic use of webpack
4.1. Install two packages related to webpack
npm install webpack@5.42.1 webpack-cli@4.7.2 -D
npm install webpack-dev-server@3.11.2 -D
4.2. Configure webpack in the project
- In the root directory of the project, create a webpack configuration file named webpack.config.js, and initialize the following basic configuration
// Mode represents the running mode of webpack. The optional values are development and production
// Conclusion: development must be used when developing, because the pursuit is the speed of packaging, not the volume;
// Conversely, production must be used when publishing online, because the online pursuit is small,
//Instead of packing fast!
  mode: 'development',
-
In the scripts node of package.json, add dev script as follows
//Scripts under the script node can be executed through npm run, such as npm run dev "scripts": { "dev": "webpack serve", "build": "webpack --mode production" }, -
Run in terminal npm run dev Command to start the webpack to package and build the project
5, Default conventions in webpack
In the versions of webpack 4.x and 5.x, there are the following default conventions:
5.1. The default package entry file is
src
->
index.js
5.2. The default output file path is
dist
->
main.js
Note: you can
webpack.config.js
Modify the default contract for packaging in
6, Custom packaging entry and exit
In the webpack.config.js configuration file, click
entry node
appoint
Packaged entrance
. adopt
output node
appoint
Packaged exit
// Export a webpack configuration object using the export syntax in Node.js
const path = require('path')
module.exports = {
  // entry: 'specify which file to process'
  entry: path.join(__dirname, './src/index1.js')
  // Specify where to store the generated files
  output: {
    // Directory of storage
    path: path.join(__dirname, 'dist'),
    // Generated file name
    filename: 'js/bundle.js'
},
The webpack configuration file is as follows:
const path = require('path')

// 1. Import the HTML webpack plugin plug-in to get the constructor of the plug-in
const HtmlPlugin = require('html-webpack-plugin')
// 2. new constructor to create an instance object of the plug-in
const htmlPlugin = new HtmlPlugin({
  // Specify which page to copy
  template: './src/index.html',
  // Specify the copied file name and storage path
  filename: './index.html'
})

// Note: {} on the left is deconstruction assignment
const { CleanWebpackPlugin } = require('clean-webpack-plugin')

// Export a webpack configuration object using the export syntax in Node.js
module.exports = {
  // In the development and debugging phase, it is recommended that everyone set the value of devtool to eval source map
  // devtool: 'eval-source-map',
  // During actual release, it is recommended that you set the value of devtool to nosources source map or close SourceMap directly
  devtool: 'nosources-source-map',
  // Mode represents the running mode of webpack. The optional values are development and production
  // Conclusion: development must be used when developing, because the pursuit is the speed of packaging, not the volume;
  // Conversely, production must be used when publishing online, because the online pursuit is small volume, not fast packaging speed!
  mode: 'development',
  // entry: 'specify which file to process'
  entry: path.join(__dirname, './src/index1.js'),
  // Specify where to store the generated files
  output: {
    // Directory of storage
    path: path.join(__dirname, 'dist'),
    // Generated file name
    filename: 'js/bundle.js'
  },
  // 3. Array of plug-ins. These plug-ins will be loaded and called when webpack runs in the future
  plugins: [htmlPlugin, new CleanWebpackPlugin()],
  devServer: {
    // After the first successful package, the browser will be opened automatically
    open: true,
    // In the http protocol, if the port number is 80, it can be omitted
    port: 80,
    // Specify the host address of the run
    host: '127.0.0.1'
  },
  module: {
    rules: [
      // Loaders corresponding to different modules are defined
      { test: /\.css$/, use: ['style-loader', 'css-loader'] },
      // loader for handling. less files
      { test: /\.less$/, use: ['style-loader', 'css-loader', 'less-loader'] },
      // loader for processing picture files
      // If there is only one loader to call, just pass a string. If there are multiple loaders, you must specify an array
      // When configuring URL loader, multiple parameters are separated by the & symbol
      { test: /\.jpg|png|gif$/, use: 'url-loader?limit=470&outputPath=images' },
      // Using Babel loader to handle Advanced JS syntax
      // When configuring Babel loader, programmers only need to convert their own code; Be sure to exclude node_ JS files in the modules directory
      // Because of the JS compatibility in third-party packages, programmers do not need to care
      { test: /\.js$/, use: 'babel-loader', exclude: /node_modules/ }
    ]
  },
  resolve: {
    alias: {
      // Tell webpack that in the code written by the programmer, the @ symbol represents the src directory
      '@': path.join(__dirname, './src/')
    }
  }
}