1, Why VuePress
There are many tools commonly used to build Blog websites, such as WordPress,Jekyll,Hexo,Docsify Each tool has its own advantages. You can choose according to your preferences, but it is not recommended that you spend energy on studying the use of each tool. After all, building a blog is only the first step. Writing and sharing a blog is the main purpose of building a personal blog website. This article mainly introduces how to use VuePress to build a personal static blog.
VuePress It is a Vue driven static website generator with simple and elegant interface, good compatibility with Markdown syntax and strong scalability. It supports the use of Vue components in Markdown or Vue to develop custom themes. Support responsive layout and PWA
VuePress consists of two parts: the first part is an open new window, which contains Vue driven theme system and plug-in API. The other part is the default theme optimized for writing technical documents. Its original intention is to support the document requirements of Vue and its subprojects.
Every page generated by VuePress has pre rendered HTML, so it has very good loading performance and search engine optimization (SEO). At the same time, once the page is loaded, Vue will take over these static contents and convert them into a complete single page application (SPA), and other pages will be loaded on demand only when users browse.
2, Get started with VuePress
Local environment construction
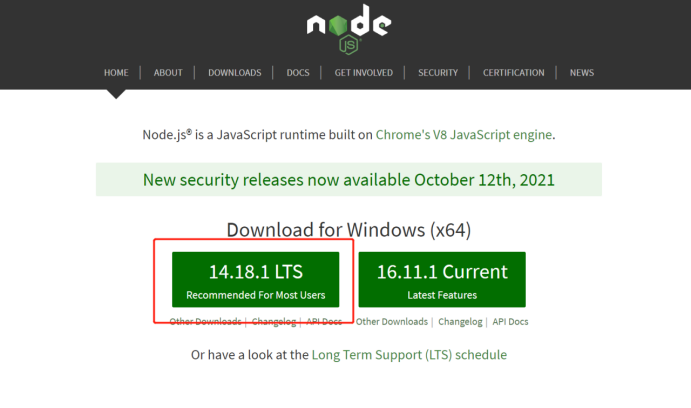
Node.js® It is a JavaScript runtime environment based on Chrome V8 engine. The use of VuePress depends on the version of node. JS > = 8.6. Taking Windows system as an example, the following describes how to install Node.js environment. If Node.js is installed on your computer, please ignore this section.
1. Download the installation package on the official website of Node.js and double-click to install it.
2. After installation, check the Node version in the console to verify whether the installation is successful.
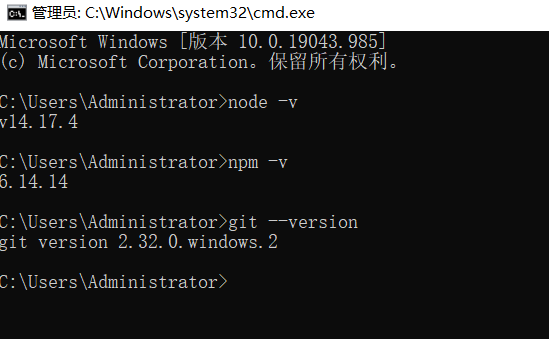
Note: Npm is a package management tool installed with the Node. It is mainly used to install third-party dependencies for local use. Of course, you can choose other package management tools, such as pnpm/yarn
VuePress installation and use
1. Create and enter a new directory
mkdir vuepress-test && cd vuepress-test
2. Use the package management tool to initialize
npm init -y
3. Install VuePress as a local dependency
npm install -D vuepress
4. Create your first document
mkdir docs && echo '# Hello VuePress' > docs/README.md
5. Add some scripts in package.json
"scripts": {
  "dev": "vuepress dev docs",
  "build": "vuepress build docs"
}
6. Start the server locally
npm run dev
VuePress will http://localhost:8080 Start a hot overloaded development server.
Now you have a simple VuePress document available. Next, we will further explain the recommended by VuePress directory structure and Basic configuration.
VuePress basic configuration
directory structure
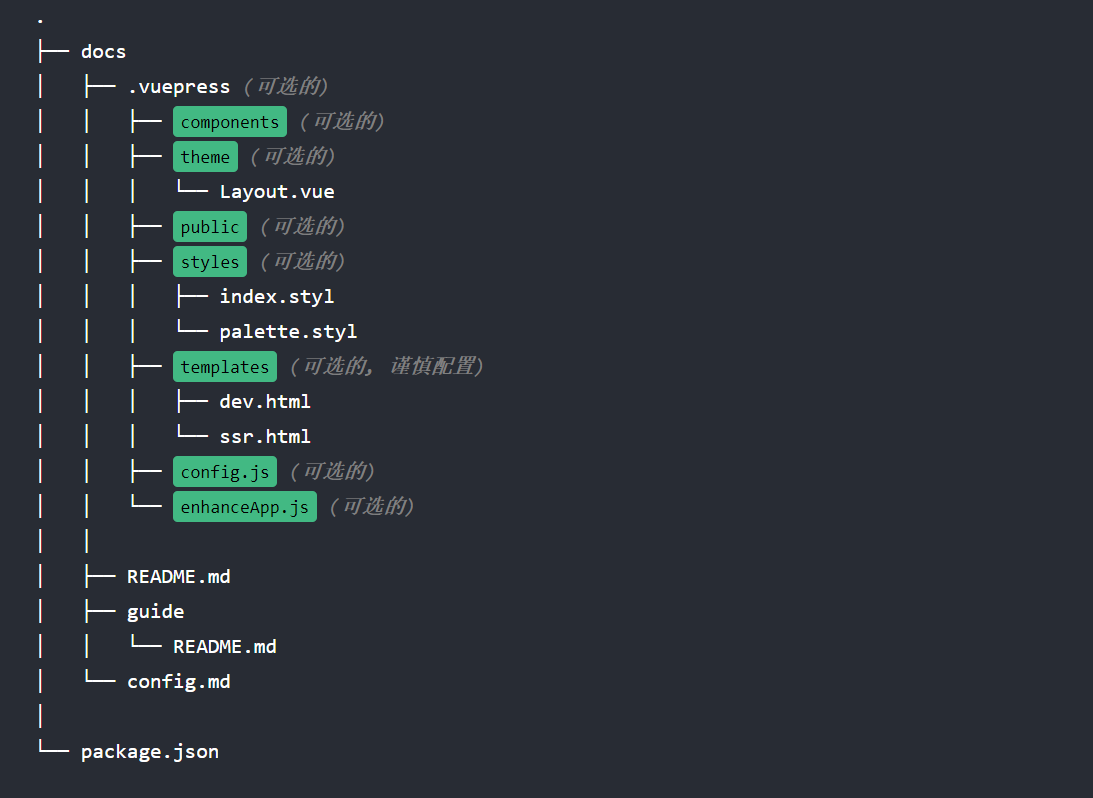
VuePress follows the principle of "agreement is better than configuration". The directory structure recommended on the official website is as follows:
-
docs/.vuepress: used to store global configurations, components, static resources, etc.
-
docs/.vuepress/components: Vue components in this directory will be automatically registered as global components.
-
docs/.vuepress/theme: used to store local topics.
-
docs/.vuepress/styles: used to store files related to styles.
-
Docs /. Vuepress / styles / index.style: the global style file that will be automatically applied will be generated at the end of the final CSS file, with higher priority than the default style.
-
Docs /. Vuepress / styles / palette.style: used to override the default color constant or set a new style color constant.
-
docs/.vuepress/public: static resource directory.
-
docs/.vuepress/templates: stores HTML template files.
-
docs/.vuepress/templates/dev.html: HTML template file for development environment.
-
docs/.vuepress/templates/ssr.html: an HTML template file based on Vue SSR at build time.
-
docs/.vuepress/config.js: the entry file of the configuration file, which can also be YML or toml.
-
docs/.vuepress/enhanceApp.js: enhancement of client application.
Is it a little flustered to see so many directories? Don't be afraid. If you don't want to toss around, use the default theme recommended by VuePress. Only the bold directories above need to be used. Now, in combination with the default theme of VuePress, let's share the basic configuration of VuePress.
Basic configuration
1. In the / docs/.vuepress folder, create a new config.js configuration file for necessary configuration and Theme configuration , taking the default theme provided by VuePress as an example, this paper notes the basic configuration one by one, as follows:
module.exports = {
    title: 'Mobile cloud', // The website title is used as a prefix for all page titles. By default, it will be displayed on the navigation bar (navbar)
    description: 'Mobile cloud is safer and smarter', // The description of the website, which will be rendered into the HTML of the current page with < meta > tags
    dest: 'blog', // Specify the output directory of vuepress build.
    base: '/test-blog/', // The basic path of the deployment site. If you want to deploy your website to a sub path, you will need to set it.
    locales: { // Multilingual support. Here, only Chinese is taken as an example and will not be described
        '/': {
            lang: 'zh-CN',
            title: 'Mobile cloud',
            description: 'Mobile cloud is safer and smarter'
        }
    },
    head: [
        // The tag injected into the HTML < head > of the current page
        ['link', { rel: 'icon', href: '/images/favicon.ico' }],
        ['link', { rel: 'manifest', href: '/mainfest.json' }],
        ['meta', { name: 'theme-color', content: '#3eaf7c' }],
        ['meta', { name: 'apple-mobile-web-app-capable', content: 'yes' }],
        ['meta', { name: 'apple-mobile-web-app-status-bar-style', content: 'black' }],
        ['link', { rel: 'apple-touch-icon', href: `/icons/apple-touch-icon-152x152.png` }],
        ['link', { rel: 'mask-icon', href: '/icons/safari-pinned-tab.svg', color: '#3eaf7c' }],
        ['meta', { name: 'msapplication-TileImage', content: '/icons/msapplication-icon-144x144.png' }],
        ['meta', { name: 'msapplication-TileColor', content: '#000000' }]
    ],
    serviceWorker: true, // Is PWA enabled
    themeConfig: { // Theme configuration. The default theme is used here, and other themes can be switched
        logo: '/images/logo.png',
        repo: '', // github warehouse
        editLinks: true, // Show edit this page button in footer
        docsDir: 'blog', // github edit path
        smoothScroll: true,
        locales: { // Multilingual support, currently only Chinese is supported
            '/': {
                label: 'Simplified Chinese',
                selectText: 'Select language',
                ariaLabel: 'Select language',
                editLinkText: 'stay GitHub Edit this page on',
                lastUpdated: 'Last update',
                nav: require('./nav/zh'), //Top navigation is maintained separately
                sidebar: require('./sidebar/zh'),// Sidebar navigation
            }
        },
        displayAllHeaders: true, // Show Title links for all pages
        sidebar: 'auto', // Sidebar configuration
        sidebarDepth: 2, // The sidebar shows level 2
    }
}
2. Configure top navigation
In the basic configuration, side navigation and top navigation are complex. In config.js above, side navigation and top navigation are maintained in separate files, as shown in the following figure:
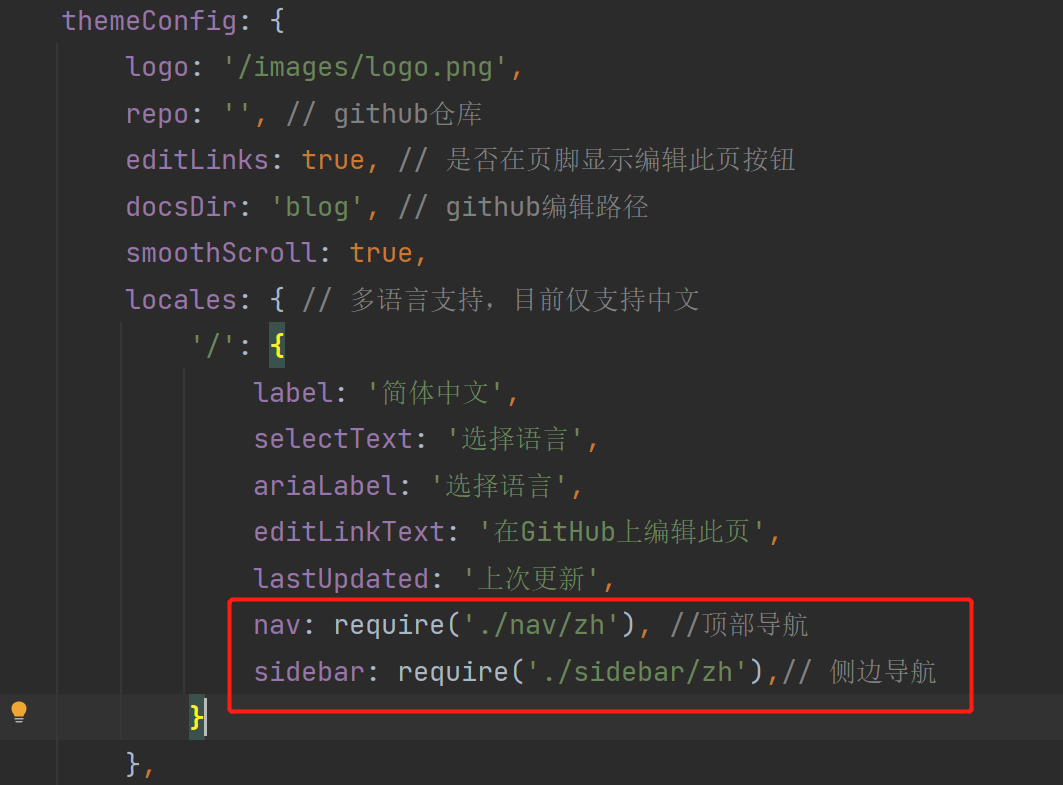
Therefore, you need to create corresponding files / docs/.vuepress/nav/zh.js and / docs/.vuepress/sidebar/zh.js. The configuration example of top navigation / docs/.vuepress/nav/zh.js is as follows:
module.exports = [
    { text: 'Best practices', link: '/practice/' },
    {
        text: 'Front end Foundation',
        link: '/accumulate/'
    },
    { text: 'Algorithm question bank', link: '/algorithm/' },
    {
        text: 'Learn more',
        ariaLabel: 'More knowledge',
        items: [
            { text: 'more1', link: '/others/more1.md' },
            { text: 'more2', link: '/others/more2.md' },
            { text: 'more3', link: '/others/more3.md' }
        ]
    },
    { text: 'Mobile cloud official website', link: 'https://ecloud.10086.cn/home/'}
]
Each navigation corresponds to an object, and the text attribute in the object is used to configure the name of the navigation. Link is used to configure the navigation route. It can be a file or folder under the local docs file path, or other links. For example, if link:'/practice /' is configured to the / docs/practice / folder, the route will read the README.md file under the folder by default. items can configure the secondary and tertiary sub routes under route navigation.
3. Configure the sidebar / docs/.vuepress/sidebar/zh.js to define the side navigation corresponding to the first level route of the top navigation. Examples are as follows:
module.exports = {
'/practice/':[
'practice1',
'practice2',
'practice3'
],
'/accumulate/':[
{
title: 'HTML',
collapsable: false,
children: [
'html1'
]
},
{
title: 'CSS',
collapsable: false,
children: [
'css1'
]
},
{
title: 'JAVASCRIPT',
collapsable: false,
children: [
'js1'
]
}
],
'/algorithm/': [
{
title: 'queue',
collapsable: false,
children: [
'queue1'
]
},
{
title: 'Stack',
collapsable: false,
children: [
'stack1'
]
}
]
}collapsable configures whether to fold the display side navigation, and children configures the specific article path.
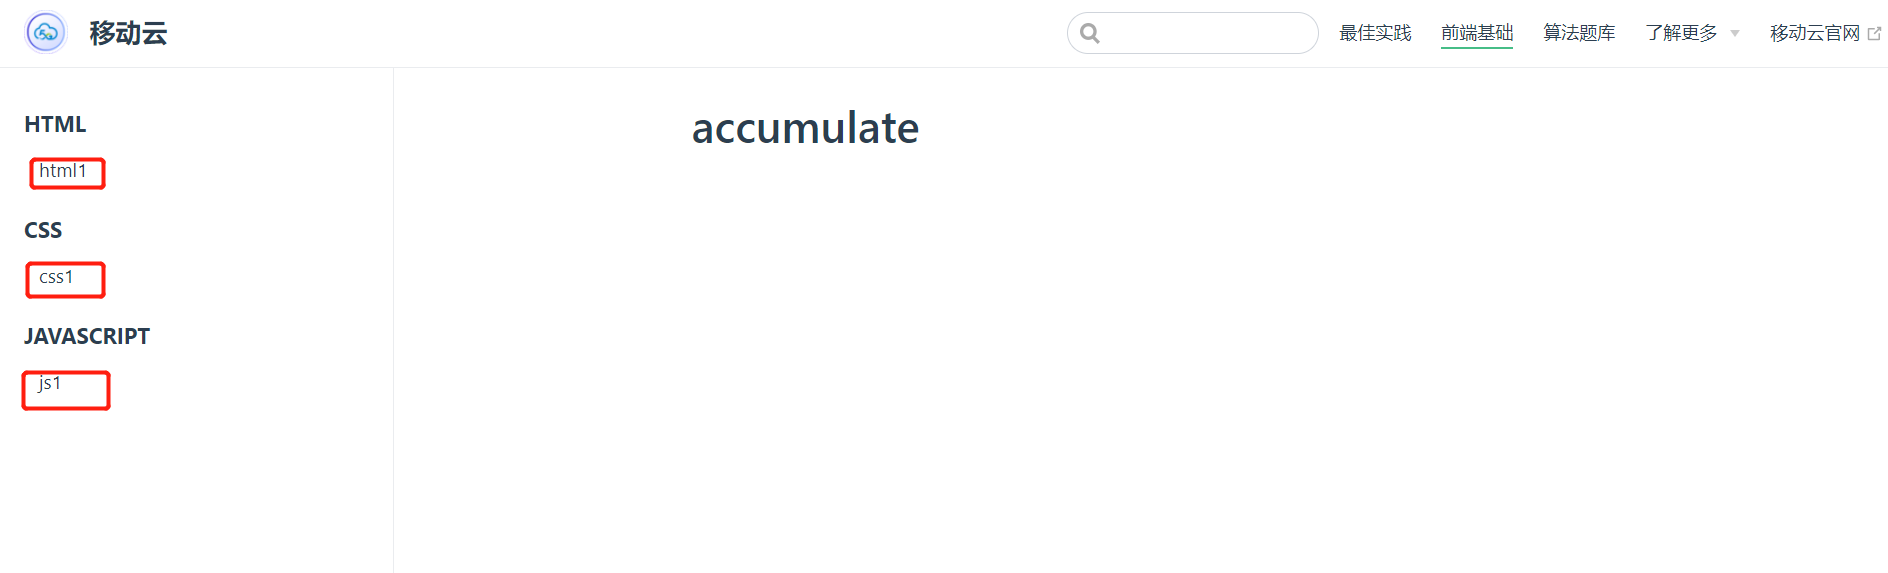
4. Create the corresponding folder according to the configured route navigation. Here, you need to pay attention to the corresponding relationship between the path and file in the top navigation and side navigation configuration. The file path corresponding to the above configuration is referred to as follows:
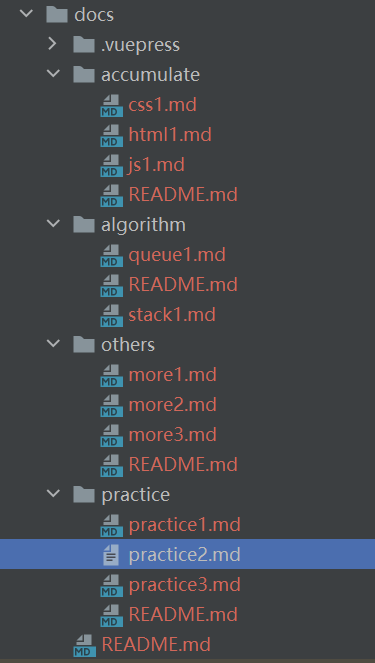
For example, the articles in / docs / calculate / readme.md will be displayed under the: / calculate / route navigation, and the corresponding secondary and tertiary routes under '/ calculate /' in / docs/.vuepress/sidebar/zh.js and specific MD documents corresponding to different routes will be displayed synchronously in the left sidebar. The display interface is as follows:
5. Homepage configuration
The default theme provides a home page layout (for The home page of this website ). To use it, you need to use README.md at your root level YAML front matter Specify home: true.
---
home: true
heroImage: /images/logo.png
heroText: Mobile cloud
tagline: Safer and smarter
actionText: Best practices →
actionLink: /practice/
features:
- title: Cloud network integration
  details: Mobile cloud construction N Centralized nodes, 31 provincial localization nodes X An edge node to create a global resource layout of "one cloud". The private network is dedicated and the network moves with the cloud, building a "one network" and global intelligent traffic scheduling and optimization. The mobile cloud construction portal provides a unified entrance to provide "integrated service capability" of one-stop service, one jump into the cloud and one acceptance.
- title: Personal service
  details: China Mobile has 31 provincial companies and 290+Municipal level companies, realize the full coverage of mobile cloud in provinces, cities and counties, and build the cloud around customers. Mobile cloud has a team of 50000 customer managers and a team of more than 11 technicians.6 10000 people, customers can enjoy the convenience of localized support and personal service.
- title: Customized
  details: Relying on localized resources, rich products and ecology, mobile cloud creates an industry exclusive, flexible and customized end-to-end solution. Develop isolated resource areas in the territory to realize the exclusive enjoyment of industrial users' resources; Meet the attribute needs of various industries and customize end-to-end solutions; A large number of industrial ecological partners support the rapid construction of solutions.
- title: Safe and controllable
  details: Mobile cloud firmly increased R & D investment, strengthened independent innovation of core technologies, created a complete product system and healthy application ecology, passed the first batch of trusted cloud certification, and took the lead in formulating five national standards related to cloud computing. By independently controlling the core technology, the mobile cloud provides a variety of security services, provides communication level security system guarantee, and creates the most trusted cloud.
footer: MIT Licensed | Copyright © 2021-present songyulong
---
6. Release
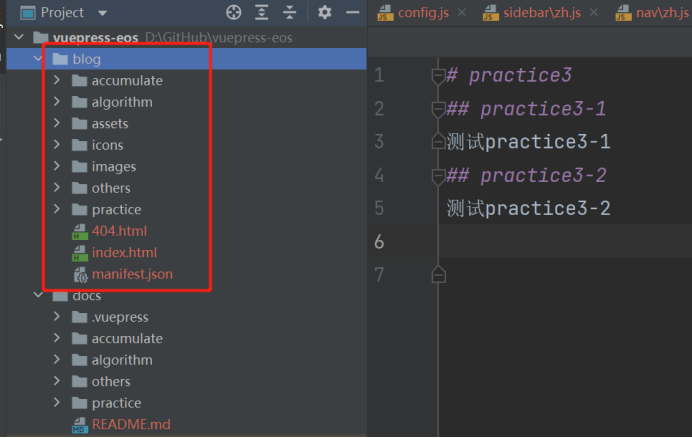
Execute npm run build to generate static files to be deployed in the / blog directory. If you want to specify the output directory of other vupress build s or modify the basic path of the deployment site, you can configure it in config.js. The example configuration in this article is packaged to generate a file to be deployed, as shown in the red box below:
3, Mobile cloud deployment
After using the vuepress build command to package and generate the static resources of the blog website, they can be deployed in various ways. For details, see the vuepress official website Deployment guidance . This article mainly shares with you how to deploy your own blog website through mobile cloud host and mobile cloud object storage.
Using virtual machine deployment
Ordering virtual machines, binding public IP, releasing security group rules, and accessing linux virtual machines Mobile cloud official website help center There are detailed instructions for use, which will not be repeated here. The following describes how to use the virtual machine to publish personal blog websites after logging in to the virtual machine.
In this example, the virtual machine system version is Centos7.2. Use MobaXterm software to access the virtual machine and perform the following operations:
Installing Nginx
1. Add source
By default, there is no Nginx source in Centos7. You need to add the source first:
sudo rpm -Uvh http://nginx.org/packages/centos/7/noarch/RPMS/nginx-release-centos-7-0.el7.ngx.noarch.rpm
2. Install Nginx
You can use yum search nginx to see if the source has been added successfully. If successful, execute the following command to install Nginx.
sudo yum install -y nginx
3. Start Nginx and set startup automatic operation
sudo systemctl start nginx.service
sudo systemctl enable nginx.service
Modify Nginx configuration file
1. Enter nginx -t in the shell to view the nginx configuration file directory, and then find the correct nginx configuration file directory:
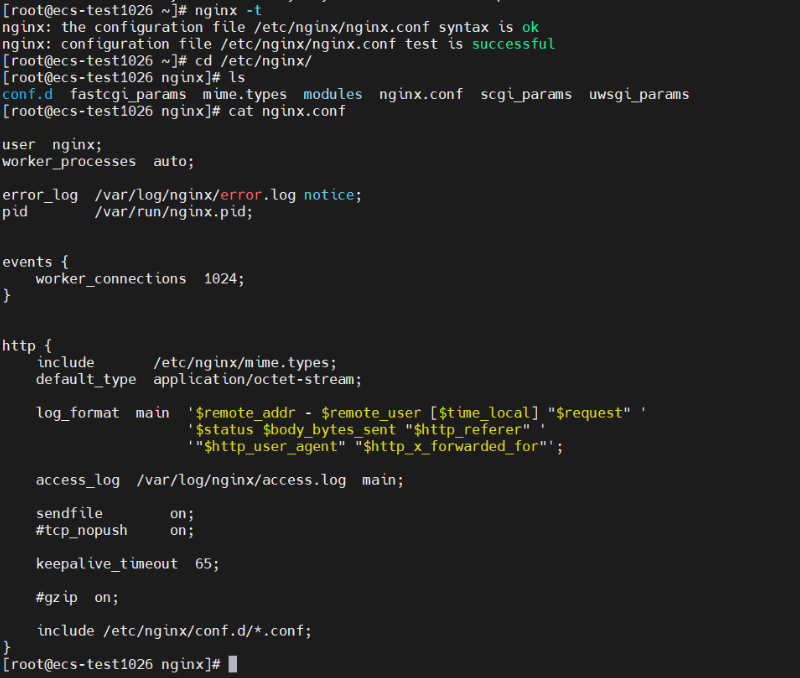
2. As shown in the above figure, the nginx configuration file is introduced into / etc/nginx/nginx.conf through include /etc/nginx/conf.d/*.conf. therefore, a route is added to the / etc/nginx/conf.d/default.conf file to deploy our blog website. The full configuration of default.conf is as follows:
server {
# To listen to port 9000, you need to release the port restriction in the virtual machine security group
listen 9000;
server_name localhost;
#access_log /var/log/nginx/host.access.log main;
location / {
root /usr/share/nginx/html;
index index.html index.htm;
}
# New / blog / route for deploying blog sites
location /blog/ {
try_files $uri $uri/ /blog/index.html;
}
#error_page 404 /404.html;
# redirect server error pages to the static page /50x.html
#
error_page 500 502 503 504 /50x.html;
location = /50x.html {
root /usr/share/nginx/html;
}
# proxy the PHP scripts to Apache listening on 127.0.0.1:80
#
#location ~ \.php$ {
# proxy_pass http://127.0.0.1;
#}
# pass the PHP scripts to FastCGI server listening on 127.0.0.1:9000
#
#location ~ \.php$ {
# root html;
# fastcgi_pass 127.0.0.1:9000;
# fastcgi_index index.php;
# fastcgi_param SCRIPT_FILENAME /scripts$fastcgi_script_name;
# include fastcgi_params;
#}
# deny access to .htaccess files, if Apache's document root
# concurs with nginx's one
#
#location ~ /\.ht {
# deny all;
#}
}Restart Nginx and deploy to the corresponding directory
1. Execute nginx -s reload to restart Nginx
2. Deploy all files in the local packaging directory / blog / folder to the corresponding folder of / blog / under / usr/share/nginx/html / directory.
3. Visit the personal blog website. In this example, the port configured by Nginx is 9000, the port configured is 9000, and the access path is http://ip:port/blog/
Using object storage deployment
The static website hosting function using object storage can also meet the deployment requirements of the blog website.
Modify the default packaging path
Because mobile cloud object storage has certain requirements for bucket and folder naming rules, it is necessary to modify the deployment path base: '/ test blog /' in the config.js configuration file. At the same time, modify the folder names that do not meet the requirements in the packaging file by using chainWebpack in config.js, as follows:
chainWebpack: (config, isServer) =>{
if (isServer) {
config
.output
.filename('assets/assets_js/[name].[chunkhash:8].js')
config.module
.rule('images')
.test(/\.(png|jpe?g|gif)(\?.*)?$/)
.use('url-loader')
.loader('url-loader')
.options({
name: `assets/assets_img/[name].[hash:8].[ext]`
})
config.module
.rule('svg')
.test(/\.(svg)(\?.*)?$/)
.use('file-loader')
.loader('file-loader')
.options({
name: `assets/assets_img/[name].[hash:8].[ext]`
})
config
.plugin('extract-css')
.use(CSSExtractPlugin, [{
filename: 'assets/assets_css/styles.[chunkhash:8].css'
}])
}
}Open object storage service
(1) The user enters the home page of mobile cloud, click product - cloud storage - object storage to enter the product page of object storage, and click mobile cloud activation under the introduction of object storage to jump to the object storage activation page.
(2) Check "I have read and agreed to the object storage service terms", and click the "open now" button, and the opening result will be prompted on the page.
Create bucket
Click console - cloud storage - object storage - bucket management to enter bucket management page, click + create bucket to enter bucket creation page, enter bucket name, select data center and storage type to complete bucket creation. Note that the bucket permissions are set to public readable.
create folder
On the object storage console, in the bucket management list, click the created bucket name to enter the bucket details page, click file management - Create directory, and complete the creation of the corresponding folder according to the local directory after packaging above.
Upload file
In console - cloud storage - object storage - bucket management, click the bucket name to enter the bucket management interface, and click file management to enter the file management window. Click the [upload] button to open the upload file window, select a file and complete the file upload. Note: when uploading a file, the file ACL is public readable
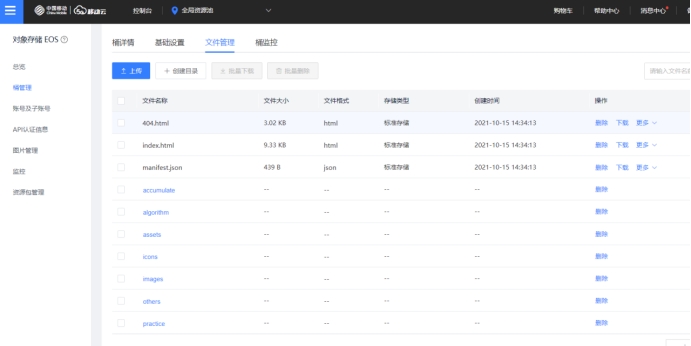
Upload the static files to be deployed generated in the local / blog directory to the object storage test blog bucket according to the corresponding directory, as shown in the following figure:
Set up static web site
(1) Log in to the EOS console.
(2) Click bucket management and click the destination bucket name.
(3) Click basic settings > static website and click on the static website page.
(4) Open the static website hosting, and configure the parameters as follows.
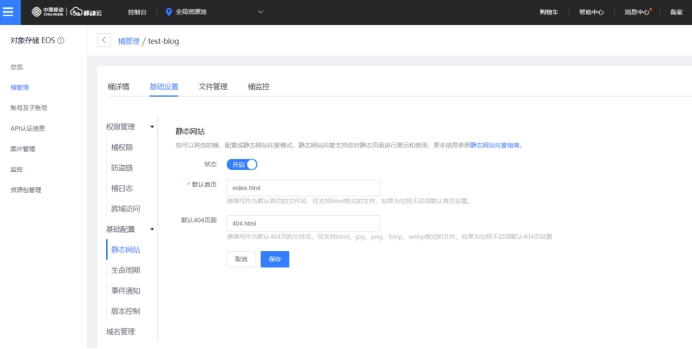
| parameter | explain |
|---|---|
| default page | The default home page is the home page of the website returned by EOS when you access the static website domain name through the browser. Only html files are supported. If it is empty, the default home page setting is not enabled. |
| Default 404 page | The error page returned by EOS when 404 error occurs when accessing the file in the Bucket. Only html, jpg, png, bmp and webp files are supported. If it is empty, the default 404 page setting will not be enabled. |
(5) Click Save to complete the configuration.
Visit static websites
Open in browser Mobile cloud You can visit your own static blog website. The static website domain name of each resource pool can be Refer to the help center on the official website Relevant instructions for.