I. Installation environment
System environment: CentOS 6.5 IP:192.168.30.242 hostname:vpn.org
Software: PPTP and LAMP have been installed. Please ensure that these are installed properly and can be used.
II. Software packages
ppp-2.4.5.tar.gz, daloradius-0.9-8.tar.gz, go-pear.phar. These are just files that need to be downloaded separately. You can download wget on the official website or on the disks. Baidu Link Address Password: rjs8
III. Start formal installation
Use yum to install and configure the following freeradius package.
[root@vpn ~]# yum -y install freeradius freeradius-mysql freeradius-utils
After installation, modify the configuration file / etc/raddb/users (remember to back up the original file before modifying the file). Add the following line at the end of the file:
testing Cleartext-Password := "password"
The general meaning of this sentence is that testing is a user name, which is the default test account of the system after installation. The password is the password encrypted in plaintext, without any change, and saved after modification.
Execute the radiusd-X command, which is entered into test mode (running this command will output a lot of information, and will stop at the end of the day)
Listening on proxy address * port 1814
Ready to process requests.
After these two lines, I have been waiting for the login test. It is also important to note that radius services must be stopped when entering test mode, or they will report errors. Then open a new terminal.
Enter on the new command line
[root@vpn ~]# radtest testing password 127.0.0.1 0 testing123
Sending Access-Request of id 249 to 127.0.0.1 port 1812
    User-Name = "testing"
    User-Password = "password"
    NAS-IP-Address = 192.168.30.242
    NAS-Port = 0
    Message-Authenticator = 0x00000000000000000000000000000000rad_recv: Access-Accept packet from host 127.0.0.1 port 1812, id=249, length=20
According to the last line: Access-Accept indicates success. Then we annotate the line we added in the previous step.
This step is to download the source package of ppp.
Attach a link: http://download.chinaunix.net/download.php?Id=35207 & ResourceID=8334
After downloading, decompress and copy the file.
[root@vpn ~]# tar zxvf ppp-2.4.5.tar.gz
[root@vpn ~]# cp -R /root/ppp-2.4.5/pppd/plugins/radius/etc/ /usr/local/etc/radiusclient
Now edit / usr/local/etc/radiusclient/servers with a set of servers and keys. I added localhost yxzcVPN.
[root@vpn ~]# vi /usr/local/etc/radiusclient/servers
#Server Name or Client/Server pair              Key
#----------------                               ---------------
#portmaster.elemental.net                       hardlyasecret
#portmaster2.elemental.net                      donttellanyone
localhost                                       yxzcVPN
Edit / usr/local/etc/radiusclient/dictionary and add content at the end of the file
[root@vpn ~]# vim /usr/local/etc/radiusclient/dictionary
#INCLUDE/etc/radiusclient/dictionary.microsoft (default here, add the following two lines after manually annotating)
INCLUDE /usr/local/etc/radiusclient/dictionary.microsoft
INCLUDE /usr/local/etc/radiusclient/dictionary.merit
Edit / etc/raddb/clients.conf to change the secret under the client localhost paragraph to the key yxzcVPN just specified
[root@vpn ~]# vim /etc/raddb/clients.conf
secret         = testing123    Modify to the following
secret          = yxzcVPN
Edit / etc/raddb/radiusd.conf, find $INCLUDE sql.conf, remove the previous #; and find $INCLUDE sql/mysql/counter.conf, remove the previous # comment.
[root@vpn ~]# vim /etc/raddb/radiusd.conf

$INCLUDE sql.conf
$INCLUDE sql/mysql/counter.conf
Enter mysql and create raduys database
[root@vpn ~]# mysql

mysql> create database radius;
Query OK, 1 row affected (0.00 sec)

mysql> flush privileges;
Query OK, 0 rows affected (0.00 sec)

mysql> exit
Edit / etc/raddb/sql.conf, configure fields such as login (username), password (password), radius_db (database name), etc.
[root@vpn ~]# vim /etc/raddb/sql.conf

sql {
        #
        #  Set the database to one of:
        #
        #       mysql, mssql, oracle, postgresql
        #

        #
        #  Which FreeRADIUS driver to use.
        #
        driver =

        # Connection :
        #port =

        # Database table configuration  everything except Oracle             readclients = yes          And find this line. Set it to ____________ yes And remove the commentary symbols#
Edit / etc/raddb/sites-enabled/default
[root@vpn ~]# Vim/etc/raddb/sites-enabled/default authorize section, turn off files, open sql
preacct Section, turn it off files
accounting Segment, open sql
session Segment, open sql
post-auth Segment, open sql
pre-proxy Section, turn it off files
2. Configure DaloRADIUS
First download the daloradius package, then download a pear package (php-db needs to be installed).
[root@vpn ~]# wget wget http://sourceforge.net/projects/daloradius/files/daloradius/daloradius-0.9-8/daloradius-0.9-8.tar.gz
[root@vpn ~]# wget http://pear.php.net/go-pear.phar[root@vpn ~]# php go-pear.phar
[root@vpn ~]# pear install DB
Create a directory and unzip it
[root@vpn ~]# mkdir /usr/share/daloRadius
[root@vpn ~]# tar zxvf daloradius-0.9-8.tar.gz
[root@vpn ~]# mv daloradius-0.9-8/* /usr/share/daloRadius/
[root@vpn ~]# rm -rf daloradius-0.9-8
Here is the import of the database
[root@vpn ~]# mysql -uroot -p radius < /usr/share/daloRadius/contrib/db/fr2-mysql-daloradius-and-freeradius.sql
Edit / usr/share/daloRadius/library/daloradius.conf.php and modify the daloRADIUS configuration file. As shown below, change to this
[root@vpn ~]# vim /usr/share/daloRadius/library/daloradius.conf.php

$configValues['CONFIG_DB_HOST'] = 'localhost';
$configValues['CONFIG_DB_USER'] = 'root';
$configValues['CONFIG_DB_PASS'] = '';
$configValues['CONFIG_DB_NAME'] = 'radius';
$configValues['CONFIG_DB_TBL_RADUSERGROUP'] = 'radusergroup';
$configValues['CONFIG_PATH_DALO_VARIABLE_DATA'] = '/usr/share/daloRadius/var';
Modify website directory links
[root@vpn ~]# cd /var/www/html/
[root@vpn ~]# ln -s /usr/share/daloRadius/ admin
In this environment, daloRADIUS management page address is http://192.168.30.242/admin, default user administrator, password radius to login.
Restart httpd, mysqld, and set it to self-start
[root@vpn ~]# service mysqld restart
[root@vpn ~]# service httpd restart
[root@vpn ~]# chkconfig httpd on
[root@vpn ~]# chkconfig mysqld on
3. Configuring PPPD
Edit / etc/ppp/options.pptpd[root@vpn ~]# vim /etc/ppp/options.pptpd (Guarantee the following five lines and set them up consistently. refuse-pap refuse-chap refuse-mschap require-mppe-128require-mschap-v2 (Add the following three lines) plugin radius.so plugin radattr.so radius-config-file /usr/local/etc/radiusclient/radiusclient.conf
Flow control, enter mysql, insert statements
[root@vpn ~]# mysql

mysql> use radius;
mysql> INSERT INTO radgroupreply (groupname,attribute,op,VALUE) VALUES ('user','Auth-Type',':=','Local');
mysql> INSERT INTO radgroupreply (groupname,attribute,op,VALUE) VALUES ('user','Service-Type',':=','Framed-User');
mysql> INSERT INTO radgroupreply (groupname,attribute,op,VALUE) VALUES ('user','Framed-IP-Address',':=','255.255.255.255');
mysql> INSERT INTO radgroupreply (groupname,attribute,op,VALUE) VALUES ('user','Framed-IP-Netmask',':=','255.255.255.0');
mysql> INSERT INTO radgroupreply (groupname,attribute,op,VALUE) VALUES ('user','Acct-Interim-Interval',':=','600');
mysql> INSERT INTO radgroupreply (groupname,attribute,op,VALUE) VALUES ('user','Max-Monthly-Traffic',':=','5368709120');
mysql> INSERT INTO radgroupcheck (groupname,attribute,op,VALUE) VALUES ('user','Simultaneous-Use',':=','1');
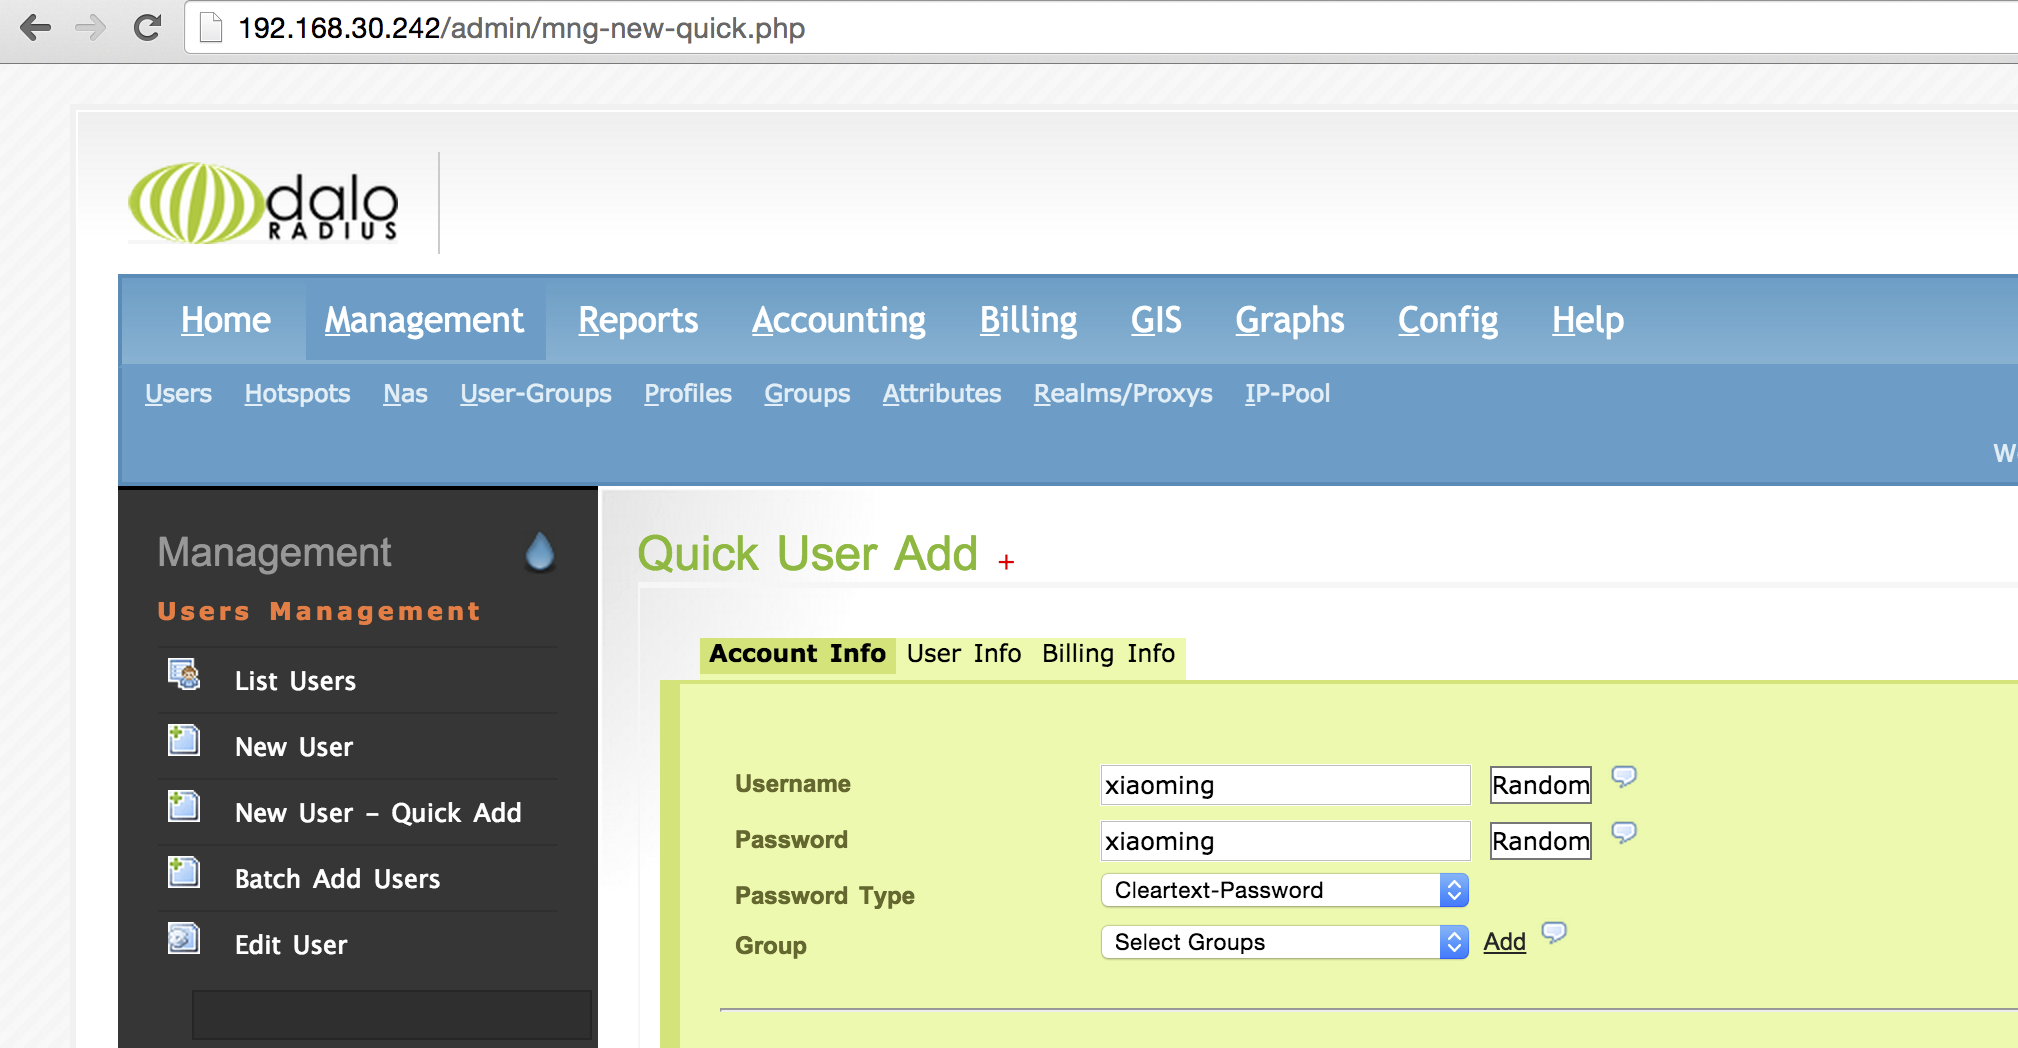
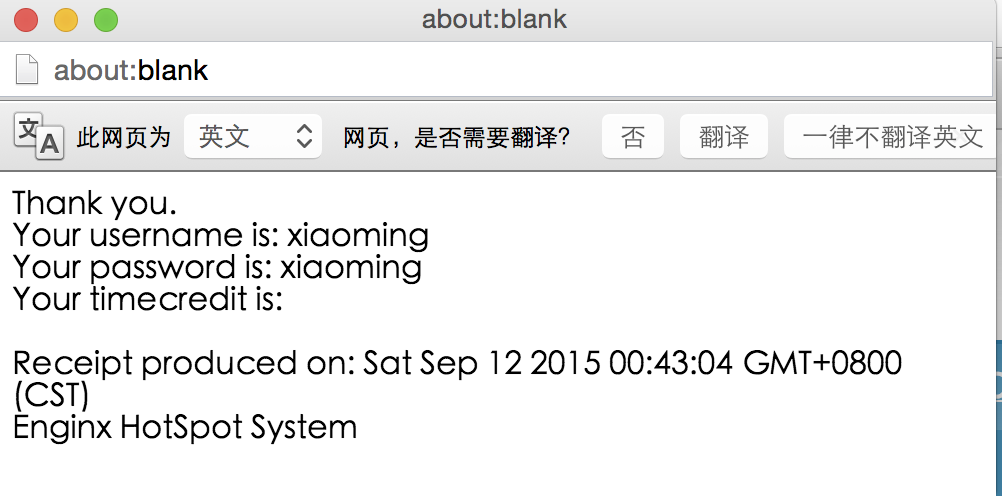
Now let's visit daloRADIUS and add a new user to the anagement. Note that the password type is Cleartext-Password. A pop-up window prompt will be created, as shown below.


Now for testing, open the test mode radiusd-X (open the test mode, stop the radiusd service first). Open another window for login testing
[root@vpn ~]# radtest xiaoming xiaoming localhost 0 yxzcVPN
Sending Access-Request of id 227 to 127.0.0.1 port 1812
    User-Name = "xiaoming"
    User-Password = "xiaoming"
    NAS-IP-Address = 192.168.30.242
    NAS-Port = 0
    Message-Authenticator = 0x00000000000000000000000000000000rad_recv: Access-Accept packet from host 127.0.0.1 port 1812, id=227, length=20
The test was successful. After the test is completed, start radiusd service!
In the last step, if you start the test mode, report the following error
 /etc/raddb/sql.conf[22]:Instantiation failed for module "sql"
 /etc/raddb/sites-enabled/default[177]: Failed to load module "sql".
/etc/raddb/sites-enabled/default[69]: Errors parsing authorize section.
Solution: Enter the database
[root@vpn ~]# mysql

mysql> use radius;
mysql> ALTER TABLE `radius`.`nas` ADD COLUMN `server` VARCHAR(45) NOT NULL AFTER `secret` ;
If the test is successful, add a statement to detect traffic at authentication time, open / etc/raddb/sites-enabled/default, and insert in authorize section:
[root@vpn ~]# vi /etc/raddb/sites-enabled/default update request { Group-Name := "%{sql:SELECT groupname FROM radusergroup WHERE username='%{User-Name}' ORDER BY priority}"}if ("%{sql: SELECT SUM(acctinputoctets+acctoutputoctets) FROM radacct WHERE username='%{User-Name}' AND date_format(acctstarttime, '%Y-%m-%d') >= date_format(now(),'%Y-%m-01') AND date_format(acctstoptime, '%Y-%m-%d') <= last_day(now());}" >= "%{sql: SELECT value FROM radgroupreply WHERE groupname='%{Group-Name}' AND attribute='Max-Monthly-Traffic';}") { reject }Finally, restart the service:
[root@vpn ~]# service radiusd restart
[root@vpn ~]# service pptpd restart
[root@vpn ~]# chkconfig pptpd on
[root@vpn ~]# chkconfig radiusd on
At the end of this experiment record, if there are any mistakes, please point out in time, I will improve Kazakhstan.
