1. E-mail system
Mail User Agent (MUA): A server that receives and receives mail for users;
Mail Delivery Agent (MDA): Mail can be saved for users when they are offline;
Mail Transfer Agent (MTA): Forward and process messages between different e-mail service providers.
In deploying an e-mail system, the outgoing service is based on the postfix service program in version RHEL7 and the receiving service is based on the dovecot service program.
After installing the postfix service program, the main configuration file needs to be modified.Restart the modified service and add a startup entry.
[root@linuxprobe ~] # vim /etc/postfix/main.cf #Main profile, the number below is the number of lines of configuration information per line
76 myhostname = mail.linuxprobe.com #Host name of post office system
83 mydomain = linuxprobe.com #Domain name of post office system
99 myorigin = $mydomain #The name of the domain name from which the message was sent locally, calling the variable mydomain
116 inet_interfaces = all #Network Card Interface for Listening
164 mydestination = $myhostname , $mydomain #Host name and domain name for acceptable mail
Modification of the main configuration file of the recipient service program dovecot
[root@linuxprobe ~] # vim /etc/dovecot/dovecot.conf
24 protocols = imap pop3 lmtp #Mail protocol supported by this service
25 disable_plaintext_auth = no #Do you want to use encryption because, experimentally, do not encrypt here?
48 login_trusted_networks = 192.168.10.0/24 #Set up loggable segments
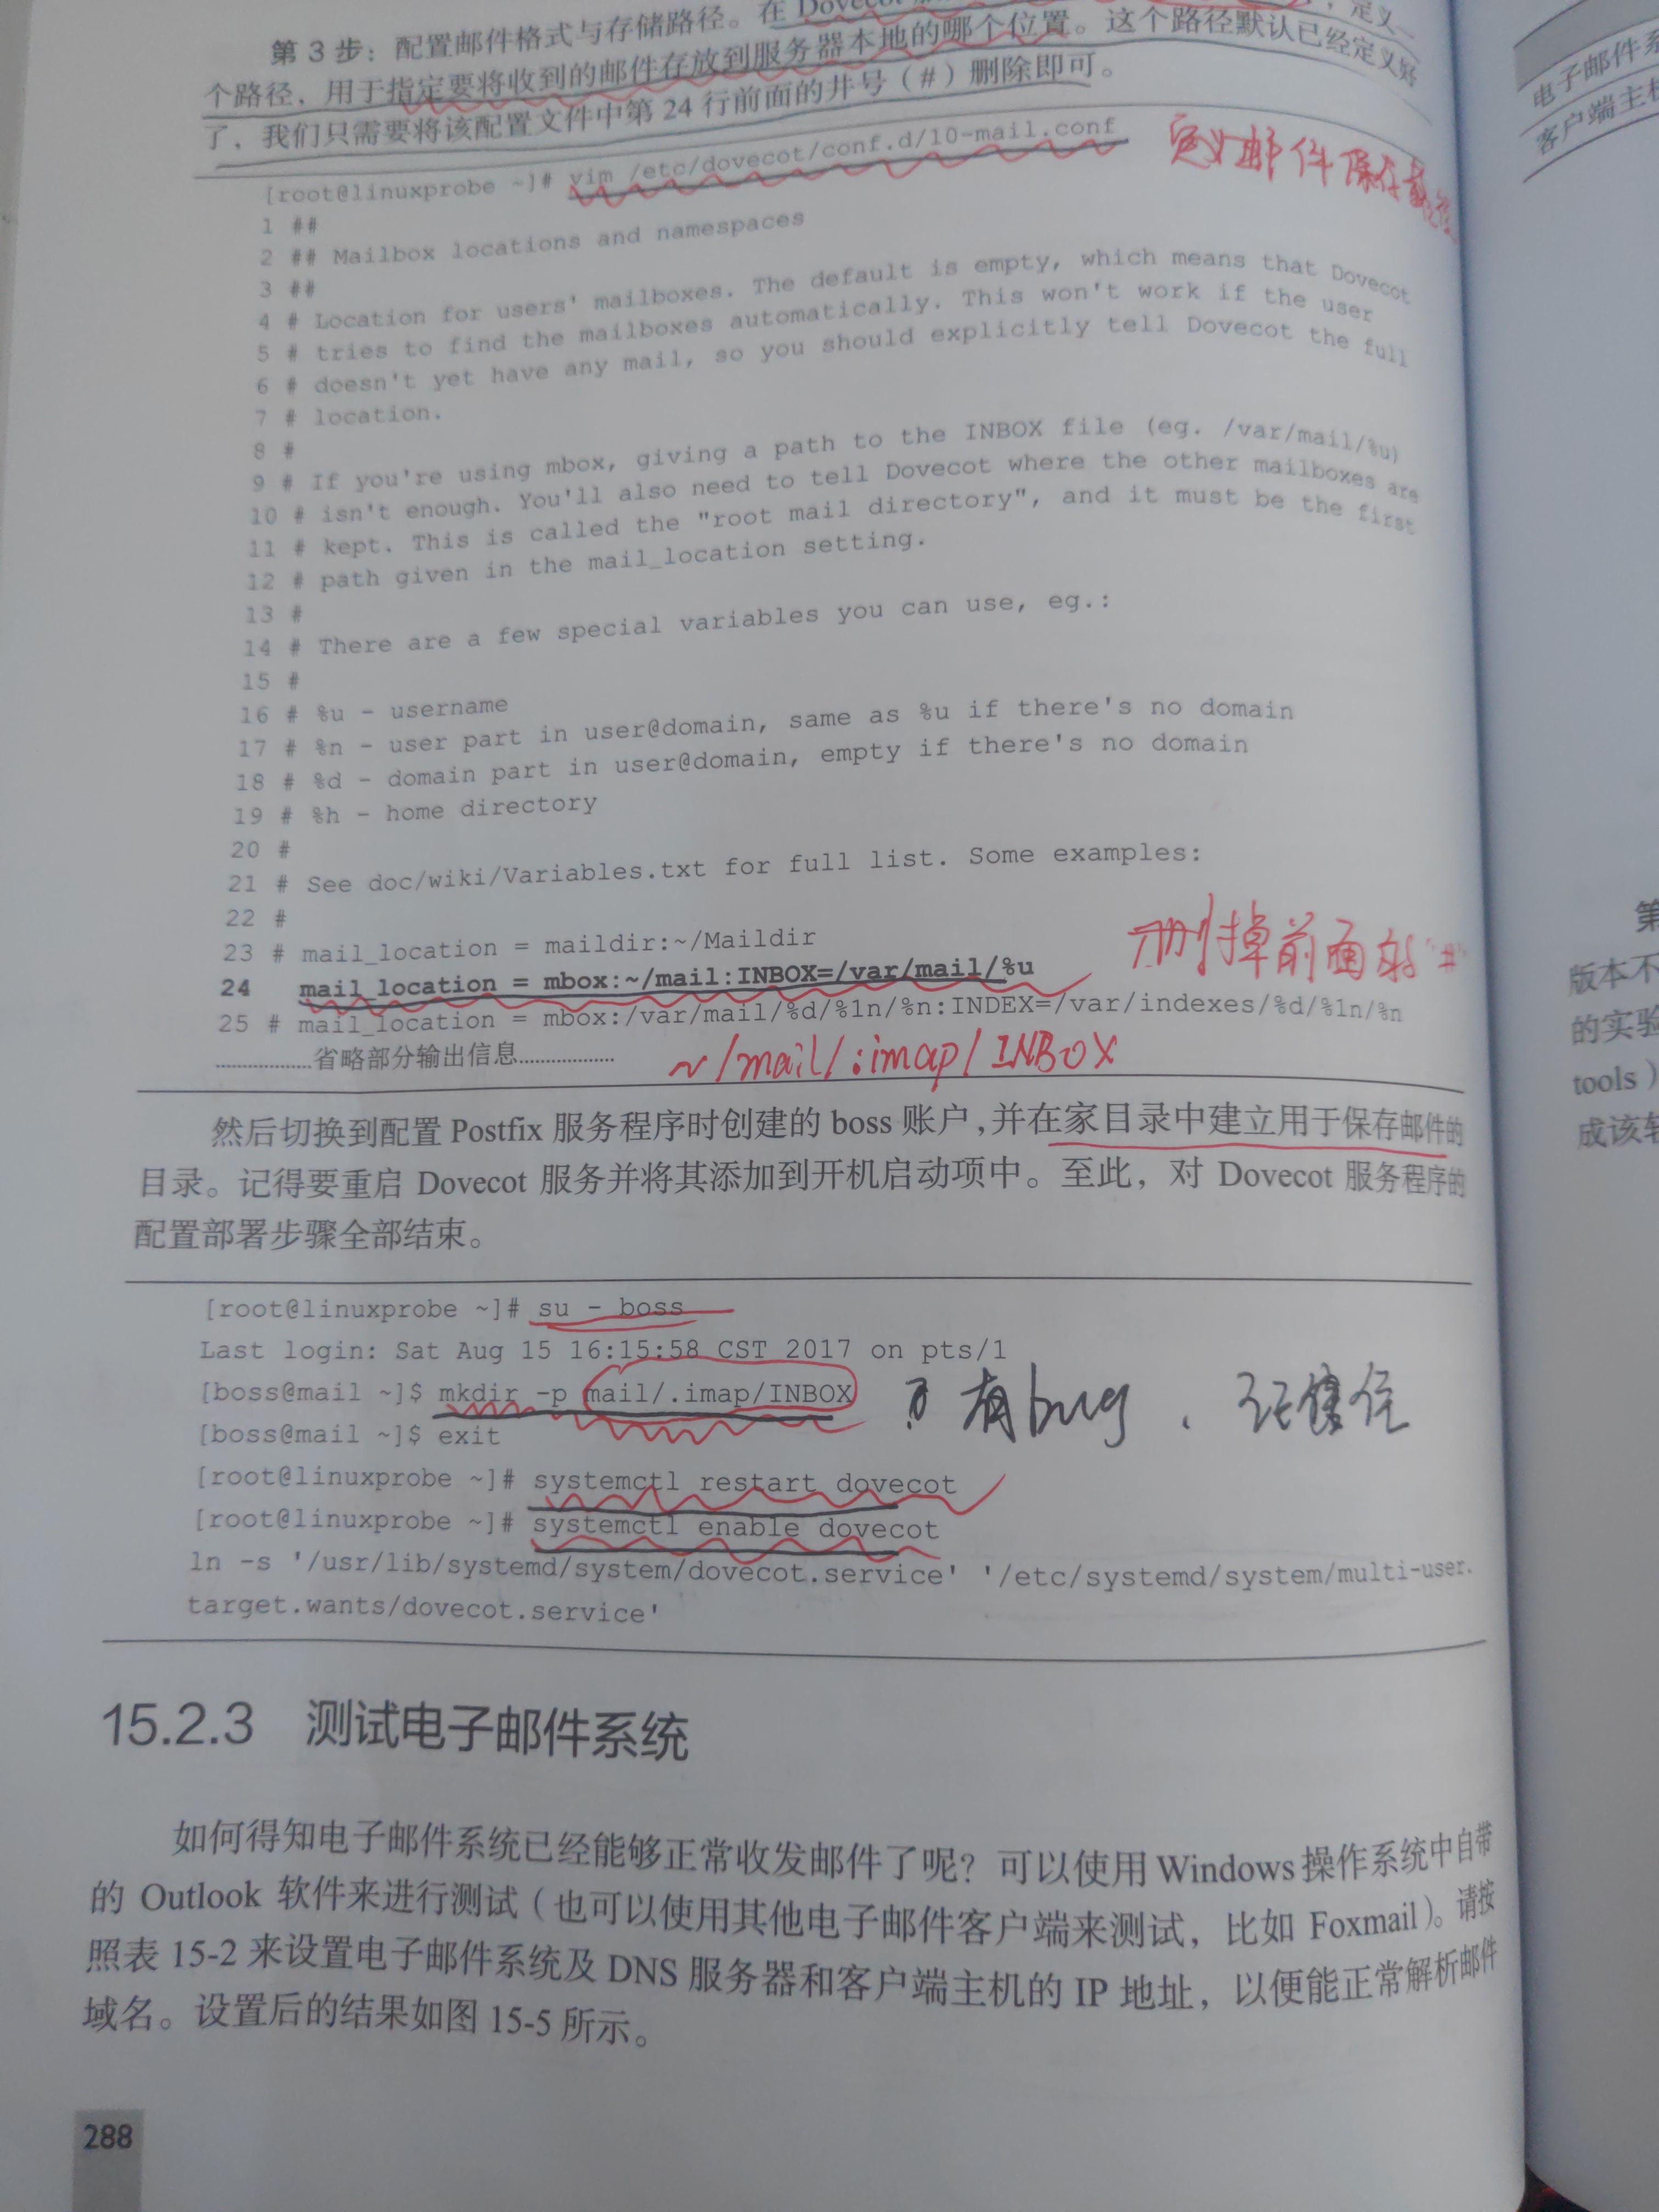
You also need to configure the dovecot service program to define the local location where mail is stored on the server
[root@linuxprobe ~] # vim /etc/dovecot/conf.d/10-mail.conf
mail_location = mbox:~/mail:INBOX=/var/mail/%u #The address is given in the configuration information, as long as the#Remove the save and exit, and the address is actually the INBOX directory in the.imap directory of the mail directory under your home directory.
Alias mailbox requires a definition/etc/aliases file, corresponding the name you want to define to the corresponding user mailbox, save and exit, and then execute the newaliases command to make the new user aliases take effect immediately.
2.squid proxy cache service
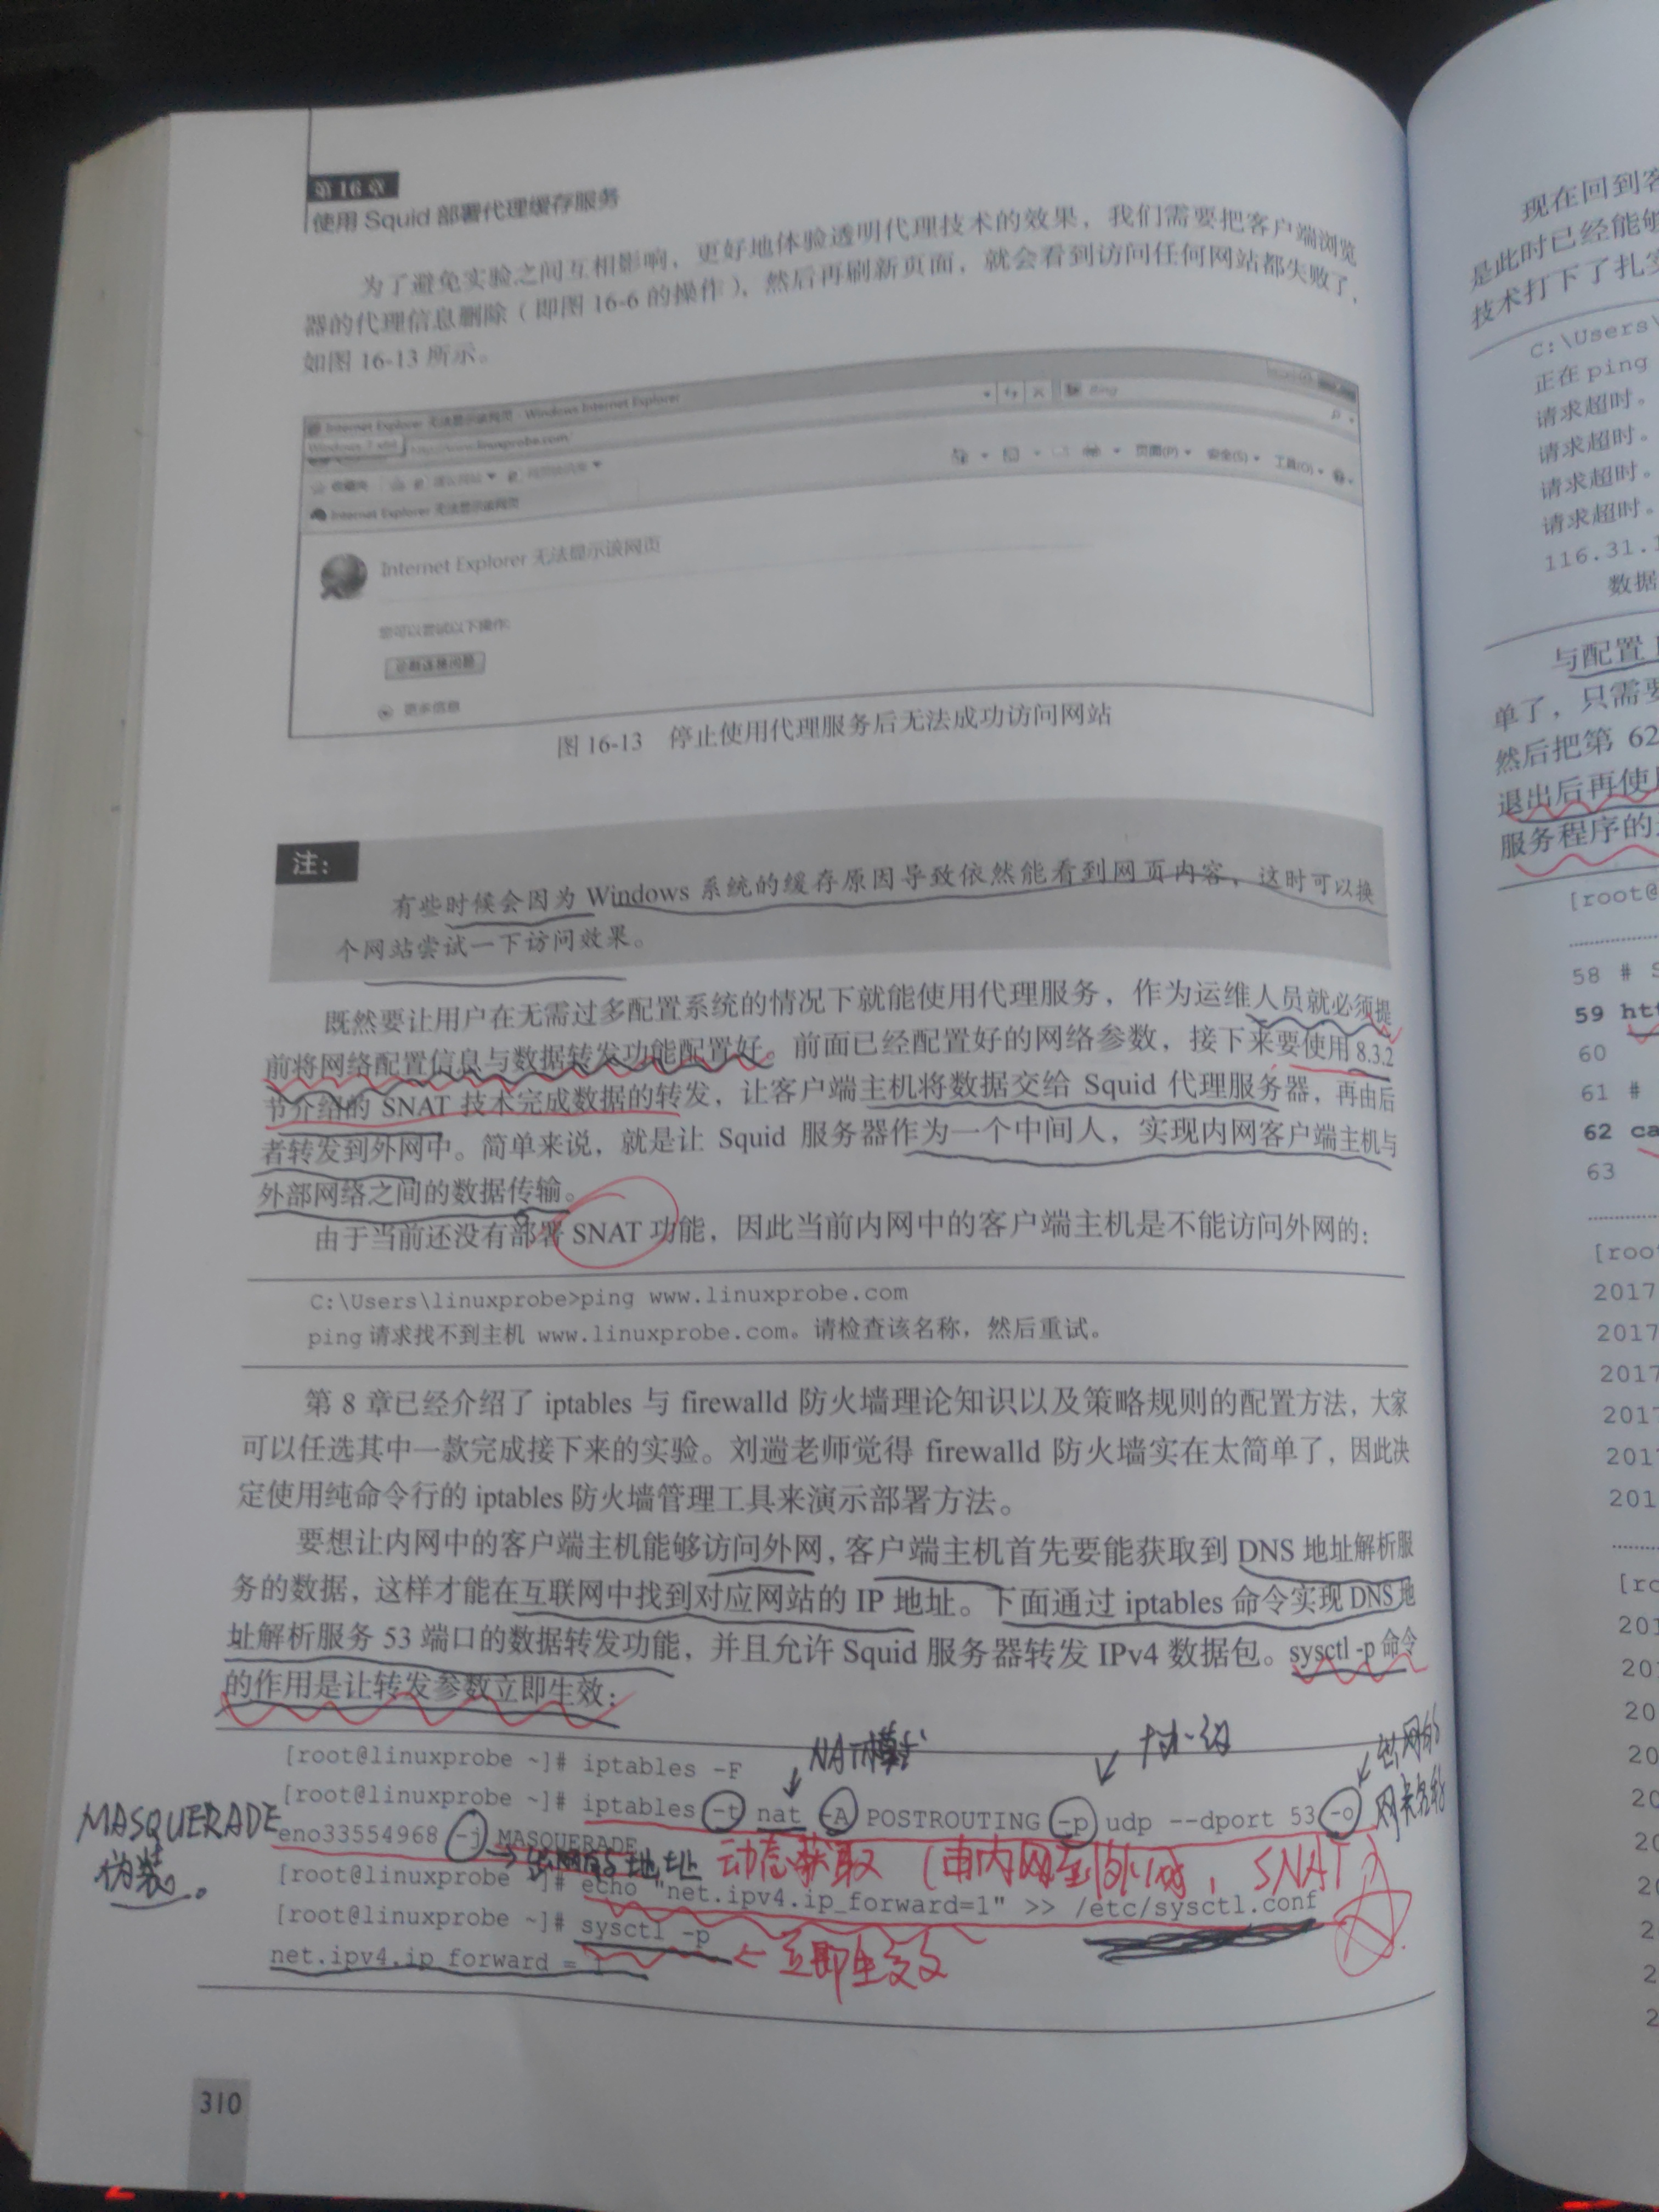
After the squid service is installed, transparent forward proxy is supported and proxy can be connected to the Internet with port number 3128.
Transparent forward agents for this service need to configure network configuration information and data forwarding first.A quick method is to check MASQUERADE with the firewall-config tool.
Configure this functionality with commands
[root@linuxprobe ~]# iptables -t nat -A POSTROUTING -p udp --dport 53 -o eno33554968 -j MASQUERADE #Implement data forwarding function of DNS Address Resolution Service port 53 through iptables command
[root@linuxprobe ~]# echo "net.ipv4.ip_forward=1" >> /etc/sysctl.conf #Allows Squid servers to forward IPv4 packets.
[root@linuxprobe ~]# sysctl -p #Make forwarding parameters take effect immediately
net.ipv4.ip_forward = 1
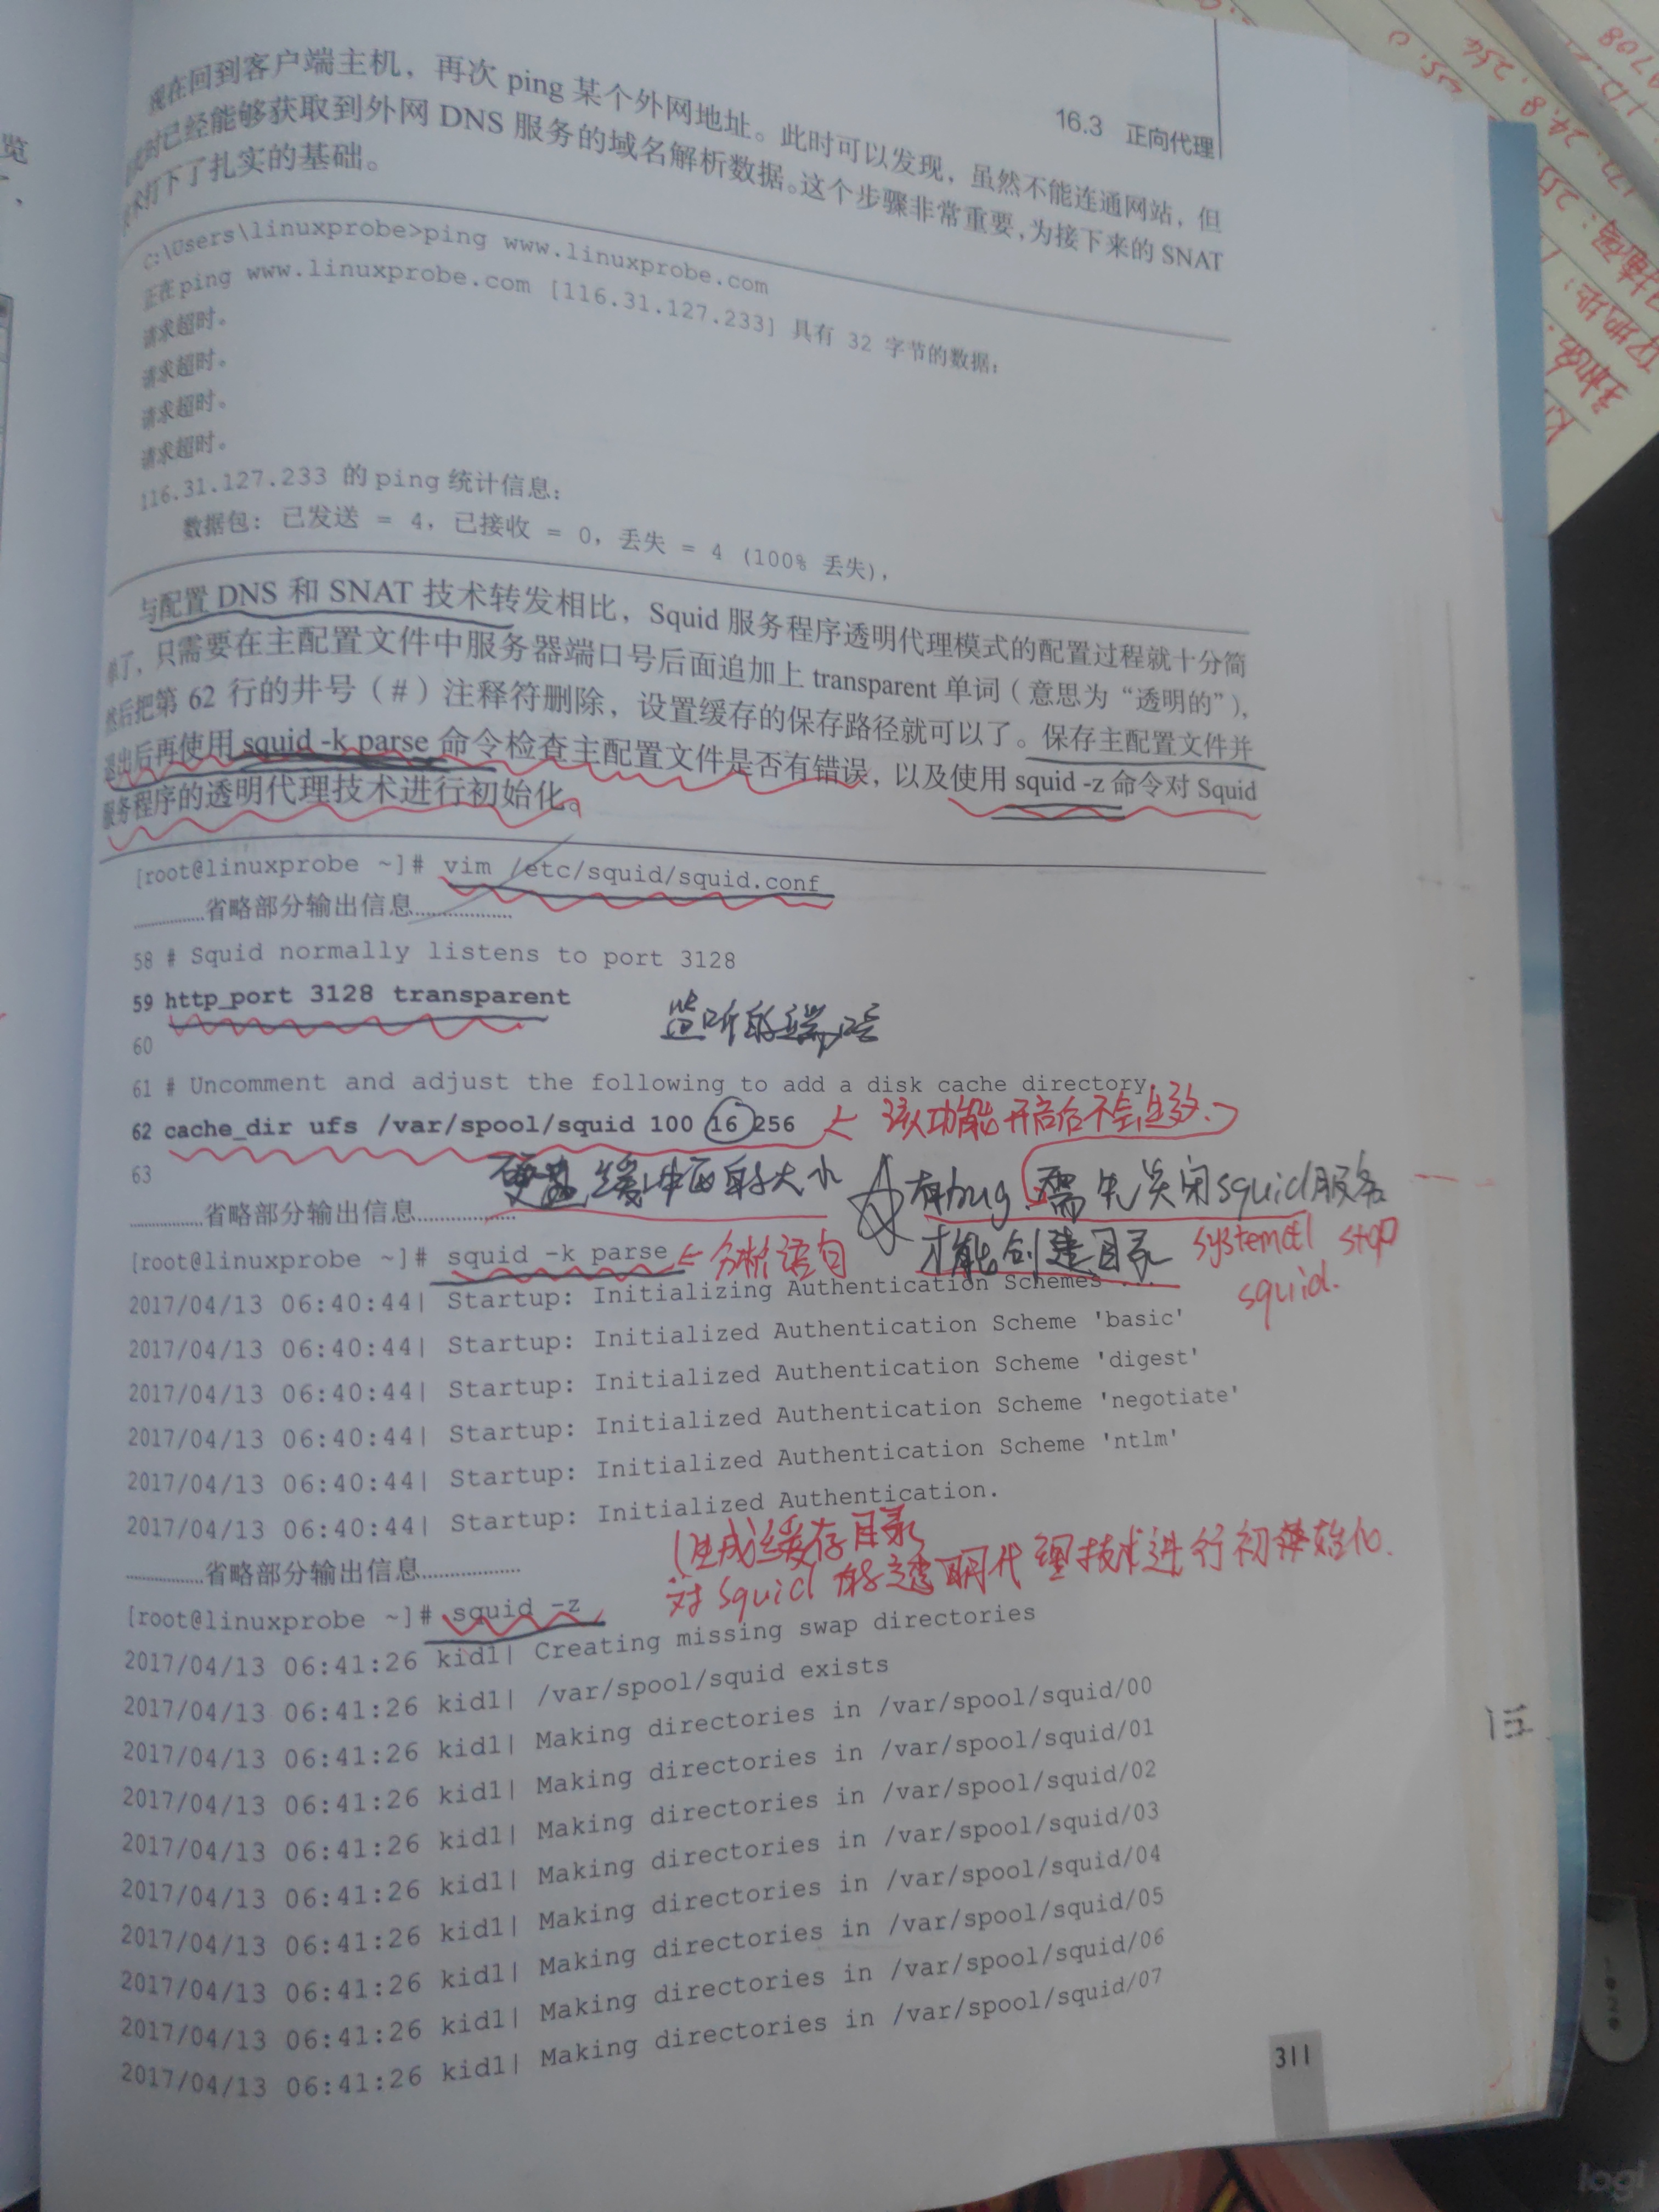
[root@linuxprobe ~]# vim /etc/squid/squid.conf
59 http_port 3128 transparent #You need to add transparent after the port number (for transparent)
62 cache_dir ufs /var/spool/squid 100 16 256 #Comment out the previous#Number, set the path to save the cache
[root@linuxprobe ~]# squid -k parse #Check statements for errors
[root@linuxprobe ~]# squid -z #Initializing transparent proxy technology requires that the squid service be shut down before execution
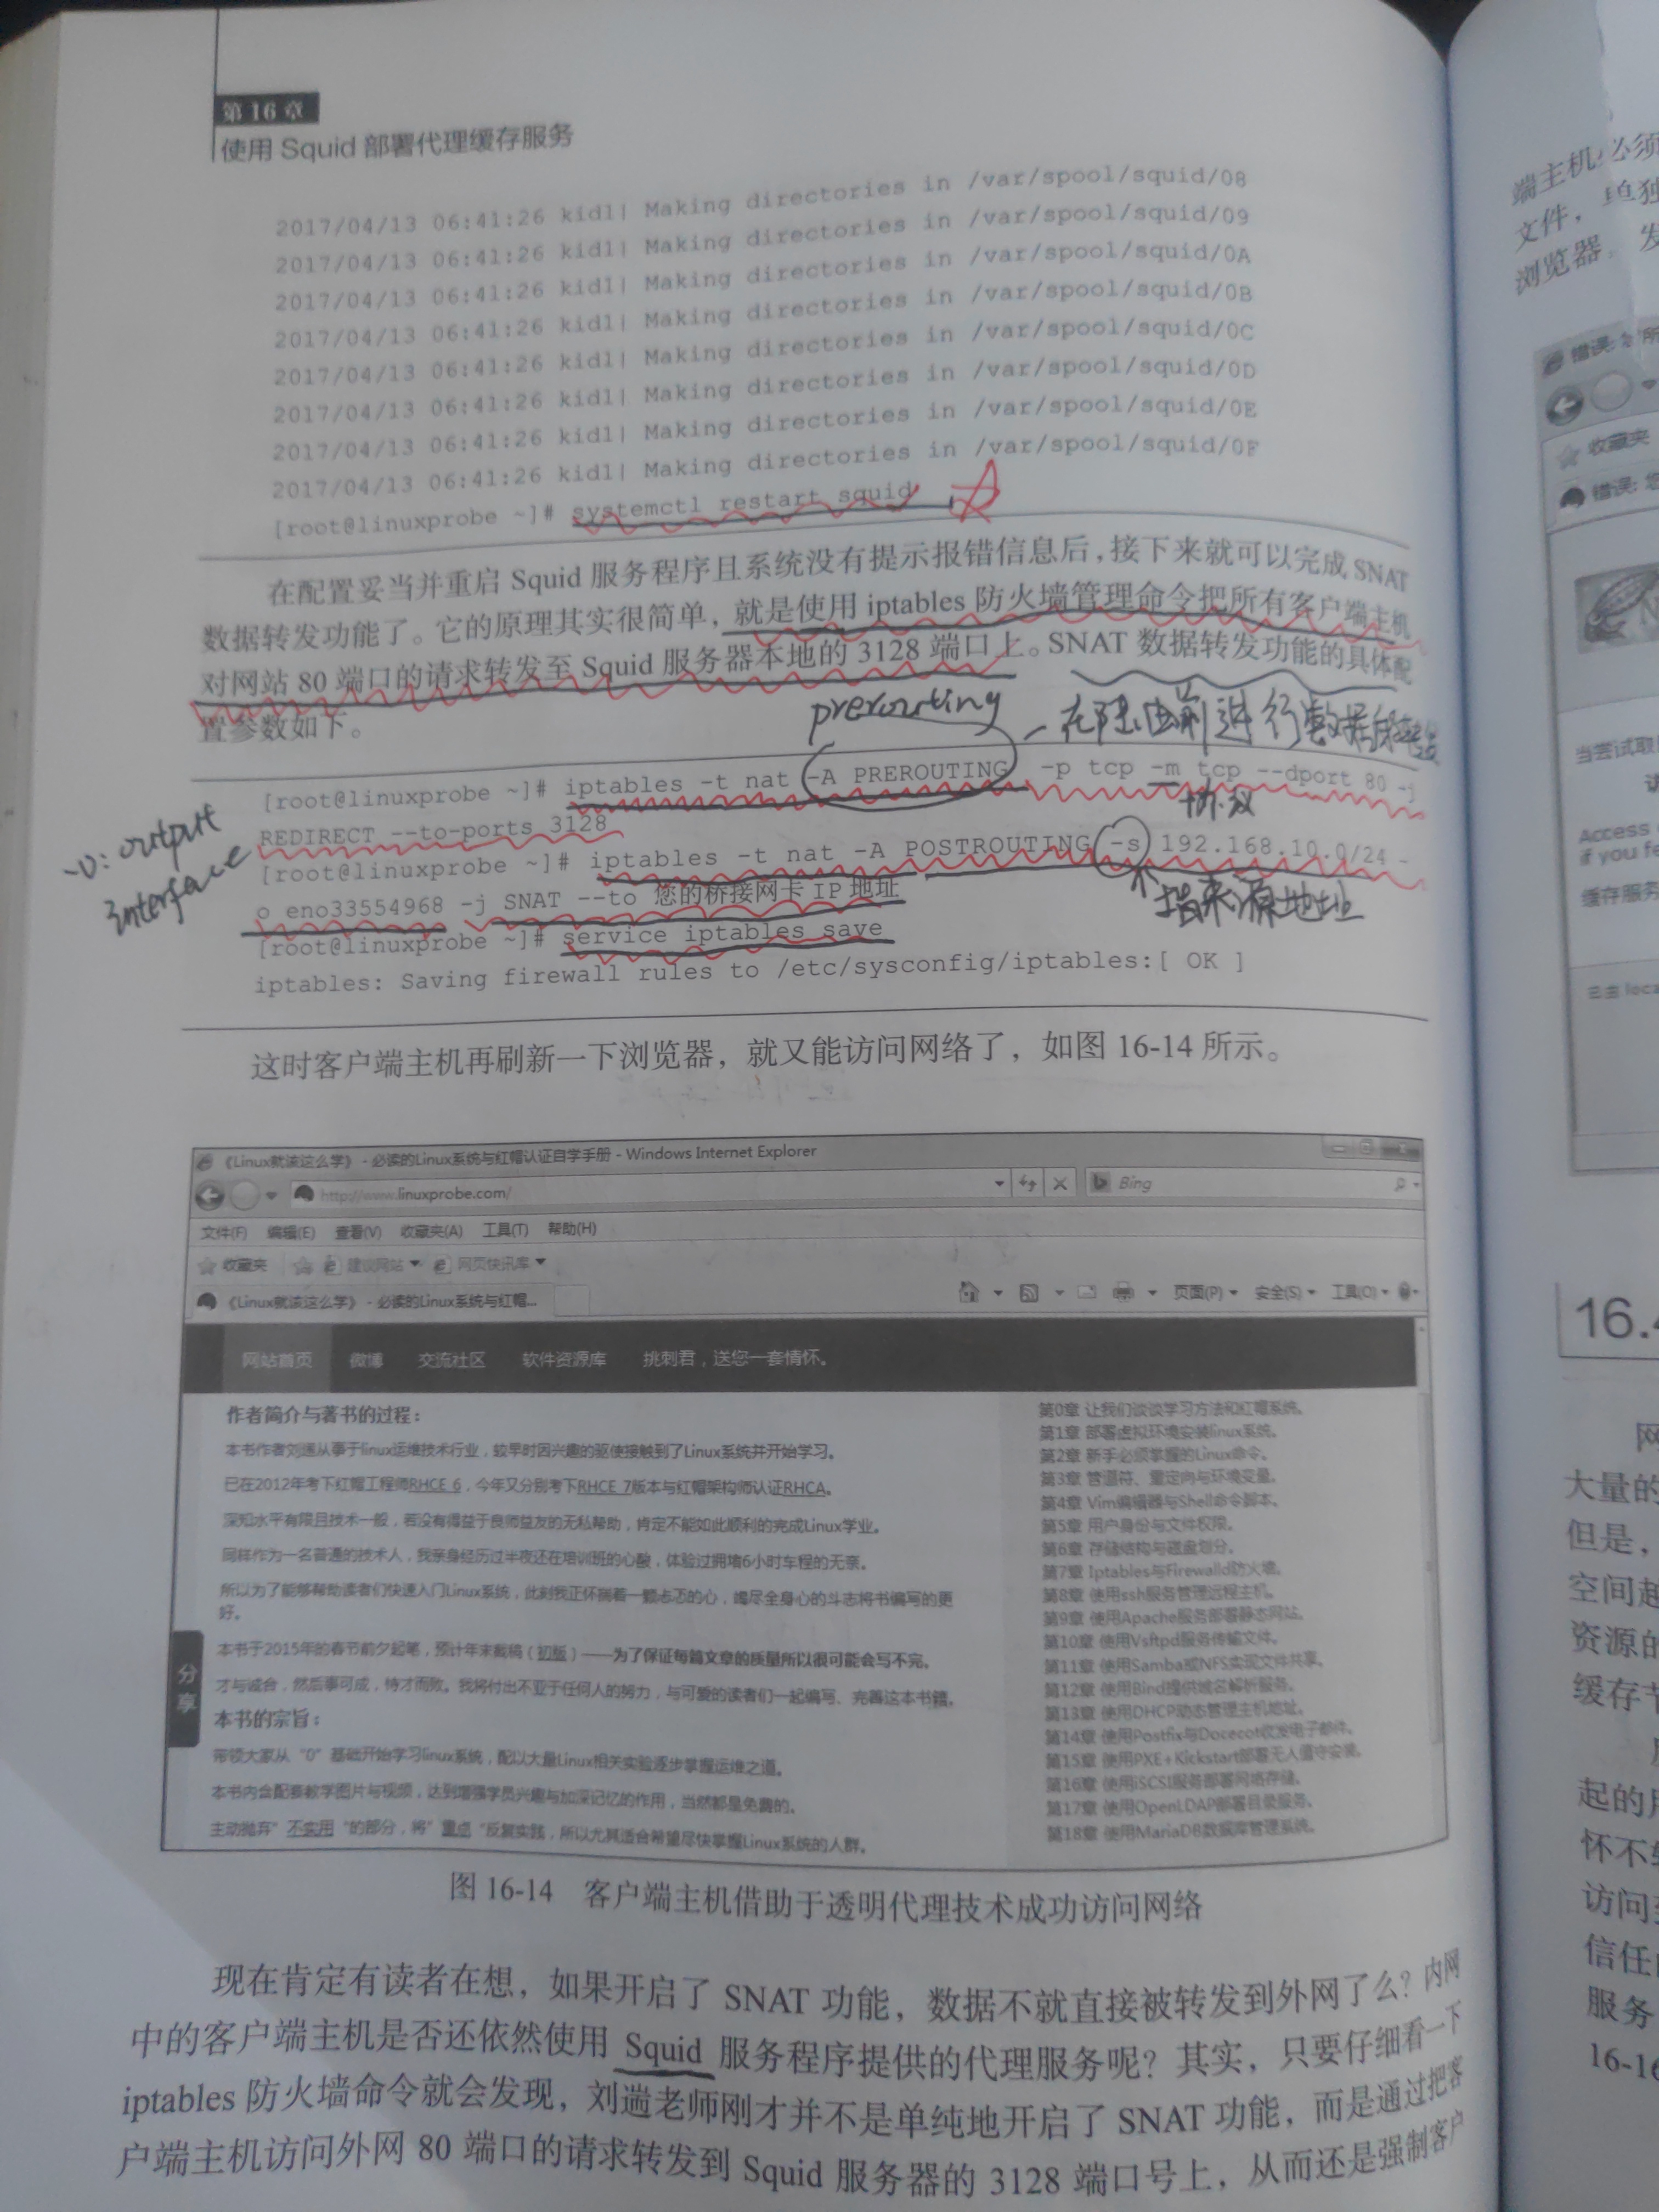
Next restart the squid service to configure SNAT data forwarding
[root@linuxprobe ~]# iptables -t nat -A PREROUTING -p tcp -m tcp --dport 80 -j REDIRECT --to-ports 3128 #Requests to port 80 of the site are forwarded to port 328 local to the Squid server
[root@linuxprobe ~]# iptables -t nat -A POSTROUTING -s 192.168.10.0/24 –o eno33554968 -j SNAT --to Your Bridged Network Card IP address #The specified segment forwards SNAT data through a specific network card.
[root@linuxprobe ~]# service iptables save #Save iptables
iptables: Saving firewall rules to /etc/sysconfig/iptables:[ OK ]