1. Configure Samba service on the server
- The first step is to install samba service through yum warehouse.
- The second step is to configure shared resources.
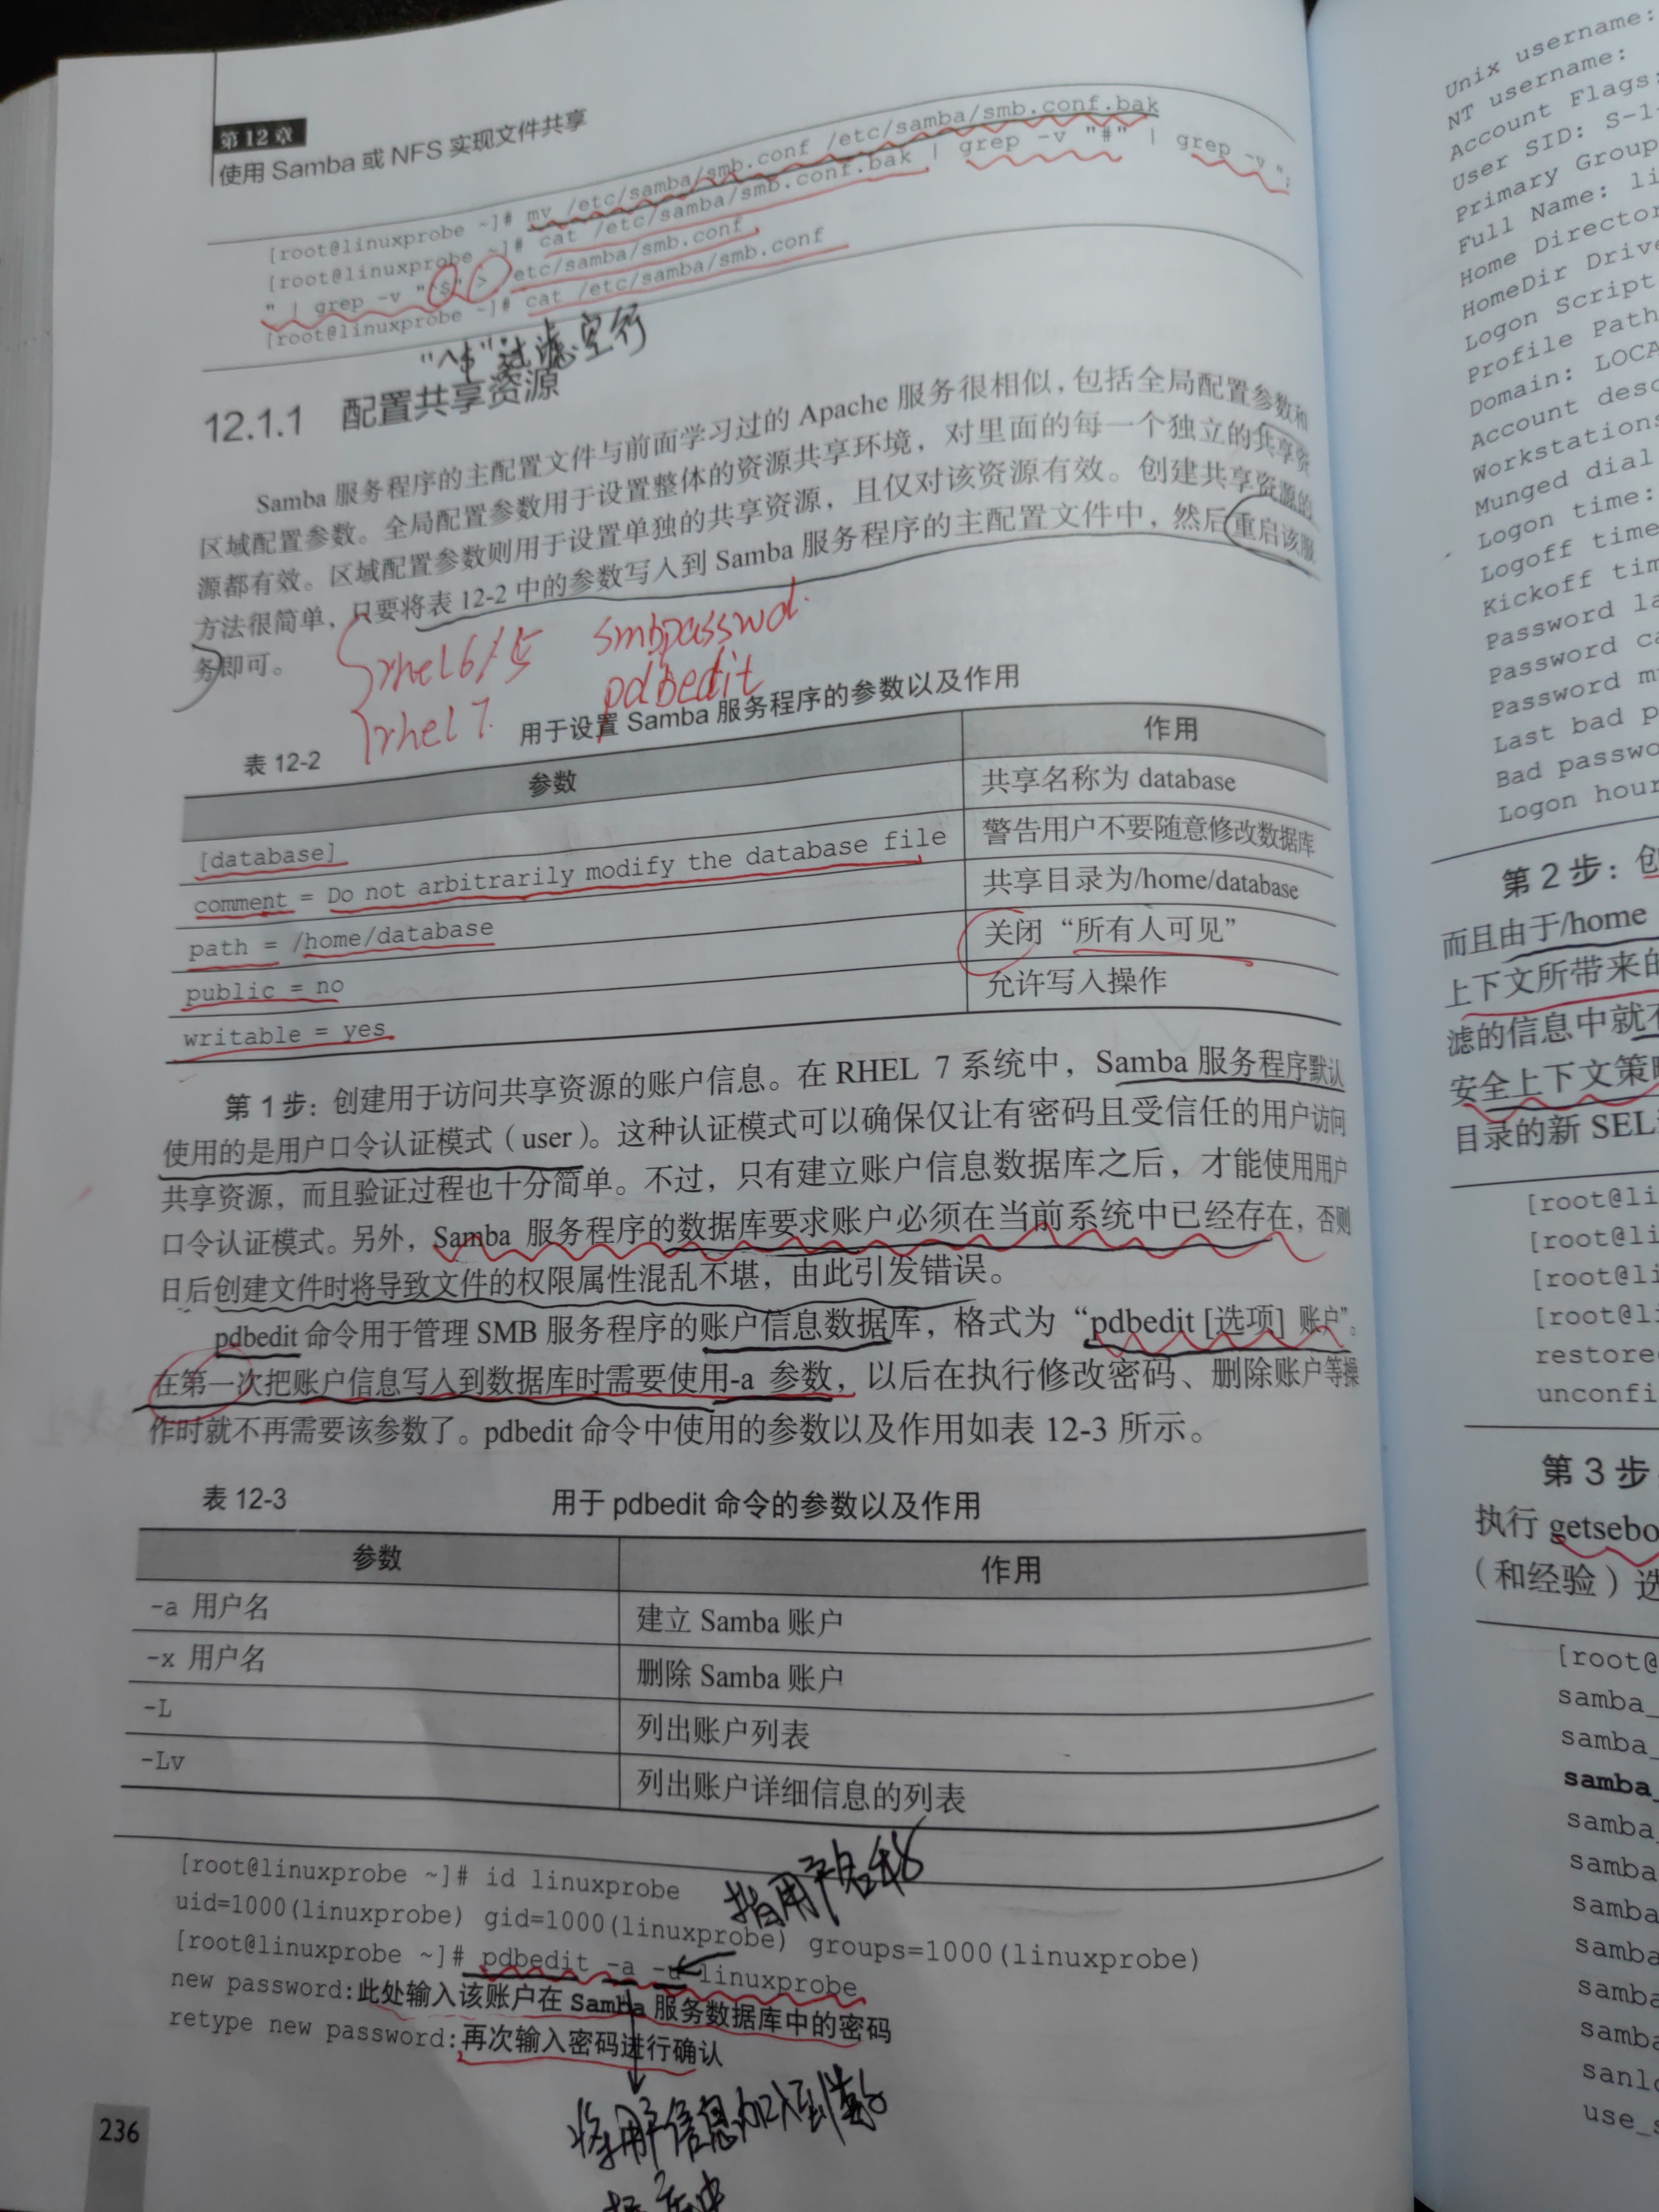
In the process of configuring shared resources, samba service uses password authentication mode by default. The password authentication mode is based on the account information database, and the account must already exist in the system. pdbedit command (RHEL7 system) the user manages the account database of the service. In red hat RHEL5/6 system, it is managed by smbpasswd command. The - a parameter indicates that the account information is written into the database for the first time.
[root@linuxprobe ~]# pdbedit -a -u linuxprobe #-The u parameter specifies the existing account of the system to be added to the database
new password:Enter this account here at Samba Password in service database #This password is separate from the account password with the same name in the system. Do not confuse the two
retype new password:Enter the password again to confirm
...Omit the following...
After adding account information to the database, create a file directory to share resources.
[root@linuxprobe ~]# mkdir /home/database #Shared directory created
[root@linuxprobe ~]# chown -Rf linuxprobe:linuxprobe /home/database #Change the owner and group to this user to avoid insufficient permission to read files
[root@linuxprobe ~]# semanage fcontext -a -t samba_share_t /home/database #Access to the user's home directory will be restricted by selinux, and the security context will be set.
[root@linuxprobe ~]# restorecon -Rv /home/database #Set the security context for this directory to take effect immediately
restorecon reset /home/database context unconfined_u:object_r:home_root_t:s0->
unconfined_u:object_r:samba_share_t:s0
[root@linuxprobe ~]# setsebool -P samba_enable_home_dirs on #Set the limitation of selinux domain, and set Samba? Enable? Home? Dirs = on
Then configure the main configuration file of samba / etc/samba/smb.conf
[database] #Shared name
comment = Do not arbitrarily modify the database file #Prompt information
path = /home/database #share directory
public = no #Is everyone visible
writable = yes #Whether write operation is allowed
Restart and add boot entry to clear iptables firewall.
[root@linuxprobe ~]# systemctl restart smb
[root@linuxprobe ~]# systemctl enable smb
[root@linuxprobe ~]# iptables -F
2. Share services with Windows and linux systems
In Windows system, make sure that the IP address is in the same network segment. The win+r shortcut key calls the window, and input "\ \ 192.168.10.10" (the IP address is based on its own settings).
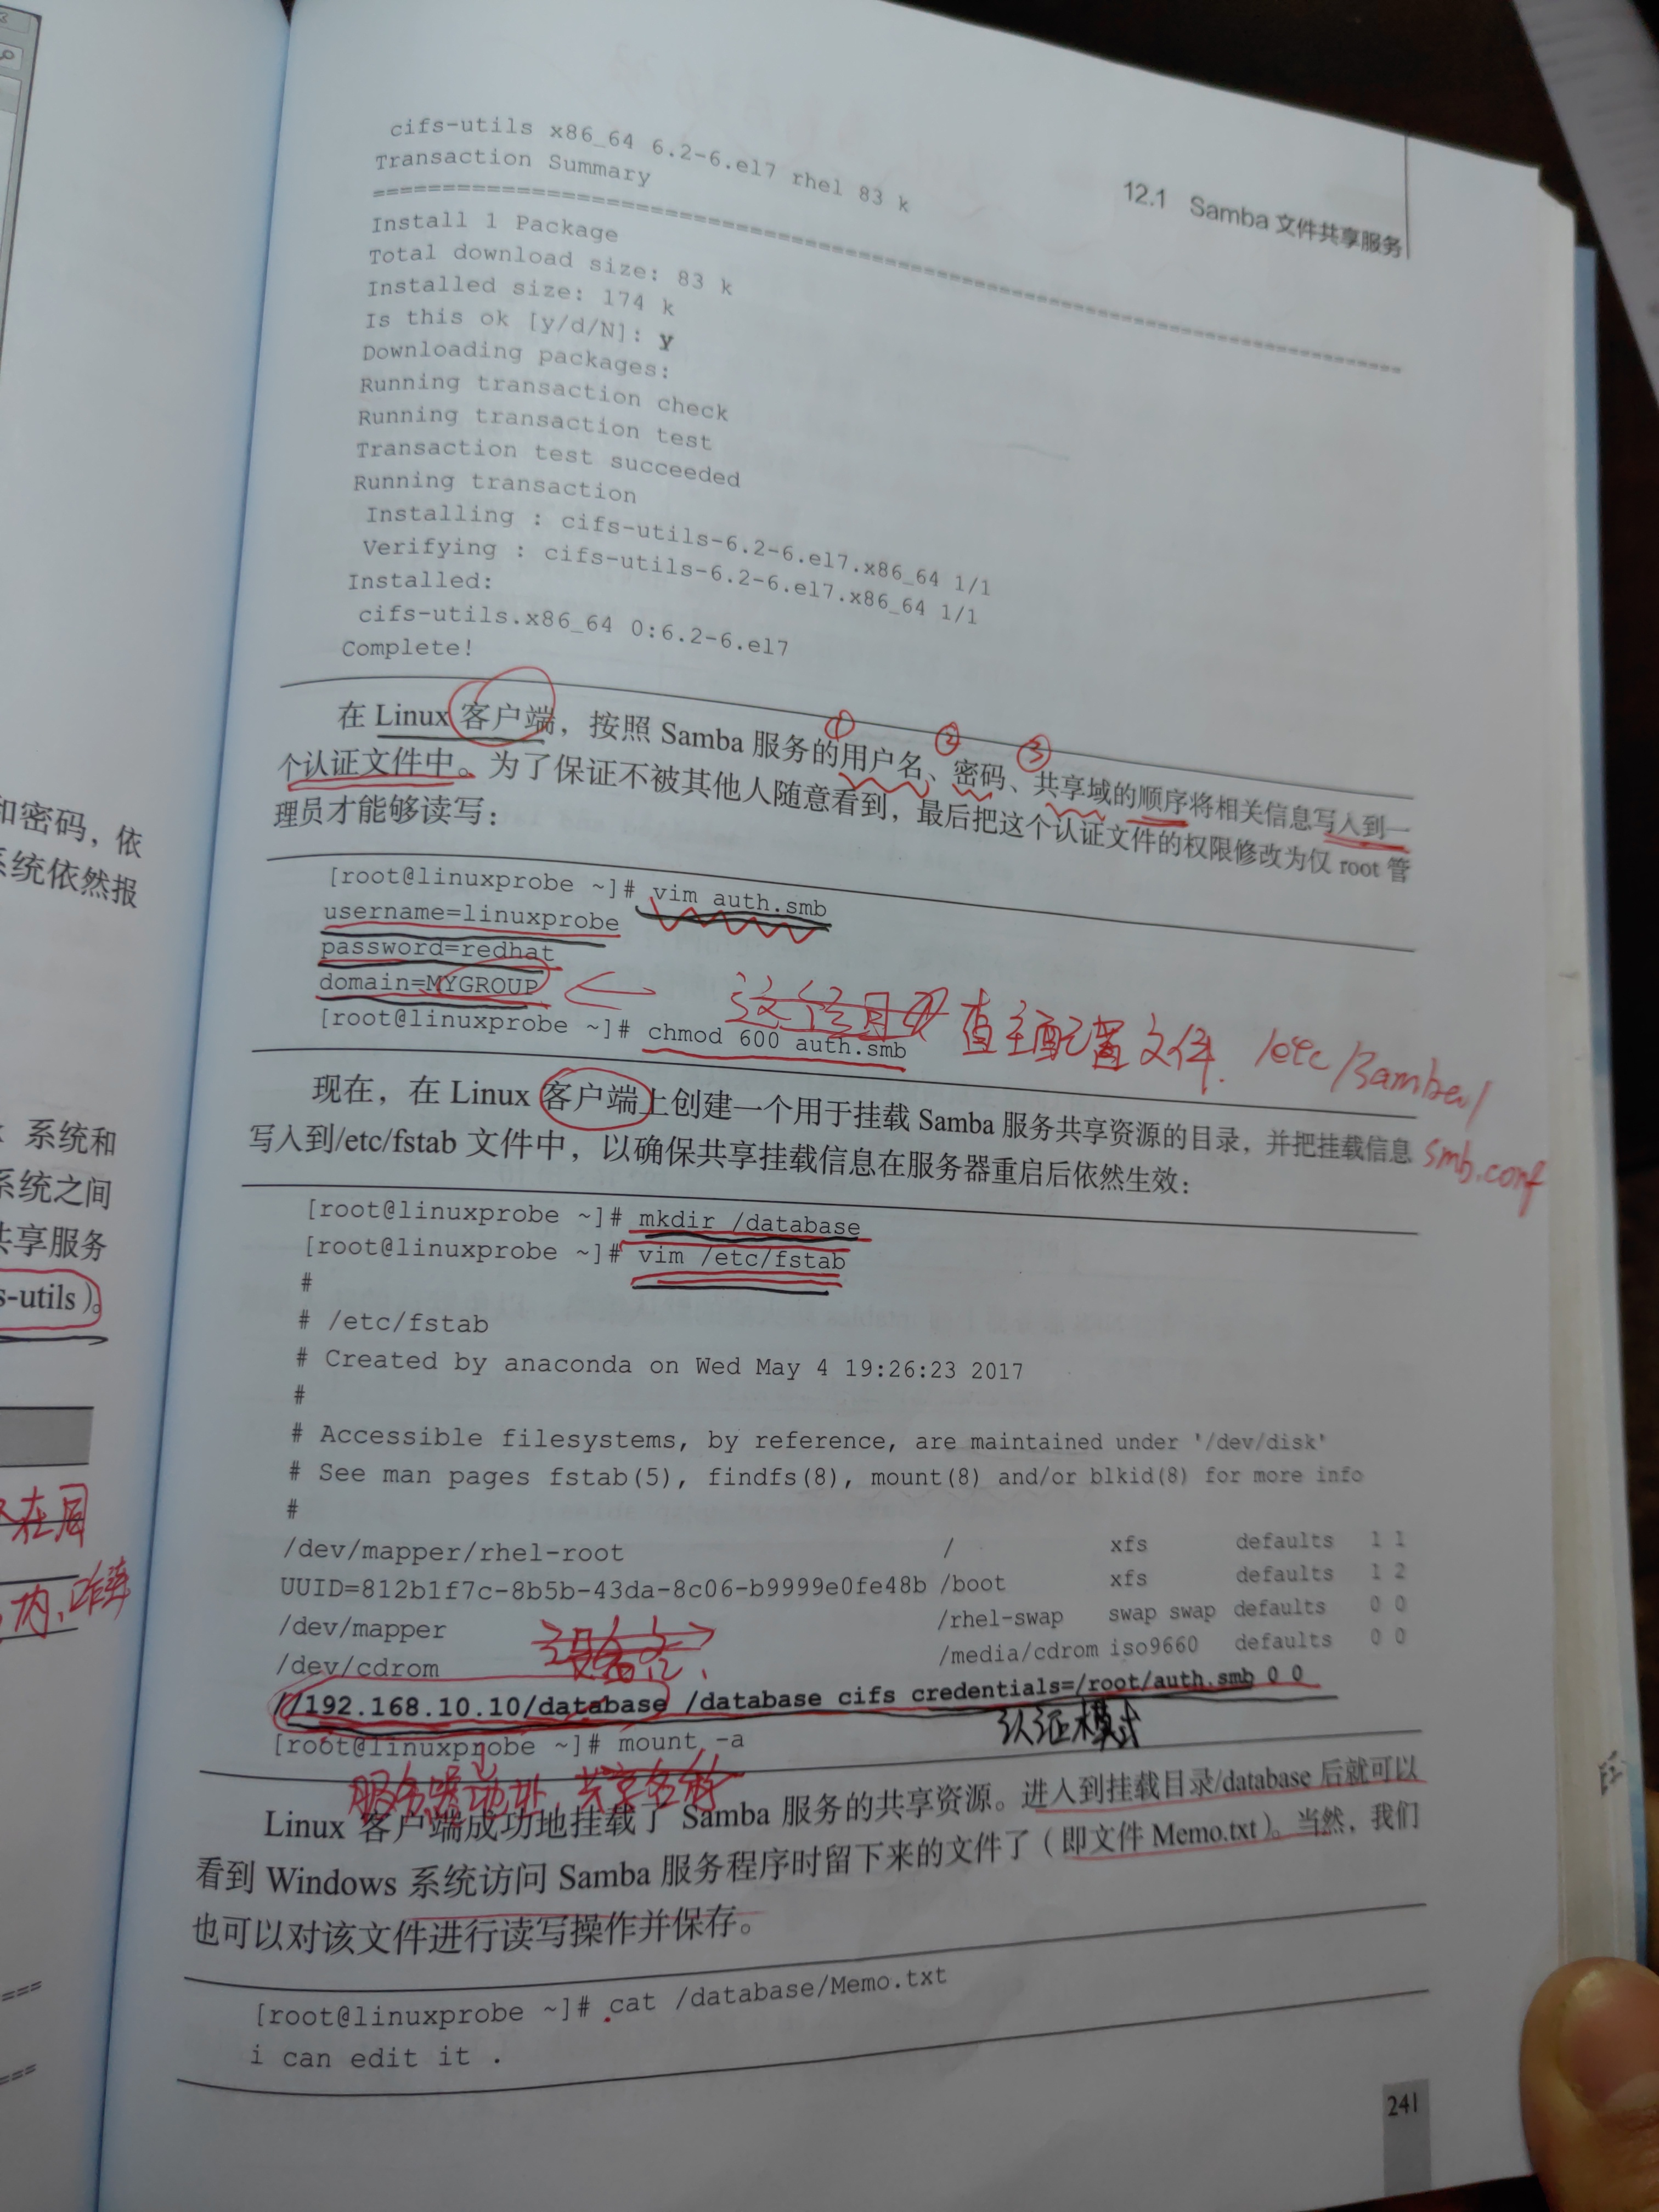
CIFS utils, a software package of file sharing service, needs to be installed in linux system. Create the authentication file in the order of user name, password and shared domain of Samba service. The shared domain is determined by the workgroup of the primary profile.
[root@linuxprobe ~]# vim auth.smb
username=linuxprobe
password=redhat
domain=MYGROUP
Then mount it and write it to the / etc/fstab directory
[root@linuxprobe ~]# vim /etc/fstab
//192.168.10.10/database/database CIFS credentials = / root / auth.smb 0 0 ා, respectively, is whether the server address and its shared directory mount directory authentication file is backed up or not self checking
3.autofs auto mount service
Configuration files are divided into main configuration files and sub configuration files
The main configuration file is written to the upper directory of the mount directory. For example, the mount directory is / media/cdrom. In the main configuration file, only write to / media, plus the directory location of the sub configuration file. Save and exit.
Fill in the sub configuration file in the format of "Mount directory mount file type and permission: device name".
[root@linuxprobe ~]# vim /etc/iso.misc
cdrom -fstype=iso9660,ro,nosuid,nodev :/dev/cdrom
The mount directory of the sub configuration file only writes cdrom, not the previous / media.
It can be used after restarting and adding the boot item.
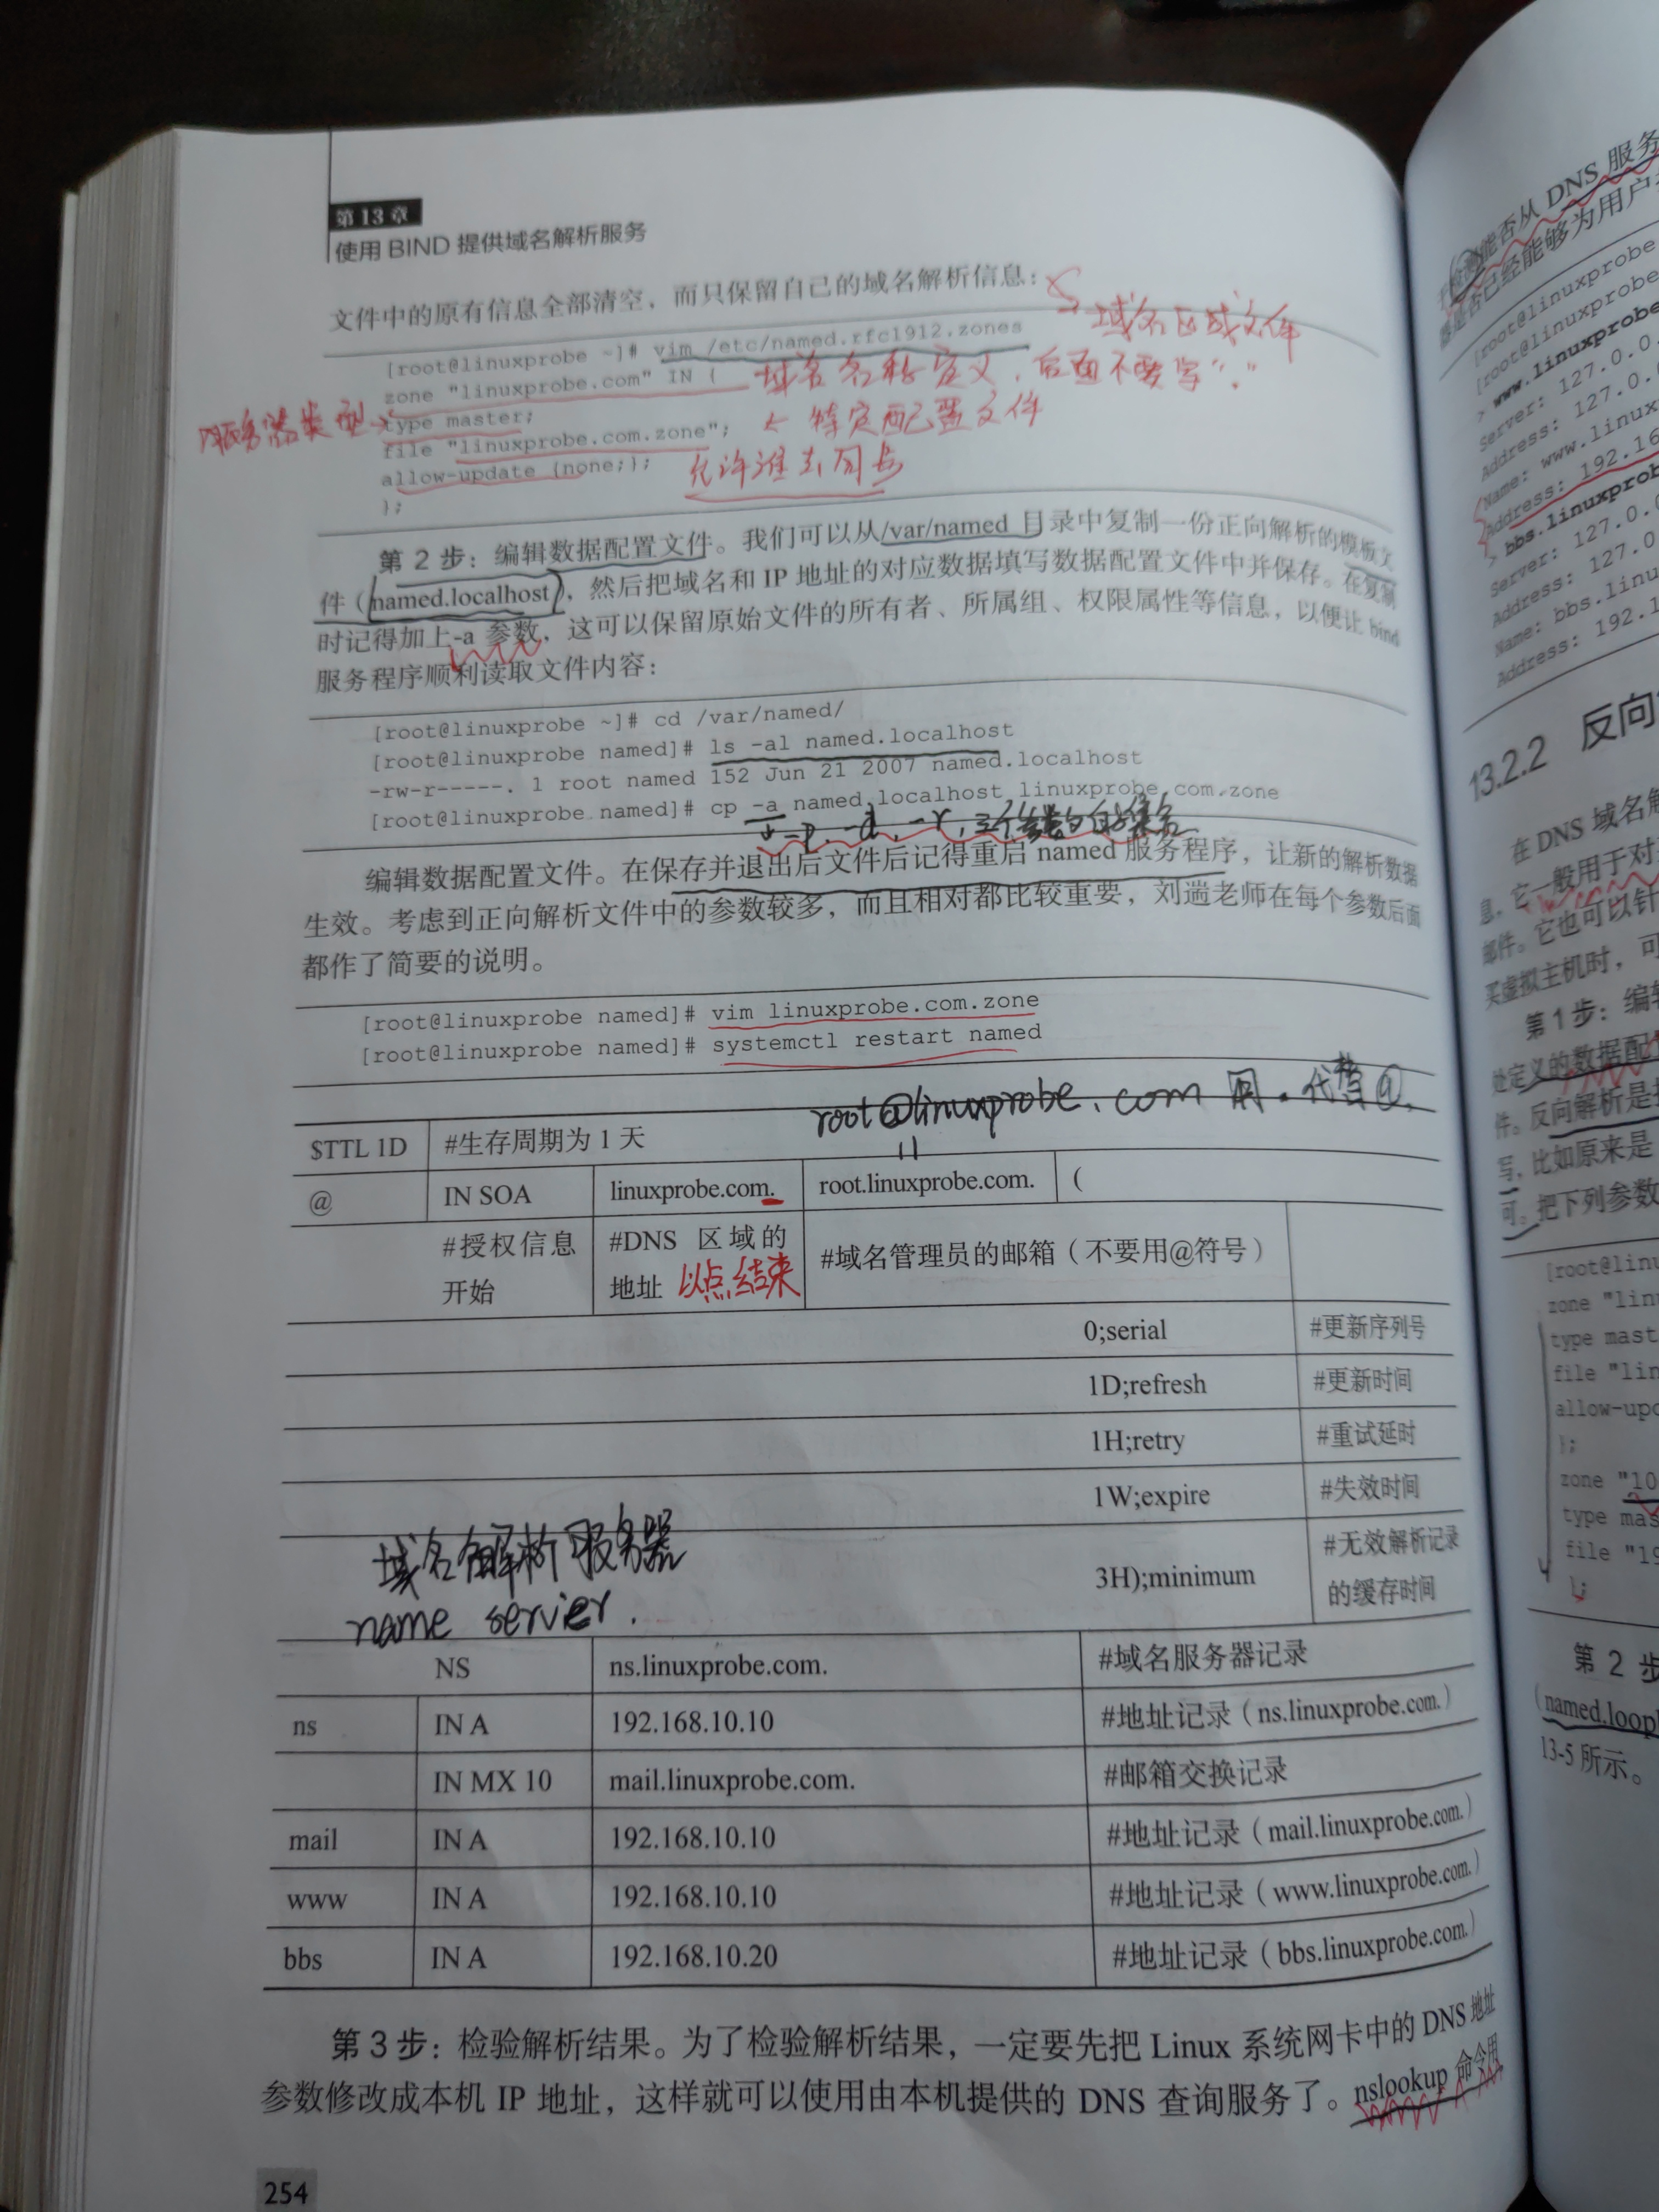
4.dns forward and reverse parsing
Set listen on port 53 {any;}; allow query {any;} in the main configuration file;
Next, set the regional configuration file, which defines the server type of the domain name and the specific configuration file.
[root@linuxprobe ~]# vim /etc/named.rfc1912.zones #Zone profile, present in system
zone "linuxprobe.com" IN {  #Forward analysis
type master; #Server type, master is the primary server
file "linuxprobe.com.zone"; #Data configuration file, which mainly provides correspondence between domain name and IP address
allow-update {none;}; #Allow synchronization or not
};
zone "10.168.192.in-addr.arpa" IN { #Reverse parsing and write back the IP address. For example, the forward write of 10.168.192 is 192.168.10
type master; #Server as main service
file "192.168.10.arpa"; #Data configuration file. The file name does not need to be backfilled
};
The configuration of the data file is to copy the template file of named.localhost through the / var/named directory. Note that the dot "." should be added after the domain name, such as linuxprobe.com., which is the root domain. The @ sign of the email account should be changed to "." otherwise, it will cause a conflict and error.
After setting, you can check whether the resolution result is correct through nslookup command.