1. Mixed development
Mixed development can be divided into two cases
- The fluent project invokes native functions
- Native items are embedded in fluent (relatively heavy, not recommended)
2. The fluent project calls the native function
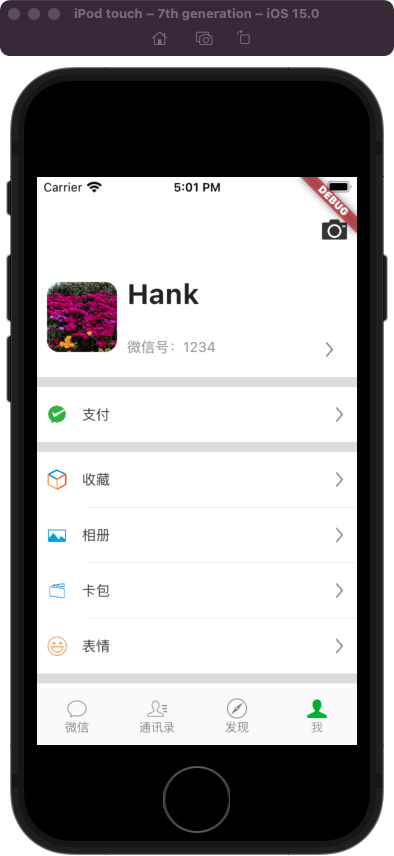
Go back to the previous wechat like my interface to make a function of clicking on the avatar to change the picture through the photo album.
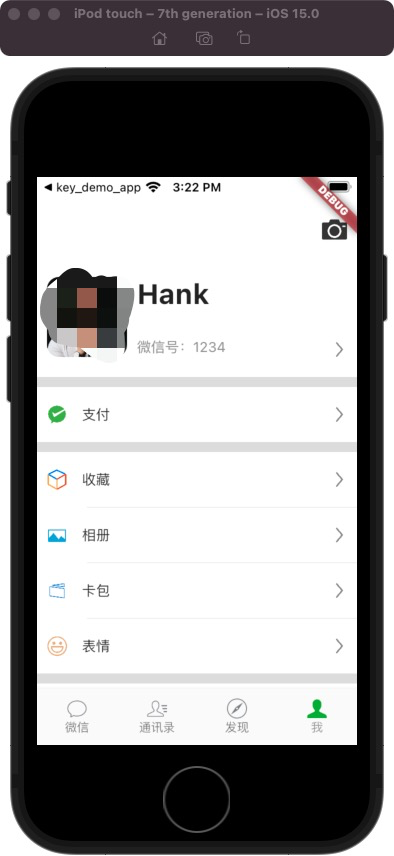
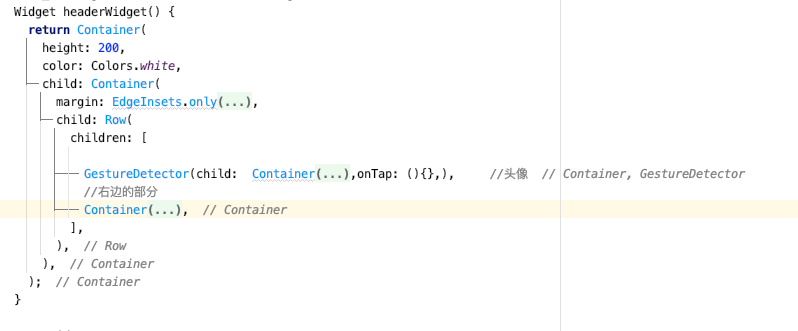
Add a GestureDetector in the previous real avatar and add the onTap method.
The method channel specially provided by Flutter is used for the internal and native communication of Flutter.
Here is a statement_ methodChannel
MethodChannel _methodChannel = MethodChannel('mine_page/method');
Then use it in onTap_ The invokemapmmethod method in methodChannel will notify the native at this time.
onTap: () {
                _methodChannel.invokeMapMethod('picture');
              },
Then come to iOS at this time and process methodChannel in appDelegate.
let vc = self.window.rootViewController
        let channel =   FlutterMethodChannel.init(name: "mine_page/method", binaryMessenger: vc as! FlutterBinaryMessenger)

        channel.setMethodCallHandler { call, result in
            if (!call.method.isEmpty && call.method == "picture" ) {
               let imageVC =  UIImagePickerController()
                vc?.present(imageVC, animated: true, completion: nil)

            }
        }
At this time, there is no problem in communicating with the iOS terminal. Next, we have to accept the data returned by iOS, which is the photo.
At this time, extract the channel as an attribute, and then AppDelegate follows UIImagePickerControllerDelegate and UINavigationControllerDelegate. Get the url of the selected picture in the didFinishPickingMediaWithInfo of UIImagePickerControllerDelegate, and use the channel to call invokeMethod to return it to the shuttle.
@objc class AppDelegate: FlutterAppDelegate, UINavigationControllerDelegate, UIImagePickerControllerDelegate {
    var channel: FlutterMethodChannel?
    override func application(
        _ application: UIApplication,
        didFinishLaunchingWithOptions launchOptions: [UIApplication.LaunchOptionsKey: Any]?
    ) -> Bool {
        GeneratedPluginRegistrant.register(with: self)
        let vc: FlutterViewController = self.window.rootViewController as! FlutterViewController
        channel = FlutterMethodChannel.init(name: "mine_page/method", binaryMessenger: vc as! FlutterBinaryMessenger)
        let imageVC =  UIImagePickerController()
        imageVC.delegate = self

        channel!.setMethodCallHandler { call, result in
            if (!call.method.isEmpty && call.method == "picture" ) {

                vc.present(imageVC, animated: true, completion: nil)

            }
        }


        return super.application(application, didFinishLaunchingWithOptions: launchOptions)
    }
    func imagePickerController(_ picker: UIImagePickerController, didFinishPickingMediaWithInfo info: [UIImagePickerController.InfoKey : Any]) {
        picker.dismiss(animated: true) {
            let urlString:String = (info[UIImagePickerController.InfoKey(rawValue: "UIImagePickerControllerImageURL")] as! NSURL).absoluteString ?? ""
            self.channel?.invokeMethod("imagePath", arguments: urlString)

        }
    }
}
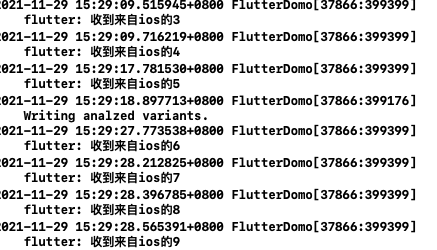
In fluent, add the call setMethodCallHandler in initState to add the processing of imagePath
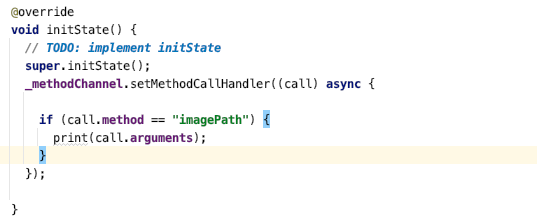
In this way, you can get the url of the picture after clicking.

After obtaining the url of the image, you can change the avatar according to the url.
Declare an optional File attribute.
File? _avatarFile;
Assign value in setMethodCallHandler
    _methodChannel.setMethodCallHandler((call) async {

      if (call.method == "imagePath") {
        String imagePath = call.arguments.toString().substring(7);
        setState(() {
          _avatarFile = File(imagePath);
        });

      }
    });
image judgment in the Avatar_ Whether the avatarFile is empty. If it is empty, the default picture will be displayed; otherwise, the selected picture will be displayed.
  GestureDetector(
              child: Container(
                width:70,
                height:70,
                decoration: BoxDecoration(
                  borderRadius: BorderRadius.circular(12.0),
                  image: DecorationImage(image: _avatarFile == null ? AssetImage('images/Hank.png') : FileImage(_avatarFile!) as ImageProvider,fit: BoxFit.cover)
                ),
              ),
              onTap: () {
                _methodChannel.invokeMapMethod('picture');
              },
            ),
3. Third party library imagePicker
Imagepick can realize the image selection of ios and Android at the same time.
Extract the click of the avatar into a method
onTap: _pickImage,
Imagepick can not only open the album, but also directly return the selection results, which greatly reduces the amount of code. Note that iOS needs to configure relevant permissions in info.plist, otherwise it will crash.
void _pickImage() async{
    XFile? file = await  ImagePicker().pickImage(source: ImageSource.gallery);
    setState(() {
      _avatarFile = File( file!.path);
    });
  }
4. Native items are embedded in the Flutter
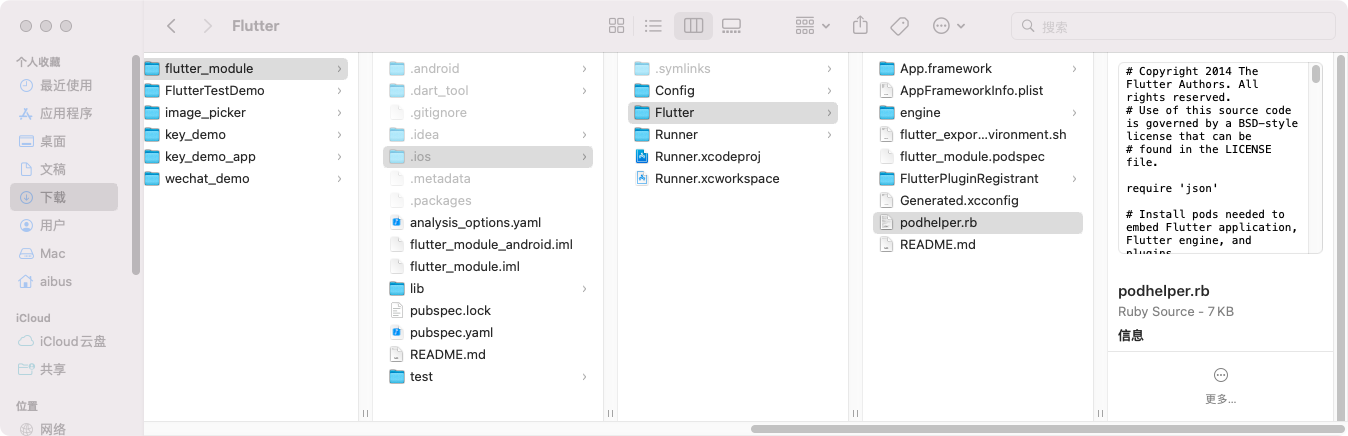
If the native project wants to embed the shutter page, the shutter app cannot be created, but the shutter module needs to be created. At this time, the created ios and android folders are hidden files, which are only used for debugging. The native code here will not be packaged, so the native code cannot be written in the fluent module.
4.1 adding a Flutter
First, create a native project, and the native project needs to use the fluent module, so you need to use cocoapods. Call pod init in the newly created xcode project folder. Then open the podfile and add the Flutter.
# Uncomment the next line to define a global platform for your project
# platform :ios, '9.0'
flutter_application_path = "../flutter_module"
load File.join(flutter_application_path,'.iOS','Flutter','podhelper.rb')

target 'FlutterTestDemo' do
  # Comment the next line if you don't want to use dynamic frameworks

install_all_flutter_pods(flutter_application_path)
  use_frameworks!

  # Pods for FlutterTestDemo

end
Flutter here_ application_ Path is the flutter created_ The location of podhelper.rb in the module.
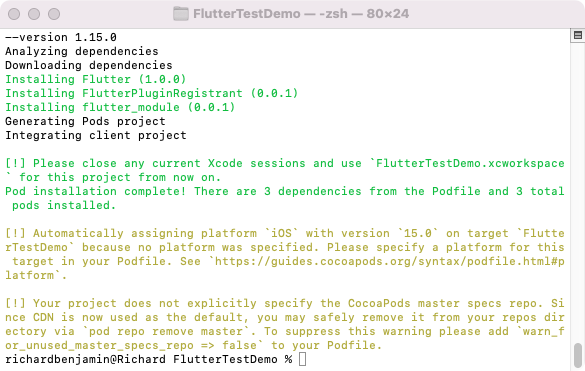
Then just pop install. At this time, you can open the iOS project to see if you can import fluent. If you can, the installation is successful.
Create a button, add a click event, and click it to call the fluent interface
- (IBAction)pushFlutter:(id)sender {
    FlutterViewController *vc = [[FlutterViewController alloc] init];
    [self presentViewController:vc animated:true completion:nil];
}
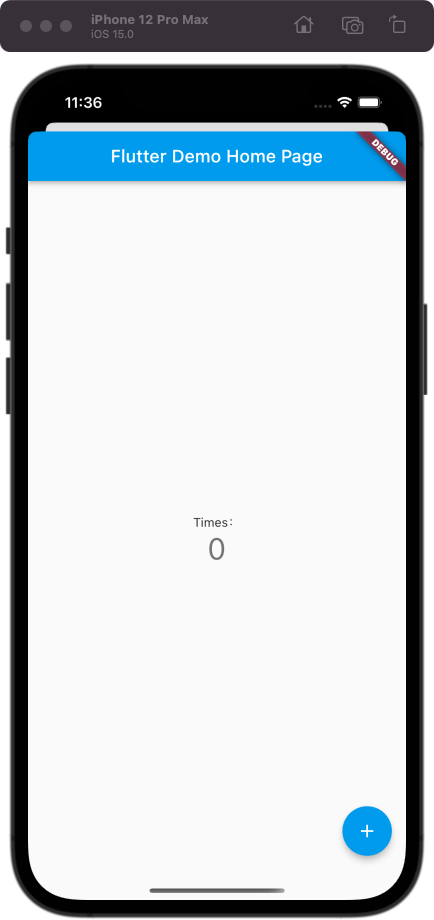
Click to call the fluent interface successfully

Modify You have pushed the button this many times: in the flyer to times:, and find that the text has not changed after re running. This is because the Framework of Flutter has not been loaded. Here, xcode needs to clean the cache and run it again. In this way, the Framework of Flutter will be reloaded, and then the interface modification will be displayed.
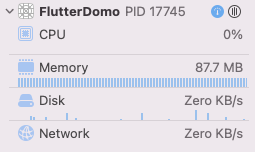
It is noted that the memory has soared to more than 80 M, because the rendering engine of Flutter is added to the program. Even if the Flutter page is turned off later, the rendering engine still exists and still needs to occupy memory.
Here, when you create a button and click it, you will also jump to a shutter page
- (IBAction)pushFlutterTwo:(id)sender {
      FlutterViewController *vc = [[FlutterViewController alloc] init];
    [self presentViewController:vc animated:true completion:nil];
}
So how do I tag and display different pages here? Here you can see the setInitialRoute method. You can see that the comments are also written and are not recommended. If you want to use it, set the route during initWithEngine. In other words, instead of creating a VC, we create an engine, and there should be only one engine.

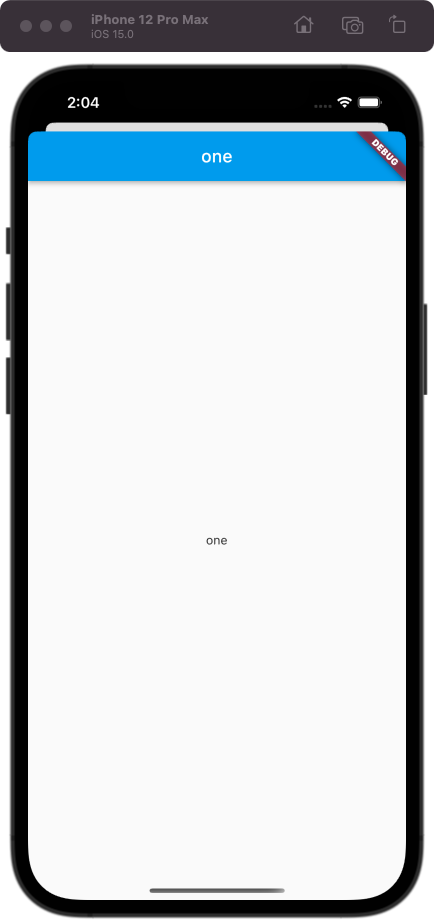
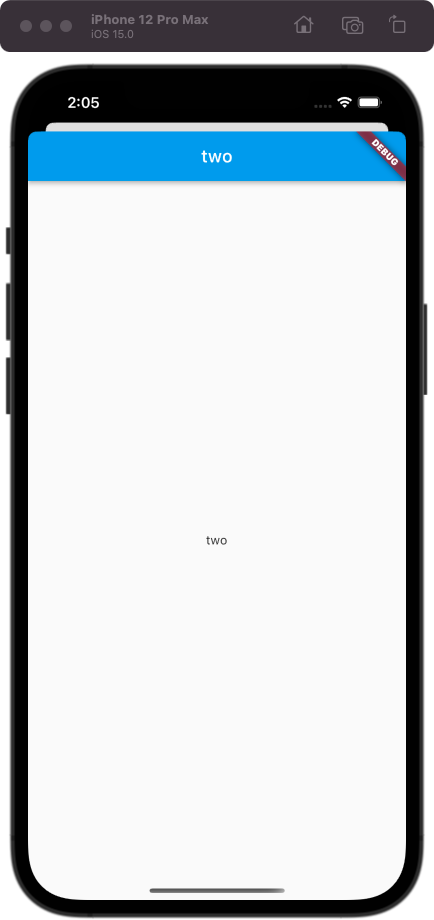
Here, first use setInitialRoute to pass the value string one to the first button and two to the second button.
- (IBAction)pushFlutter:(id)sender {
    FlutterViewController *vc = [[FlutterViewController alloc] init];
    [vc setInitialRoute:@"one"];
    [self presentViewController:vc animated:true completion:nil];
}
- (IBAction)pushFlutterTwo:(id)sender {
    FlutterViewController *vc = [[FlutterViewController alloc] init];
    [vc setInitialRoute:@"two"];
    [self presentViewController:vc animated:true completion:nil];
}
Modify the page in fluent, accept the Route value transmitted from iOS, and then return to different interfaces according to this value.
import 'dart:ui';

import 'package:flutter/material.dart';

void main() => runApp( MyApp(
  pageIndex: window.defaultRouteName,
));

class MyApp extends StatelessWidget {
  final String pageIndex;
  const MyApp({Key? key, required this.pageIndex}) : super(key: key);

  // This widget is the root of your application.
  @override
  Widget build(BuildContext context) {
    return MaterialApp(
      title: 'Flutter Demo',
      theme: ThemeData(

      ),
      home:  _rootPage(pageIndex),
    );
  }

  // Return page according to pageIndex
  Widget _rootPage(String pageIndex) {
    switch(pageIndex) {
      case 'one':
        return Scaffold(
      appBar: AppBar(title: Text(pageIndex),),
      body: Center(child: Text(pageIndex),),
      );
      case 'two':
        return Scaffold(
          appBar: AppBar(title: Text(pageIndex),),
          body: Center(child: Text(pageIndex),),
        );
      default:
        return Scaffold(
          appBar: AppBar(title: Text(pageIndex),),
          body: Center(child: Text(pageIndex),),
        );
    }
  }
}
Then click different buttons at this time to go to different pages.
4.2 MethodChannel
You also need to add the disass function in the shuttle.
Here, first go to the fluent to modify MyApp to StatefulWidget, and there is no need to pass pageIndex here. Here_ Create the property pageIndex in MyAppState_ oneChannel,_ twoChannel, then listen to the value passed from the native, then set the value of pageIndex, add a button to the returned widget, and call invokemapmmethod to pass the value in their respective channels.
void main() => runApp( MaterialApp(
  title: 'Flutter Demo',
  theme: ThemeData(
    highlightColor: const Color.fromRGBO(1, 0, 0, 0.0),
    splashColor:  const Color.fromRGBO(1, 0, 0, 0.0),
    primarySwatch: Colors.grey,
  ),
  home: const MyApp(),
));
class MyApp extends StatefulWidget {
  const MyApp({Key? key}) : super(key: key);

  @override
  _MyAppState createState() => _MyAppState();
}

class _MyAppState extends State<MyApp> {
  String pageIndex = 'one';
  final _oneChannel = MethodChannel('one_page');
  final _twoChannel = MethodChannel('two_page');

  @override
  void initState() {
    // TODO: implement initState
    super.initState();
    _oneChannel.setMethodCallHandler((call) {
      setState(() {
        pageIndex = call.method;
      });
      return Future(() {});
    });

    _twoChannel.setMethodCallHandler((call) {
      setState(() {
        pageIndex = call.method;
      });
      return Future(() {});
    });
  }

  @override
  Widget build(BuildContext context) {
    return _rootPage(pageIndex!);
  }

  Widget _rootPage(String pageIndex) {
    switch (pageIndex) {
      case 'one':
        return Scaffold(
          appBar: AppBar(
            title: Text(pageIndex),
          ),
          body: ElevatedButton(
            onPressed: () {
              _oneChannel.invokeMapMethod('exit');
            },
            child: Text(pageIndex),
          ),
        );
      case 'two':
        return Scaffold(
          appBar: AppBar(
            title: Text(pageIndex),
          ),
          body: ElevatedButton(
            onPressed: () {
              _twoChannel.invokeMapMethod('exit');
            },
            child: Text(pageIndex),
          ),
        );
      default:
        return Scaffold(
          appBar: AppBar(
            title: Text(pageIndex),
          ),
          body: ElevatedButton(
            onPressed: () {
              MethodChannel('default_page').invokeMapMethod('exit');
            },
            child: Text(pageIndex),
          ),
        );
    }
  }
}
Then modify the iOS code. Here, create an engine and call the run method.
@property (nonatomic,strong) FlutterEngine *flutterEngine;
// Lazy loading
- (FlutterEngine *) flutterEngine{
    if (!_flutterEngine) {
        FlutterEngine *engine =  [[FlutterEngine alloc] initWithName:@"FlutterEngine"];
        if (engine.run) {
            _flutterEngine = engine;
        }
    }
    return _flutterEngine;
}
Declare a flutterVc
@property (nonatomic,strong) FlutterViewController *flutterVc;
Then initialize flutterVc in viewDidLoad, which can also avoid jamming in subsequent calls.
self.flutterVc = [[FlutterViewController alloc] initWithEngine:self.flutterEngine nibName:nil bundle:nil];
In this way, you can use the same flutterVc as the present, create a methodChannel, call the invokeMethod method of the methodChannel to pass different values, and then use the methodChannel to listen to the information of the flutter. If you pass' exit ', call the dismissViewController method.
- (IBAction)pushFlutter:(id)sender {
    //Create MethodChannel
    FlutterMethodChannel *methodChannel =  [FlutterMethodChannel methodChannelWithName:@"one_page" binaryMessenger:self.flutterVc.binaryMessenger];
    //Tell fluent the corresponding page
    [methodChannel invokeMethod:@"one" arguments:nil];
    //Pop up VC
    [self presentViewController:self.flutterVc animated:true completion:nil];
    //Listening exit
    [methodChannel setMethodCallHandler:^(FlutterMethodCall * _Nonnull call, FlutterResult  _Nonnull result) {
        if ([call.method isEqualToString:@"exit"]) {
            [self dismissViewControllerAnimated:true completion:nil];
        }
    }];
}
- (IBAction)pushFlutterTwo:(id)sender {

    //Create MethodChannel
    FlutterMethodChannel *methodChannel =  [FlutterMethodChannel methodChannelWithName:@"two_page" binaryMessenger:self.flutterVc.binaryMessenger];
    //Tell fluent the corresponding page
    [methodChannel invokeMethod:@"two" arguments:nil];
    //Pop up VC
    [self presentViewController:self.flutterVc animated:true completion:nil];
    //Listening exit
    [methodChannel setMethodCallHandler:^(FlutterMethodCall * _Nonnull call, FlutterResult  _Nonnull result) {
        if ([call.method isEqualToString:@"exit"]) {
            [self dismissViewControllerAnimated:true completion:nil];
        }
    }];
}
4.3 BasicMessageChannel
Another commonly used channel: BasicMessageChannel is used for continuous communication. You can reply to messages after receiving messages.
To create a BasicMessageChannel in the Flutter, you need to pass two parameters, one is the name and the other is the decoder.
final BasicMessageChannel _basicMessageChannel = BasicMessageChannel('messageChannel',StandardMessageCodec());
Then go to initState to use_ Basic message channel to listen for information from ios.
_basicMessageChannel.setMessageHandler((message) {
      print('Received from ios of $message');
      return Future(() {});
    });
Then in_ rootPage changes the body to Column, adds a TextField, and then transfers the value to the native when the input changes.
 Widget _rootPage(String pageIndex) {
    switch (pageIndex) {
      case 'one':
        return Scaffold(
          appBar: AppBar(
            title: Text(pageIndex),
          ),
          body: Column(
            mainAxisAlignment: MainAxisAlignment.center,
            children: [
              ElevatedButton(
                onPressed: () {
                  _oneChannel.invokeMapMethod('exit');
                },
                child: Text(pageIndex),
              ),
              TextField(onChanged: (String str){
                _basicMessageChannel.send(str);
              },)
            ],
          ),
        );
      case 'two':
        return Scaffold(
          appBar: AppBar(
            title: Text(pageIndex),
          ),
          body: Column(
            mainAxisAlignment: MainAxisAlignment.center,
            children: [
              ElevatedButton(
                onPressed: () {
                  _oneChannel.invokeMapMethod('exit');
                },
                child: Text(pageIndex),
              ),
              TextField(onChanged: (String str){
                _basicMessageChannel.send(str);
              },)
            ],
          ),
        );
      default:
        return Scaffold(
          appBar: AppBar(
            title: Text(pageIndex),
          ),
          body: Column(
            mainAxisAlignment: MainAxisAlignment.center,
            children: [
              ElevatedButton(
                onPressed: () {
                  _oneChannel.invokeMapMethod('exit');
                },
                child: Text(pageIndex),
              ),
              TextField(onChanged: (String str){
                _basicMessageChannel.send(str);
              },)
            ],
          ),
        );
    }
  }
Next, create a fluterbasicmessagechannel in iOS and add listening
@property (nonatomic,strong) FlutterBasicMessageChannel *flutterBasicMessageChannel;
self.flutterBasicMessageChannel = [FlutterBasicMessageChannel messageChannelWithName:@"messageChannel" binaryMessenger:self.flutterVc.binaryMessenger];
[self.flutterBasicMessageChannel setMessageHandler:^(id _Nullable message, FlutterReply _Nonnull callback) {
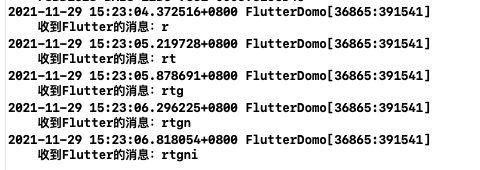
NSLog(@"received Flutter Message:%@",message);
}];
In this way, you can listen to the changes of textfile input in fluent.
Add touchesBegan to iOS and send a message to Flutter.
- (void)touchesBegan:(NSSet<UITouch *> *)touches withEvent:(UIEvent *)event {
    static int a = 0;
    [self.flutterBasicMessageChannel sendMessage:[NSString stringWithFormat:@"%d",a++]];
}
Here you can see that the message from iOS has been successfully received.