This article continues to study the official tutorial of Flask. I will skip the three sections of Templates, Static Files and Blog Blueprint directly, because these technologies will not be used in actual projects. I have time to learn more about the front end. This article summarizes the three sections of Make the Project Installable, Test Coverage and Deploy to Production. I think this is an official release process of flash project, as shown in the figure below:
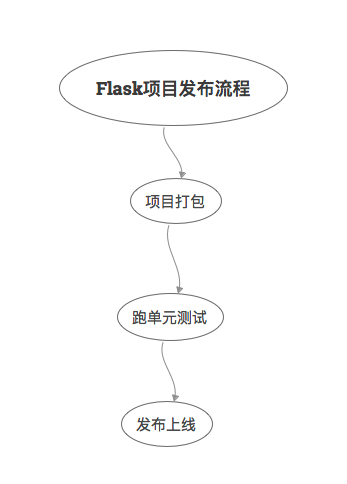
This is similar to the release process I have been exposed to in large projects. Especially for our testing, it is necessary to have a good understanding of running unit testing. Fortunately, thanks to the simplicity of Python, it will be easier to understand. The so-called "all in one" means that you can understand the single test of Flask and the single test of other languages.
Pack Project
To create a setup.py file:
from setuptools import find_packages, setup

setup(
    name='flaskr',
    version='1.0.0',
    packages=find_packages(),
    include_package_data=True,
    zip_safe=False,
    install_requires=[
        'flask',
    ],
)- Packages specifies the Python package, find_ The packages () function automatically finds the.
- include_ package_ The data representation includes other files, such as static files and templates files.
If you need to include other data, create the MANIFEST.in file:
include flaskr/schema.sql
graft flaskr/static
graft flaskr/templates
global-exclude *.pyc
Where global exclude excludes *. pyc files.
Then you can use the pip command to install:
$ pip install -e .
After installation, you can use the pip list command to view:
$ pip list

Package        Version   Location
-------------- --------- ----------------------------------
click          6.7
Flask          1.0
flaskr         1.0.0     /home/user/Projects/flask-tutorial
itsdangerous   0.24
Jinja2         2.10
MarkupSafe     1.0
pip            9.0.3
setuptools     39.0.1
Werkzeug       0.14.1
wheel          0.30.0
The process is as follows: pip finds the setup.py file in the current directory, then packages the project file according to the file description and installs it locally. After installation, you can use flash run to start the application anywhere, not just in the flash turbo directory.
Running unit test
Unit testing can not guarantee that the program has no Bug, but it is an effective means to ensure code quality in the development stage. Take our company as an example. When developing, testing and launching, unit testing will be used as a card point. If the coverage rate of single test does not reach 45%, it cannot be tested and launched.
Two tools are used for unit testing of the Flask project. One is pytest, which we are very familiar with, and the other is coverage. Install them first:
$ pip install pytest coverage
Create a new tests/data.sql file and insert some test data:
INSERT INTO user (username, password)
VALUES
  ('test', 'pbkdf2:sha256:50000$TCI4GzcX$0de171a4f4dac32e3364c7ddc7c14f3e2fa61f2d17574483f7ffbb431b4acb2f'),
  ('other', 'pbkdf2:sha256:50000$kJPKsz6N$d2d4784f1b030a9761f5ccaeeaca413f27f2ecb76d6168407af962ddce849f79');

INSERT INTO post (title, body, author_id, created)
VALUES
  ('test title', 'test' || x'0a' || 'body', 1, '2018-01-01 00:00:00');
The fixture of pytest is equivalent to setup. You can do some initialization before testing. Create tests / confitest.py and write the fixture:
import os
import tempfile

import pytest
from flaskr import create_app
from flaskr.db import get_db, init_db

with open(os.path.join(os.path.dirname(__file__), 'data.sql'), 'rb') as f:
    _data_sql = f.read().decode('utf8')


@pytest.fixture
def app():
    db_fd, db_path = tempfile.mkstemp()

    app = create_app({
        'TESTING': True,
        'DATABASE': db_path,
    })

    with app.app_context():
        init_db()
        get_db().executescript(_data_sql)

    yield app

    os.close(db_fd)
    os.unlink(db_path)


@pytest.fixture
def client(app):
    return app.test_client()


@pytest.fixture
def runner(app):
    return app.test_cli_runner()
app
Create an application and initialize the database using test configuration and test data.
- Tempfile. Mkstep() creates a temporary file and returns the file descriptor and file path. And the temporary file path is passed into DATABASE, and then the test data is inserted. Close and remove temporary files after testing. The code before the yield of the fixture is equivalent to setup, and the code after the yield is equivalent to teardown.
- TESTING: True set flag to the test mode, and some adjustments will be made inside flag to facilitate testing.
client
Call app.test_client returns a test client that can be used to send requests to applications.
runner
Call app.test_cli_runner() returns a runner that can execute the registered command of the application.
Test the Factory:
# tests/test_factory.py
from flaskr import create_app


def test_config():
    assert not create_app().testing
    assert create_app({'TESTING': True}).testing


def test_hello(client):
    response = client.get('/hello')
    assert response.data == b'Hello, World!'
Test the Database:
# tests/test_db.py
import sqlite3

import pytest
from flaskr.db import get_db


def test_get_close_db(app):
    with app.app_context():
        db = get_db()
        assert db is get_db()

    with pytest.raises(sqlite3.ProgrammingError) as e:
        db.execute('SELECT 1')

    assert 'closed' in str(e.value)


def test_init_db_command(runner, monkeypatch):
    class Recorder(object):
        called = False

    def fake_init_db():
        Recorder.called = True

    # monkeypatch is a fixture built into pytest, that is, monkey patch.
    monkeypatch.setattr('flaskr.db.init_db', fake_init_db)
    result = runner.invoke(args=['init-db'])
    assert 'Initialized' in result.output
    assert Recorder.called
Test Authentication:
# tests/conftest.py
class AuthActions(object):
    def __init__(self, client):
        self._client = client

    def login(self, username='test', password='test'):
        return self._client.post(
            '/auth/login',
            data={'username': username, 'password': password}
        )

    def logout(self):
        return self._client.get('/auth/logout')


# This allows the user to log in using auth.login()
@pytest.fixture
def auth(client):
    return AuthActions(client)
# tests/test_auth.py
import pytest
from flask import g, session
from flaskr.db import get_db
def test_register(client, app):
assert client.get('/auth/register').status_code == 200
response = client.post(
'/auth/register', data={'username': 'a', 'password': 'a'}
)
assert 'http://localhost/auth/login' == response.headers['Location']
with app.app_context():
assert get_db().execute(
"SELECT * FROM user WHERE username = 'a'",
).fetchone() is not None
@pytest.mark.parametrize(('username', 'password', 'message'), (
('', '', b'Username is required.'),
('a', '', b'Password is required.'),
('test', 'test', b'already registered'),
))
def test_register_validate_input(client, username, password, message):
response = client.post(
'/auth/register',
data={'username': username, 'password': password}
)
assert message in response.data
def test_login(client, auth):
assert client.get('/auth/login').status_code == 200
response = auth.login()
assert response.headers['Location'] == 'http://localhost/'
# After using with, you can access the session in context
with client:
client.get('/')
assert session['user_id'] == 1
assert g.user['username'] == 'test'
@pytest.mark.parametrize(('username', 'password', 'message'), (
('a', 'test', b'Incorrect username.'),
('test', 'a', b'Incorrect password.'),
))
def test_login_validate_input(auth, username, password, message):
response = auth.login(username, password)
assert message in response.data
def test_logout(client, auth):
auth.login()
# After using with, you can access the session in context
with client:
auth.logout()
assert 'user_id' not in sessionMore test cases about Blog will not be repeated here. Interested students can click the link at the end of the article to view the official website.
Finally, when the use case is written, it's time to run. Adding some configurations to the setup.cfg file can appropriately reduce the single test redundancy:
[tool:pytest]
testpaths = tests

[coverage:run]
branch = True
source =
    flaskr
Then you can execute pytest:
$ pytest

========================= test session starts ==========================
platform linux -- Python 3.6.4, pytest-3.5.0, py-1.5.3, pluggy-0.6.0
rootdir: /home/user/Projects/flask-tutorial, inifile: setup.cfg
collected 23 items

tests/test_auth.py ........                                      [ 34%]
tests/test_blog.py ............                                  [ 86%]
tests/test_db.py ..                                              [ 95%]
tests/test_factory.py ..                                         [100%]

====================== 24 passed in 0.64 seconds =======================
pytest -v can display each test function.
The single test coverage is the soul, so it is recommended to run the single test in this way:
$ coverage run -m pytest
Then view the report:
$ coverage report

Name                 Stmts   Miss Branch BrPart  Cover
------------------------------------------------------
flaskr/__init__.py      21      0      2      0   100%
flaskr/auth.py          54      0     22      0   100%
flaskr/blog.py          54      0     16      0   100%
flaskr/db.py            24      0      4      0   100%
------------------------------------------------------
TOTAL                  153      0     44      0   100%
You can also generate html reports:
$ coverage html
Release Online
Install the wheel library first:
$ pip install wheel
Then create the. whl file:
$ python setup.py bdist_wheel
After the command is executed, a dist / flagr-1.0.0-py3-none-any.whl file will be generated. The file format is {project name}-{version}-{python tag} -{abi tag}-{platform tag}.
You can install on the server:
$ pip install flaskr-1.0.0-py3-none-any.whl
Because it is a new machine, you need to initialize the database:
$ export FLASK_APP=flaskr
$ flask init-db
If it is a Python virtual environment, you can find the Flask instance in venv / var / Flask r instance.
Finally, set SECRET_KEY, the official website of Flask gives a method to generate random SECRET_KEY method:
$ python -c 'import secrets; print(secrets.token_hex())'

'192b9bdd22ab9ed4d12e236c78afcb9a393ec15f71bbf5dc987d54727823bcbf'
After generation, create a new venv / var / flaskr instance / config.py file and paste it:
SECRET_KEY = '192b9bdd22ab9ed4d12e236c78afcb9a393ec15f71bbf5dc987d54727823bcbf'
As for the selection of production server, it is recommended not to use flash run, because this is the development server provided by Werkzeug, which is neither stable nor secure.
You can use a WSGI server, such as Waitress:
$ pip install waitress
$ waitress-serve --call 'flaskr:create_app'

Serving on http://0.0.0.0:8080
The standard WSGI server is as follows:
reference material: https://flask.palletsprojects.com/en/2.0.x/tutorial/install/ https://flask.palletsprojects.com/en/2.0.x/tutorial/tests/ https://flask.palletsprojects.com/en/2.0.x/tutorial/deploy/