Flask is another excellent Web framework implemented in Python besides Django. Compared with the fully functional Django, flask is famous for its freedom and flexibility. When developing some small applications, flash is very suitable. This paper will use flask to develop a microblog user portrait generator.
The development steps are as follows:
- Capture microblog user data;
- Analyze data and generate user portrait;
- Website implementation, beautify the interface.
1, Microblog capture
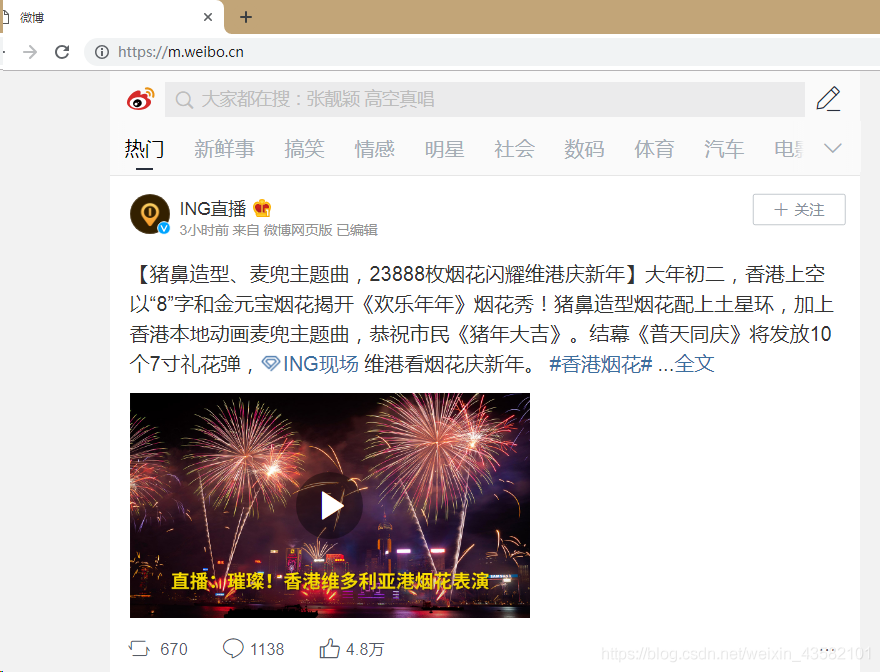
I use the mobile microblog here( m.weibo.cn ), for example. This tutorial uses the chrome browser for debugging.

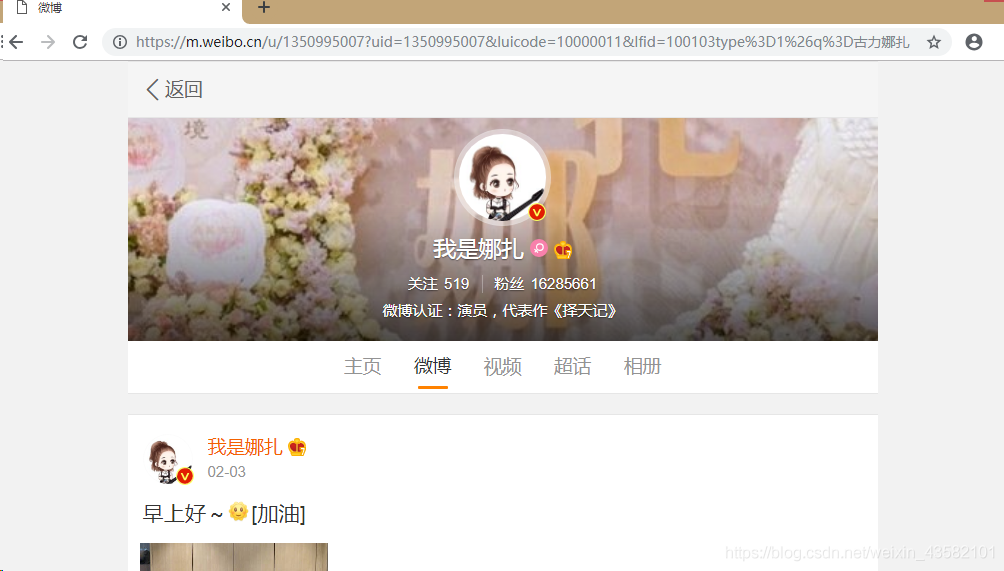
Search for "gulinaza" in "discovery"

, click to enter her home page;

Start analyzing the request message, right-click to open the debugging window, and select the "network" tab of the debugging window;

Select "Preserve Log" to refresh the page;

Analyzing each request process, we can find that the data of the blog is from https://m.weibo.cn/api/container/getIndex?XXX Similar addresses. The main parameters are type (fixed value), value (blogger ID), containerid (identification, returned in the request) and page (page number)
Let's start the code of crawling blog posts.
Import related libraries
import requests
from time import sleep

# Define the function to get blogger information
# The parameter uid is the id of the blogger

def get_user_info(uid):
    # Send request
    result = requests.get('https://m.weibo.cn/api/container/getIndex?type=uid&value={}'
                          .format(uid))
    json_data = result.json()  # Get the json content in the information
    userinfo = {
        'name': json_data['userInfo']['screen_name'],                    # Get user Avatar
        'description': json_data['userInfo']['description'],             # Get user description
        'follow_count': json_data['userInfo']['follow_count'],           # Get number of concerns
        'followers_count': json_data['userInfo']['followers_count'],     # Get fans
        'profile_image_url': json_data['userInfo']['profile_image_url'], # Get Avatar
        'verified_reason': json_data['userInfo']['verified_reason'],     # Authentication information
        'containerid': json_data['tabsInfo']['tabs'][1]['containerid']   # This field is required in getting blog posts
    }

    # Get gender. In the microblog, m represents male and f represents female
    if json_data['userInfo']['gender'] == 'm':
        gender = 'male'
    elif json_data['userInfo']['gender'] == 'f':
        gender = 'female'
    else:
        gender = 'unknown'
    userinfo['gender'] = gender
    return userinfo
# Get gulinaza information
userinfo = get_user_info('1350995007')
# The information is as follows
userinfo
{'containerid': '1076031350995007',
 'description': 'Please contact: nazhagongzuo@163.com',
 'follow_count': 529,
 'followers_count': 12042995,
 'name': 'I'm Naza',
 'profile_image_url': 'https://tvax2.sinaimg.cn/crop.0.0.1242.1242.180/50868c3fly8fevjzsp2j4j20yi0yi419.jpg',
 'verified_reason': 'Actor, representative work "choosing the day"'}


# Cycle to get all blog posts

def get_all_post(uid, containerid):
    # Start on the first page
    page = 0
    # This is used to store the blog list
    posts = []
    while True:
        # Request blog list
        result = requests.get('https://m.weibo.cn/api/container/getIndex?type=uid&value={}&containerid={}&page={}'
                              .format(uid, containerid, page))
        json_data = result.json()

        # When the blog post is obtained, exit the loop
        if not json_data['cards']:
            break

        # Loop to add new posts to the list
        for i in json_data['cards']:
            posts.append(i['mblog']['text'])

        # Pause for half a second to avoid being anti crawled
        sleep(0.5)

        # Jump to next page
        page += 1

    # Return all posts
    return posts
posts = get_all_post('1350995007', '1076031350995007')
# Number of blog posts viewed
len(posts)
1279
# Display the first 3
posts[:3]
At this point, the user's data is ready, and then start generating the user portrait.
2, Generate user portrait
1. Extract keywords
Here we extract keywords from the blog list and analyze the hot words published by bloggers
import jieba.analyse
from html2text import html2text

content = '\n'.join([html2text(i) for i in posts])

# Here, jieba's textrank is used to extract 1000 keywords and their proportion
result = jieba.analyse.textrank(content, topK=1000, withWeight=True)

# Generate keyword dictionary
keywords = dict()
for i in result:
    keywords[i[0]] = i[1]
2. Generate word cloud
from PIL import Image, ImageSequence
import numpy as np
import matplotlib.pyplot as plt
from wordcloud import WordCloud, ImageColorGenerator

# Initialize picture
image = Image.open('./static/images/personas.png')
graph = np.array(image)

# When generating cloud images, it should be noted that WordCloud does not support Chinese by default, so the Chinese bold font library needs to be loaded here
wc = WordCloud(font_path='./fonts/simhei.ttf',
    background_color='white', max_words=300, mask=graph)
wc.generate_from_frequencies(keywords)
image_color = ImageColorGenerator(graph)
# display picture
plt.imshow(wc)
plt.imshow(wc.recolor(color_func=image_color))
plt.axis("off") # Turn off the image coordinate system
plt.show()
3, Implement flash application
Developing Flask is not as complex as Django. A small application can be completed with a few files. The steps are as follows:
- install
Use pip to install flash. The command is as follows:
pip install flask
2. Implement application logic
Simply put, a Flask application is a Flask class whose url request is controlled by the route function. The code implementation is as follows:
# app.py


from flask import Flask
import requests
from PIL import Image, ImageSequence
import numpy as np
import matplotlib.pyplot as plt
from wordcloud import WordCloud, ImageColorGenerator
import jieba.analyse
from html2text import html2text
from time import sleep
from collections import OrderedDict
from flask import render_template, request

# Create a flash application
app = Flask(__name__)


# Microblog correlation function #

# Define the function to get blogger information
# The parameter uid is the id of the blogger

def get_user_info(uid):
    # Send request
    result = requests.get('https://m.weibo.cn/api/container/getIndex?type=uid&value={}'
                          .format(uid))
    json_data = result.json()  # Get the json content in the information
    # Get gender. In the microblog, m represents male and f represents female
    if json_data['userInfo']['gender'] == 'm':
        gender = 'male'
    elif json_data['userInfo']['gender'] == 'f':
        gender = 'female'
    else:
        gender = 'unknown'

    userinfo = OrderedDict()
    userinfo['nickname'] = json_data['userInfo']['screen_name']           # Get user Avatar
    userinfo['Gender'] = gender                                         # Gender
    userinfo['Number of concerns'] = json_data['userInfo']['follow_count']        # Get number of concerns
    userinfo['Number of fans'] = json_data['userInfo']['followers_count']     # Get fans
    userinfo['Authentication information'] = json_data['userInfo']['verified_reason']   # Get fans
    userinfo['describe'] = json_data['userInfo']['description']           # Get fans
    data = {
        'profile_image_url': json_data['userInfo']['profile_image_url'], # Get Avatar
        'containerid': json_data['tabsInfo']['tabs'][1]['containerid'],  # This field is required in getting blog posts
        'userinfo': '
'.join(['{}:{}'.format(k, v) for (k,v) in userinfo.items()])
    }

    return data


# Cycle to get all blog posts

def get_all_post(uid, containerid):
    # Start on the first page
    page = 0
    # This is used to store the blog list
    posts = []
    while True:
        # Request blog list
        result = requests.get('https://m.weibo.cn/api/container/getIndex?type=uid&value={}&containerid={}&page={}'
                              .format(uid, containerid, page))
        json_data = result.json()

        # When the blog post is obtained, exit the loop
        if not json_data['cards']:
            break

        # Loop to add new posts to the list
        for i in json_data['cards']:
            posts.append(i['mblog']['text'])

        # Pause for half a second to avoid being anti crawled
        sleep(0.5)

        # Jump to next page
        page += 1

    # Return all posts
    return posts


##############################
## Cloud correlation function

# Generate cloud map
def generate_personas(uid, data_list):
    content = '
'.join([html2text(i) for i in data_list])

    # Here, jieba's textrank is used to extract 1000 keywords and their proportion
    result = jieba.analyse.textrank(content, topK=1000, withWeight=True)

    # Generate keyword dictionary
    keywords = dict()
    for i in result:
        keywords[i[0]] = i[1]

    # Initialize picture
    image = Image.open('./static/images/personas.png')
    graph = np.array(image)

    # When generating cloud images, it should be noted that WordCloud does not support Chinese by default, so the Chinese bold font library needs to be loaded here
    wc = WordCloud(font_path='./static/fonts/simhei.ttf',
        background_color='white', max_words=300, mask=graph)
    wc.generate_from_frequencies(keywords)
    image_color = ImageColorGenerator(graph)
    plt.imshow(wc)
    plt.imshow(wc.recolor(color_func=image_color))
    plt.axis("off") # Turn off the image coordinate system
    dest_img = './static/personas/{}.png'.format(uid)
    plt.savefig(dest_img)
    return dest_img


#######################################
# Define route
# Specifies the response function for the root path request
@app.route('/', methods=['GET', 'POST'])
def index():
    # Initialization template data is empty
    userinfo = {}
    # If it is a Post request and there is a microblog user id, obtain the microblog data and generate the corresponding cloud map
    # The value of request.method is the request method
    # request.form is a submitted form
    if request.method == 'POST' and request.form.get('uid'):
        uid = request.form.get('uid')
        userinfo = get_user_info(uid)
        posts = get_all_post(uid, userinfo['containerid'])
        dest_img = generate_personas(uid, posts)
        userinfo['personas'] = dest_img
    return render_template('index.html', **userinfo)


if __name__ == '__main__':
    app.run()
The above is all the code, simple? Of course, the single file structure is only suitable for small applications. With the increase of function and code, it is still necessary to separate the code into different file structures for development and maintenance. Finally, there is still a template file for the page.
3. Template development
The template needs an input form and user information display, which is based on Jinja2 template engine. Those who are familiar with Django templates should be able to get started quickly. The process is similar to Django types. Create a folder named templates under the project root directory and a new file named index.html. The code is as follows:
Flask Microblog single user portrait generator
In this way, the application is completed, and the project structure is as follows:
$ tree .
weibo_personas
├── app.py
├── static
│   ├── css
│   │   └── style.css
│   ├── fonts
│   │   └── simhei.ttf
│   └── images
│       └── personas.png
└── templates
    └── index.html
Enter the project folder and start the project:
 python app.py
 Running on http://127.0.0.1:5000/ (Press CTRL+C to quit)
Then the browser opens http://127.0.0.1:5000 You can see the effect of this tutorial.
The above is only a preliminary implementation, and there are still many areas that need to be improved. For example, if there are many published blogs and the acquisition time is long, you can consider adding a cache to store the acquired users to avoid repeated requests. The front end can also add a loading effect. This tutorial only shows a single user. Later, you can also obtain user information in batches and generate user portraits of a group.
