catalogue
4. Check, enable and add system management
2, Understanding Nginx profiles
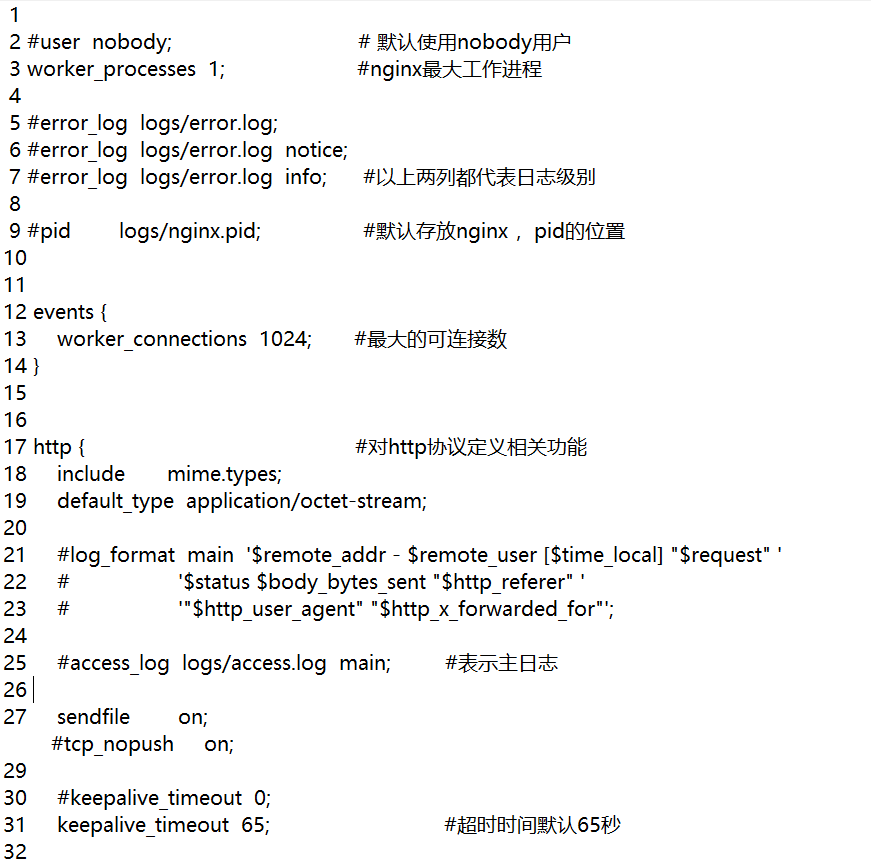
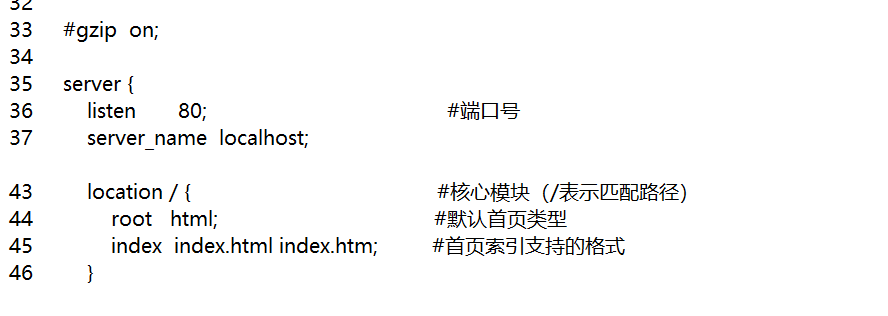
nginx.conf main configuration file
1. Generate user password authentication file
3. Restart the service and access the test
preface
Nginx is developed for performance optimization, which is characterized by stability and low system resource consumption. Because of this, a large number of social networks, news and information, e-commerce and other services choose nginx to provide web services.
1, Introduction to Nginx
1. High stability
2. Low system resource consumption
3. High processing capacity for HTTP concurrent links
A single server can support 30000 ~ 50000 concurrent requests
2, Install Nginx service
1. Environmental preparation
Turn off firewall
Put the Nginx installation package into the opt directory
2. Install dependent packages
yum -y install pcre-devel zlib-devel gcc gcc-c++ make
3. Compile and install Nginx
tar zxvf nginx-1.12.0.tar.gz -C /opt/

cd nginx-1.12.0/
./configure \
--prefix=/usr/local/nginx \				      #Specify the installation path of nginx
--user=nginx \								  #Specify user name
--group=nginx \								  #Specify group name
--with-http_stub_status_module				  #Enable http_stub_status_module
Module to support status statistics

make && make install


ln -s /usr/local/nginx/sbin/nginx /usr/local/sbin/
#Soft connection for system identification

useradd -M -s /sbin/nologin nginx
#Create run user
4. Check, enable and add system management
nginx -t                             #Check whether the configuration file is correct
nginx                                #start-up


cat /usr/local/nginx/logs/nginx.pid	  #First check the PID number of nginx
kill -3 <PID number>
kill -s QUIT <PID number>				  #stop it
killall -3 nginx
killall -s QUIT nginx
5. Add nginx system service
vim /lib/systemd/system/nginx.service
[Unit]
Description=nginx
After=network.target
[Service]
Type=forking
PIDFile=/usr/local/nginx/logs/nginx.pid
ExecStart=/usr/local/nginx/sbin/nginx
ExecrReload=/bin/kill -s HUP $MAINPID
ExecrStop=/bin/kill -s QUIT $MAINPID
PrivateTmp=true
[Install]
WantedBy=multi-user.target

chmod 754 /lib/systemd/system/nginx.service
#No user except root can modify it
systemctl start nginx.service
#Open service
systemctl enable nginx.service
#Start up self start
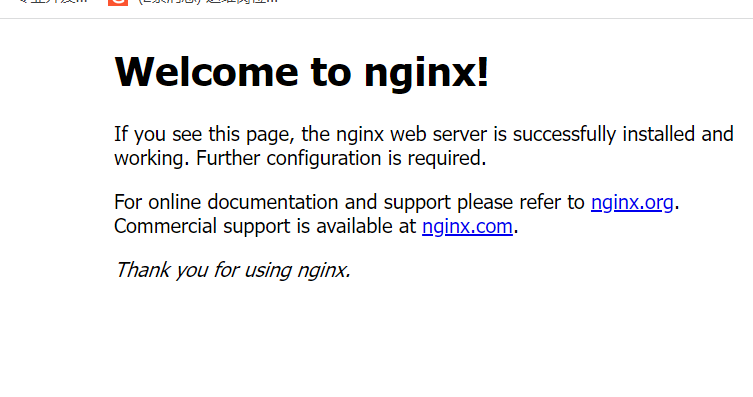
After setting, enter the host IP in the browser. Seeing this interface means that the service is started successfully

2, Understanding Nginx profiles
Enter the nginx directory and you can see the following files

sbin: command file directory
html: Site Directory
conf: configuration file
conf file

nginx.conf main configuration file


3, Password access
Refers to authorization based access control
1. Generate user password authentication file
yum install -y httpd-tools
#Install tools for user access authentication

htpasswd -c /usr/local/nginx/passwd.db zhang
#Make a data file and specify the user as zhang

 zhangNew password:
Re-type new password:
Adding password for user zhang
#And set the password

chown nginx /usr/local/nginx/passwd.db
chmod 400 /usr/local/nginx/passwd.db
#Add nginx management to grant 400 permissions
2. Modify profile
 43         location / {
 44             auth_basic "secret";
#Add authentication in home configuration
 45             auth_basic_user_file /use/local/nginx/p
    asswd.db;
#Add authentication on the home page
 46             root   html;
 47             index  index.html index.htm;
3. Restart the service and access the test
nginx -t
systemctl restart nginx

Browser access http://192.168.154.138 you can see that password authentication is required

summary
1. Firstly, nginx and httpd are similar in the function of static page + dynamic page forwarding, but nginx has the advantages of high concurrency resistance, lightweight and stable performance
2. Global module
Again, the content defined in the module will take effect in all configurations
3,http
It is applied to the user's http access to nginx process