Recently, the company needs to build a FastDfs distributed file system to query and refer to a lot of information on the network, but according to their configuration from beginning to end, there will be more or less errors in the middle, which may be versions or other problems. After continuous research, the system has been successfully configured and has been applied online. Now share the experience for your reference, also as a record of their own, so that future use can be reviewed.
1. Download Software
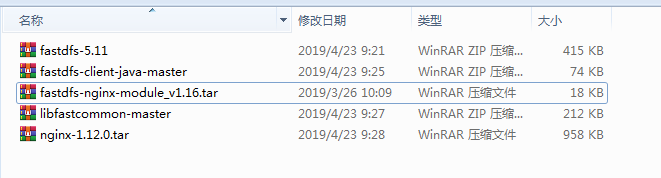
Download the software you need to install first on the Internet
2. Pre-preparation
Once the required tools are downloaded, the setup is ready. First, Download all the required tools to run the commands.
 yum -y install zlib zlib-devel pcre pcre-devel gcc gcc-c++ openssl openssl-devel libevent libevent-devel perl unzip net-tools wget

     After downloading, install rz command
      yum install lrzsz -y
  Upload to / home directory by rz command or xftp and create a new directory (according to personal habits), which is mainly used for downloading software to store directories.

        cd  /home
        mkdir    kai
        ls
        cd  kai

Upload software to kai directory 
3. Install libfast common
Unzip the newly uploaded file and enter the unzipped file directory
 [root@localhost kai]# unzip libfastcommon-master.zip
     [root@localhost kai]# cd libfastcommon-master
 [root@localhost libfastcommon-master]# ll
     //We can see that.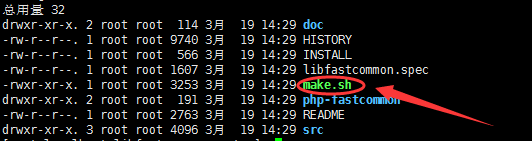
Start installation, execute
[root@localhost libfastcommon-master]# ./make.sh
[root@localhost libfastcommon-master]# ./make.sh  install
See if there are any errors. If there are no errors, soft links can be executed.
 ln -s /usr/lib64/libfastcommon.so /usr/local/lib/libfastcommon.so
 ln -s /usr/lib64/libfastcommon.so /usr/lib/libfastcommon.so
 ln -s /usr/lib64/libfdfsclient.so /usr/local/lib/libfdfsclient.so
 ln -s /usr/lib64/libfdfsclient.so /usr/lib/libfdfsclient.so
4. Installation of FastDfs
Then go back to / home/kai (or under the file you created)
Decompression fastdfs
[root@localhost kai]# unzip fastdfs-5.11.zip
Then enter fastdfs 5.11
 [root@localhost kai]# cd fastdfs-5.11
 [root@localhost kai]# ./make.sh
  [root@localhost kai]# ./make.sh install
Check the directory after success
 [root@localhost kai]# cd /etc/fdfs
 [root@localhost fdfs]# ll

 -rw-r--r--. 1 root root  1461 4 Month 2310:20 client.conf.sample
 -rw-r--r--. 1 root root  7927 4 Month 2310:20 storage.conf.sample
 -rw-r--r--. 1 root root  7389 4 Month 2310:20 tracker.conf.sample

//We need to serve one of these three instance files and remove the sample.

 [root@localhost fdfs]# cp client.conf.sample client.conf
 [root@localhost fdfs]# cp storage.conf.sample storage.conf
 [root@localhost fdfs]# cp tracker.conf.sample tracker.conf
OK, FastDFS installation is over.
5. Installing tracker
Create tarcker working directory
This directory can be customized to save tracker's data and log
Create directories according to custom:
[root@localhost fdfs]# cd /usr/
[root@localhost usr]# mkdir kai
[root@localhost usr]# cd kai
[root@localhost kai]# mkdir dev
[root@localhost kai]# cd dev
[root@localhost dev]# mkdir fastdfs
[root@localhost dev]# cd fastdfs
[root@localhost fastdfs]# mkdir fastdfs_tracker
[root@localhost fastdfs]# cd fastdfs_tracker
[root@localhost fastdfs_tracker]# pwd
/usr/kai/dev/fastdfs/fastdfs_tracker
[root@localhost fastdfs_tracker]#
Configure tracker
[root@localhost ~]# cd /etc/fdfs
[root@localhost fdfs]# vim tracker.conf
Find the following four places for modification
1.disabled=false          #The default may be turned on
2.port=22122              #Default port number
3.base_path=/usr/kai/dev/fastdfs/fastdfs_tracker         #Directory just created
4.http.server_port=80                               #The default port is 8080
Save Modified Files
Start the tracker command:
[root@localhost fdfs]# service fdfs_trackerd start
If you can't start successfully, you can use the system CTL command
systemctl start fdfs_trackerd
After success, you can see
 [root@localhost fdfs]# service fdfs_trackerd start
 Starting fdfs_trackerd (via systemctl):                    [  Determine  ]
Enter the tracker directory you created. It was found that there were more data and log directories in the directory.
[root@localhost fdfs]# cd /usr/kai/dev/fastdfs/fastdfs_tracker/
[root@localhost fastdfs_tracker]# ll
 //Total dosage 0
drwxr-xr-x. 2 root root 178 4 Month 2310:45 data
drwxr-xr-x. 2 root root  26 4 Month 2310:30 logs
We can't start tracker every time. We need to add boot to tracker.
First, we need to give execution authority.
[root@localhost fastdfs_tracker]# chmod +x /etc/rc.d/rc.local
Then start modifying rc.local
[root@localhost fastdfs_tracker]# vim /etc/rc.d/rc.local
Add the last sentence at the end of the configuration file.
      #!/bin/bash
      # THIS FILE IS ADDED FOR COMPATIBILITY PURPOSES
      #
      # It is highly advisable to create own systemd services or udev rules
      # to run scripts during boot instead of using this file.
      #
      # In contrast to previous versions due to parallel execution during boot
      # this script will NOT be run after all other services.
      #
      # Please note that you must run 'chmod +x /etc/rc.d/rc.local' to ensure
      # that this script will be executed during boot.

     touch /var/lock/subsys/local
     service fdfs_trackerd start
Save, and then view tracker port listening
     [root@localhost fastdfs_tracker]# netstat -unltp|grep fdfs
      tcp        0      0 0.0.0.0:22122           0.0.0.0:*               LISTEN                 17664/fdfs_trackerd
The monitor is successful at port 22122.
6. Installing storage
To configure the working directory for storage, since storage also requires a directory to store data, an additional fasdfs_storage_data is built.
 [root@localhost fastdfs]# ls
 fastdfs_storage  fastdfs_storage_data  fastdfs_tracker
Modify storage Profile
Modify storage.conf
[root@localhost fastdfs]# vim /etc/fdfs/storage.conf
Find the following places to modify
1.disabled=false
2.group_name=group1 # group name, modify according to the actual situation
3.port=23000# Set the port number of storage, default is 23000, the same group of storage port number must be consistent
4.base_path=/usr/kai/dev/fastdfs/fastdfs_storage# Set up storage data files and log directories
5.store_path_count=1 number of storage paths, which need to be matched with the number of store_paths
6.base_path0=/usr/kai/dev/fastdfs/fastdfs_storage# actual file storage path
7. tracker_server = 192.168.18.91:22122 CentOS 7 ip address
8.http.server_port=80 # Set the HTTP port number
After saving, create a soft reference
         ln -s /usr/bin/fdfs_storaged /usr/local/bin

//Start storage
service fdfs_storaged start
Similarly, if you can't start, you can use the following commands
systemctl start fdfs_storaged
Success should be as follows
  [root@localhost fdfs]# service fdfs_stroaged   start
  Starting fdfs_stroaged    (via systemctl):                    [  Determine  ]
Similarly set boot start
Modify rc.local
vim /etc/rc.d/rc.local
Finally add
service fdfs_storaged start
Check if the service started successfully
[root@localhost fdfs]# netstat -unltp | grep fdfs
  tcp        0      0 0.0.0.0:22122           0.0.0.0:*               LISTEN        17664/fdfs_trackerd
  tcp        0      0 0.0.0.0:23000           0.0.0.0:*               LISTEN      17710/fdfs_storaged
The service is started and the fastdfs has been configured by now. Finally, let's confirm whether storage is registered with tracker.
[root@localhost fdfs]# /usr/bin/fdfs_monitor /etc/fdfs/storage.conf
After success, we can see that:
ip_addr = 192.168.18.91 (localhost.localdomain) ACTIVE
If the above sentence is included, the configuration will be successful.
        [root@localhost fdfs]# vim  /etc/fdfs/client.conf

      base_path=/usr/kai/dev/fastdfs/fastdfs_tracker
    tracker_server=192.168.18.91:22122
    http.tracker_server_port=80
Next, upload a picture to centos7 for testing
Upload test.jpg image to / home/kai directory with xftp
Next
/ usr/bin/fdfs_upload_file/etc/fdfs/client.conf/home/kai/test.jpg# The path of the picture you uploaded (on centos)
The path back to the image after success
[root@localhost fdfs]# /usr/bin/fdfs_upload_file /etc/fdfs/client.conf /home/kai/test.jpg
group1/M00/00/00/wKgSW1zAYuqAaSn6AAChouYMtyM839.jpg
You can check if the upload is successful by checking the way you just uploaded it.
[root@localhost fdfs]# cd /usr/kai/dev/fastdfs/fastdfs_storage_data/data
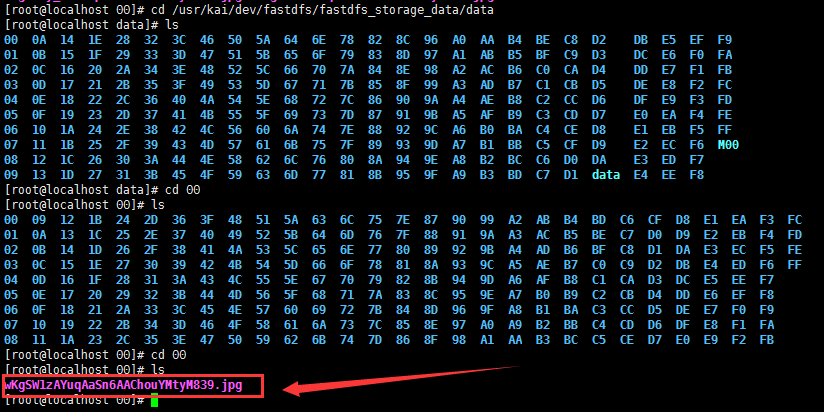
Can find the picture just uploaded
But now it's not accessible through browsers, and you need to configure nginx
7. Installation of nginx module of FastDFS
[root@localhost 00]# cd /home/kai
Before installing nginx, install the required dependency lib for nginx:
yum -y install pcre pcre-devel
yum -y install zlib zlib-devel
yum -y install openssl openssl-devel
Unzip nginx, and fastdfs-nginx-module:
[root@localhost kai]# tar -zxvf nginx-1.12.0.tar.gz
[root@localhost kai]# tar -zxvf fastdfs-nginx-module_v1.16.tar.gz
Modification of config configuration file into fastdfs-nginx-module
[root@localhost kai]# cd fastdfs-nginx-module/src
[root@localhost src]# vim config

Remove the local from the graph
Then enter nginx Install directory, add fastdfs-nginx-module:

  [root@localhost kai]# cd nginx-1.12.0
[root@localhost nginx-1.12.0]# ./configure --prefix=/usr/local/nginx --add-module=/home/kai/fastdfs-nginx-module/src
If there is no error message, start the installation
  [root@localhost nginx-1.12.0]# make
  [root@localhost nginx-1.12.0]#make install
Modify the conf file of nginx
 [root@localhost nginx-1.12.0]# cd /usr/local/nginx/conf

   [root@localhost conf]# vim nginx.conf
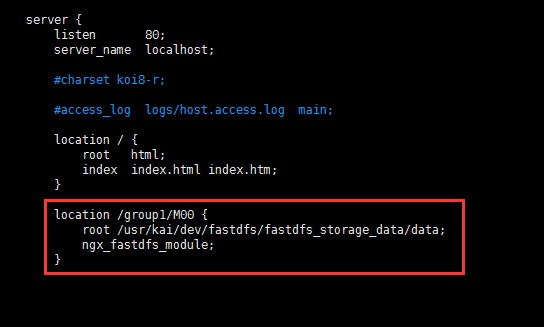
Add to:
location /group1/M00 {
        root /usr/kai/dev/fastdfs/fastdfs_storage_data/data;
        ngx_fastdfs_module;
    }
Then enter the unzipped directory of FastDFS installation and copy http.conf and mime.types to the / etc/fdfs directory:
  [root@localhost fastdfs-5.11]# cd  /home/kai/fastdfs-5.11/conf/
  [root@localhost conf]# ls
  anti-steal.jpg  http.conf   storage.conf      tracker.conf
   client.conf     mime.types  storage_ids.conf
  [root@localhost conf]#    cp http.conf   /etc/fdfs/
  [root@localhost conf]#    cp mime.types   /etc/fdfs/
In addition, it is necessary to copy mod_fastdfs.conf in the src directory of the fastdfs-nginx-module installation directory to the / etc/fdfs directory:
[root@localhost conf]# cp /usr/kai/dev/nginx/fastdfs-nginx-module/src/mod_fastdfs.conf /etc/fdfs/
Modify the mod_fastdfs.conf file just copied:
[root@localhost conf]# vim /etc/fdfs/mod_fastdfs.conf
Amendment:
       base_path=/usr/kai/dev/fastdfs/fastdfs_storage        #Save Log Directory
       tracker_server=192.168.18.91:22122         #IP address and port number of tracker server
    storage_server_port=23000          #Port number of storage server
     url_have_group_name = true         #Does the group name exist in the file url?
     store_path0=/usr/kai/dev/fastdfs/fastdfs_storage       #Storage path
     group_count = 3             #Set the number of groups, and in fact only group 1 is used this time.
At the end of the file, set the group
 [group1]
 group_name=group1
storage_server_port=23000
store_path_count=1
store_path0=/usr/kai/dev/fastdfs/fastdfs_storage_data
store_path1=/usr/kai/dev/fastdfs/fastdfs_storage_data

[group2]
group_name=group2
storage_server_port=23000
store_path_count=1
store_path0=/usr/kai/dev/fastdfs/fastdfs_storage_data

 [group3]
 group_name=group3
storage_server_port=23000
store_path_count=1
store_path0=/usr/kai/dev/fastdfs/fastdfs_storage_data
Create a symbolic connection from M00 to storage directory:
[root@localhost conf]# ln -s /usr/muyou/dev/fastdfs/fastdfs_storage_data/data/ /usr/muyou/dev/fastdfs/fastdfs_storage_data/data/M00
Start nginx:
[root@localhost conf]# /usr/local/nginx/sbin/nginx
ngx_http_fastdfs_set pid=13397
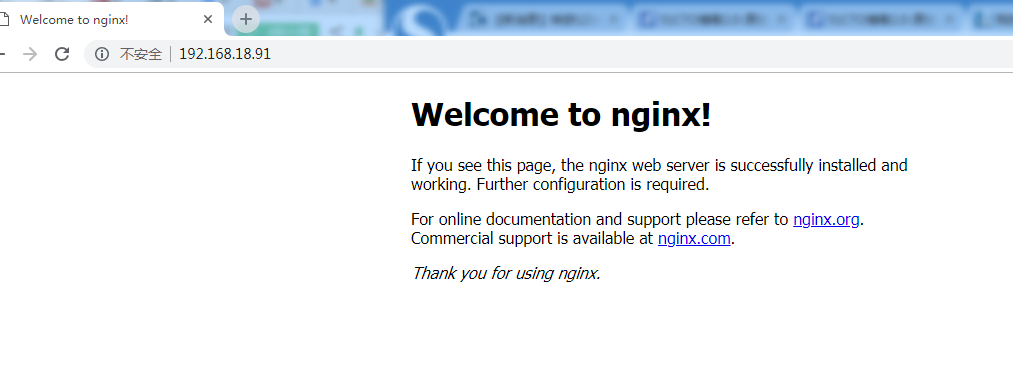
Then add the address of the picture uploaded just now to the IP address. Success, perfect!