For your reference and study, if you have any questions, welcome to exchange and correct!
first, there are installed anaconda, pytorch 1.0 and cuda on the laboratory server. First, apply for an account with the administrator and enter the account folder according to the account password.
1. Remote connection server ssh(VScode)
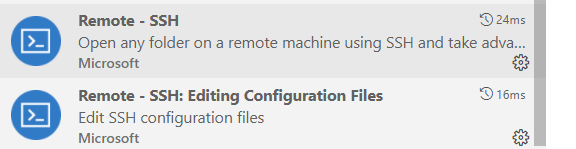
- Install the remote SSH plug-in
- Create a new remote connection, enter a name and press enter (if tested)


- Select to open the config file, as shown in the figure below


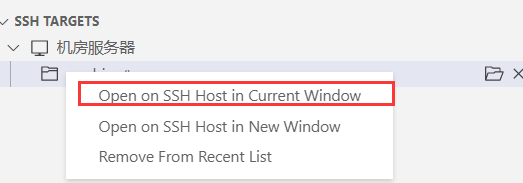
- Modify the Host to any name, HostName to the IP address of the server, and User to his User name on the server

- Right click to select the first one, and then you will be prompted to enter your own server account and password to connect to the server
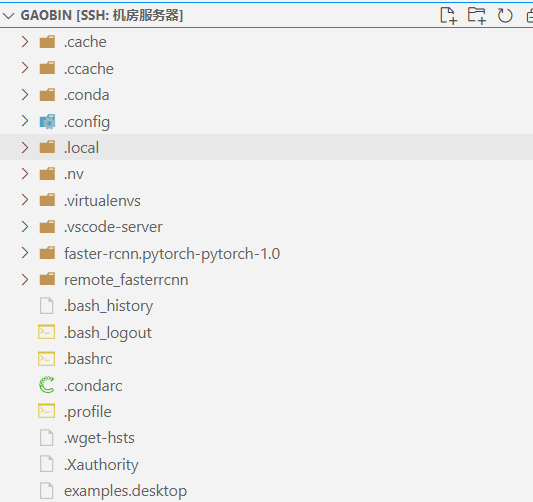
- Finally, you can modify the files on the server locally, run your own model with the server GPU, or store your own things on the server.
2. Model code data preparation
Note that all file paths and naming should follow the steps, because the model code has specified the file path structure of the data. In addition, the data set and pre training model are relatively large, and downloading requires scientific Internet access. Bloggers are putting the downloaded files in their online disk.
Link: https://pan.baidu.com/s/1icSxvO5PGRNYXBpmmP67AA
Extraction code: rsus
- It comes from a fastercnn model comparing fire on github.
Model download link: https://github.com/jwyang/faster-rcnn.pytorch/tree/pytorch-1.0 - Then copy the downloaded model file to your server folder, or directly git clone.
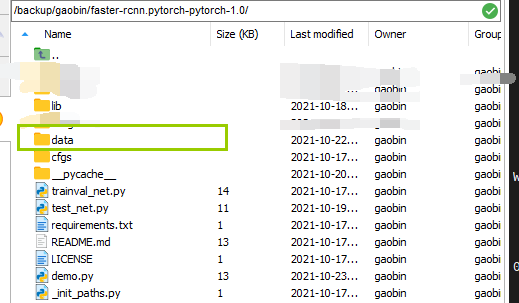
- Enter the model folder and create a new data folder
cd faster-rcnn.pytorch-pytorch-1.0 && mkdir data
- Enter the data folder and download the VOC2007 standard dataset data with the following command, or directly download it on the http page and put it in the data folder.
wget http://host.robots.ox.ac.uk/pascal/VOC/voc2007/VOCtrainval_06-Nov-2007.tar
wget http://host.robots.ox.ac.uk/pascal/VOC/voc2007/VOCtest_06-Nov-2007.tar
wget http://host.robots.ox.ac.uk/pascal/VOC/voc2007/VOCdevkit_08-Jun-2007.tar
- Decompress the dataset. The following three lines of commands are used together. Do not enter them separately. After decompressing, the files will be uniformly generated in the VOCdevkit folder under data.
tar xvf VOCtrainval_06-Nov-2007.tar
tar xvf VOCtest_06-Nov-2007.tar
tar xvf VOCdevkit_08-Jun-2007.tar
- Then change the VOCdevkit folder name to VOCdevkit 2007, or use the following command to establish a soft connection (note that - s is followed by the absolute path of VOCdevkit)
ln -s /faster-rcnn.pytorch-pytorch-1.0/data/VOCdevkit VOCdevkit2007
-
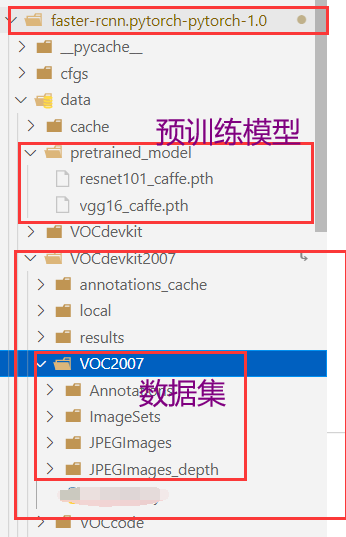
Next, create the subfolder pretrained under data_ Model, download the pre training model VGG16, ResNet101 and put it into pre trained_ In the model folder
VGG16 pre training model link: https://www.dropbox.com/s/s3brpk0bdq60nyb/vgg16_caffe.pth?dl=0
ResNet101 pre training model link: https://www.dropbox.com/s/iev3tkbz5wyyuz9/resnet101_caffe.pth?dl=0 -
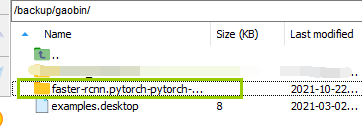
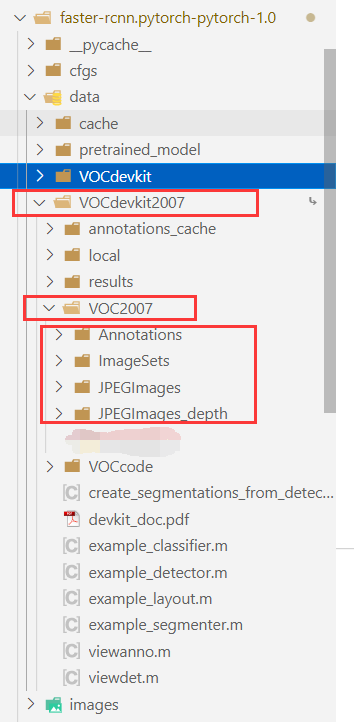
The final file structure is:
3. Environmental preparation
- Create your own virtual environment using conda on the command line (gaobin_py3.6 is your own virtual environment name, python==3.6 is your own version of Python)
conda create -n gaobin_py3.6 python==3.6
- Then enter your own virtual environment
conda activate gaobin_py3.6
The effect is shown in the figure below. If there is no base or your own environment name in front, it is recommended to initialize conda init first.

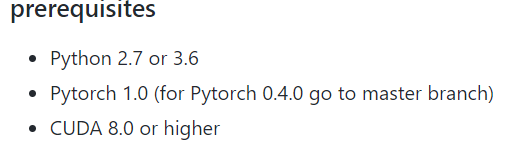
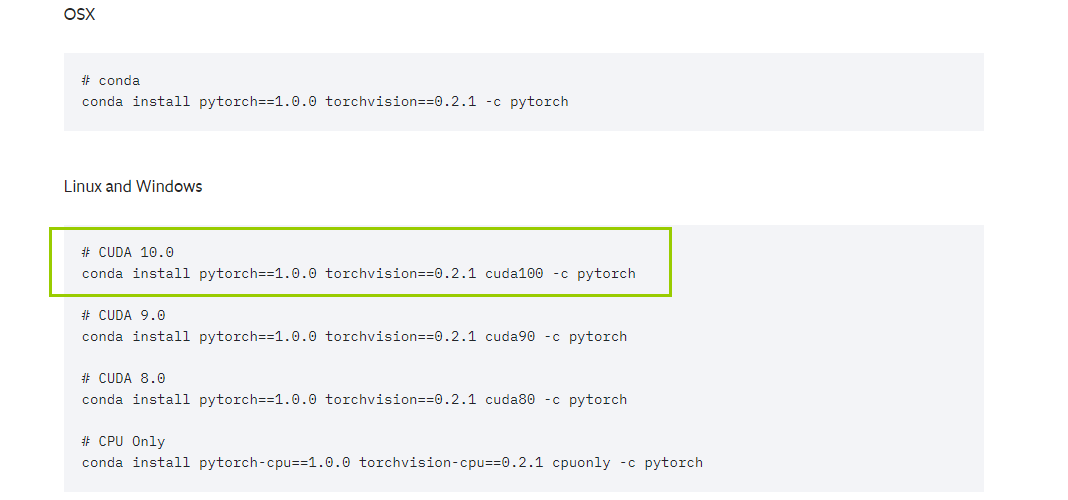
- Then install the environment you need. First, let's look at the preparation environment suggested by the github author. When creating the virtual environment, we have set Python 3.6, and then conda list to see if there is a python in your virtual environment. If not, in this pytorch website ( https://pytorch.org/get-started/previous-versions/ )Find the installation command corresponding to the version. cuda is downward compatible. cuda11.4 is installed on our server. You can view the installed cuda information with NVIDIA SMI. Therefore, the command in the figure below is actually available. After installation, remember to check whether pytorch is installed in conda list.
- Then go back to the fast-rcnn.python-1.0 folder and install the python dependent package
pip install -r requirements.txt
- Then enter the lib folder to compile cuda
cd lib
python setup.py build develop
During this step or training, you may encounter two problems
(1)cannot import name '_mask'
At this time, there is a problem with the pycocotools package. I just reinstalled pip install pycocotools. However, there are many problems on the Internet by downloading cocoapi. You can try it later.
(2)can't import 'imread'
This is the version problem of scipy. I forgot the specific version. Reinstall a 1.2.1 version with pip install scipy==1.2.1.
4. Training, testing and demo running (res101 pre training model used here)
- Run trainval_net.py file. The first is the description of the running command. The second is the command I use. I should pay attention to my GPU number and the pre training model. The author has suggested parameters on the other parameters github. We only run the VOC2007 data set.
 CUDA_VISIBLE_DEVICES=$GPU_ID python trainval_net.py \
                   --dataset pascal_voc --net vgg16 \
                   --bs $BATCH_SIZE --nw $WORKER_NUMBER \
                   --lr $LEARNING_RATE --lr_decay_step $DECAY_STEP \
                   --cuda
CUDA_VISIBLE_DEVICES=1 python trainval_net.py
                      --dataset pascal_voc --net res101
                      --bs 1 --nw 4  --cuda --epochs 5
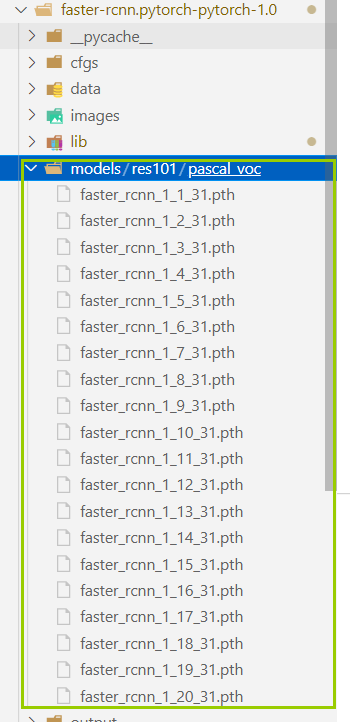
After the operation, if there is no self-made model folder, a models folder will appear under the fast-rcnn.pytorch-pytorch-1.0 folder. The folder structure is as follows: (the 31 contained after the name in the file should be 2504, which is related to the size of the data set. This 31 is trained by my own data set)
- Test VGG16, ResNet101 pre training model, and the trained model is in Pascal_ For the performance on the VOC test set, the following commands are used. The first is the description of the running command, and the second is the command I use myself (learn the meaning of specific parameters later).
python test_net.py --dataset pascal_voc --net vgg16 \
                   --checksession $SESSION --checkepoch $EPOCH --checkpoint $CHECKPOINT \
                   --cuda
python test_net.py --dataset pascal_voc --net res101
                   --checksession 1 --checkepoch 20
                   --checkpoint 2504
                   --cuda
- Run demo.py. The image is the image to run. If you want to run your own image, replace it. If you don't change the path during training, run it directly according to the following commands. The first is the description of running the command, and the second is the command I use myself,
python demo.py --net res101 \
               --checksession $SESSION --checkepoch $EPOCH --checkpoint $CHECKPOINT \
               --cuda --load_dir + Model storage folder
python demo.py --net res101
               --checksession 1 --checkepoch 20
               --checkpoint 2054
               --cuda --load_dir models
If the model storage path is changed during training, modify – load_dir parameters are troublesome and difficult to modify, or maintain the same file structure as models/res101/pascal_voc
Note that the following errors may occur:
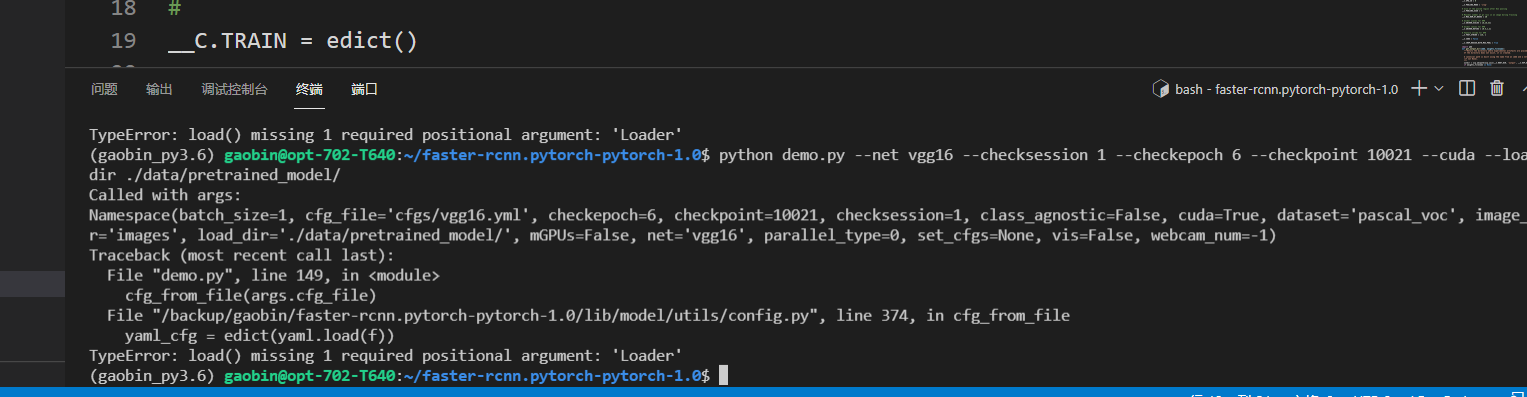
Display missing parameters. This problem is the yaml version. You can conda install pyyaml==5.4.1 and reinstall a lower version of yaml.
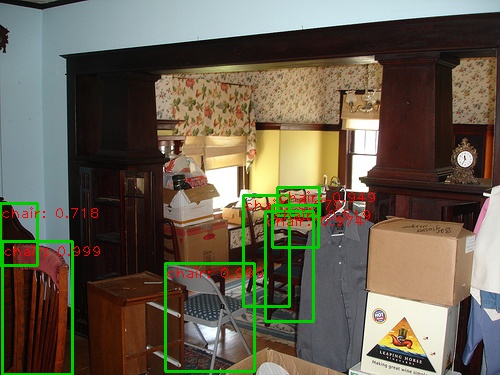
- Effect: (for one picture, the picture of the test result is added with "_det" more than the name of the original picture, pay attention to distinguish)
5. Train your own data
-
Its own data structure is consistent with that of VOC2007. For convenience, directly delete the data of the standard data set and copy it in the third red box below. Here, you can identify the photo data of JPEGImages folder and the label data of Annotations folder, and then automatically generate the files of training set and test set. Refer to this blog: Detailed explanation of the construction and use process of fast-rcnn.pytorch (applicable to pytorch version 1.0 or above).
-
Modify / lib / datasets / Pascal_ Detection category in voc.py (about 48 lines of code):
The original test categories are:
self._classes = ('__background__',  # always index 0
                         'aeroplane', 'bicycle', 'bird', 'boat',
                         'bottle', 'bus', 'car', 'cat', 'chair',
                         'cow', 'diningtable', 'dog', 'horse',
                         'motorbike', 'person', 'pottedplant',
                         'sheep', 'sofa', 'train', 'tvmonitor','plane')
Instead, I have only one category:
self._classes = ('__background__',  # always index 0
                         'thyroid')
- Modify the categories in demo.py (about 170 lines of code) in the same way as above.
- Train, test, run your own data and run the results
CUDA_VISIBLE_DEVICES=0 python trainval_net.py
                     --dataset pascal_voc --net res101
                     --bs 4 --nw 0 --lr 0.001
                     --lr_decay_step 5 --cuda
python test_net.py --dataset pascal_voc
                   --net res101  --checksession 1 --checkepoch 20 --checkpoint 31
                   --cuda
python demo.py --net res101 --checksession 1 --checkepoch 20 --checkpoint 31
               --cuda --load_dir models