1, dlib library introduction and related installation
1.1 INTRODUCTION
- Dlib library is an open source library of machine learning, which contains many algorithms of machine learning. It is very convenient to use. It can directly include header files, and does not depend on other libraries (with its own image codec library source code). Dlib can help you create many complex machine learning software to help solve practical problems. At present, Dlib has been widely used in industry and academic fields, including robots, embedded devices, mobile phones and large-scale high-performance computing environments.
1.2 download and installation of Library
- dlib Library (Python 3.8) version (extraction code 1111)
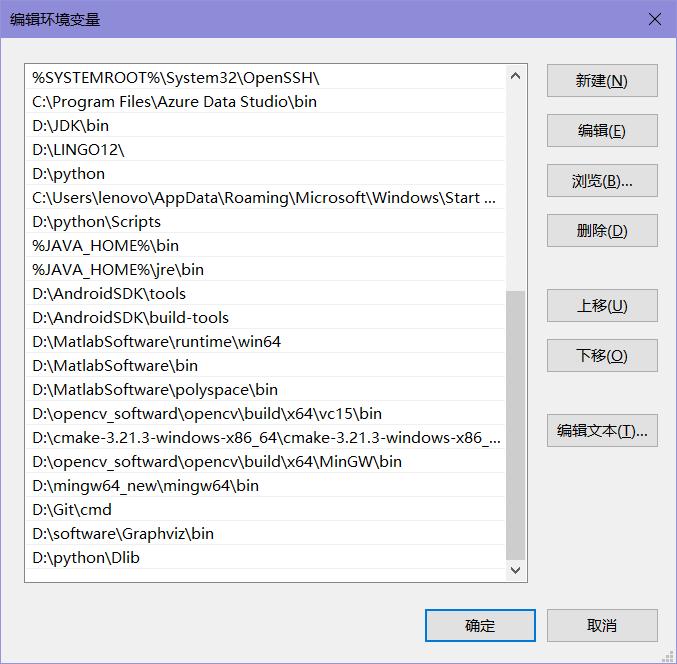
- The next step is to enter your download location and add the file path to the environment variable

- Use the following command to install, followed by the file name. If your python is of other versions, you need to download the corresponding version of dlib library and change the file name
pip install dlib-19.19.0-cp38-cp38-win_amd64.whl
- The opencv Library in python will also be used later. This installation is still quite simple. Just use pip directly, but like the dlib library installed above, pay attention to the version. At that time, search the corresponding version on the Internet. Version 3.4.11.15 can be used for version 3.8
pip install opencv_python==3.4.11.45
2, Draw a black solid circle at the eye using dlib library
- Download dlib library training set (extraction code 1111)
- The next step is the code module. The first step is to import the relevant packages
# Import package
import numpy as np
import cv2
import dlib
import os
import sys
import random
- Add a function to obtain the default face detector and trained face 68 feature point detector
def get_detector_and_predicyor():
    #Use the front that comes with dlib_ face_ Detector as our feature extractor
    detector = dlib.get_frontal_face_detector()
    """
    Function: face detection frame
    Parameters: PythonFunction and in Classes
    in classes Indicates the number of sampling times. The more the number of times, the more the number of faces obtained, but it is easier to frame errors
    The return value is the coordinates of the rectangle, and each rectangle is a human face (the default face detector)
    """
    #Return to the trained face 68 feature point detector
    predictor = dlib.shape_predictor('..\\source\\shape_predictor_68_face_landmarks.dat')
    return detector,predictor
- I used jupyter to get the detector. This step takes a long time, so I took it out alone
#Acquisition detector
detector,predictor=get_detector_and_predicyor()
- The function added to draw a circle for the eye is to find the feature points around the eye, then confirm the center point, and then draw it with the circle function
def painting_sunglasses(img,detector,predictor):
    #Put sunglasses on your face
    rects = detector(img_gray, 0)
    for i in range(len(rects)):
        landmarks = np.matrix([[p.x, p.y] for p in predictor(img,rects[i]).parts()])
        right_eye_x=0
        right_eye_y=0
        left_eye_x=0
        left_eye_y=0
        for i in range(36,42):#Right eye range
            #Add coordinates
            right_eye_x+=landmarks[i][0,0]
            right_eye_y+=landmarks[i][0,1]
        #Take the midpoint coordinate of the eye
        pos_right=(int(right_eye_x/6),int(right_eye_y/6))
        """
        utilize circle Function circle
        Function prototype
        cv2.circle(img, center, radius, color[, thickness[, lineType[, shift]]])
        img: Input picture data
        center: Center position
        radius: Radius of circle
        color: Color of circle
        thickness: The thickness of the circular outline (if positive). A negative thickness indicates that you want to draw a solid circle.
        lineType:  The type of circle boundary.
        shift: The number of decimal places in the center coordinate and radius values.
        """
        cv2.circle(img=img, center=pos_right, radius=30, color=(0,0,0),thickness=-1)
        for i in range(42,48):#Left eye range
           #Add coordinates
            left_eye_x+=landmarks[i][0,0]
            left_eye_y+=landmarks[i][0,1]
        #Take the midpoint coordinate of the eye
        pos_left=(int(left_eye_x/6),int(left_eye_y/6))
        cv2.circle(img=img, center=pos_left, radius=30, color=(0,0,0),thickness=-1)
- Call the function
camera = cv2.VideoCapture(0)#Turn on the camera
ok=True
# Open the camera parameter as the input stream, which can be a camera or video file
while ok:
    ok,img = camera.read()
     # Convert to grayscale image
    img_gray = cv2.cvtColor(img,cv2.COLOR_BGR2GRAY)
    #display_feature_point(img,detector,predictor)
    painting_sunglasses(img,detector,predictor)#Call the draw Sunglasses function
    cv2.imshow('video', img)
    k = cv2.waitKey(1)
    if k == 27:    # press 'ESC' to quit
        break
camera.release()
cv2.destroyAllWindows()
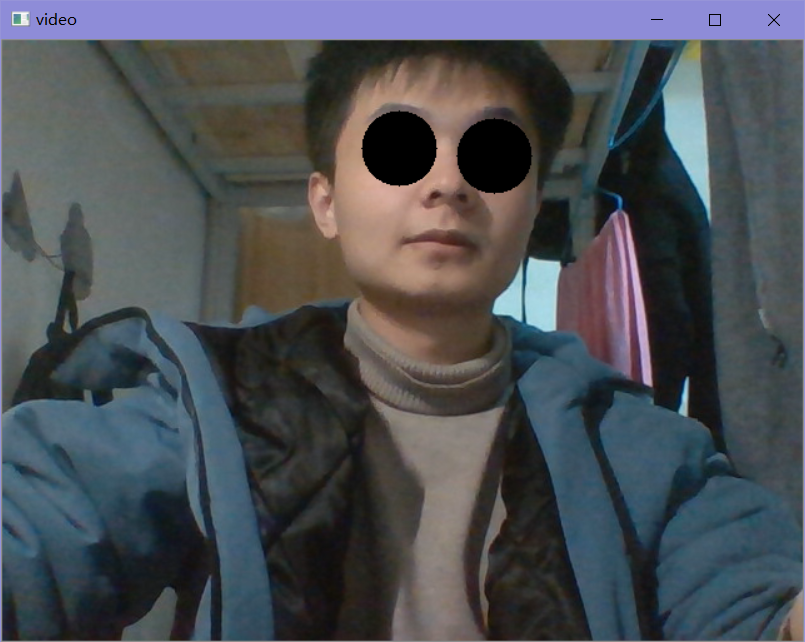
- The actual effect, people are not good-looking, the effect is the key

3, Summary
- The dlib library and opencv library have been done this time. Because they are related to visualization, they are still interesting when debugging functions. Because they are implemented by calling library functions, they don't have a clear understanding of how to implement them, but they are familiar with the use. The opencv library functions are really complete.
4, Reference
Py's dlib: introduction, installation and use of the dlib Library of Python Library
dlib.shape_predictor() key detector
dlib.get_ frontal_ face_ Detector (face detection)