What is data embedding
The so-called data embedding point is the application of data collection for a specific behavior or event in a specified process.Using the collected data for user analysis and page analysis, you can get the overall usage of the application and provide data support for subsequent optimization of products and operations.Common data burying points include: visits, length of stay, exposure, clicks, jump-out rates, and so on.
The WeChat applet also provides us with custom analysis statistics, including API reporting (code burying point), filling in configuration (no burying point, just in the public background).The third-party statistical platform is well known for Aladdin Statistics, which only needs to introduce an integrated SDK to meet most of the needs at a low cost.
Data embedding needs to analyze the page flow, determine the embedding requirements, and select the embedding method.If it is a code burying point, focus on trigger timing, condition judgment, data capture, and secondly on whether there are missing scenarios that do not achieve burying point.Although code embedding is costly (intrusive code), it has high accuracy and can meet the requirements of embedding well.
What is Exposure
Exposure, as its name implies, is the number of times a specified element appears in an observable view, also known as the amount of display.
Usually we use clicks/exposures to get clicks as one of the metrics to measure whether a content is liked by users.For example, only 10 clicks are exposed 100 times, and 100 clicks are exposed 100 times, obviously the latter is more popular with users.With these data references, you can recommend more favorite content to retain users.
Cross-observer
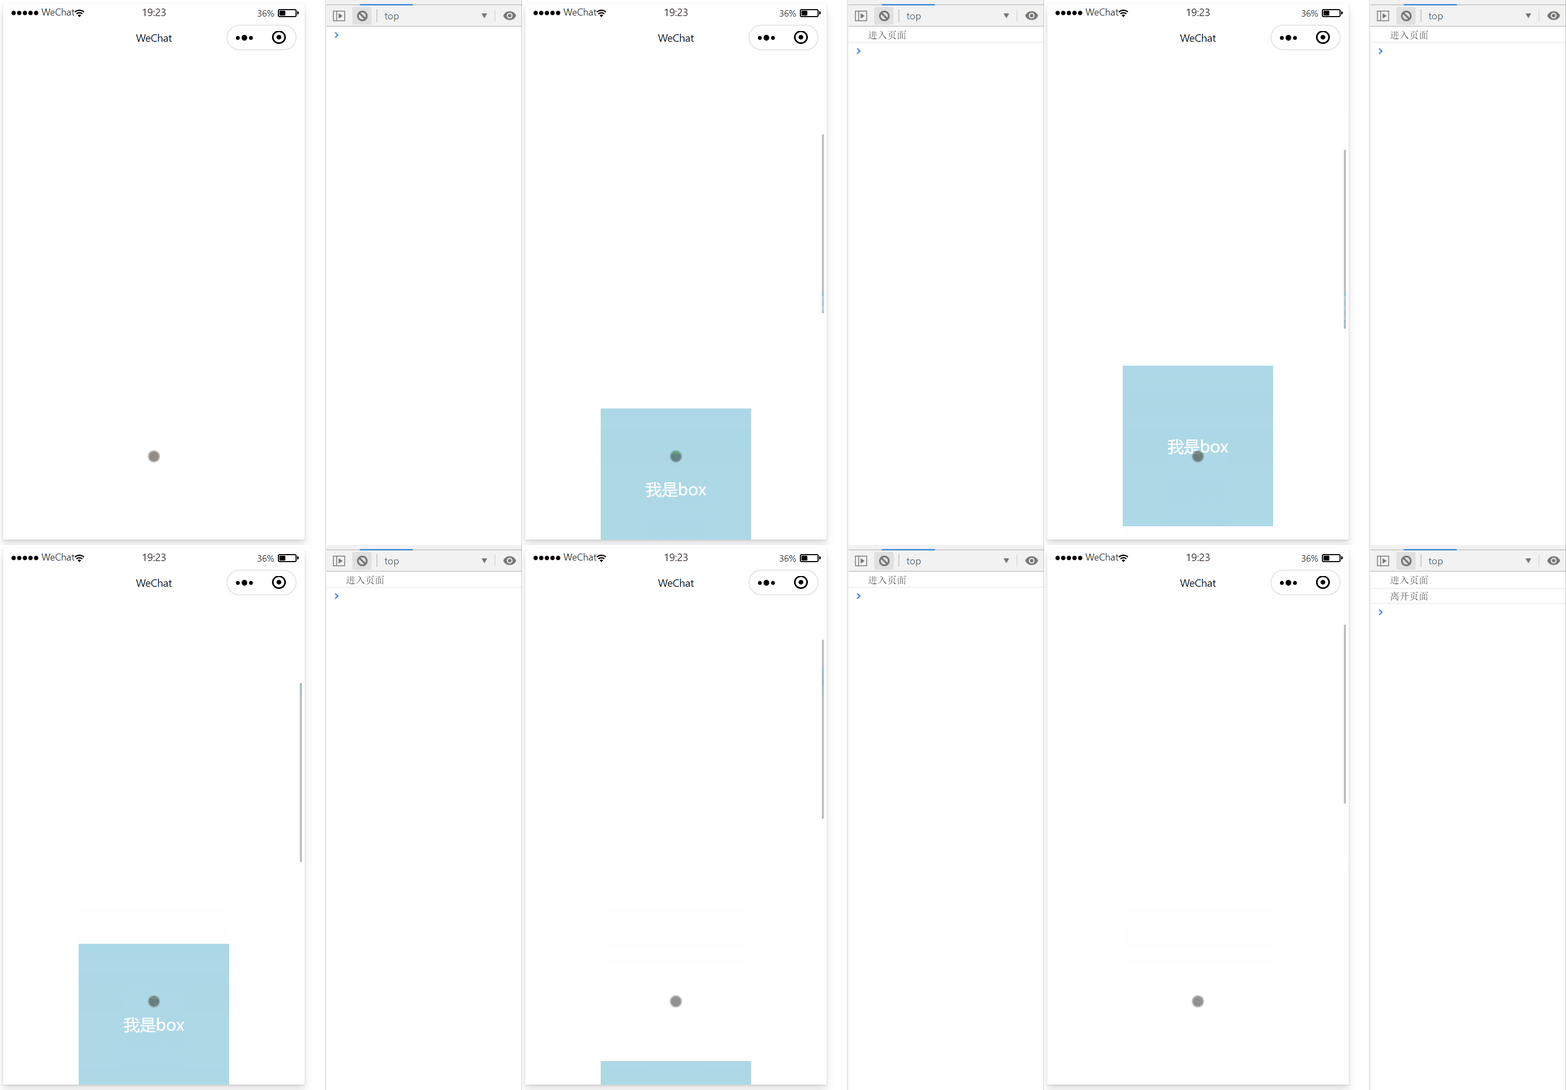
The IntersectionObserver interface provides a way to asynchronously observe the crossing state of a target element with its ancestor element or top-level document viewport, which is called the root.Simply put, whether the target of the observation crosses the ancestor elements and the window, that is, entering or leaving.
The applet supports the wx.createIntersectionObserver interface (this.createIntersectionObserver is used within components) from the base library 1.9.3 onwards, which allows the creation of IntersectionObserver objects.Viewable if you are not familiar with this interface Official Documents.
Basic Use
// Create an instance
let ob = this.createIntersectionObserver()
// Listen relative to document window
ob.relativeToViewport()
    .observe('.box', res => {
        // res.intersectionRatio is the intersection ratio
        if (res.intersectionRatio > 0) {
            console.log('Enter Page')
        } else {
            console.log('Leave the page')
        }
    })

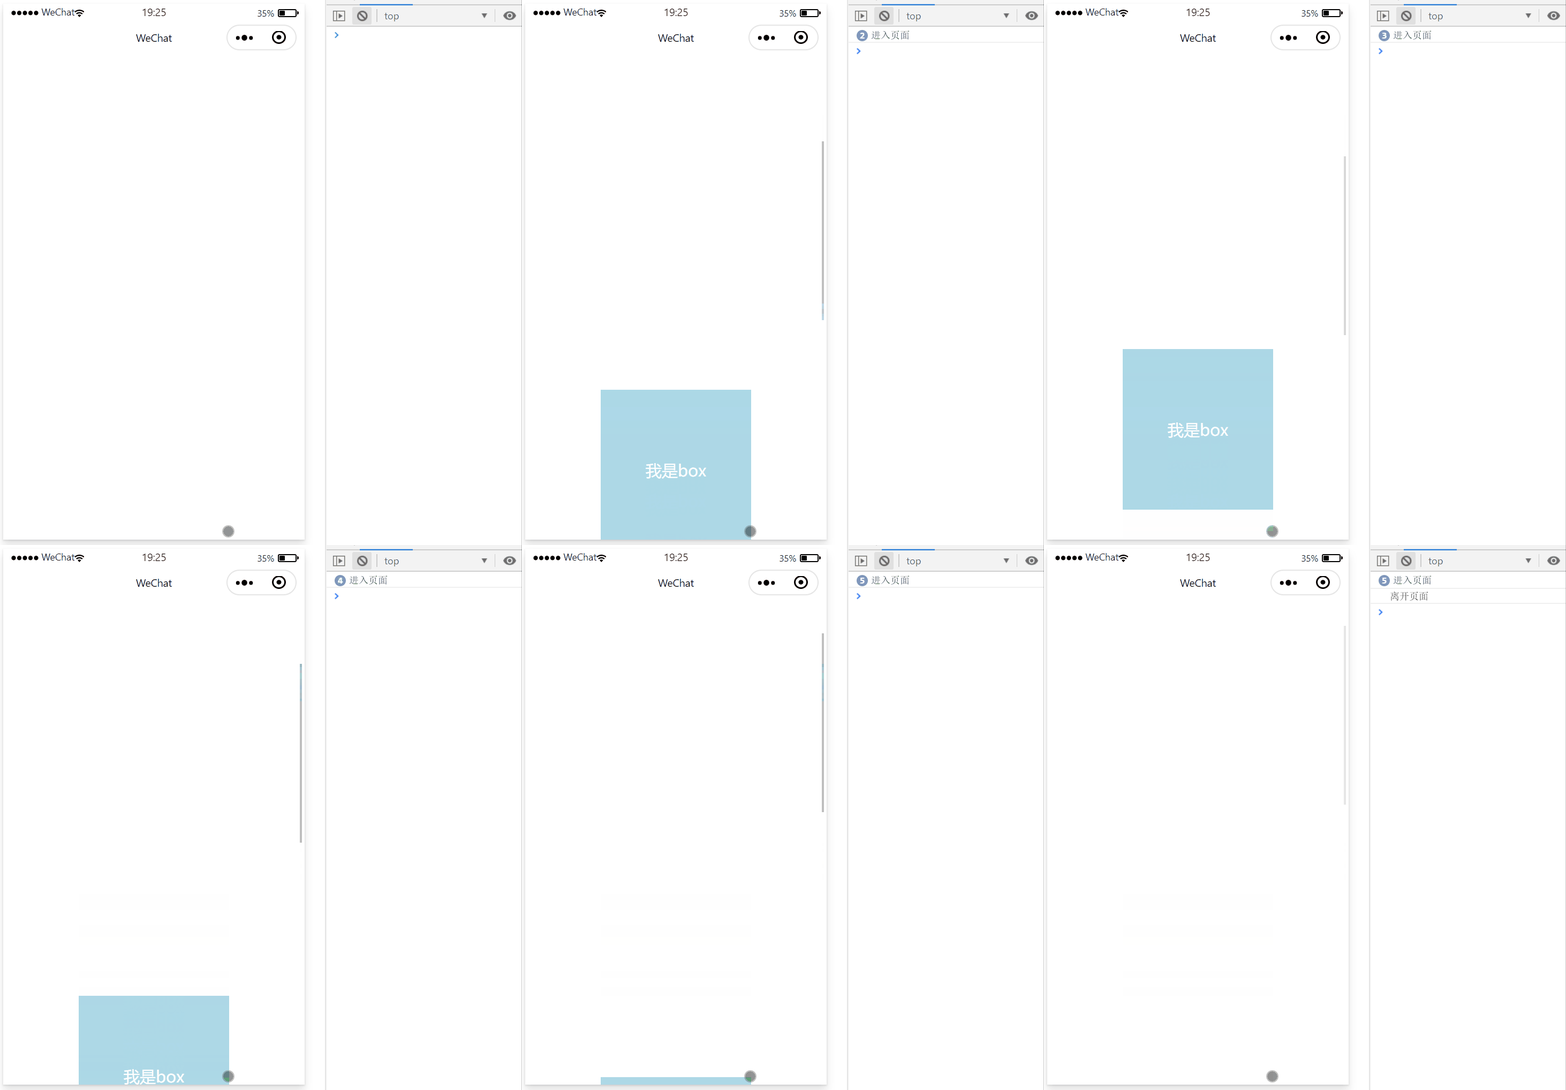
threshold
Configurations can be passed in when an instance is created, of which thresholds are an important configuration that controls when callbacks are triggered.Throwolds is an array of number types, defaulting to [0].That is, a callback is triggered when the intersection ratio is 0. Let's set a threshold to see what happens:
// Create an instance
let ob = this.createIntersectionObserver({
    thresholds: [0, 0.5, 1]
})

As you can see from the diagram, each element triggers a callback at the intersection ratio of 0, 0.5, and 1.Setting a threshold for statistical exposure is very useful, and I usually set it to 1, meaning that elements are recorded only when they are fully displayed on the page, which makes the data more realistic and accurate.
Shrink and expand reference area
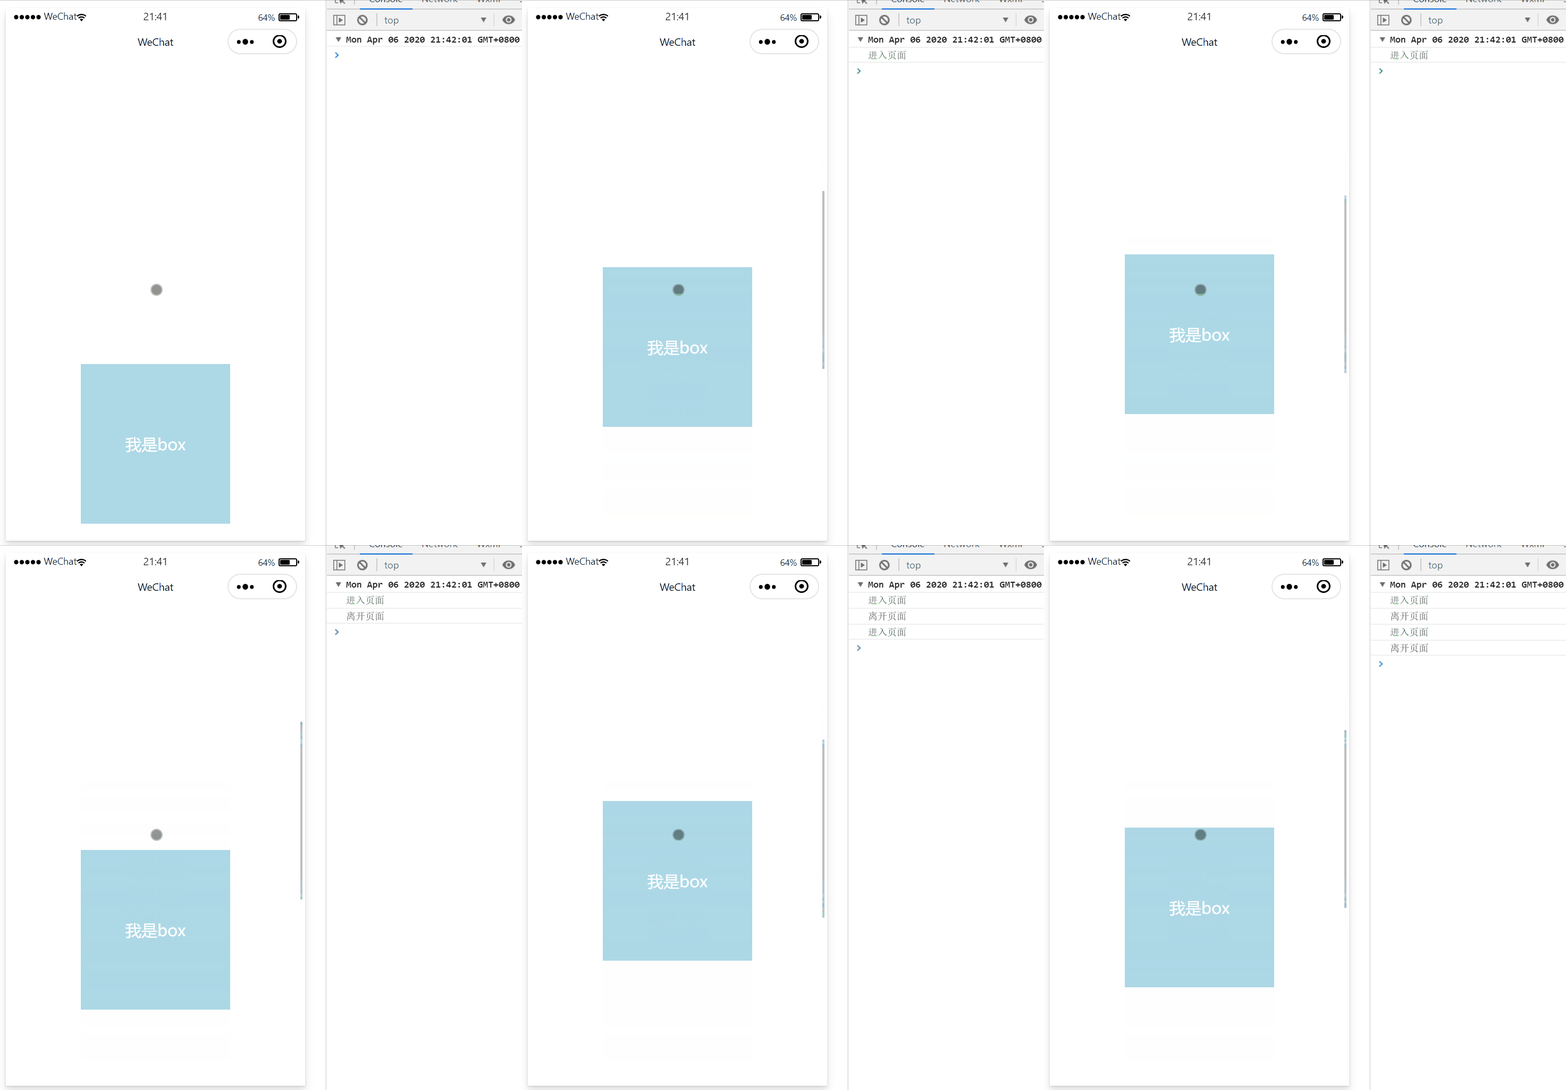
In addition to the threshold, another important setting is that when using relativeToor relativeToViewport to specify the reference area, we can pass in the configuration margins to shrink and expand the reference area.Margins include four parameter configurations: left, right, top, and bottom.
// Create an instance
let ob = this.createIntersectionObserver()
// Listen relative to document window
ob.relativeToViewport({
        bottom: -330
    })
    .observe('.box', res => {
        // res.intersectionRatio is the intersection ratio
        if (res.intersectionRatio > 0) {
            console.log('Enter Page')
        } else {
            console.log('Leave the page')
        }
    })
By shrinking 330px from the bottom of the reference area above, you can understand that the entire area is clipped 330px from the bottom, so the callback will only be triggered if the element enters the top half of the page.

Getting down to business
After some introduction above, I believe you all know the benefits and uses of cross-observers alike.Next to the main topic~
background
This time, my project is a small program of information category, mainly used for publishing and reprinting some academic articles.Items with this information need to collect users'reading habits through data embedding to recommend articles for users.
Embedding uses the custom analysis provided by the WeChat background to collect articles, while our own background collects users.The former derives the overall user's reading preferences and article popularity, while the latter is mainly accurate to the user to analyze the user unit's reading preferences.
Modify Components
After analyzing the page layout and the pm's discussion, several areas of the article requiring statistical exposure are shown roughly the same, which happens to be in the encapsulated list component.The logic for collecting exposure is then handled internally by the component.
Component modification:
- Defines the isObserver property, which is controlled by an external Boolean value to collect exposure
- Listen for incoming list s, binding cross-observers for each element
The following sections of code are omitted to show only the main logic:
<block wx:for="{{list}}" wx:key="id">
    <view class="artic-item artic-item-{{index}}" data-id="{{item.id}}" data-index="{{index}}">
    </view>
</block>
const app = getApp()
Component({
    data: {
        currentLen: 0
    }
    properties: {
        list: {
            type: Array,
            value: []
        },
        isObserver: {
            type: Boolean,
            value: false
        }
    },
    observers: {
        list(list) {
            if (this.data.isObserver === false) {
                return
            }
            if (list.length) {
                // CurrtLen records the length of the current list
                // Used to calculate the index of listening elements, no longer repeat listening on elements that have already been listened on
                let currentLen = this.data.currentLen
                for (let i = 0; i < list.length - currentLen; i++) {
                    let ob = this.createIntersectionObserver({
                        thresholds: [1]
                    })
                    ob.relativeToViewport()
                        .observe('.artic-item-' + (currentLen + i), res => {
                            // Get the dataset of the element
                            let {
                                id,
                                index
                            } = res.dataset
                            if (res.intersectionRatio === 1) {
                                // Exposure is collected here and internal processing logic is mentioned below
                                this.sendExsureId(id)
                                // Cancel watcher monitoring after an element appears to avoid repeated triggers
                                ob.disconnect()
                            }
                        })
                }
            }
            this.data.currentLen = list.length
        }
    }
})

find_

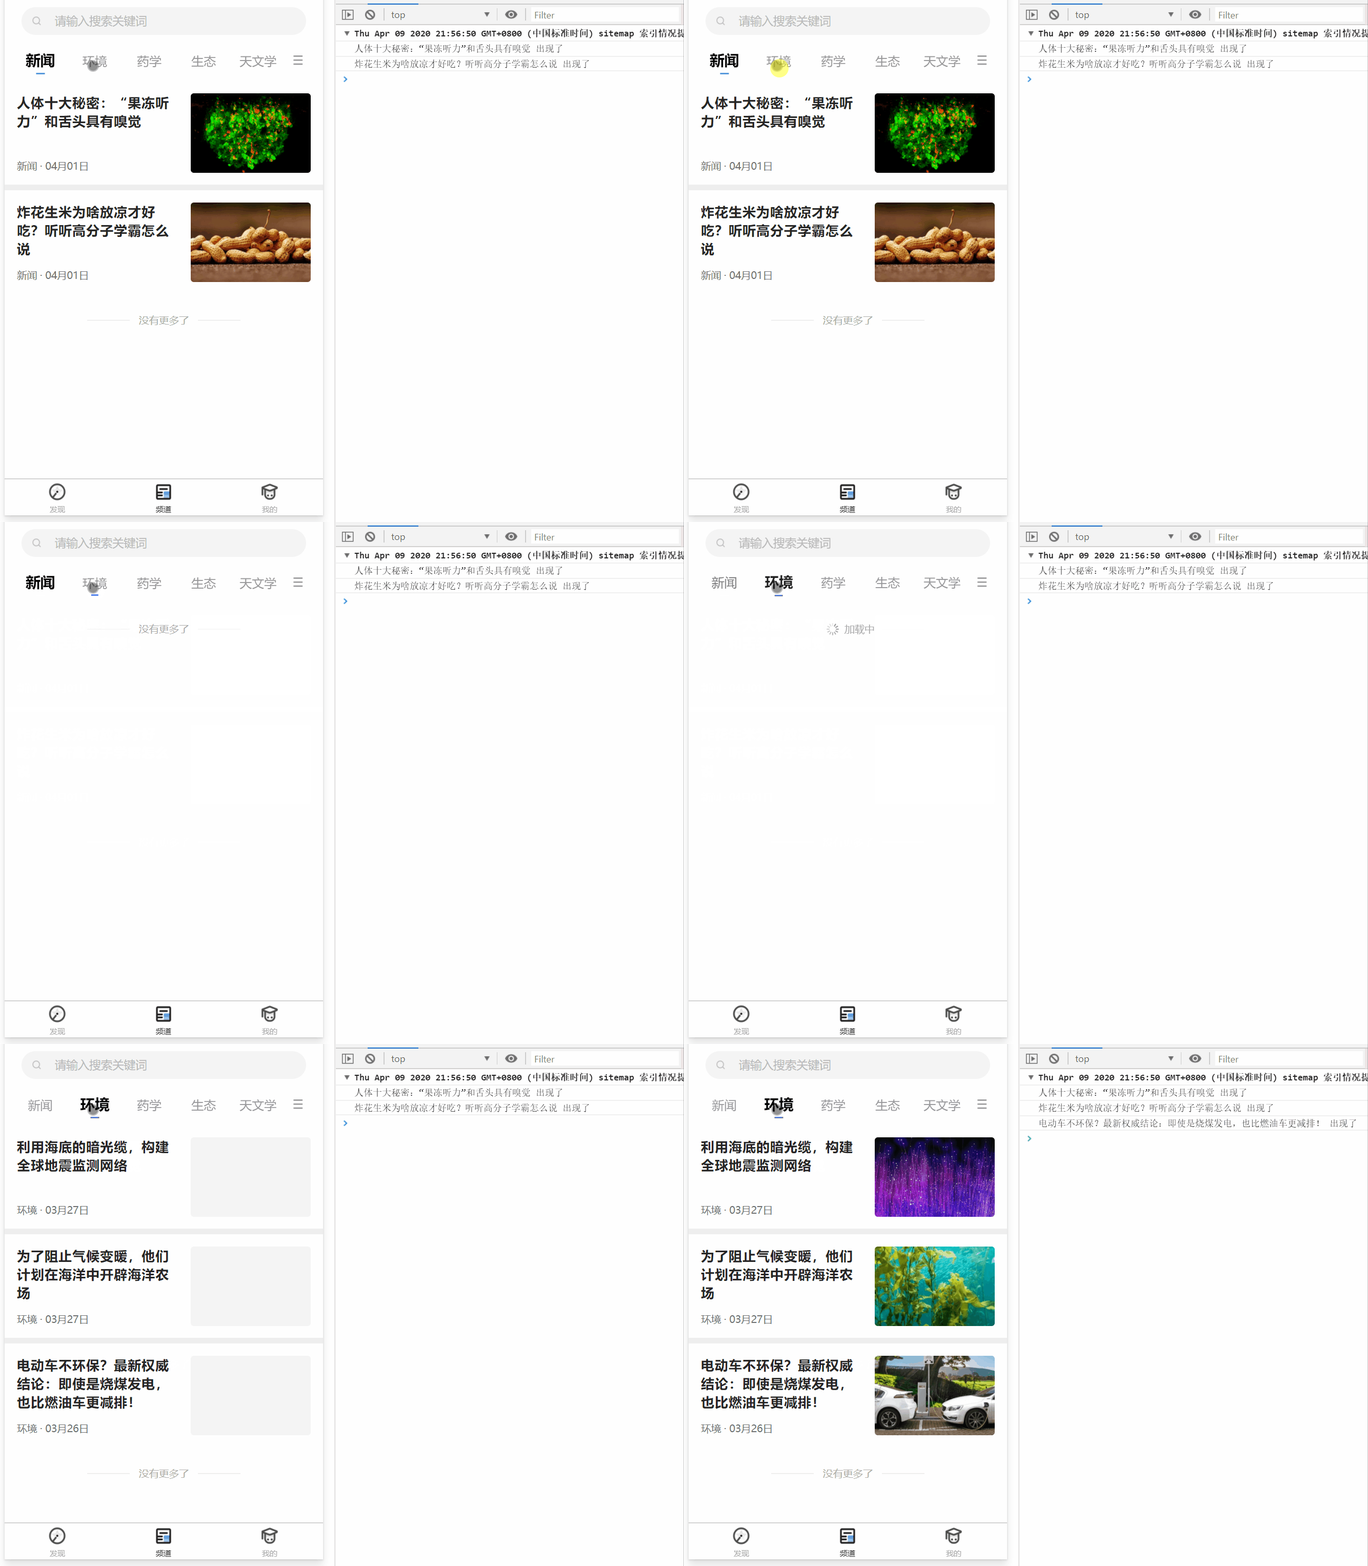
Ideally, you would switch to the second category to print three articles, but since the component starts recording the currentLen of the first category list, the currentLen is not cleared when you switch to the second category, resulting in a cycle length error.
Solution: First record the id of the first item in the list, and when listening for changes in the list, compare it with the first id of the new list.If not, the list is reassigned, and currentLen is set to zero.
Component({
    data: {
        flagId: 0,
        currentLen: 0
    }
    properties: {
        list: {
            type: Array,
            value: []
        },
        isObserver: {
            type: Boolean,
            value: false
        }
    },
    observers: {
        list(list) {
            if (this.data.isObserver === false) {
                return
            }
            if (list.length) {
                // Compare IDS
                if (this.data.flagId != list[0].id) {
                    this.data.currentLen = 0
                }
                let currentLen = this.data.currentLen
                for (let i = 0; i < list.length - currentLen; i++) {
                    let ob = this.createIntersectionObserver({
                        thresholds: [1]
                    })
                    ob.relativeToViewport()
                        .observe('.artic-item-' + (currentLen + i), res => {
                            let {
                                id,
                                index
                            } = res.dataset
                            if (res.intersectionRatio === 1) {
                                this.sendExsureId(id)
                                ob.disconnect()
                            }
                        })
                }
            }
            // Set the first item id of the list
            this.data.flagId = list[0] ? list[0].id : 0
            this.data.currentLen = list.length
        }
    }
})
Component optimization
Because you need to listen for the intersection state of the articles ahead of time, loop observe as the list is passed in.Now imagine a scenario where, upon entering the page, callbacks have been completed for some articles registered, but the user exits the page without seeing them.Does that mean none of these instances are disconnect ed?
Solution: Save each observer instance in an array while observing, check if there are observer instances in the array when a component is destroyed, and call disconnect for those instances if there are.
Component({
    data: {
        currentLen: 0,
        obItems: [] // Array holding instances
    },
    observers: {
        list(list) {
            if (this.data.isObserver === false) {
                return
            }
            if (list.length) {
                if (this.data.flagId != list[0].id) {
                    this.data.currentLen = 0
                    // Cancel instance monitoring
                    this.removeObItems()
                }
                let currentLen = this.data.currentLen
                for (let i = 0; i < list.length - currentLen; i++) {
                    let ob = this.createIntersectionObserver({
                        thresholds: [1]
                    })
                    ob.relativeToViewport().observe('.artic-item-' + (currentLen + i), res => {
                        let {
                            index,
                            id
                        } = res.dataset
                        if (res.intersectionRatio === 1) {
                            this.sendExsureId(id)
                            ob.disconnect()
                            // Move instances out of the array after listening is cancelled
                            this.data.obItems.shift()
                        }
                    })
                    // Save instances in an array
                    this.data.obItems.push(ob)
                }
            } else {
                // Cancel instance monitoring
                this.removeObItems()
            }
            this.data.flagId = list[0] ? list[0].id : 0
            this.data.currentLen = list.length
        }
    },
    lifetimes: {
        detached() {
            // Cancel instance monitoring when component is destroyed
            this.removeObItems()
        }
    },
    methods: {
        removeObItems() {
            if (this.data.obItems.length) {
                this.data.obItems.forEach(ob => {
                    ob.disconnect()
                })
            }
        }
    }
})
Collection Processing
Now that the component can collect the ID of the exposure article, all that remains is to send data back to the background.So the question arises, does the article make a request once it's exposed?If you're not afraid to fight back-end colleagues, you can.To know that requests are made multiple times, the server_It will be very large.After a large number of users, the concurrency amount that the server can bear will be greatly tested.So the correct way to do this is to cache the collected IDs and send them together when a certain number of IDs are available.
Next, do some work with the collected data:
// This function collects exposure above
sendExsureId(id) {
    if (typeof app.globalData.exposureIds === 'undefined') {
        // exposureIds is an array defined to hold exposure article ID s globally
        app.globalData.exposureIds = []
    }
    app.globalData.exposureIds.push(id)
    // When the array reaches 50, start reporting data
    if (app.globalData.exposureIds.length >= 50) {
        wx.$api.recordExposure({
            // Because of the large number of ID s, I agreed to use comma-separated backends
            ids: app.globalData.exposureIds.join(',')
        })
        // Empty the array after reporting
        app.globalData.exposureIds = []
    }
}
It looks like we're done here, but there's one more thing to consider.If the user only sees 40 and quits the applet, and the reporting condition is that 50 will send the data, this useful part of the data will be lost.Because the applet has no callbacks to listen for the applet being destroyed, only the onHide function of the applet can be used to do something here.The onHide function is executed when the applet enters the background, where data can be reported.
App({
    onHide() {
        if (this.globalData.exposureIds.length) {
            wx.$api.recordExposure({
                ids: this.globalData.exposureIds.join(',')
            })
            this.globalData.exposureIds = []
        }
    }
})
Write at the end
To be honest, the knowledge of burying is not very familiar, and the business scene is relatively simple.Because there is no big man's guidance, but also to see the needs to do this, where there are errors or omissions, please point out.If you have a better plan or experience, you are welcome to comment_~