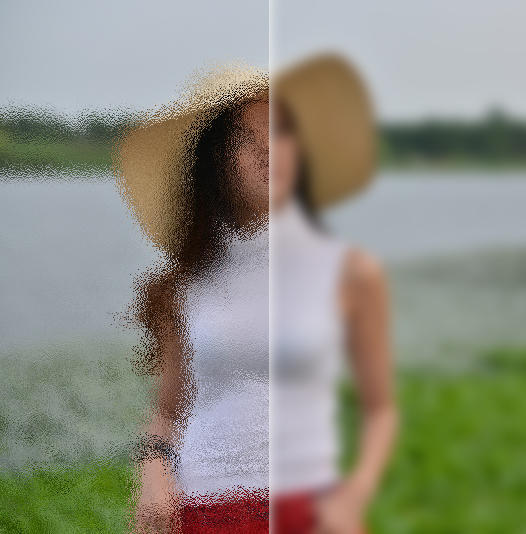
In the development of iOS, sometimes it is necessary to set blurred pictures to achieve better user experience for specific effects. After iOS7, translucent blurring effect has been widely used. Now it can be seen that many applications use image blurring effect locally, and can achieve image blurring effect through Gauss blurring and ground glass effect.
Gauss Fuzzy Effect
1. CoreImage:
After iOS 5.0, the Core Image API appeared. The Core Image API was placed in the Core Image. Framework library. On the iOS and OS X platforms, Core Image provides a large number of filters. There are more than 120 filters on OS X, and more than 90 filters on iOS.
+(UIImage *)coreBlurImage:(UIImage *)image withBlurNumber:(CGFloat)blur
{
    CIContext *context = [CIContext contextWithOptions:nil];
    CIImage *inputImage= [CIImage imageWithCGImage:image.CGImage];
    //Setting up filter
    CIFilter *filter = [CIFilter filterWithName:@"CIGaussianBlur"];
    [filter setValue:inputImage forKey:kCIInputImageKey]; [filter setValue:@(blur) forKey: @"inputRadius"];
    //Blurred picture
    CIImage *result=[filter valueForKey:kCIOutputImageKey];
    CGImageRef outImage=[context createCGImage:result fromRect:[result extent]];
    UIImage *blurImage=[UIImage imageWithCGImage:outImage];
    CGImageRelease(outImage);
    return blurImage;
}
2. vImage
vImage belongs to Accelerate.Framework. It needs to import the Accelerate header file under Accelerate. Accelerate is mainly used for the library of vector and matrix operations related to digital signal processing and image processing. Image can be considered to be composed of vector or matrix data. Since Accelerate provides an efficient mathematical operation API, it is naturally convenient for us to do a variety of image processing. Fuzzy algorithm uses the function of vImageBox Convolve_ARGB8888.
+(UIImage *)boxblurImage:(UIImage *)image withBlurNumber:(CGFloat)blur
 {
     if (blur < 0.f || blur > 1.f) {
        blur = 0.5f;
     }
     int boxSize = (int)(blur * 40);
     boxSize = boxSize - (boxSize % 2) + 1;
     CGImageRef img = image.CGImage;
     vImage_Buffer inBuffer, outBuffer;
     vImage_Error error;
     void *pixelBuffer;
     //Getting data from CGImage
     CGDataProviderRef inProvider = CGImageGetDataProvider(img);
     CFDataRef inBitmapData = CGDataProviderCopyData(inProvider);
     //Set the properties of the object to be retrieved from CGImage
     inBuffer.width = CGImageGetWidth(img);
     inBuffer.height = CGImageGetHeight(img);
     inBuffer.rowBytes = CGImageGetBytesPerRow(img);
     inBuffer.data = (void*)CFDataGetBytePtr(inBitmapData);
     pixelBuffer = malloc(CGImageGetBytesPerRow(img) * CGImageGetHeight(img));
     if(pixelBuffer == NULL)
         NSLog(@"No pixelbuffer");
     outBuffer.data = pixelBuffer;
     outBuffer.width = CGImageGetWidth(img);
     outBuffer.height = CGImageGetHeight(img);
     outBuffer.rowBytes = CGImageGetBytesPerRow(img);
     error = vImageBoxConvolve_ARGB8888(&inBuffer, &outBuffer, NULL, 0, 0, boxSize, boxSize, NULL, kvImageEdgeExtend);
     if (error) {
           NSLog(@"error from convolution %ld", error);
     }
     CGColorSpaceRef colorSpace = CGColorSpaceCreateDeviceRGB();
     CGContextRef ctx = CGBitmapContextCreate( outBuffer.data, outBuffer.width, outBuffer.height, 8, outBuffer.rowBytes, colorSpace, kCGImageAlphaNoneSkipLast);
     CGImageRef imageRef = CGBitmapContextCreateImage (ctx);
     UIImage *returnImage = [UIImage imageWithCGImage:imageRef];
     //clean up CGContextRelease(ctx);
     CGColorSpaceRelease(colorSpace);
     free(pixelBuffer);
     CFRelease(inBitmapData);
     CGColorSpaceRelease(colorSpace);
     CGImageRelease(imageRef);
     return returnImage;
}
Method calls
UIImageView  *imageView=[[UIImageView alloc]initWithFrame:CGRectMake(0, 300, SCREENWIDTH, 100)];
imageView.contentMode=UIViewContentModeScaleAspectFill;
imageView.image=[UIImage boxblurImage:image withBlurNumber:0.5];
imageView.clipsToBounds=YES;
[self.view addSubview:imageView];
3.GPUImage
GPUImage is an open source library that uses the GPU of the device to process pictures in real time and add various filters to the pictures.
The camera can be filtered in real time, which is supported by many App s.
Link Address: https://github.com/BradLarson/GPUImage
Difference:
Effect: The first kind of Core Image ambiguity will produce white edges around it. There is no problem in using vImage.
Performance: Image blurring is a complex calculation. Most of the blurred images are vImage, which has the best performance.
Project address: https://github.com/524429264/iOS-UIImageBoxBlur
Reference material: https://developer.apple.com/library/ios/documentation/GraphicsImaging/Reference/CoreImageFilterReference/index.html#//apple_ref/doc/filter/ci/CIGaussianBlur
Ground glass effect
-
After iOS 7.0, many system interfaces used ground glass effect, which increased the aesthetics of the interface, such as notification center interface; in fact, before iOS 7.0 (including), there were classes that could achieve ground glass effect, namely UIToolbar class.
iOS7.0 //Styles of Ground Glass (Enumeration) UIBarStyleDefault = 0, UIBarStyleBlack = 1, UIBarStyleBlackOpaque = 1, // Deprecated. Use UIBarStyleBlack UIBarStyleBlackTranslucent = 2, // Deprecated. Use UIBarStyleBlack and set the translucent property to YES UIImageView *bgImgView = [[UIImageView alloc] initWithFrame:self.view.bounds]; bgImgView.image = [UIImage imageNamed:@"huoying4.jpg"]; [self.view addSubview:bgImgView]; UIToolbar *toolbar = [[UIToolbar alloc] initWithFrame:CGRectMake(0, 0, bgImgView.frame.size.width*0.5, bgImgView.frame.size.height)]; toolbar.barStyle = UIBarStyleBlackTranslucent; [bgImgView addSubview:toolbar]; -
After iOS 8.0, Apple added a new class UI Visual Effect View, through which the ground glass effect is the same as the UI Toolbar above, and the efficiency is very high. The use of UI Visual Effect View is very simple and can be done in several lines of code. UI Visual Effect View is an abstract class, which can not be used directly. It needs to be implemented through the following three subclasses (UIBlur Effect, UI Visual Effect, UIEffect View);
The subclass UIBlurEffect has only one class method to quickly create a ground glass effect. The parameter is an enumeration to set the style of the ground glass. The UIVisual EffectView has two more attributes and two construction methods to quickly add the ground glass created to the UIVisual EffectView.
Special note: This class is only applicable after iOS 8.0, so if the project is compatible with iOS 7.0, there are two other ways to consider.
Implementation code:
Similarly, we first instantiate UIBlur Effect and set the style of ground glass, then add the instance of UIBlur Effect to it through the construction method of UIVisual Effect View, and finally set the frame or add constraints to the view control to achieve the effect of ground glass. The effect is the same as above.
 iOS8.0
 //Styles of Ground Glass (Enumeration)
 UIBlurEffectStyleExtraLight,
 UIBlurEffectStyleLight,
 UIBlurEffectStyleDark

 UIBlurEffect *effect = [UIBlurEffect effectWithStyle:UIBlurEffectStyleDark];
 UIVisualEffectView *effectView = [[UIVisualEffectView alloc] initWithEffect:effect];
 effectView.frame = CGRectMake(0, 0, bgImgView.frame.size.width*0.5, bgImgView.frame.size.height);
 [bgImgView addSubview:effectView];
Project address: https://github.com/524429264/EffectViewDemo