Events in js
Events in javascript can be understood as an interactive operation in HTML documents or browsers.
1, How to bind events
1. Inline
This mode is the most traditional way to handle events. In the inline model, the event handler is an attribute of the HTML tag that handles the specified event. Although inline was used more in the early days, it was mixed with HTML and was not separated from HTML.
<body>
	<button onclick="btnFn()">inline model</button>
</body>
<script type="text/javascript">
	function btnFn(){
	    console.log("inline model");
	}
</script>
Because the inline model violates the principle of separating HTML and JavaScript code hierarchies. To solve this problem, we can handle events in JavaScript. This approach is known as the outreach (scripting) model.
2. External (scripted)
The DOM 0 level event definition needs two parts. First, find the DOM node, and then assign the processing function to the event attribute of the node object. If you want to release the event, just assign null to the event property. DOM0 level event cannot add more than one handler to an event.
<body>
	<button id="btn">Outreach mode</div>
</body>
<script type="text/javascript">
	var oBtn = document.getElementById("btn");
	 //Element. on event name = unnamed function
	oBtn.onclick = function(){
	    console.log("Outreach mode");
	}
</script>
3. Event monitoring
Listening event binding (DOM2 level event binding): listen to a certain behavior. When this behavior is triggered, execute the corresponding event processing function. Multiple listening can be enabled to listen to their own.
Browser based on W3C core:
(1) Syntax for adding event listener: element. Addeventlistener (parameter 1, parameter 2, parameter 3)
- Parameter 1: event type
- Parameter 2: callback function, indicating future event handling function
- Parameter 3: Boolean value, true capture, false bubble (default)
(2) The method to delete the function of event listening binding: it can be deleted through the handle (function name) of event processing function
Browser based on IE kernel:
(1) Syntax for adding event listening: element. Attachevent (parameter 1, parameter 2)
- Parameter 1: event type: need to add on, for example: "onclick"
- Parameter 2: callback function, used as event handler
(2) Method to delete event listening: element. Detachevent (parameter 1, parameter 2)
- Parameter 1: event type to be deleted: need to add on, for example: "onclick"
- Parameter 2: handle to the event handler to be deleted
Based on the above two syntax, the following compatibility (browser compatible with IE8 below) is made, which is convenient for later use.
	// Add event listening
	function addEvent(node,eventType,funcName){
	    if(node.addEventListener){
	        node.addEventListener(eventType,funcName,false);
	    }else{
	        node.attachEvent("on"+eventType,funcName);
	    }
	}
	// Delete event listening
	function removeEvent(node,eventType,funcName){
	    if(node.removeEventListener){
	       node.removeEventListener(eventType,funcName,false);
	    }else{
	        node.detachEvent("on"+eventType,cb);
	    }
	}
Example of event listening:
<head>
	<meta charset="utf-8">
	<title></title>
	<style type="text/css">
		#box{width: 100px;height: 100px;background: red}
	</style>
</head>
<body>
	<div id="box"></div>
</body>
<script type="text/javascript">
	 var obox = document.getElementById("box");
	// Add event listening
	function addEvent(node,eventType,funcName){
	    if(node.addEventListener){
	        node.addEventListener(eventType,funcName,false);
	    }else{
	        node.attachEvent("on"+eventType,funcName);
	    }
	}
	// Delete event listening
	function removeEvent(node,eventType,funcName){
	    if(node.removeEventListener){
	       node.removeEventListener(eventType,funcName,false);
	    }else{
	        node.detachEvent("on"+eventType,cb);
	    }
	}

	//Execute add event listener function
	addEvent(obox,"click",fn1);
	function fn1(){
	    console.log(1)
	}
	addEvent(obox,"click",fn2);
	function fn2(){
	    console.log(2)
	}
	//Execute delete event listening function
	removeEvent(obox,"click",fn1)
	removeEvent(obox,"click",fn2)
</script>
2, Event object
According to the browser, the first parameter of the event handling function is the event object. In the following example, obox: event source; onclick: event type; function() {}: event handling function; the process is planned and completed by the browser.
<style>
	#box{width: 100px;height: 100px;background: pink;}
</style>
</head>
<body>
    <div id="box"></div>
</body>
<script>
    var obox = document.getElementById("box");
    obox.onclick = function(eve){
		// Compatibility problems are solved by||
        var e = eve || window.event;
        console.log(e);
    }
</script>
The first parameter of the event handler is a parameter, which is the value passed by the browser to the parameter. When the event ends, the browser recycles the event object. No event, no event object. Event objects are usually hidden and need to be used and acquired.
1. Get event object: element node. on + event type = nameless function;
Once the event binding operation is completed, an event object (automatically generated by the system according to the event binding) will be generated.
For example: when you click the box on the page, the system will call this function, which will automatically pass the event object to the first parameter of the function.
2. The event types that JavaScript can handle are: mouse type, keyboard type, and HTML type
When using, remember to add on in front, such as onclick, which is the on + event name
First: mouse events.
click: triggered when the mouse button is clicked;
dblclick: triggered when the user double clicks the main mouse button;
mousedown: triggered when the user presses the mouse and it does not pop up;
mouseup: triggered when the user releases the mouse button;
mouseover: triggered when the mouse moves over an element;
mouseout: triggered when the mouse moves over an element;
mousemove: triggered when the mouse pointer moves over an element;
mouseenter: triggered when the mouse cursor moves from the outside of the element to the scope of the element for the first time, and does not participate in bubbling;
mouseleave: mouse out;
Second: keyboard events.
keydown: it is triggered when the user presses any key on the keyboard. If it is pressed and held, it will be triggered repeatedly;
keyup: triggered when the user releases the key on the keyboard;
keypress: it is triggered when the user presses the character key on the keyboard. If it is pressed and held, it will be triggered repeatedly;
Third: HTML events.
load: triggered on the window when the page is fully loaded, or on the frameset when the frameset is loaded;
unload: triggered on the window when the page is completely unloaded, or on the frameset when the frameset is unloaded;
select: triggered when the user selects one or more characters in the text box (input or textarea);
change: triggered when the content of the text box (input or textarea) changes and loses focus;
Input: input; focus: triggered on the window and related elements when the page or element gets the focus;
blur: triggered on the window and related elements when the page or element loses focus;
Submit: when the user clicks the submit button to trigger on the element;
Reset: when the user clicks the reset button to trigger on the element;
resize: triggered on the window or frame when the size of the window or frame changes;
Scroll: triggered when a user scrolls an element with a scroll bar;
Get properties of mouse coordinates
Clientx clienty origin position, the upper left corner of the window visual area is the origin
Pagex pagey origin position, upper left corner of the whole page (with scrolling height)
Screenx screeny origin position, top left corner of the entire screen
e. When the event of offsetx, e.offsety occurs, the coordinates of the mouse relative to the current element are compatible, Google has, Firefox does not
If offsetX/Y cannot be used, you can calculate by yourself: e.pageX - obox.offsetLeft === e.offsetX.
The related examples are as follows:
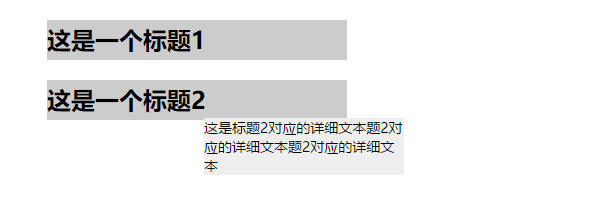
    <style>
        .box{width: 300px;height: 40px;background: #ccc;margin: 20px auto;position: relative;}
        .box *{margin: 0;}
        .box h2{line-height: 40px;}
        .box p{width: 200px;background: #eee;font-size: 14px;position: absolute;left:0;top:0;display: none;z-index: 1;}

        #box{width: 100px;height: 100px;background: red;display: block}
        #box:hover{display: none;}

    </style>
</head>
<body>
    <div class="box">
        <h2>This is a title1</h2>
        <p>This is the title.1Corresponding detailed text this is the title1Corresponding detailed text this is the title1Ben, this is the title1</p>
    </div>
    <div class="box">
        <h2>This is a title2</h2>
        <p>This is the title.2Corresponding detailed text questions2Corresponding detailed text questions2Corresponding detailed text</p>
    </div>

    <div id="box"></div>
</body>
<script>
    var ah2 = document.querySelectorAll(".box h2");

    for(var i=0;i<ah2.length;i++){
        ah2[i].onmouseover = function(){
            // console.log(this); / / indicates the element of the current trigger event
            this.nextElementSibling.style.display = "block";
        }
        ah2[i].onmousemove = function(eve){
            var e = eve || window.event;
            // Set the positioning position of p behind h2 to the mouse coordinate, and back a little bit to prevent the mouse from being placed on the event source
            this.nextElementSibling.style.left = e.offsetX + 5 + "px";
            this.nextElementSibling.style.top = e.offsetY + 5 + "px";
        }
        ah2[i].onmouseout = function(){
            this.nextElementSibling.style.display = "none";
        }
    }

</script>
Effect: the prompt box follows the mouse
3, Event propagation (bubbling and capturing)
Document flow: the elements in a page appear from top to bottom, left to right
Event flow: it describes the order in which events are received from the page. When several elements with events are stacked together, when you click one of them, not only the currently clicked element will trigger the event, but all the elements stacked within your click range will trigger the event. There are two modes of event flow: bubbling and capturing
1. From inside out:
Event bubbling: when an event of a child element is triggered, the same event of all parent elements will be triggered up in turn. This phenomenon is called event bubbling. Modern browsers, by default, are bubble models. Multi level control, add the same event, trigger, will be progressive layer by layer.
2. From outside to inside:
Event capture: when an event of a parent element is triggered, the same event of all child elements will be triggered down in turn. This phenomenon is called event capture. Capture can't be triggered directly. It needs to be implemented by specific methods. Specific mode is a new event binding mode (event listening)

3. Prevent event propagation (bubbling and trapping)
Cancelbubble = true IE
stopPropagation() other browsers
The following compatible processing is done for the above, in the form of function encapsulation:
//e is used to receive event objects
function stopBubble(e){
        if(e.stopPropagation){
            e.stopPropagation();
        }else{
            e.cancelBubble = true;
        }
    }
An example of preventing an event from bubbling: click blank to hide
    <style>
        #box{width: 200px;height: 40px;background: #ccc}
        ul{width: 200px;background: #eee;display: none;margin: 0;}
    </style>
</head>
<body>
    <div id="box">Where to click</div>
    <ul>
        <li>link1</li>
        <li>link2</li>
        <li>link3</li>
        <li>link4</li>
    </ul>
</body>
<script src="../public.js"></script>
<script>
    var obox = document.getElementById("box");
    var oul = document.querySelector("ul");

    obox.onclick = function(eve){
        var e = eve || window.event;

        function stopBubble(e){
            if(e.stopPropagation){
                e.stopPropagation();
            }else{
                e.cancelBubble = true;
            }
        }
		stopBubble(e);
        oul.style.display = "block";
    }

    document.onclick = function(){
        oul.style.display = "none";
    }
Effect: when clicking box, ul list will be displayed, and then clicking blank list will disappear
4. Prevent the right-click menu (the system has its own right-click menu)
 document.oncontextmenu = function( ){

	   return false;

}
4, Event delegation
Event delegation is like that you delegate things that should have been handled by yourself to others for some reasons to achieve the same effect as your own handling
1. Principle of event delegation:
Based on the principle of event bubbling and the attribute of event source in event object, the same event of multiple identical elements is delegated to the existing and common parent elements on the page. The advantage is to save efficiency, improve speed, and bind events to elements that do not exist temporarily on the page.
2. Event delegation - case implementation
The table that can be deleted (this shows the binding event for elements that do not exist temporarily on the page). The specific code is as follows:
<head>
    <meta charset="UTF-8">
    <title>Document</title>
    <style>

    </style>
</head>
<body>
    <input type="text" id="txt1">
    <input type="text" id="txt2">
    <input type="text" id="txt3">
    <input type="button" id="btn" value="Add to">
    <table border="1" align="center">
        <thead>
            <tr>
                <th>Full name</th>
                <th>Gender</th>
                <th>Age</th>
                <th>operation</th>
            </tr>
        </thead>
		<!-- Later passage js Add to tr,td -->
        <tbody></tbody>
    </table>
</body>
<script>
    var otxt1 = document.getElementById("txt1");
    var otxt2 = document.getElementById("txt2");
    var otxt3 = document.getElementById("txt3");
    var obtn = document.getElementById("btn");
    var otbody = document.querySelector("tbody");

	// When clicking, get the contents of the input box, put them in the created td, then put td in tr, and finally put tr in tbody
    obtn.onclick = function(){
        var td1 = document.createElement("td");
        td1.innerHTML = otxt1.value;
        var td2 = document.createElement("td");
        td2.innerHTML = otxt2.value;
        var td3 = document.createElement("td");
        td3.innerHTML = otxt3.value;
        var td4 = document.createElement("td");
        td4.innerHTML = "delete";
        td4.className = "delete";
        var tr = document.createElement("tr");
		//Put td in tr
        tr.appendChild(td1);
        tr.appendChild(td2);
        tr.appendChild(td3);
        tr.appendChild(td4);
		//Put tr in tbody
        otbody.appendChild(tr);

		// In it, you can directly bind td that needs to be added and deleted. When you write it outside, you need to use event delegation
        // td4.onclick = function(){
        //     tr.remove();
        // }
    }
    // Use event delegation to bind click event to td that needs to add delete function
    otbody.onclick = function(eve){
        var e = eve || window.event;
		// Through the event object, find the event target (real event source) that actually triggers the event
        var sjmb = e.target || e.srcElement;
        // Find the element to find according to the current specific conditions
        if(sjmb.className == "delete"){
			// Find tr to delete an entire row
            sjmb.parentNode.remove();
        }
    }

</script>
Effect: click Delete to delete a line

