preface
Recently, I bought a month's standard example on Tencent cloud Internet of things platform and sent an ESP-12S development board to start the systematic learning of ESP8266. Therefore, I have reinstalled ubuntu several times. After thinking about it, I'd better record the ESP8266_ RTOS_ SDK_ The linux environment of V3.0 is built step by step from the installation of the operating system. I hope you can avoid unnecessary holes. (the shell instructions used in this article are based on relative paths)
Linux environment construction
Virtual machine: VMware Workstation 16 Pro
Ubuntu operating system: ubuntu-18.04.5-desktop-amd64.ios
Alicloud image: (closer to my current version) ubuntu-18.04.6-desktop-amd64.iso
I won't elaborate on building environment tutorials here. I'll refer to Baidu by myself, or I'll attach the link when I'm free.
Software installation and configuration under Linux
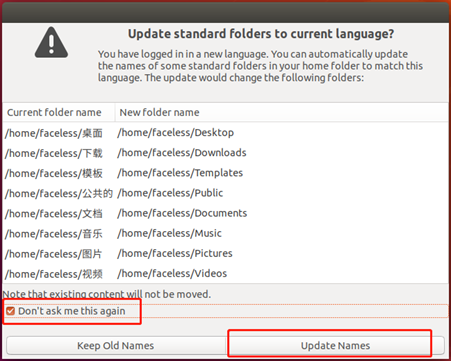
Directory English switching: the Chinese file name under the home directory is not suitable for terminal operation. It is recommended to switch the English file name.
-
Set > > region and language > > select English > > Restart > > check no more reminder in the pop-up window and select update file name
-
Set > > language support > > select Chinese > > Restart > > finish > > view home directory file


Vmware tools
Solve the problems of fixed screen scale and partial operation
- Virtual machine menu bar virtual machine install VMware Tools
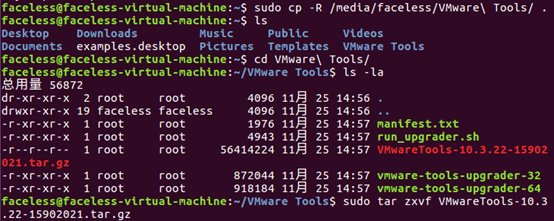
- The CD file is under / media/faceless /
- Copy VMware Tools files to the current directory
sudo cp -r /media/faceless/VMware\ Tools/ .
- Enter VMware Tools and unzip VMware Tools-10.3.22-15902021.tar.gz
cd VMware\ Tools/
ls -la
sudo tar -zxvf VMwareTools-10.3.22-15902021.tar.gz
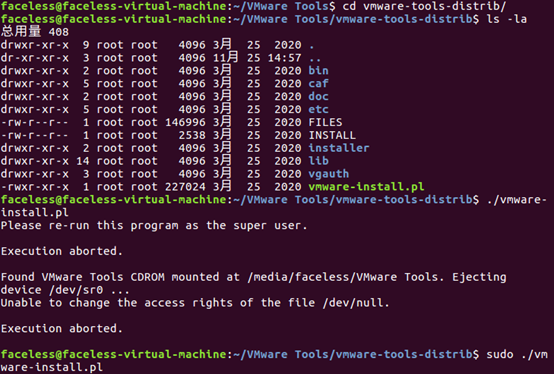
- Execute the sh file to install VMware Tools
cd vmware-tools-distrib/
sudo ./vmware-install.pl
Vim editor
sudo apt-get purge vim-common
sudo apt-get install vim
Download using alicloud image source
Backup linux download source files
sudo cp /etc/apt/sources.list /etc/apt/sources.list.backup
sudo vim /etc/apt/sources.list
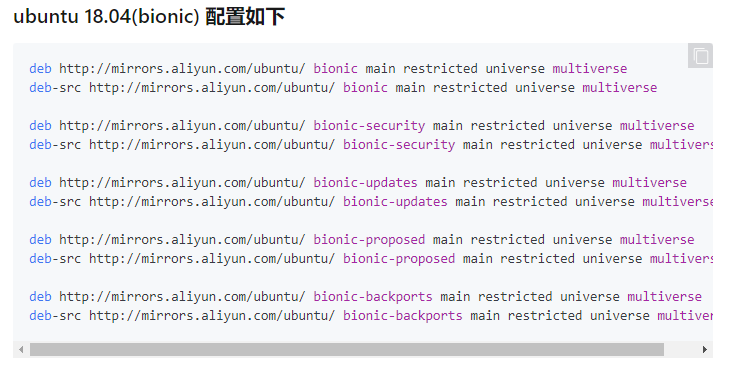
Alicloud Ubuntu image source acquisition
Add the image source conforming to the modified ubuntu version and press ESC to enter: wq! Save, and finally update the source
Update software image source list
sudo apt-get update
File transfer between Windows and ubuntu (FTP service and FTP client FileZilla)
FTP service under Ubuntu
Download and install FTP service
sudo apt-get install vsftpd
Modify the configuration file vsftpd.conf
sudo vim /etc/vsftpd.conf
local_enable=YES
write_enable=YES

After setting the configuration, you need to restart FTP to take effect
sudo /etc/init.d/vsftpd restart

Download and install network tools (use ifconfig to view the ip address)
sudo apt install net-tools
FileZilla software
Select the appropriate computer version according to your computer version FileZilla
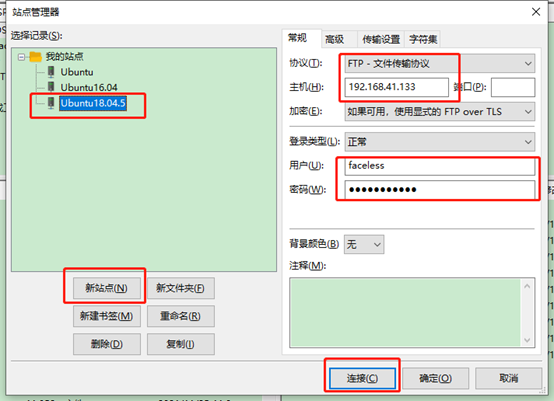
Open the FileZilla client under windows, select File > > Site Management > > new site configuration in the menu bar, as shown in the figure. My Ubuntu host is 192.168.41.133, and then enter the user's account and password to connect
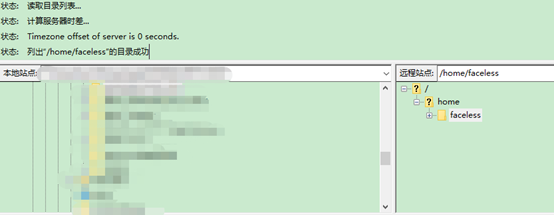
At this time, the connection is successful. On the left is the file under windows and on the right is the file under ubuntu
SDK basic environment setup
Install dependent packages
Required for environmental construction Latest package documentation
The following are the dependent package instructions that bloggers can use for personal testing, and the installation time is relatively long
sudo apt-get install git wget flex bison gperf python python-pip python-setuptools cmake ninja-build ccache libffi-dev libssl-dev dfu-util libusb-1.0-0 libncurses5-dev
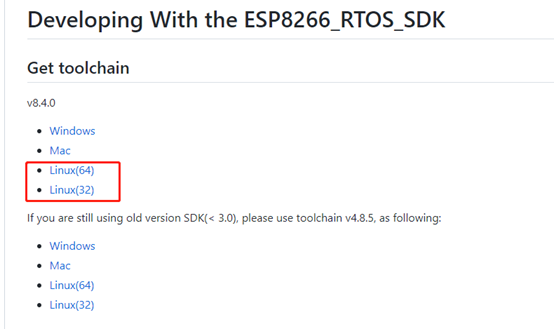
SDK tool chain
Download address: xtensa-lx106-elf-gcc8_4_0-esp-2020r3-linux-amd64.tar.gz
I've downloaded it here. Transfer it to Ubuntu through FilaZilla client, and unzip the tool chain compressed package to ESP8266 directory
sudo tar -zxvf xtensa-lx106-elf-gcc8_4_0-esp-2020r3-linux-amd64.tar.gz

Modify permissions under its file
sudo chmod 777 -R xtensa-lx106-elf
Get ESP8266_RTOS_SDK source code
- Official pull source code
sudo git clone --recursive https://github.com/espressif/ESP8266_RTOS_SDK.git
- Recommended use Half a heart Original warehouse resources contributed by bloggers (thanks for sharing)
Pull source code
sudo git clone https://gitee.com/xuhongv/ESP8266_RTOS_SDK.git
Modify ESP8266_RTOS_SDK file permissions
sudo chmod 777 -R ESP8266_RTOS_SDK/
Because the sub module is not standardized, you need to modify. gitmodules
cd ESP8266_RTOS_SDK/
sudo vim .gitmodules
Modify the contents of the file into the following contents and press ESC to enter: wq! preservation
[submodule "components/json/cJSON"]
        path = components/json/cJSON
        url = https://gitee.com/xuhongv/cJSON.git

[submodule "components/mbedtls/mbedtls"]
        path = components/mbedtls/mbedtls
        url = https://gitee.com/xuhongv/mbedtls.git

[submodule "components/lwip/lwip"]
        path = components/lwip/lwip
        url = https://gitee.com/xuhongv/esp-lwip.git

[submodule "components/mqtt/esp-mqtt"]
        path = components/mqtt/esp-mqtt
        url = https://gitee.com/xuhongv/esp-mqtt.git

[submodule "components/coap/libcoap"]
        path = components/coap/libcoap
        url = https://gitee.com/xuhongv/libcoap.git
After modification, you need to update the source code of the pull sub module
sudo git submodule update --init --recursive
Setting environment variables
Toolchain path: / home/faceless/ESP8266/xtensa-lx106-elf

SDK path: / home/faceless/ESP8266/ESP8266_RTOS_SDK

Modify the contents of bashrc file
sudo vim ~/.bashrc
Add the following and press ESC to enter: wq! preservation
export PATH=$PATH:/home/faceless/ESP8266/xtensa-lx106-elf/bin
export IDF_PATH=/home/faceless/ESP8266/ESP8266_RTOS_SDK
Update bashrc file content
source ~/.bashrc
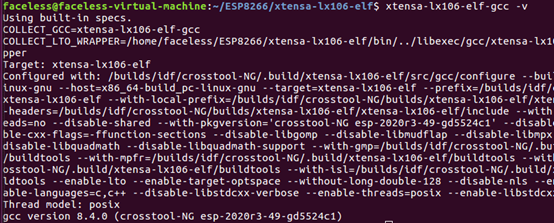
View tool chain settings status
xtensa-lx106-elf-gcc -v
View SDK settings status
echo $IDF_PATH

Compile sample code
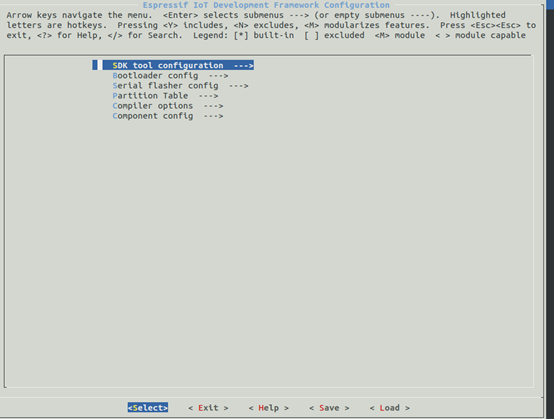
cd examples/get-started/hello_world/
make menuconfig

After that, make menuconfig will still report an error, and the requirements.txt file needs to be updated according to the prompt
/usr/bin/python -m pip install --user -r /home/faceless/ESP8266/ESP8266_RTOS_SDK/requirements.txt
Finally!
make menuconfig
Compile code
make all
Burn code
make flash

There may be two kinds of questions above
- The hardware is not connected. Connect the hardware to the virtual machine
- Serial port permission is not set. sudo chmod 777 /dev/ttyUSB0 is required
If the problem is solved, it will connect the hardware and burn the program
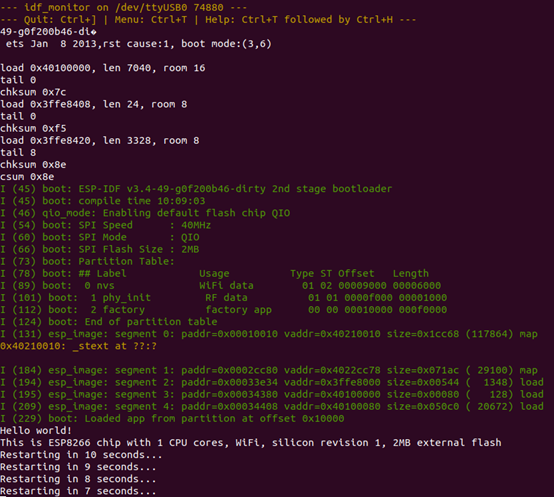
 Serial port display
make monitor
I usually use it directly
make flash monitor