1 environment
| IP | Hostname | OS Version | Elasticsearch Version |
|---|---|---|---|
| 192.168.7.41 | es-node1 | Ubuntu 18.04.3 | 7.6.1 |
| 192.168.7.42 | es-node2 | Ubuntu 18.04.3 | 7.6.1 |
| 192.168.7.43 | es-node3 | Ubuntu 18.04.3 | 7.6.1 |
Disable swap and synchronize time.
2 installation steps
2.1 install elasticsearch
Download path of installation package: https://mirror.tuna.tsinghua.edu.cn/elasticstack/apt/7.x/pool/main/e/elasticsearch/
# dpkg -i elasticsearch-7.6.1-amd64.deb
2.2 edit elastic search service configuration file
# grep -v "^#" /etc/elasticsearch/elasticsearch.yml
cluster.name: hechunping-es #elasticsearch cluster name, each node in the cluster must be consistent
node.name: es-node1 #elasticsearch node name, each node in the cluster must be unique
path.data: /elk/data #elasticsearch data storage directory
path.logs: /elk/logs #elasticsearch log storage directory
bootstrap.memory_lock: true #Lock enough memory when the service starts to prevent data from being written to swap
network.host: 192.168.7.41 #Monitor IP
http.port: 9200 #Listening port
discovery.seed_hosts: ["192.168.7.41", "192.168.7.42","192.168.7.43"] #node discovery list in elastic search cluster
cluster.initial_master_nodes: ["192.168.7.41", "192.168.7.42","192.168.7.43"] #List of nodes that can be elected as master when starting a new elastic search cluster
gateway.recover_after_nodes: 2 #Data recovery processing is allowed only after N nodes in the elasticsearch cluster are started. The default value is 1. Generally, it is set to more than half of the number of cluster nodes. For example, if there are 3 nodes in the cluster, the value is set to 2. If there are 5 nodes in the cluster, the value is set to 3, and so on.
action.destructive_requires_name: true #Set whether the index library can be deleted or closed through regular or all. By default, true means that the name of the index library must be explicitly specified. It is recommended to set true for the production environment. When deleting the index library, you must specify it. Otherwise, it may cause incorrect deletion.
2.3 configure the memory used by elasticsearch
# vim /usr/lib/systemd/system/elasticsearch.service
[Service]
Limitmemlock = infinite ා unlimited use of memory

# vim /etc/elasticsearch/jvm.options
-Xms1g
-Xmx1g
 Set Xmx and Xms to no more than 50% of physical RAM and set them to the same size. Reference: https://www.elastic.co/guide/en/elasticsearch/reference/current/heap-size.html
2.4 directory permission setting
# mkdir -p /elk/{data,logs}
# chown -R elasticsearch.elasticsearch /elk/
# ll /elk/ -d
drwxr-xr-x 4 elasticsearch elasticsearch 4096 May  8 17:20 /elk//
Note: the above operations are almost the same for each node in the elastic search cluster. Note that the listening address should be changed to the ip of the corresponding node, and node.name should be unique in the cluster.
2.5 start the elasticsearch service for each node in the elasticsearch cluster
# systemctl daemon-reload
# systemctl enable --now elasticsearch
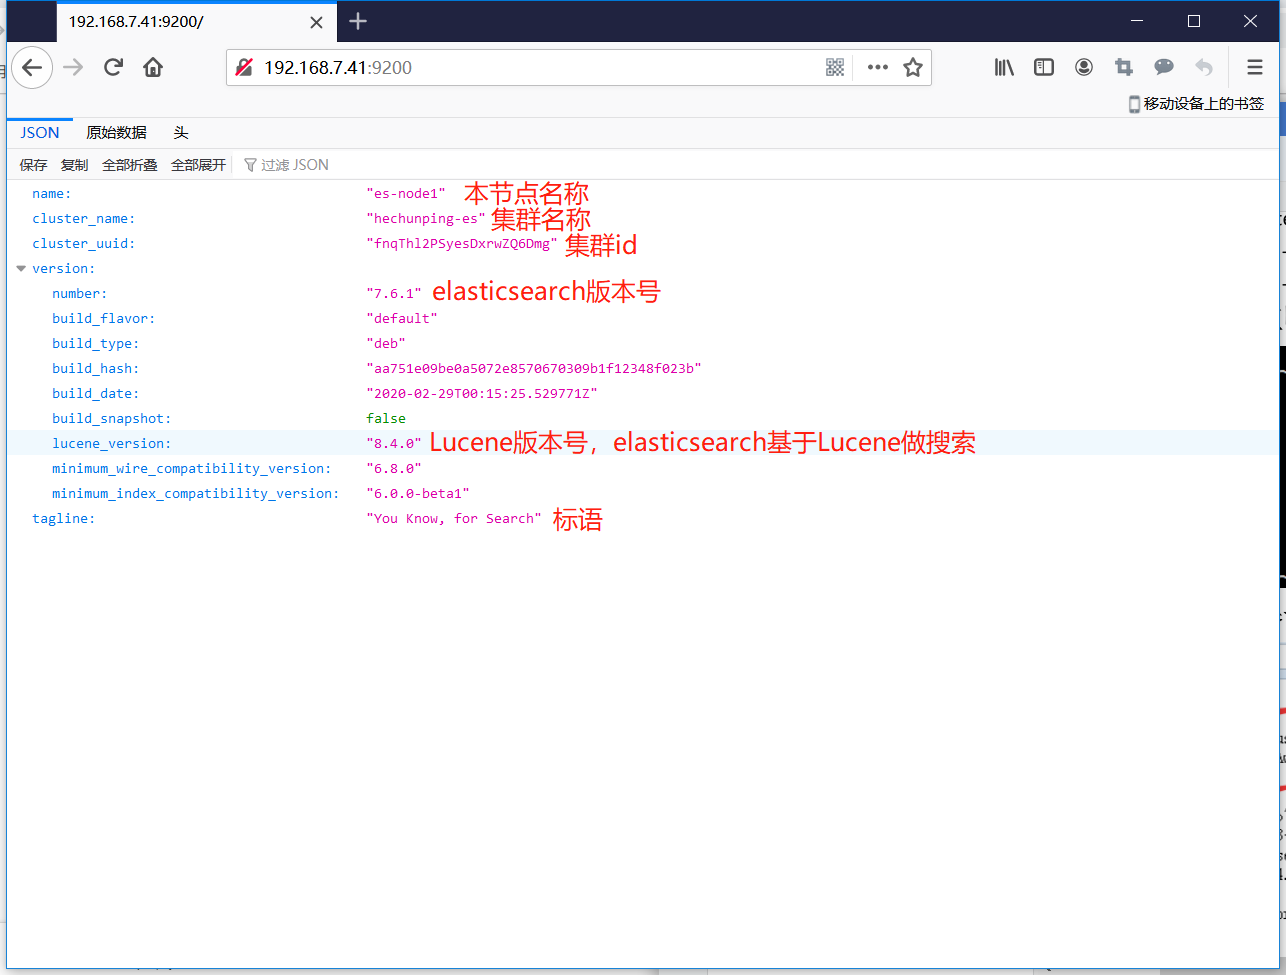
2.6 access elastic search through browser

2.7 view the status of elasticsearch cluster
# curl -XGET "http://192.168.7.41:9200/_cat/health?v"
epoch      timestamp cluster       status node.total node.data shards pri relo init unassign pending_tasks max_task_wait_time active_shards_percent
1588933648 10:27:28  hechunping-es green           3         3      0   0    0    0        0             0                  -                100.0%
# curl -XGET "http://192.168.7.41:9200/_cat/nodes?v"
ip           heap.percent ram.percent cpu load_1m load_5m load_15m node.role master name
192.168.7.41           15          96   2    0.01    0.05     0.08 dilm      -      es-node1
192.168.7.42           19          96   2    0.00    0.02     0.00 dilm      -      es-node2
192.168.7.43           17          95   3    0.05    0.08     0.06 dilm      *      es-node3

//From the above information, we can see that the name of the elastic search cluster is hechunping es, the current state is green, and there are three node nodes, among which es-node3 is the master node.