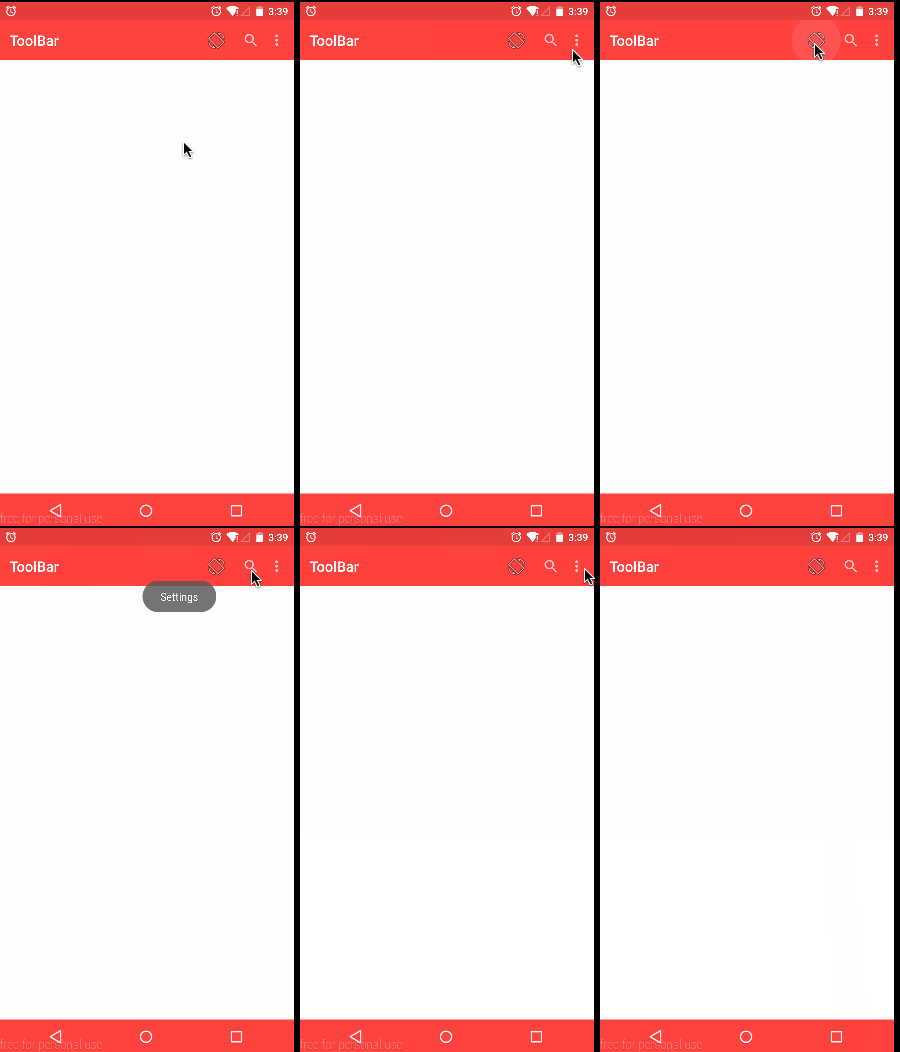
Friends who have used ToolBar must be familiar with its usage, because its usage is very simple. If you are skilled in using ActionBar, ToolBar will be easier! However, I believe that you have encountered such a problem in the process of using, we need to add ToolBar control to every xml we want to use. For example, if I need to use ToolBar in MainActivity, then his xml file needs to be written like this.
<RelativeLayout xmlns:android="http://schemas.android.com/apk/res/android"
    xmlns:tools="http://schemas.android.com/tools"
    xmlns:app="http://schemas.android.com/apk/res-auto"
    android:layout_width="match_parent"
    android:layout_height="match_parent"
    android:background="@android:color/white">

    <android.support.v7.widget.Toolbar
        android:layout_height="?attr/actionBarSize"
        android:layout_width="match_parent"
        android:id="@+id/id_tool_bar"
        android:background="?attr/colorPrimary"
        app:navigationIcon="?attr/homeAsUpIndicator"
        >
    </android.support.v7.widget.Toolbar>
    <TextView
        android:text="@string/hello_world"
        android:layout_width="wrap_content"
        android:layout_height="wrap_content"/>

    <TextView
        android:layout_width="wrap_content"
        android:layout_height="wrap_content"
        android:text="asdfasf"
        android:layout_alignParentBottom="true"/>
</RelativeLayout>
Similarly, pages needed in other activities need to be added in xml
<android.support.v7.widget.Toolbar
        android:layout_height="?attr/actionBarSize"
        android:layout_width="match_parent"
        android:id="@+id/id_tool_bar"
        android:background="?attr/colorPrimary"
        app:navigationIcon="?attr/homeAsUpIndicator"
        >
 </android.support.v7.widget.Toolbar>
Such a piece of code, although not many, but our most troublesome is to write duplicate code, also does not conform to our programming ideas; so there are the following writing methods
<RelativeLayout xmlns:android="http://schemas.android.com/apk/res/android"
    android:layout_width="match_parent"
    android:layout_height="match_parent"
    android:background="@android:color/white">

    <include layout="@layout/toolbar"
        android:layout_width="match_parent"
        android:layout_height="?attr/actionBarSize"
        />
    <TextView
        android:text="@string/hello_world"
        android:layout_width="wrap_content"
        android:layout_height="wrap_content"/>

    <TextView
        android:layout_width="wrap_content"
        android:layout_height="wrap_content"
        android:text="asdfasf"
        android:layout_alignParentBottom="true"/>
</RelativeLayout>
The code for toolbar.xml is as follows
<?xml version="1.0" encoding="utf-8"?>
<FrameLayout xmlns:android="http://schemas.android.com/apk/res/android"
xmlns:app="http://schemas.android.com/apk/res-auto"
android:layout_width="match_parent"
android:layout_height="match_parent">

    <android.support.v7.widget.Toolbar
        android:layout_height="?attr/actionBarSize"
        android:layout_width="match_parent"
        android:id="@+id/id_tool_bar"
        android:background="?attr/colorPrimary"
        app:navigationIcon="?attr/homeAsUpIndicator"
        >
    </android.support.v7.widget.Toolbar>
</FrameLayout>
So we just need to embed the toolbar.xml layout in every XML we want to use toolbar through include. It feels like a few lines less code than before! But it doesn't make much sense. And the encapsulation that I want to achieve here is that I don't need to write a line of code about toolbar in xml, that is to say, I don't need to write toolbar in the same way as usual. Look down, please.
The premise is to prepare toolbar.xml,ToolBarActivity.java,ToolBarHelper.java
The basic attributes of configuring toolbar in toolbar.xml are:
Other styles such as the width of toolbar, the background color of toolbar, etc.
ToolBarActivity.java is the parent class of toolbar Activity, which I define as an abstract class because a single class can't do anything.
ToolBarHelper.java is an association class between Activity and toolbar
Let's start with the toolbar.xml code
<?xml version="1.0" encoding="utf-8"?>
<FrameLayout xmlns:android="http://schemas.android.com/apk/res/android"
             xmlns:app="http://schemas.android.com/apk/res-auto"
             android:layout_width="match_parent"
             android:layout_height="match_parent">
    <android.support.v7.widget.Toolbar
        Set the height to ActionBar Height
        android:layout_height="?attr/actionBarSize"
        android:layout_width="match_parent"
        android:id="@+id/id_tool_bar"
        //The background color is ActionBar Background color
        android:background="?attr/colorPrimary"
        //Return button icon
        app:navigationIcon="?attr/homeAsUpIndicator"
        >
    </android.support.v7.widget.Toolbar>
</FrameLayout>
Content of ToolBarActivity.java: The main code is implemented in setContentView (int id)
package toolbar.toolbar;

import android.os.Bundle;
import android.support.v7.app.AppCompatActivity;
import android.support.v7.widget.Toolbar;
import android.view.MenuItem;

/**
 * Created by moon.zhong on 2015/6/12.
 * time : 10:26
 */
public abstract class ToolBarActivity extends AppCompatActivity {
    private ToolBarHelper mToolBarHelper ;
    public Toolbar toolbar ;
    @Override
    protected void onCreate(Bundle savedInstanceState) {
        super.onCreate(savedInstanceState);
    }

    @Override
    public void setContentView(int layoutResID) {

        mToolBarHelper = new ToolBarHelper(this,layoutResID) ;
        toolbar = mToolBarHelper.getToolBar() ;
        setContentView(mToolBarHelper.getContentView());
        /*Set toolbar to Activity*/
        setSupportActionBar(toolbar);
        /*Some custom operations*/
        onCreateCustomToolBar(toolbar) ;
    }

    public void onCreateCustomToolBar(Toolbar toolbar){
        toolbar.setContentInsetsRelative(0,0);
    }

    @Override
    public boolean onOptionsItemSelected(MenuItem item) {
        if (item.getItemId() == android.R.id.home){
            finish();
            return true ;
        }
        return super.onOptionsItemSelected(item);
    }
}
ToolBarHelper.java
The function of this class is to create a ViewGroup as the parent view of the view, and Add the user-defined View and toolBar to the ViewGroup in turn.
package toolbar.toolbar;

import android.content.Context;
import android.content.res.TypedArray;
import android.support.v7.widget.Toolbar;
import android.view.LayoutInflater;
import android.view.View;
import android.view.ViewGroup;
import android.widget.FrameLayout;

/**
 * Created by moon.zhong on 2015/6/12.
 * time : 10:45
 */
public class ToolBarHelper {

    /*Context, which you need to use when creating a view*/
    private Context mContext;

    /*base view*/
    private FrameLayout mContentView;

    /*User-defined view*/
    private View mUserView;

    /*toolbar*/
    private Toolbar mToolBar;

    /*View constructor*/
    private LayoutInflater mInflater;

    /*
    * Two properties
    * 1,toolbar Is it suspended above the window?
    * 2,toolbar High Acquisition
    * */
    private static int[] ATTRS = {
            R.attr.windowActionBarOverlay,
            R.attr.actionBarSize
    };

    public ToolBarHelper(Context context, int layoutId) {
        this.mContext = context;
        mInflater = LayoutInflater.from(mContext);
        /*Initialize the whole content*/
        initContentView();
        /*Initialize user-defined layout*/
        initUserView(layoutId);
        /*Initialize toolbar*/
        initToolBar();
    }

    private void initContentView() {
        /*Create a frame layout directly as the parent container of the view container*/
        mContentView = new FrameLayout(mContext);
        ViewGroup.LayoutParams params = new ViewGroup.LayoutParams(ViewGroup.LayoutParams.MATCH_PARENT,
                ViewGroup.LayoutParams.MATCH_PARENT);
        mContentView.setLayoutParams(params);

    }

    private void initToolBar() {
        /*Getting the layout file of toolbar through inflater*/
        View toolbar = mInflater.inflate(R.layout.toolbar, mContentView);
        mToolBar = (Toolbar) toolbar.findViewById(R.id.id_tool_bar);
    }

    private void initUserView(int id) {
        mUserView = mInflater.inflate(id, null);
        FrameLayout.LayoutParams params = new FrameLayout.LayoutParams(ViewGroup.LayoutParams.MATCH_PARENT, ViewGroup.LayoutParams.MATCH_PARENT);
        TypedArray typedArray = mContext.getTheme().obtainStyledAttributes(ATTRS);
        /*Get the suspension flag defined in the topic*/
        boolean overly = typedArray.getBoolean(0, false);
        /*Get the height of the toolbar defined in the topic*/
        int toolBarSize = (int) typedArray.getDimension(1,(int) mContext.getResources().getDimension(R.dimen.abc_action_bar_default_height_material));
        typedArray.recycle();
        /*If it is suspended, there is no need to set spacing.*/
        params.topMargin = overly ? 0 : toolBarSize;
        mContentView.addView(mUserView, params);

    }

    public FrameLayout getContentView() {
        return mContentView;
    }

    public Toolbar getToolBar() {
        return mToolBar;
    }
}
Here, even if the simple package of toolbar is finished, let's take a look at the effect of the package.
MainActivity.java
package toolbar.toolbar;

import android.os.Bundle;
import android.support.v7.widget.Toolbar;
import android.view.Menu;
import android.view.MenuItem;


public class MainActivity extends ToolBarActivity {

    @Override
    protected void onCreate(Bundle savedInstanceState) {
        super.onCreate(savedInstanceState);
        setContentView(R.layout.activity_main);

    }

    @Override
    public boolean onCreateOptionsMenu(Menu menu) {
        // Inflate the menu; this adds items to the action bar if it is present.
        getMenuInflater().inflate(R.menu.menu_main, menu);
       return true;
    }

}
activity_main.xml
<RelativeLayout xmlns:android="http://schemas.android.com/apk/res/android"
    android:layout_width="match_parent"
    android:layout_height="match_parent"
    android:background="@android:color/white">
    <TextView
        android:text="@string/hello_world"
        android:layout_width="wrap_content"
        android:layout_height="wrap_content"/>
    <TextView
        android:layout_width="wrap_content"
        android:layout_height="wrap_content"
        android:text="asdfasf"
        android:layout_alignParentBottom="true"/>
</RelativeLayout>
There is no ToolBar in MainActivity or activity_main, but MainActivity no longer inherits AppCompatActivity, but inherits our ToolBar Activity.
The other uses of ToolBar are not mentioned here. They are almost the same as ActionBar.
Finally:
When using ToolBar, you need to use an ActionBar-free theme.
    <!-- Base application theme. -->
    <style name="AppThemeParent" parent="Theme.AppCompat.NoActionBar">
        <!-- Customize your theme here. -->
        <item name="colorPrimary">@android:color/holo_red_light</item>

    </style>
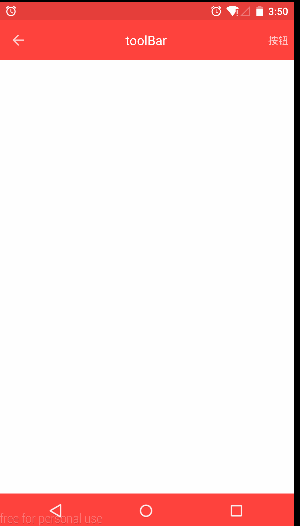
Another ToolBar rendering of a custom View:
The title is in the middle, and buttons can be added to the right.
Source download