#1, User name + password + jwt authentication to achieve login authentication
The following are some codes of VUE front-end login interface
	<div class="inp" v-if="login_type==0">
	          <input v-model="username" type="text" placeholder="user name / phone number" class="user">
	          <input v-model="password" type="password" name="" class="pwd" placeholder="password">
	          <div id="geetest1"></div>
	          <div class="rember">
	            <p>
	              <input type="checkbox" class="no" v-model="remember" name="a"/>
	              <span>Remember password</span>
	            </p>
	            <p>Forget password</p>
	          </div>
	          <button class="login_btn" @click="loginhander">Sign in</button>
	          <p class="go_login">No account <span>Register now</span></p>
	        </div>
// Sign in
methods: {
loginhander() {
if (this.username == '' || this.password == '') {
this.$message.error("User name or password cannot be empty")
return;
}
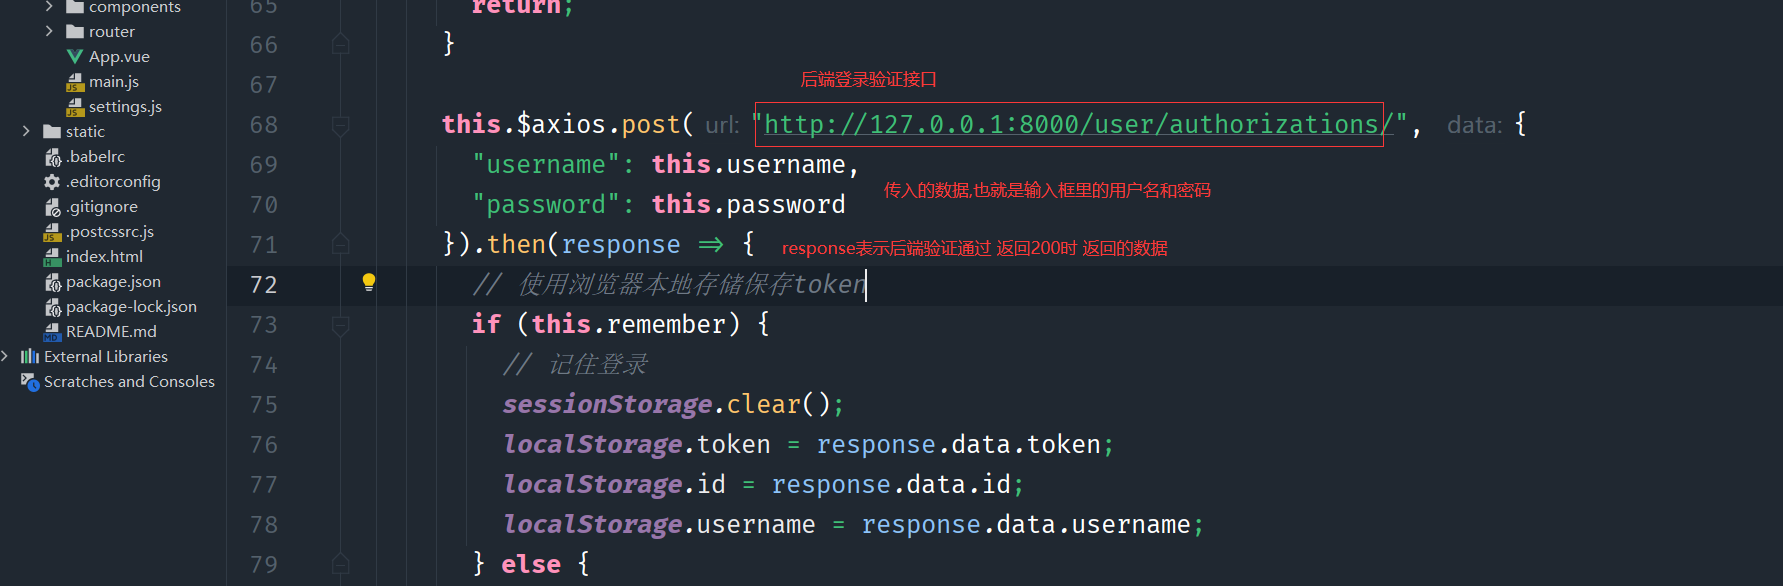
this.$axios.post("http://127.0.0.1:8000/user/authorizations/", {
"username": this.username,
"password": this.password
}).then(response => {
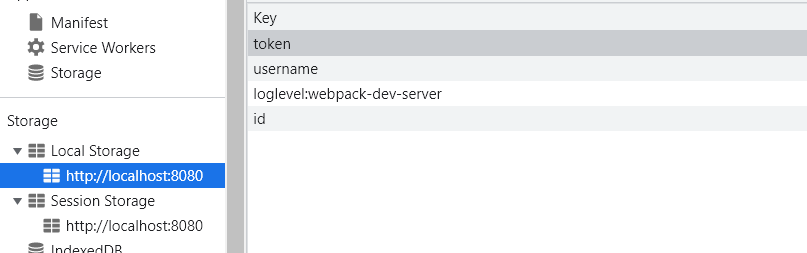
// Save the token using the browser local storage
if (this.remember) {
// Remember to log in
sessionStorage.clear();
localStorage.token = response.data.token;
localStorage.id = response.data.id;
localStorage.username = response.data.username;
} else {
// Login not remembered
localStorage.clear();
sessionStorage.token = response.data.token;
sessionStorage.id = response.data.id;
sessionStorage.username = response.data.username;
}
// The page jumps back to the previous page, or you can use this.$router.push("/") to return to the home page
this.$router.go(-1)
}).catch(error => {
this.$message.error("Login failed")
})
},
}
DRF has provided authentication system Auth module by default
Register a sub application python... /... / manage.py startapp user


Define the user model class of the user in the created sub Appuser models.py.
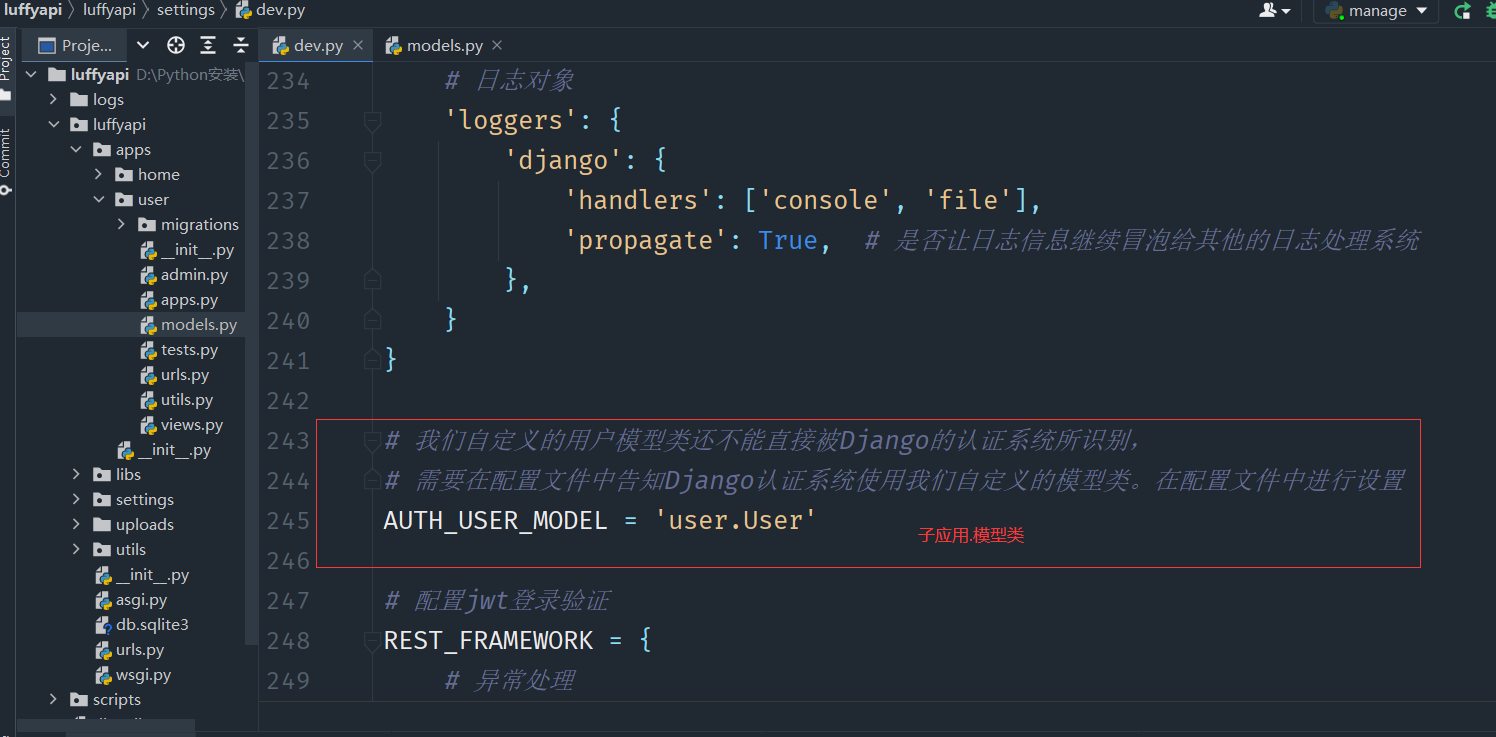
Our customized user model class can not be directly recognized by Django's authentication system. You need to tell Django's authentication system to use our customized model class in the configuration file.
Set in configuration file

 Then perform the database migration (the first migration must be guaranteed)
python manage.py makemigrations
python manage.py migrate
Next, install Django REST framework JWT
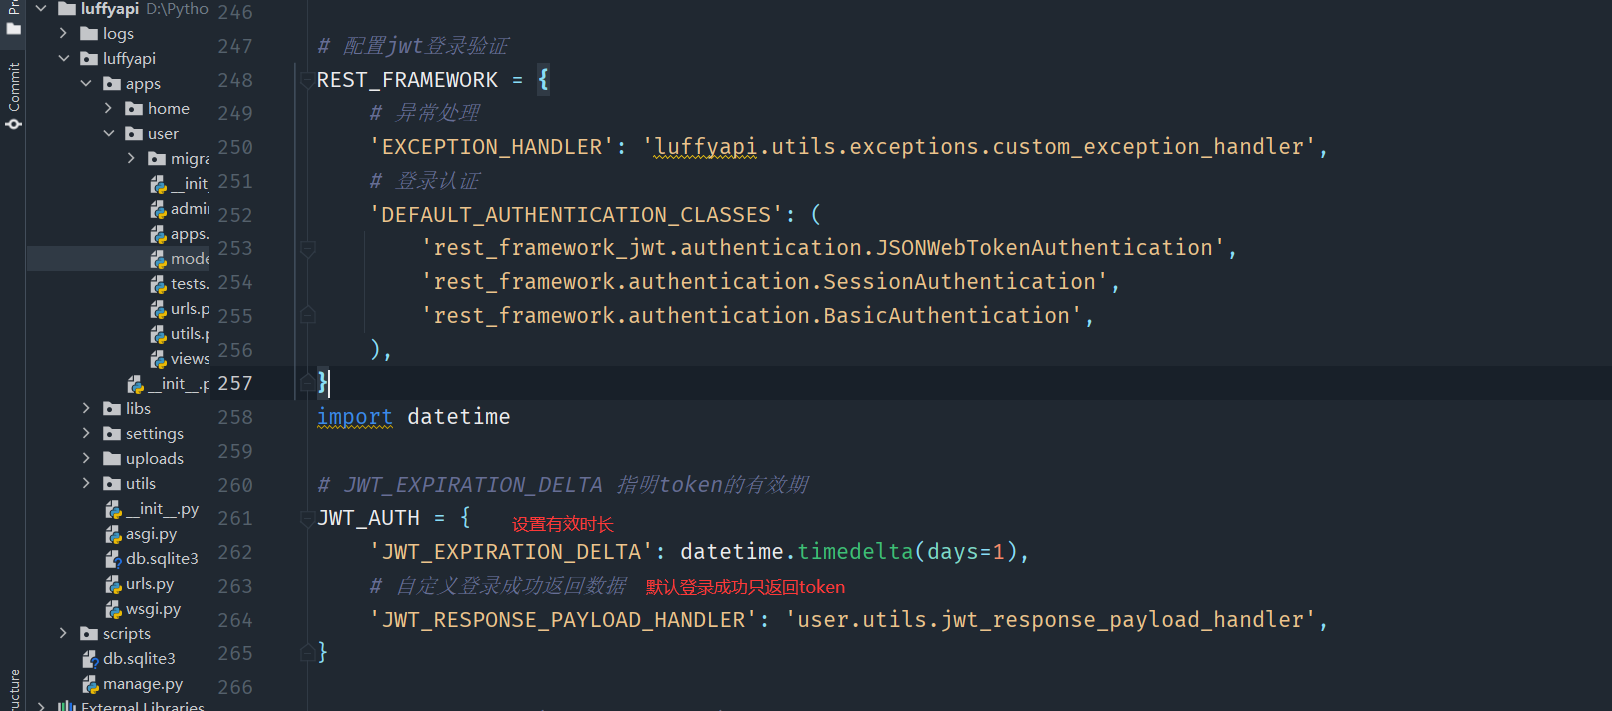
After the user registers or logs in, we want to record the user's login status or create authentication credentials for the user. Instead of using Session authentication mechanism, we use Json Web Token authentication mechanism.
Install PIP install djangorestframework JWT
settings/dev.py to configure
jwt can also be generated manually. After the user registration or login is successful, the user information can be returned in the serializer, and then the token can be returned at the same time.
from rest_framework_jwt.settings import api_settings

jwt_payload_handler = api_settings.JWT_PAYLOAD_HANDLER
jwt_encode_handler = api_settings.JWT_ENCODE_HANDLER

payload = jwt_payload_handler(user)
token = jwt_encode_handler(payload)
Next, prepare the route
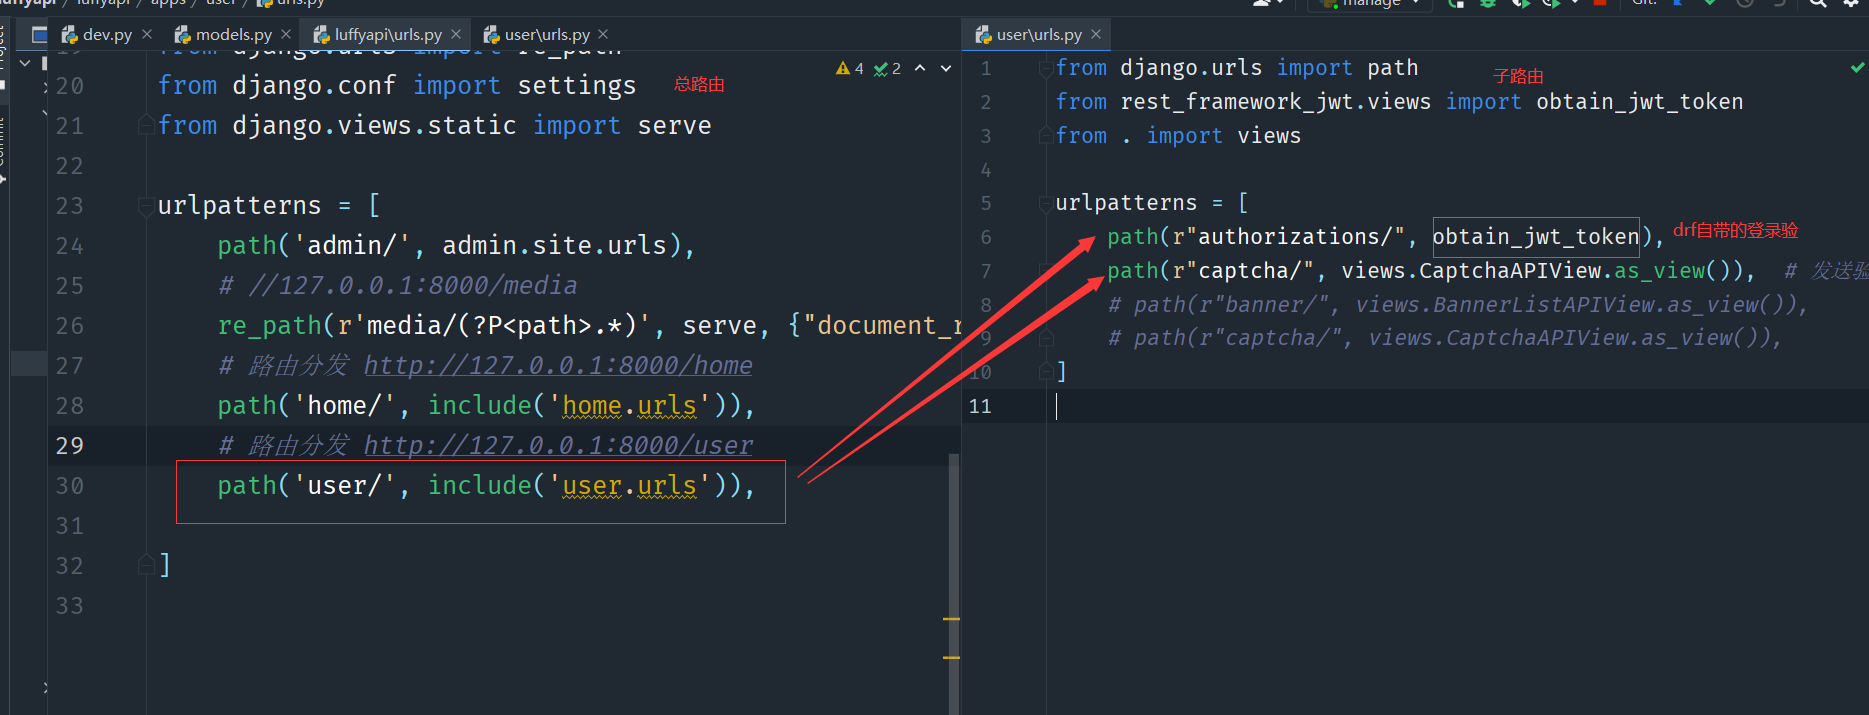 Login interface configuration completed. Next, you can test it.
Enter the user name and password at the front end
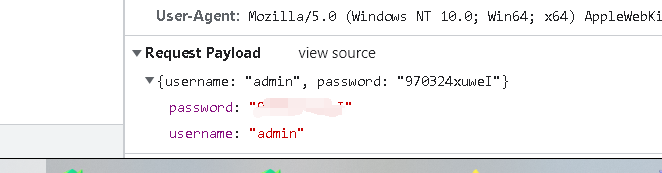
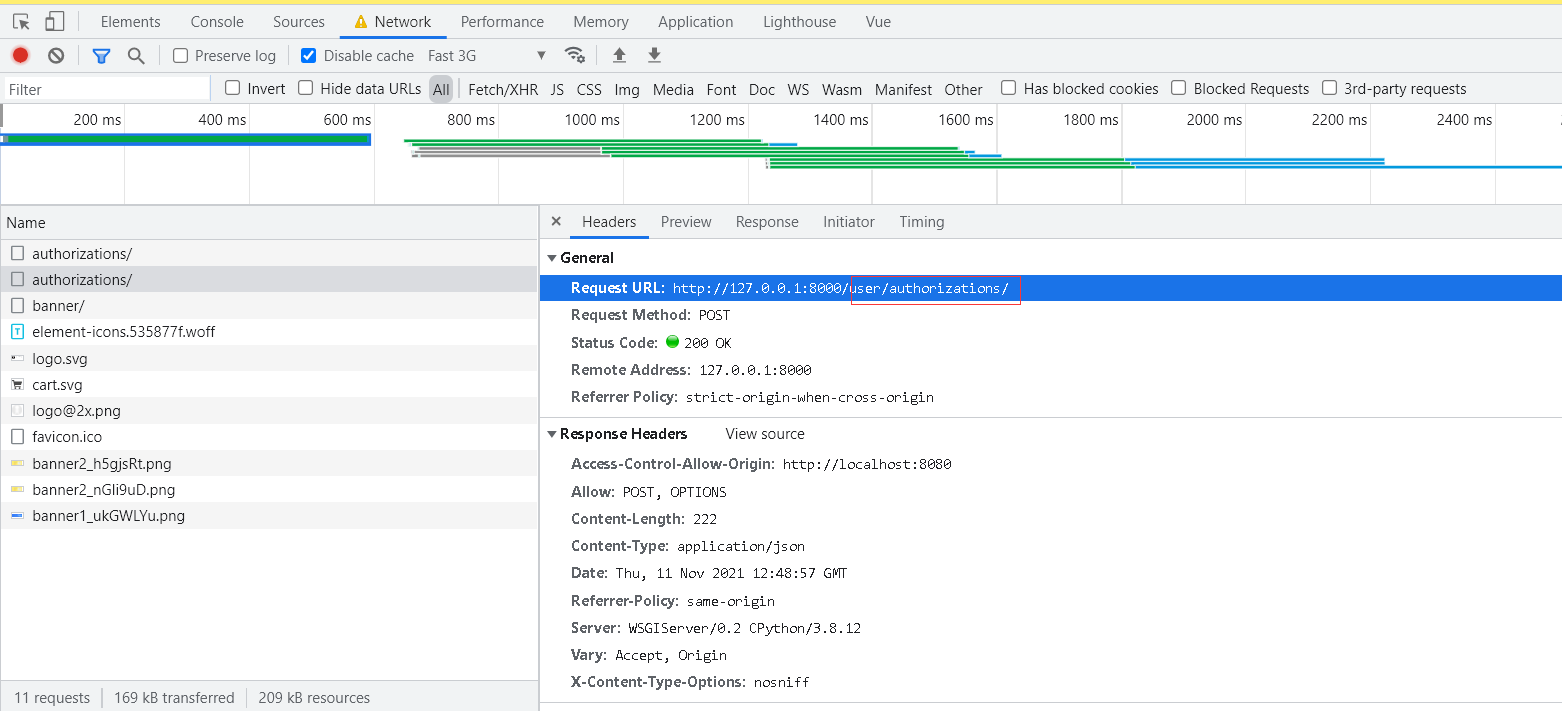 obtain_ jwt_ The token will verify the user name and password. If the verification is passed, the login is successful and a token is returned
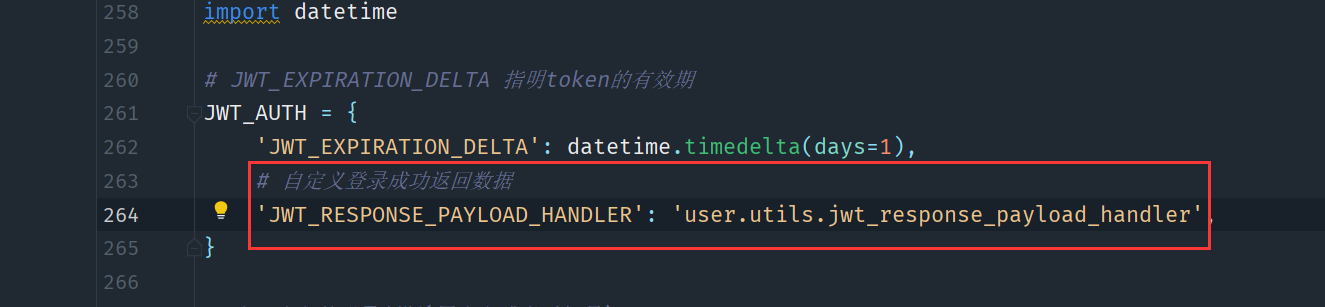
If you want to return other information, you can set it
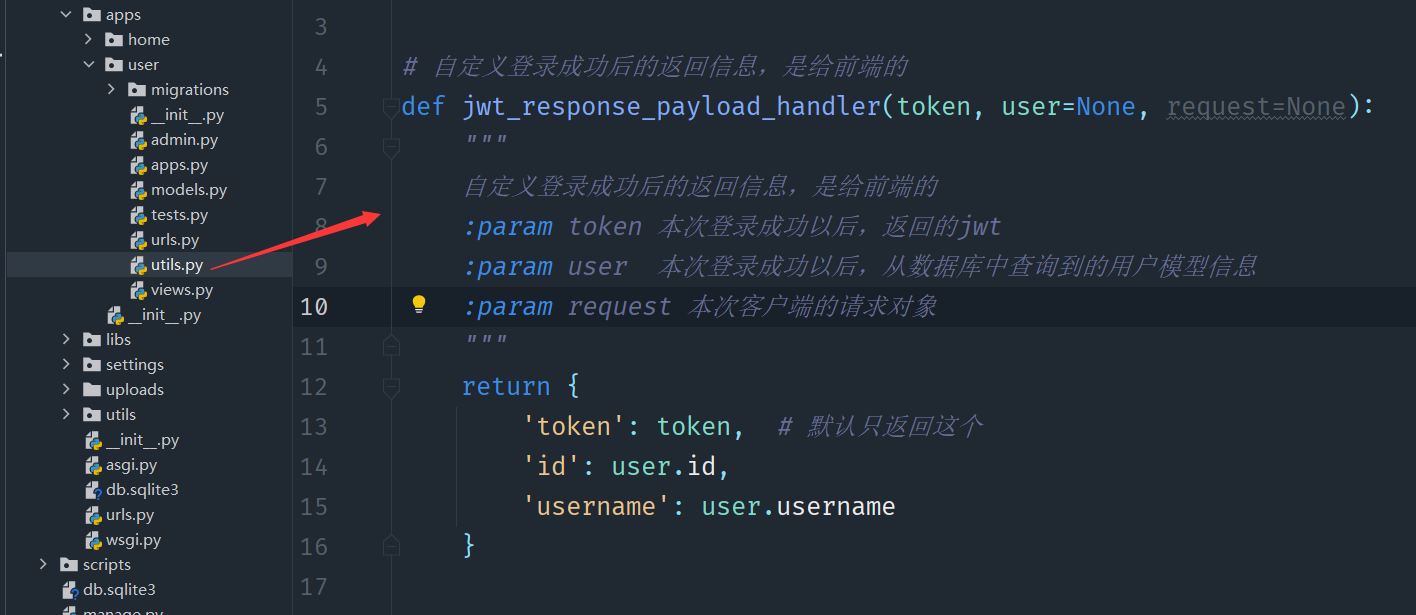
Modify the settings/dev.py configuration file
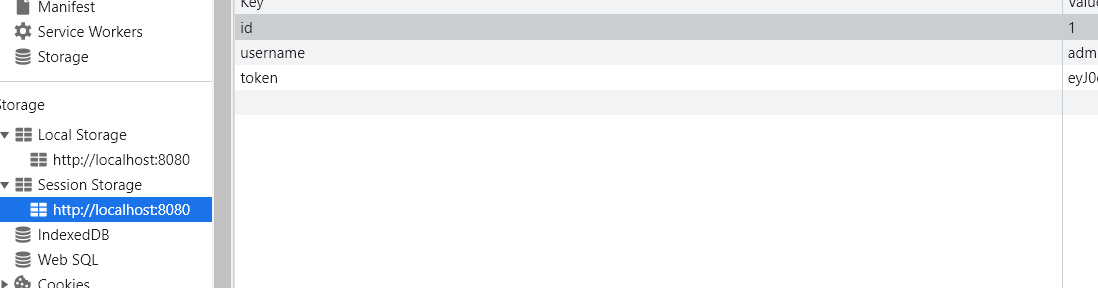
 Then store the returned data in sessionStorage or localStorage as needed
2, Multi conditional login (by default, the obtain_jwt_token can only log in with user name and password), but we want to log in with email + password and mobile number + password
When the authentication system of DRF receives the user name and password, it will call authenticate() to verify the user name and password
Parameter description of authenticate(self, request, username=None, password=None, **kwargs) method:
- request object of this authentication
- username user account provided for this authentication
- Password the password provided for this authentication
Write in users/utils.py:
# Add mobile phone or user name or email direct login function (user name / email / mobile phone number + password)
def get_user_by_account(account):
    """
    Get according to account number user object
    :param account: Account number, which can be user name username,It can also be a mobile phone number mobile, Or other data
    :return: User Object or None
    """
    try:
        user = User.objects.filter(Q(username=account) | Q(mobile=account) | Q(email=account)).first()
    except User.DoesNotExist:
        return None
    else:
        return user


from .models import User
from django.db.models import Q
from django.contrib.auth.backends import ModelBackend


# Add mobile phone or user name or email direct login function (user name / email / mobile phone number + password)
class UsernameMobileAuthBackend(ModelBackend):
    def authenticate(self, request, username=None, password=None, **kwargs):
        # At this time, the username can be either username or mobile
        user = get_user_by_account(username)
        # If the User object is found, call the check of the User object_ The password method checks whether the password is correct
        if user is not None and user.check_password(password) and user.is_authenticated:
            return user
        else:
            return None
In the configuration file settings/dev.py, tell DRF to use our custom authentication backend
AUTHENTICATION_BACKENDS = [
    'user.utils.UsernameMobileAuthBackend',
]
Then it can be realized.


3, Email + verification code login verification
1. Interface preparation for front-end sending verification code
<div class="inp" v-show="login_type==1">
          <input v-model="email" type="text" placeholder="mailbox" class="user">
          <input v-model="code" type="text" class="pwd" placeholder="Verification Code">
          <button :disabled="disabled" id="get_code" @click="sendsms">{{ text }}</button>
          <button class="login_btn" @click="smsloginhander">Sign in</button>
          <p class="go_login">No account <span>Register now</span></p>
        </div>
//Send verification code
sendsms() {
//Mailbox cannot be empty
if (this.email == '') {
this.$message.error("Mailbox cannot be empty")
return;
}
//Verify that the mailbox format is correct
var regEmail = /^[A-Za-z0-9\u4e00-\u9fa5]+@[a-zA-Z0-9_-]+(\.[a-zA-Z0-9_-]+)+$/
if (!regEmail.test(this.email)) {
this.$message.error('The mailbox format is incorrect')
return;
}
//Disable send button
this.disabled = true;
//Turn on the countdown
let count = 0;
let tag = setInterval(() => {
if (++count >= 60) {
clearInterval(tag);
this.disabled = false;
this.text = "Send verification code";
return;
}
this.text = `${60 - count}Get in seconds`;
}, 1000);
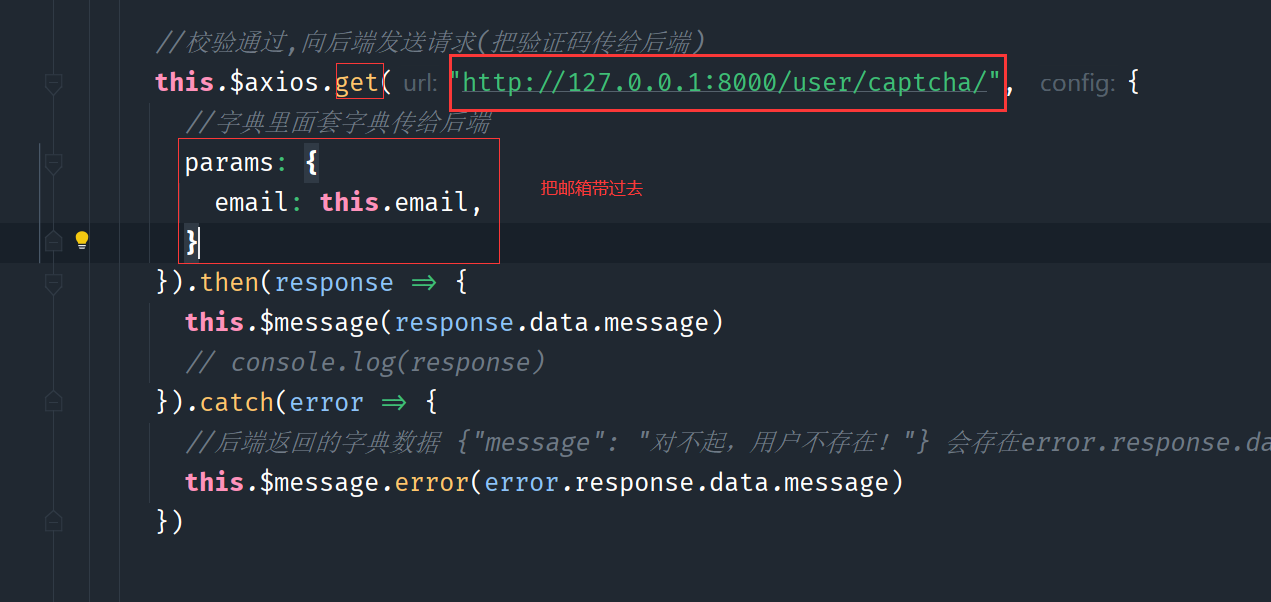
//If the verification passes, send a request to the back end (send the verification code to the back end)
this.$axios.get("http://127.0.0.1:8000/user/captcha/", {
//A set of dictionaries in the dictionary is sent to the back end
params: {
email: this.email,
}
}).then(response => {
this.$message(response.data.message)
// console.log(response)
}).catch(error => {
//The dictionary data {"message": "sorry, the user does not exist!"} returned by the backend will be stored in error.response.data
this.$message.error(error.response.data.message)
})
},
When the mailbox format is correct, send the request
The back end encapsulates the interface for data reception and verification:
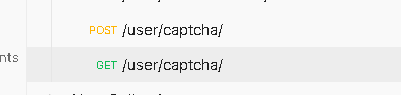
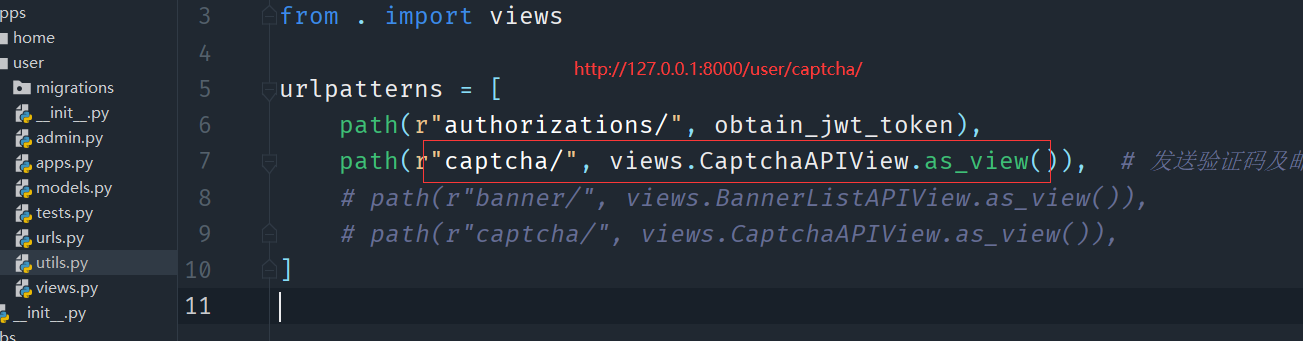 Check the view function (get request is used to send verification code to the mobile phone, and post request is used to log in for verification)
params: {
email: this.email,
}
class CaptchaAPIView(APIView):
def get(self, request):
"""Get verification code"""
email = request.query_params.get("email")
# Query whether there is this user according to email=username
user = get_user_by_account(email)
if user is None:
# The request failed 400. The {"message": "sorry, the user does not exist!"} dictionary will be returned to the catch of the front-end axios
return Response({"message": "Sorry, the user does not exist!"}, status=http_status.HTTP_400_BAD_REQUEST)
# Mailbox exists, send now
code = random.randrange(1000, 9999)
print("Verification Code:", code)
message = "Hello! Your registration verification code is{},1 Valid within minutes,Do not disclose,Beware of being cheated.".format(code)
# Send SMS (send code and email)
smtp_tran(message, email)
# Write verification code to redis (Django redis)
conn = get_redis_connection('default')
conn.set(email, code, ex=60)
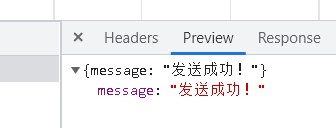
# If the request succeeds 200, it will be returned to the catch of the front-end axios
return Response({"message": "Sending succeeded!"}, status=http_status.HTTP_200_OK)
def post(self, request):
"""Verification method of verification code"""
# 1. Obtain the data transmitted from the front end
user = request.data
# user= {'email': '1293416157@qq.com', 'code': '8414'}
# print("user=", user)
# 2. Check the mailbox
myuser = get_user_by_account(user['email'])
if myuser is None:
# The request failed 400. The {"message": "sorry, the user does not exist!"} dictionary will be returned to the catch of the front-end axios
return Response({"message": "User mailbox does not exist!"}, status=http_status.HTTP_400_BAD_REQUEST)
# 3. Verification code
conn = get_redis_connection()
redis_code = conn.get(myuser.email) # Get the verification code according to the mailbox
# print("redis_code=", redis_code)
if not redis_code:
return Response({"message": "Verification code failure,Please resend!"}, status=http_status.HTTP_400_BAD_REQUEST)
redis_str_code = redis_code.decode('utf-8')
if user['code'].strip() != redis_str_code:
return Response({"message": "Verification code error!"}, status=http_status.HTTP_400_BAD_REQUEST)
# 4. After the mailbox and verification code are verified successfully, a token is returned
payload = jwt_payload_handler(myuser)
token = jwt_encode_handler(payload)
return Response({"message": "Login succeeded!", "username": myuser.username, "id": myuser.id, "token": token},
status=http_status.HTTP_200_OK)
smtp_ The tran (message, email) function is a function for sending verification codes. You can create a py file separately:
import smtplib

from email.mime.text import MIMEText


def smtp_tran(message, email):
    msg = MIMEText(message, 'html', 'utf-8')
    HOST = 'smtp.qq.com'
    SUBJECT = 'Email verification code'
    FROM = 'Messages sent@qq.com'
    TO = email   # Received mail
    msg['Subject'] = SUBJECT
    msg['From'] = FROM
    msg['To'] = TO

    server = smtplib.SMTP_SSL(HOST, 465)
    server.login(FROM, 'Your authorization code')  # Authorization code
    server.sendmail(FROM, [TO], msg.as_string())
    server.quit()
Then test: input qq email in the front input box to send:

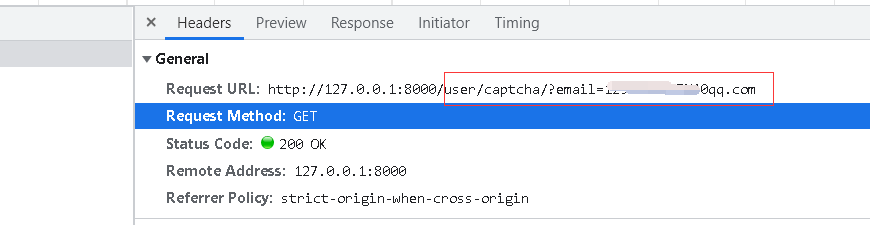
Then log in via email: http://127.0.0.1:8000/user/captcha/ Interface address
smsloginhander() {
//Cannot be empty
if (this.email == '' || this.code == '') {
this.$message.error("Mailbox or verification code cannot be empty")
return;
}
//Verify that the mailbox format is correct
var regEmail = /^[A-Za-z0-9\u4e00-\u9fa5]+@[a-zA-Z0-9_-]+(\.[a-zA-Z0-9_-]+)+$/
if (!regEmail.test(this.email)) {
this.$message({
message: 'The mailbox format is incorrect',
type: 'error'
})
return;
}
//If the verification passes, send a request to the back end
this.$axios.post("http://127.0.0.1:8000/user/captcha/", {
"email": this.email,
"code": this.code
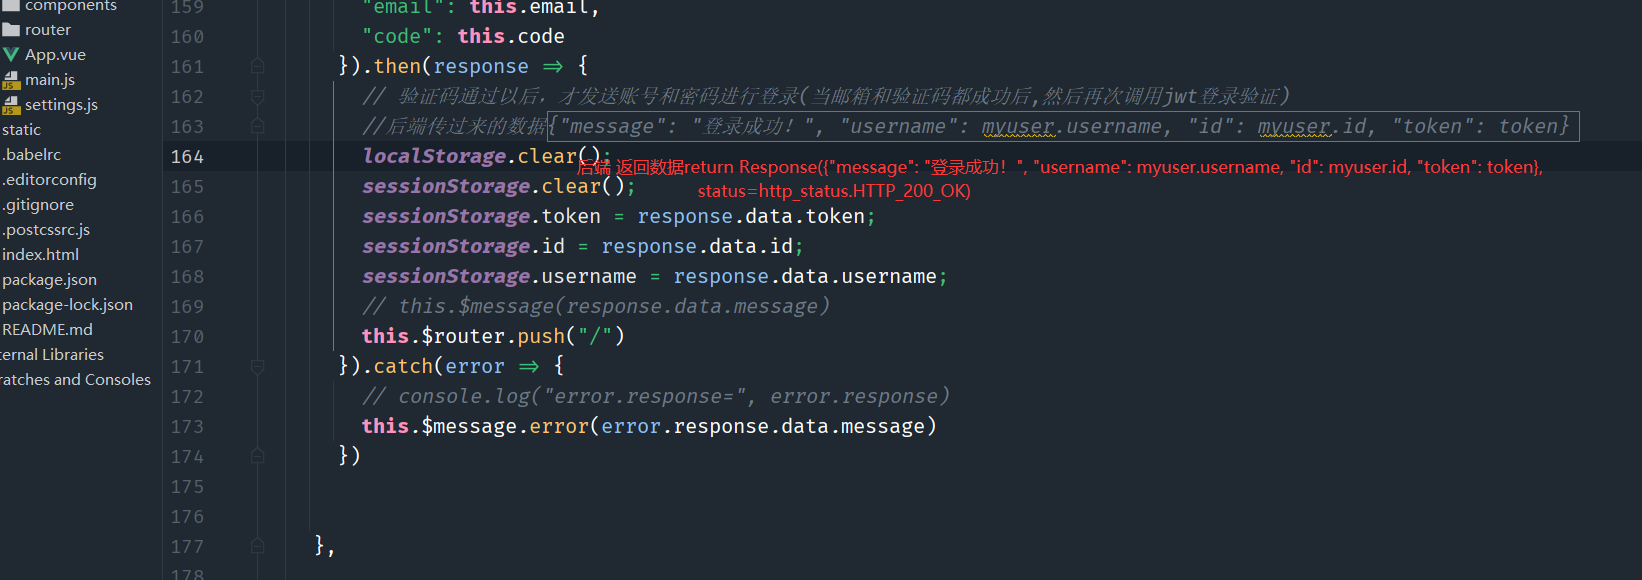
}).then(response => {
// After the verification code passes, the account and password are sent for login (when the mailbox and verification code are successful, then call jwt login verification again)
//Data {"message": "login succeeded!", "username": myuser.username, "id": myuser.id, "token": token}
localStorage.clear();
sessionStorage.clear();
sessionStorage.token = response.data.token;
sessionStorage.id = response.data.id;
sessionStorage.username = response.data.username;
// this.$message(response.data.message)
this.$router.push("/")
}).catch(error => {
// console.log("error.response=", error.response)
this.$message.error(error.response.data.message)
})
The backend receives data for verification:
def post(self, request):
"""Verification method of verification code"""
# 1. Obtain the data transmitted from the front end
user = request.data
# user= {'email': '1293416157@qq.com', 'code': '8414'}
# print("user=", user)
# 2. Check the mailbox
myuser = get_user_by_account(user['email'])
if myuser is None:
# The request failed 400. The {"message": "sorry, the user does not exist!"} dictionary will be returned to the catch of the front-end axios
return Response({"message": "User mailbox does not exist!"}, status=http_status.HTTP_400_BAD_REQUEST)
# 3. Verification code
conn = get_redis_connection()
redis_code = conn.get(myuser.email) # Get the verification code according to the mailbox
# print("redis_code=", redis_code)
if not redis_code:
return Response({"message": "Verification code failure,Please resend!"}, status=http_status.HTTP_400_BAD_REQUEST)
redis_str_code = redis_code.decode('utf-8')
if user['code'].strip() != redis_str_code:
return Response({"message": "Verification code error!"}, status=http_status.HTTP_400_BAD_REQUEST)
# 4. After the mailbox and verification code are verified successfully, a token is returned (user-defined jwt, which was returned automatically before)
payload = jwt_payload_handler(myuser) # myuser is an object object
token = jwt_encode_handler(payload)
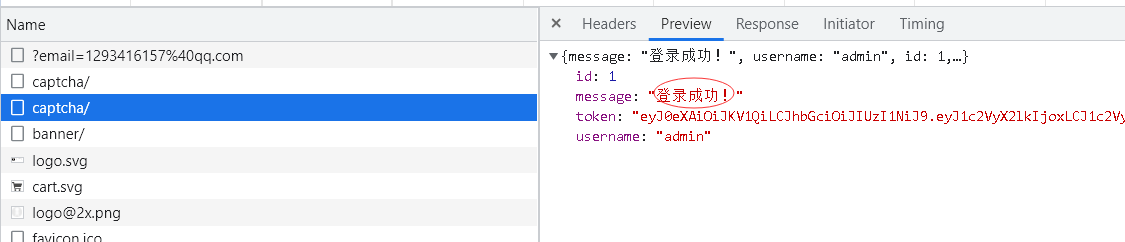
return Response({"message": "Login succeeded!", "username": myuser.username, "id": myuser.id, "token": token},
status=http_status.HTTP_200_OK)
Generate jwt manually
The manual issuance of JWT is provided in the documentation of Django REST framework JWT extension
from rest_framework_jwt.settings import api_settings

jwt_payload_handler = api_settings.JWT_PAYLOAD_HANDLER
jwt_encode_handler = api_settings.JWT_ENCODE_HANDLER

payload = jwt_payload_handler(user)
token = jwt_encode_handler(payload)
 Test one:
ok