Write in front
See the link: https://yyywwqqq.coding.me/draw
 Project download address: https://coding.net/u/yywwqqq/p/draw
 I hope you can order a fork, a collection of concerns!
If you have any questions, please leave a message.
code implementation
1.HTML content 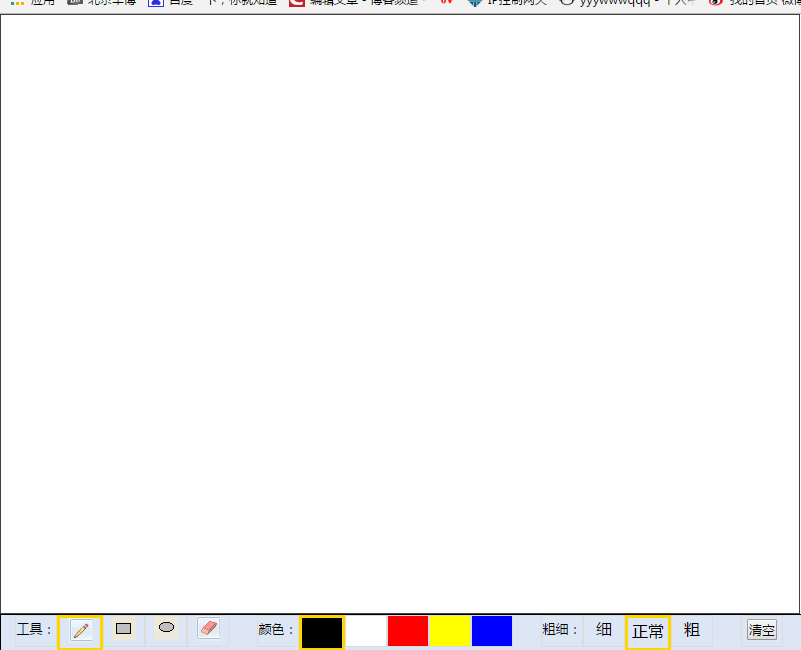
Above is a div 800*600, which contains two canvas of the same size, covering each other, because the canvas is transparent by default, so you can see on which canvas you paint.
Below are four ul lists, which correspond to tools, colors, thickness, and clearance. Remember to add a class distinction to each li option.
The following is the content of body:
<div id="div1">
            <canvas id="c" width="800px" height="600px" style=""></canvas>
            <canvas id="c2" width="800px" height="600px"  ></canvas>
        </div>
        <div id="div2" >

            <ul>
                <li style="font-size: 13px;">Tools:</li>
                <li id="qianbi" class="choice"><img src="img/qianbi.png"/></li>
                <li id="juxing"><img src="img/juxing.png"/></li>
                <li id="yuanxing"><img src="img/yuanxing.png"/></li>
                <li id="xiangpi"><img src="img/xiangpi.png"/></li>
            </ul>
            <ul>
                <li style="font-size: 13px;">Color:</li>
                <li class="black choice"></li>
                <li class="white" ></li>
                <li class="red"></li>
                <li class="yellow"></li>
                <li class="blue"></li>
            </ul>
            <ul>
                <li style="font-size: 13px;">Thickness:</li>
                <li class="small" >fine</li>
                <li class="normol choice" >normal</li>
                <li class="big">crude</li>
            </ul>
            <ul>
                <!--<li class="savedraw" ><button>Preservation</button></li>-->
                <li class="cleardraw" ><button>empty</button></li>
            </ul>
        </div>
2.CSS
After we've written the contents of the body, let's set up the style.
There are two main points to be paid attention to:
1. The two canvas should be overlapped, so they need to be adjusted.
2. Under ul, li is a block-level element, each of which takes up one line and allows them to be displayed in one line.
The following is the css code:
body
            {
                margin: 0px;
            }
            canvas
            {
                 position: absolute;
                 left: 0px;
                 right: 0px;
                 /*background-color: transparent  */
            }
            #div1
            {
                width: 800px;
                height: 600px;
                position: relative;
                border: 1px solid black;
            }
            #div2
            {
                width: 800px;
                height: 36px;
                border: 1px solid black;
                background-color:rgb(220,230,244) ;
            }
            ul
            {
                background-color: rgb(220,230,244);
                text-align: center;
                margin: 0;
                padding: 0;
                height: 30px;
                float: left;
                margin-left: 14px;
                margin-right: 14px;
            }
            ul>li
            {
                float: left;
                border: 1px solid gainsboro;
                width: 40px;
                line-height: 25px;
                display: inline-block;
                height: inherit;
            }
            button
            {
                padding: 0px;

            }
            .red
            {
                background-color: red;
            }
            .black
            {
                background-color: black;
            }
            .white
            {
                background-color: white;
            }
            .blue
            {
                background-color: blue;
            }
            .yellow
            {
                background-color: yellow;
            }
            .choice
            {
                border: 3px solid gold;
            }
3.JS
Speaking of my implementation ideas, I define three variables, style, mywidth and mycolor, which represent tool type, thickness and color, respectively. So the first thing to write is the click event of li under ul, and add a choice class (with a thick black border) to each click of li to indicate its selected state.
The following click event code:
var style = 0;
var mycolor = "black";
var mywidth = 2.5;
$(function(){
    //Add Selected Styles
    $("li").click(function(){
        $(".cleardraw").removeClass("choice");
        //If the point is that the subheadings are unresponsive
        if ($(this).prop("className") == "firstli") {

        } else{
        //First remove the selected state of the other elements under the parent element.
            $(this).parent().children().removeClass("choice");
            $(this).addClass("choice");
        }

    })
    $(".small").click(function(){
        mywidth = 1;
    })
    $(".normol").click(function(){
        mywidth = 2.5;
    })
    $(".big").click(function(){
        mywidth = 5;
    })
    $("#qianbi").click(function(){
        style=0;
    })
    $("#juxing").click(function(){
        style=1;
    })
    $("#yuanxing").click(function(){
        style=2;
    })
    $("#xiangpi").click(function(){
        style=3;
    })
    $(".red").click(function(){
        mycolor = "red";
    })
    $(".black").click(function(){
        mycolor = "black";
    })
    $(".white").click(function(){
        mycolor = "white";
    })
    $(".yellow").click(function(){
        mycolor = "yellow";
    })
    $(".blue").click(function(){
        mycolor = "blue";
    })
    $(".cleardraw").click(function(){
        ctx.clearRect(0,0,800,600);
    })
})
This basically completes the click event. The following is to achieve the painting function, mainly involving three events: mousedown mousemove mouseup.
Let's talk about my idea. When the mouse is clicked, trigger the mousedown function, switch the style, and decide whether it's a pencil or a rubber, or a rectangle or a circle.~
First of all, pencil, record the coordinates beginx and beginy of mousedown. Every time the mouse moves, take the event.pageX and event.pageY variables at this time, then draw a line between these two points, and modify the starting point of the next MouseDown drawing line should be the end point of the previous one. That is to say, after each move, beginx =event.pageX, beginy =event.pageY
Note: The mousemove event is not clear with your mouse up, even if you write it under the mousedown event, so I use a lock, lock = true when clicking, lock = false when mouseup.
$("#div1").mousedown(function(event){
        beginx =event.pageX;
        beginy =event.pageY;
        console.log("When I ordered down:",beginx,beginy);
        switch(style)
        {
            //Pencil State
            case 0:
                console.log("I chose a pencil.");
                lock0 = true;
                //console.log("When I ordered down:",beginx,beginy);
                $("#div1").mousemove(function(event){
                    if(lock0)
                    {
                        ctx.beginPath();
                        ctx.moveTo(beginx,beginy);
                        ctx.lineTo(event.pageX,event.pageY);
                        ctx.strokeStyle = mycolor;
                        ctx.lineWidth = mywidth;
                        ctx.stroke();
                        beginx =event.pageX;
                        beginy =event.pageY;
                   }
                })
                break;
                }
        }
    })
The idea of rubber is the same as that of pencil, except that the color should be fixed in white!
    case 3:
                console.log("I chose rubber.");
                lock3 = true;
                //console.log("When I ordered down:",beginx,beginy);
                $("#div1").mousemove(function(event){
                    if(lock3)
                    {

                        ctx.beginPath();
                        ctx.moveTo(beginx,beginy);
                        ctx.lineTo(event.pageX,event.pageY);
                        ctx.strokeStyle = "white";
                        ctx.lineWidth = mywidth*3;
                        ctx.stroke();
                        beginx =event.pageX;
                        beginy =event.pageY;
                     }
                })
                break;
Then we draw a rectangle, and then we use the second canvas of the declaration. We can think of it as a buffer. When the mouse moves under the mousemove, we first empty the buffer, and then draw a rectangle inside the buffer. When mouseup, it also clears the following buffer and declares the same rectangle in the first canvas according to its location. The code is as follows:
case 1:
                lock1 = true;
                console.log("Draw a rectangle.");
                $("#div1").mousemove(function(event){
                    if(lock1)
                    {
                        ctx2.clearRect(0,0,800,600);
                        xx=event.pageX-beginx;
                        yy=event.pageY-beginy;
                        ctx2.beginPath();
                        ctx2.rect(beginx,beginy,xx,yy);
                        ctx2.strokeStyle = mycolor;
                        ctx2.lineWidth = mywidth;
                        ctx2.stroke();
                    }
                })
                break;
If you draw a circle, it's similar to drawing a rectangular board, so I won't dwell on it.
Here is the code for drawing circles:
                case 2 :
                lock2=true;
                console.log("Draw a circle!")
                $("#div1").mousemove(function(event){
                    if(lock2)
                    {
                        ctx2.clearRect(0,0,800,600);
                        xx=event.pageX-beginx;
                        yy=event.pageY-beginy;
                        r = Math.sqrt(xx*xx+yy*yy)/2;
                        centerx = (event.pageX+beginx)/2;
                        centery = (event.pageY+beginy)/2;
                        console.log(xx,yy,centerx,centery,r);
                        ctx2.beginPath();
                        ctx2.arc(centerx,centery,r,0,2*Math.PI,true);
                        ctx2.strokeStyle = mycolor;
                        ctx.lineWidth = mywidth;
                        ctx2.stroke();
                    }
                })
                break;
Finally, the event that the mouse is raised is pasted. Here is the code:
$("#div1").mouseup(function(){
        switch(style)
        {
            //Pencil State
            case 0:

                break;
            //Rectangular state
            case 1:
                ctx2.clearRect(0,0,800,600);
                xx=event.pageX-beginx;
                yy=event.pageY-beginy;
                ctx.beginPath();
                ctx.rect(beginx,beginy,xx,yy);
                ctx.strokeStyle = mycolor;
                ctx.lineWidth = mywidth;
                ctx.stroke();
                break;
            //Circle drawing state
            case 2:
                ctx2.clearRect(0,0,800,600);
                xx=event.pageX-beginx;
                yy=event.pageY-beginy;
                console.log(event.pageX,event.pageY);
                r = Math.sqrt(xx*xx+yy*yy)/2;
                centerx = (event.pageX+beginx)/2;
                centery = (event.pageY+beginy)/2;
                console.log(xx,yy,centerx,centery,r);
                ctx.beginPath();
                ctx.arc(centerx,centery,r,0,2*Math.PI,true);
                ctx.strokeStyle = mycolor;
                ctx.lineWidth = mywidth;
                ctx.stroke();
                break;
            case 3:

                break;

        }

        lock0=false;
        lock1=false;
        lock2=false;
        lock3=false;
    });