Django is an open source Web application framework written in Python.
There are many web frameworks in python, such as Django, Tornado, Flask. Django has many advantages over other WEB frameworks: large and complete, the framework itself integrates many functions such as ORM, model binding, template engine, caching, Session, etc.
Django uses the MV C software design pattern, namely Model M, View V, and Controller C.
Installation Page
01 Install Django
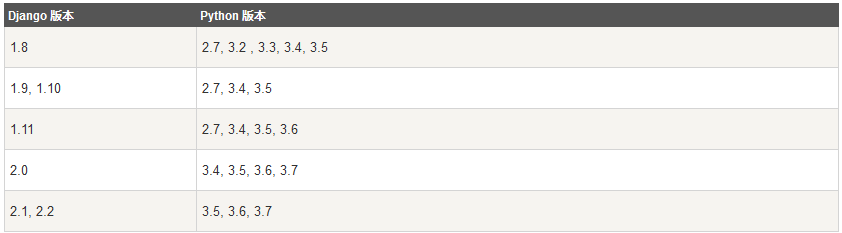
Make sure you have python installed before you install it (let's not say=. =!), and take a look at the version mapping, skip it~
Install under 0x01 Linux:
The first is pip installation:
pip install Django
This is the simplest way to install, but I have a lot of pits when introducing other modules after installing under Python 2.7, all recommended after upgrading to Python 3.6.Install it again.
Of course, another way is to install the source code:
Download the source package: https://www.djangoproject.com/download/
Enter the following command and install it:
tar -zxvf Django-X.Y.tar.gz    # Unzip Download Package
cd Django-X.Y                 # Enter Django directory
python setup.py install       # Execute installation commands
Note: After successful installation, Django is located in the site-packages directory of the Python installation directory.
Install under 0x02 Win:
The first method is to install the package:
Just like installing the python installation package, download the Django download address: https://www.djangoproject.com/download/
(You need to look at the version table above, By the way: Python 3.x is now fully compatible with Django versions above 1.6.x.)
After downloading the Django package, unzip it and place it in the same root directory as the Python installation directory, enter the Django directory, execute the python setup.py install, and then start the installation, Django will be installed in the site-packages under Lib of Python.

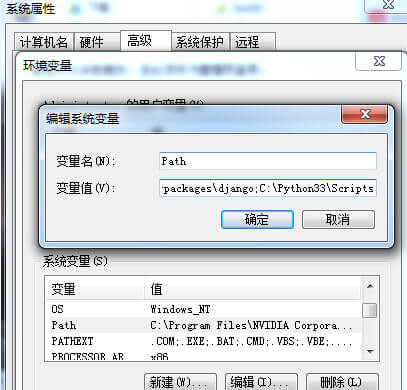
Then configure the environment variables and add these directories to the system environment variables: C:\Python33\Lib\site-packages\django;C:\Python33\Scripts.Once the addition is complete, you can use Django's django-admin.py command to create a new project.
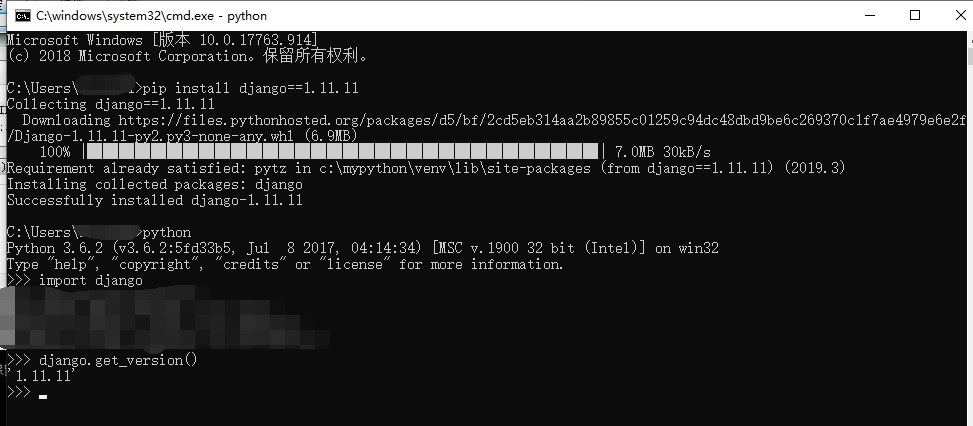
The second method is pip command line installation (recommended)
pip install django==1.11.11
The third way is to install Pycharm:
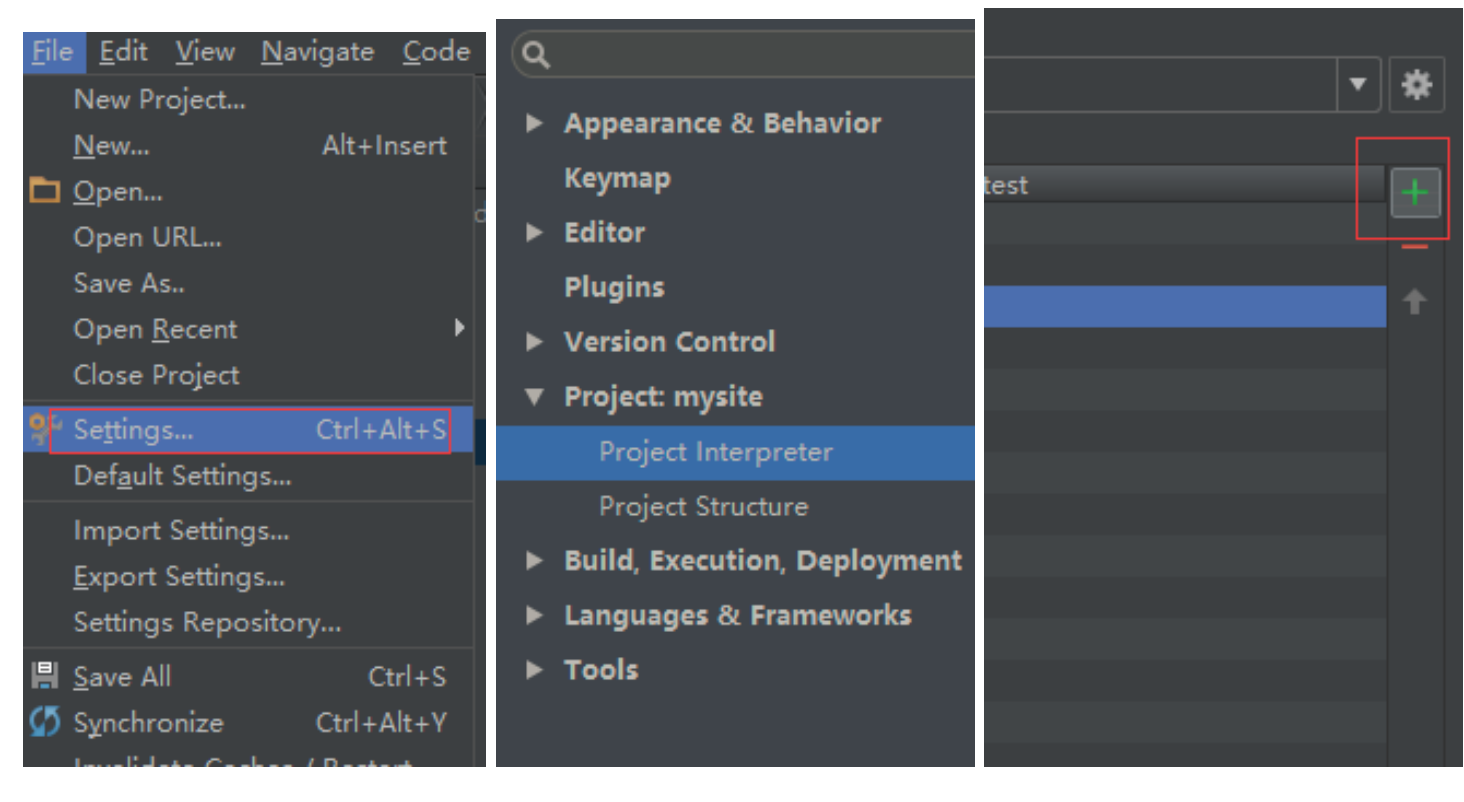
Then search for django installation.
Install under 0x03 MAC
Refer to this link https://www.runoob.com/django/django-install.html
02 Configuration Papers
1. Create a project
Execute django-admin (regardless of linux \window) under 0x01 command line
django-admin startproject mysite
This should be done in the directory you want to create, as it will be created in place!
0x02 pycharm creation
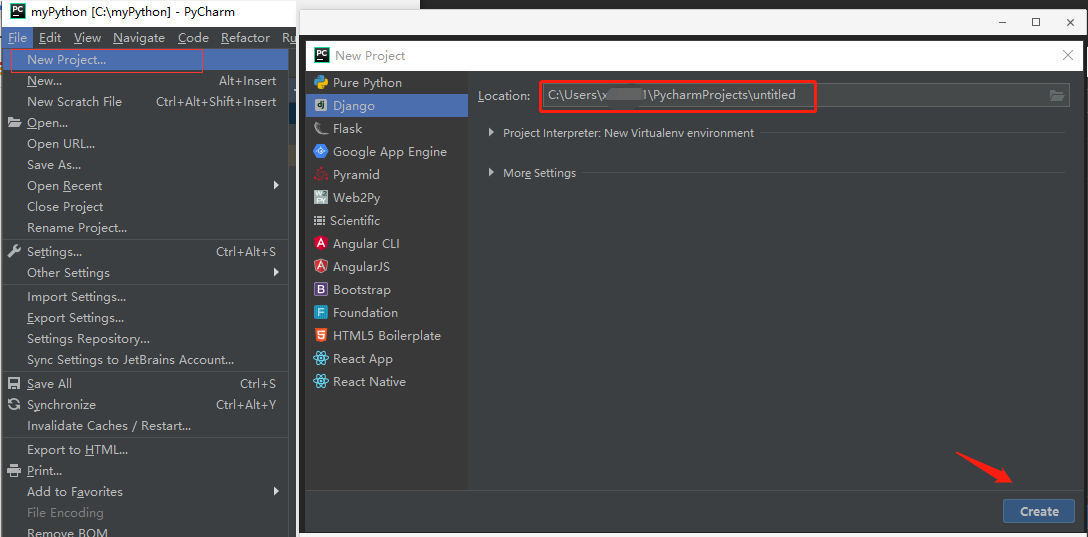
This is roughly what the directory will look like after it is created:
mysite/       #Containers for Projects
├── manage.py  # Manage files so you can interact with the Django project in various ways
└── mysite  # Project Directory
    ├── __init__.py   #An empty file tells Python that the directory is a Python package
    ├── settings.py  # configuration file
    ├── asgi.py  # asgi server to process websocket requests
    ├── urls.py  # Routing System --> URL Correspondence to function
    └── wsgi.py  # The runserver command makes a simple web server using the wsgiref module
#Below is an example of a project I created that is Secfile, not mysite
Explanation:
- Manage.py #All operations on the current Django program can be based on python manage.py runserver | startapp appname | syncdb | makemigrations | migrate | createsuperuser
- wsgi.py #is used to define what socket django is implemented with
- WSGI (Web Server Gateway Interface) is a specification that defines the interface format between web app and web server written using python to decouple web app from web server.
2. Running Django Project
python manage.py runserver 0.0.0.0:8000
0.0.0.0 allows other computers to connect to the development server, with port number 8000.If not specified, the port number defaults to 8000.
Enter the IP of your server in the browser (here we enter the local IP address: 127.0.0.1:8000) and the port number. If started normally, the output will be as follows
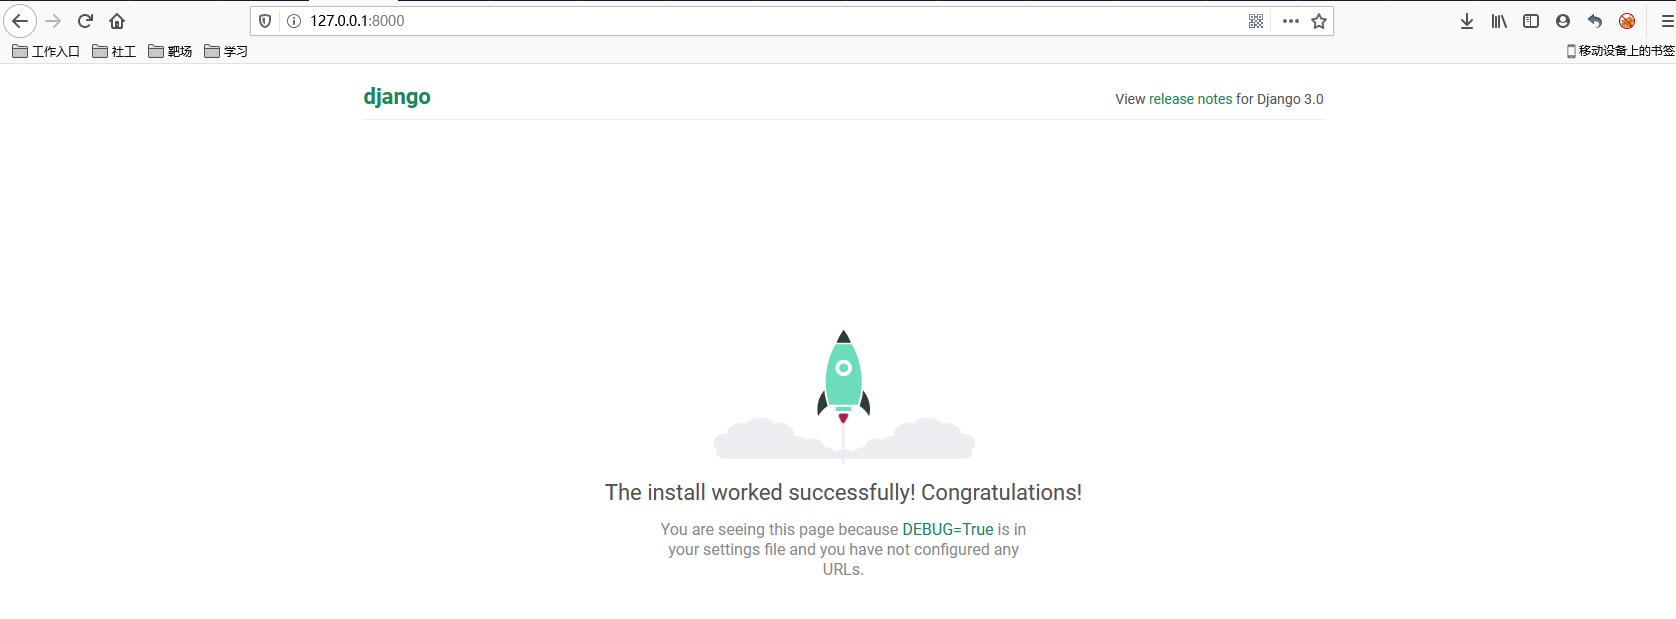
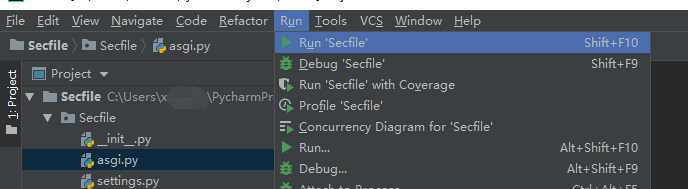
Run the run item under pycharm by clicking the button run!
3. Profile Configuration
First let's look at the default url.py file.
from django.contrib import admin
from django.urls import path

urlpatterns = [
    path('admin/', admin.site.urls),
]
#This is where URL s correspond to functions, and when http://127.0.0.1:8000/admin/is accessed, the written function admin.site.urls is executed.
Functions, which process user requests and return results, require at least one parameter
Example:
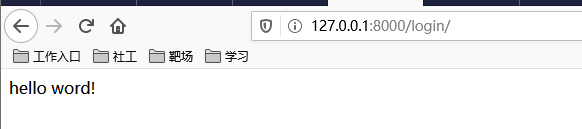
from django.contrib import admin
from django.urls import path

from django.shortcuts import HttpResponse
def login(request):
    '''
    //Processing user requests and returning content
    :param request:User requests all relevant information (objects)
    :return:
    '''
    return HttpResponse('hello word!')


urlpatterns = [
    #path('admin/', admin.site.urls),
    path('login/',login),
]
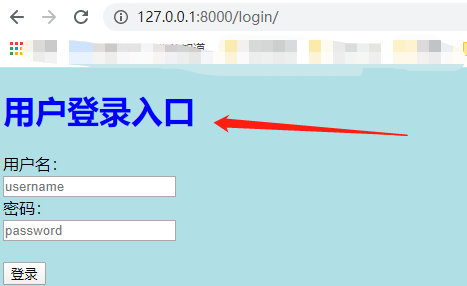
This example is an attempt to create a login function that uses HttpReponse, a string that return s the user when the user accesses the login/Perform as follows:
Fully illustrates routing relationships and functions for handling requests
At this time, we pretend to be making a user login interface, and it is not polite for you to show the user a word, right?
Can we then:
Return html tag information to the user:
1 def login(request):
2     '''
3 Processing user requests and returning content
 4:param request:User requests all relevant information (objects)
5     :return:
6     '''
7     return HttpResponse('<input type="text" />')

Magic!
With this idea, we can put a login.html in the templates folder, but how does this file tell django how to read it?Because HttpReponse only knows strings!
That smash?-->Use render module!
from django.shortcuts import HttpResponse,render
def login(request):
    #return HttpResponse('<input type="text" />')
    return render(request,'login.html')

urlpatterns = [
    #path('admin/', admin.site.urls),
    path('login/',login),
]
This render automatically finds the login.html under the template path to read the content and return it to the user (essentially HttpResponse)
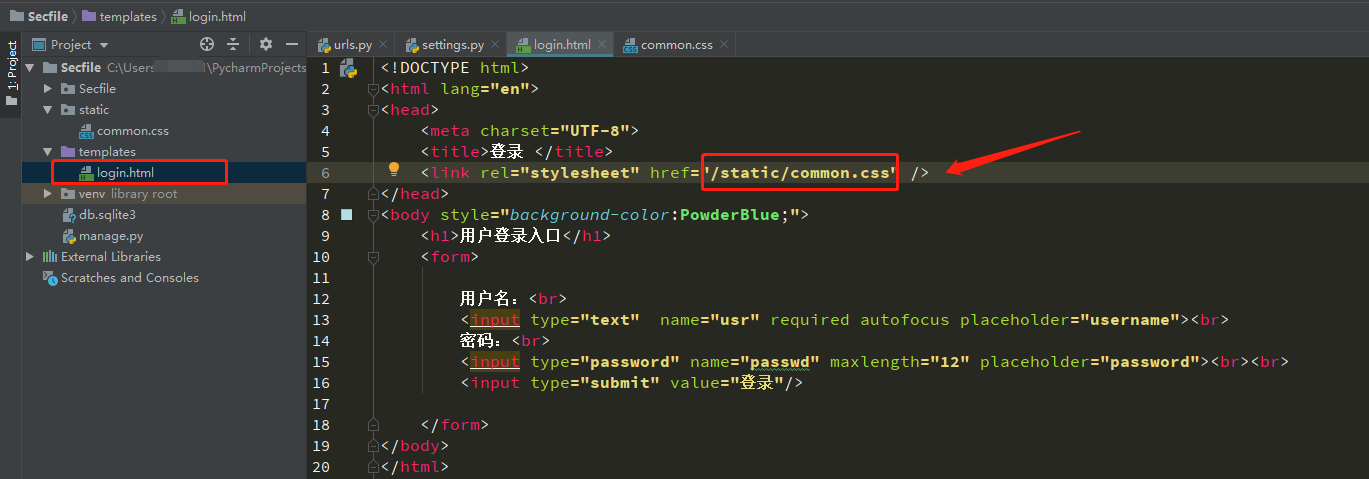
The "login.html" file can be used as a landing interface.For example:
<!DOCTYPE html>
<html lang="en">
<head>
    <meta charset="UTF-8">
    <title>Sign in </title>
</head>
<body style="background-color:PowderBlue;">
    <form>

        User name:<br>
        <input type="text"  name="usr" required autofocus placeholder="username"><br>
        Password:<br>
        <input type="password" name="passwd" maxlength="12" placeholder="password"><br><br>
        <input type="submit" value="Sign in"/>

    </form>
</body>
</html>
The correspondence is set in setting.py and templates are already used as basez_dir, so the name paths of this folder need to be consistent.
Configuration template path:
TEMPLATES = [
    {
        'BACKEND': 'django.template.backends.django.DjangoTemplates',
        'DIRS': [os.path.join(BASE_DIR, 'templates')]
        ,
        'APP_DIRS': True,
        'OPTIONS': {
            'context_processors': [
                'django.template.context_processors.debug',
                'django.template.context_processors.request',
                'django.contrib.auth.context_processors.auth',
                'django.contrib.messages.context_processors.messages',
            ],
        },
    },
]
There is actually one more template path configuration
Where do you want to set the CSS static file to be saved?
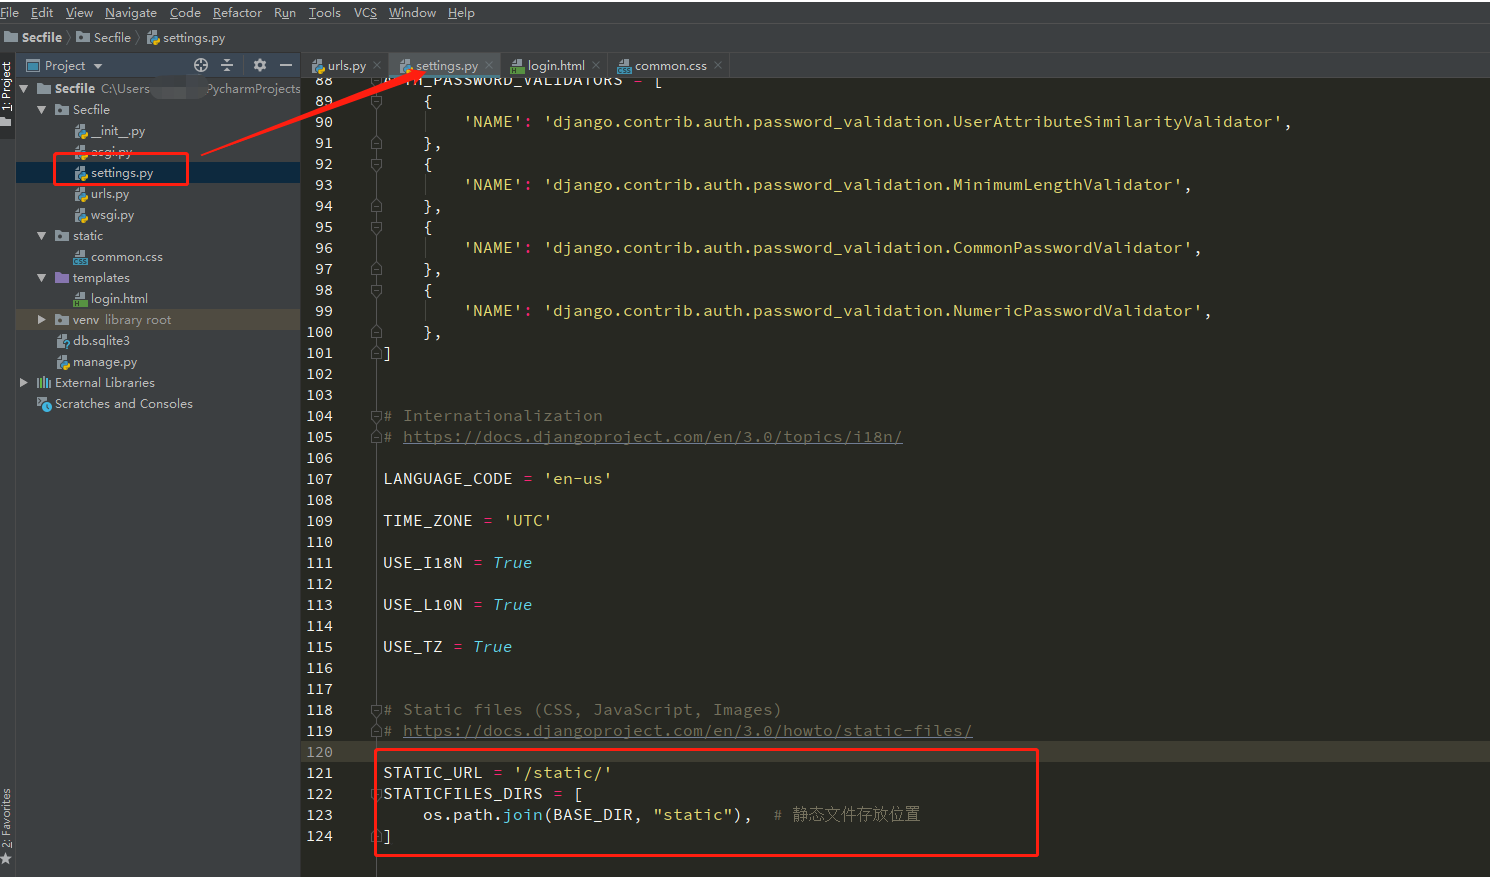
Static file configuration: that is, you write HTML files as static file paths for imported js, jQuery, bootstrap\pictures, etc.
STATIC_URL = '/static/'  # HTML Static folder prefix used in
STATICFILES_DIRS = [
    os.path.join(BASE_DIR, "static"),  # Static file storage location
]
Note: 1. Add a location at the end of setting.py and/static/name correspondence will not force the name; 2. Comma, don't forget!
The path in your html should also be modified in response
<script src="/static/jquery-3.2.1.min.js"></script>
<script src="/static/bootstrap/js/bootstrap.min.js"></script>
<link rel="stylesheet" href="/static/bootstrap/css/bootstrap.min.css">
Lift a chestnut:

Disable csrf
The csrf middleware can be temporarily disabled in the configuration file to facilitate form submission tests when you first start testing.
MIDDLEWARE = [
    'django.middleware.security.SecurityMiddleware',
    'django.contrib.sessions.middleware.SessionMiddleware',
    'django.middleware.common.CommonMiddleware',
    # 'django.middleware.csrf.CsrfViewMiddleware',     ###  <--Comment on this line
    'django.contrib.auth.middleware.AuthenticationMiddleware',
    'django.contrib.messages.middleware.MessageMiddleware',
    'django.middleware.clickjacking.XFrameOptionsMiddleware',
]
To summarize, the three steps to create a django are as follows:
  1. Create a project
  2. Configuration
 * Template Path
      'DIRS': [os.path.join(BASE_DIR, 'templates')]
* Static file path
 3. Disable csrf first