1. Design model
We used to operate the database by writing sql statements. Can we operate the database without writing sql statements? Of course, it's time to use the ORM framework.
1.1 ORM framework
O is object, which means class object, R is relation, translated into Chinese is relation, which means data table in relational database, M is mapping, which means mapping. In the ORM framework, it helps us map the class and data table, which enables us to operate the data in the corresponding table through the class and class object. The ORM framework also has a function, which can automatically help us to generate tables in the database according to our designed classes, eliminating the process of building tables ourselves.
django is embedded with ORM framework, which does not need to be directly oriented to database programming, but defines model classes, and completes the operation of adding, deleting, modifying and querying data tables through model classes and objects.
There are three steps to use django for database development:
1. Define model class in models.py
2. migration
3. Add, delete, modify and query data through classes and objects
Let's take saving book information as an example to introduce the whole process of database development in Django.
1.2 create model
To create a model in models.py under booktest, you need to inherit the models.Model class:
from django.db import models
#Design class model class corresponding to table
# Create your models here.

#Books category
class BookInfo(models.Model):
    '''Book model class'''
    #Title of book CharField Description is a string max_length Specifies the maximum length of the string
    btitle = models.CharField(max_length=20)
    #Publication date DateField Description is a date type
    bpub_date = models.DateField()
1.3 migration
There are two steps to migration:
1. Generate migration file: generate the migration file to create the table according to the model class.
2. Perform migration: create tables in the database according to the migration files generated in the first step.
The command to generate the migration file is as follows:
python manage.py makemigrations
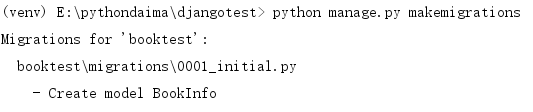
After executing the generate migration file command, the migration file will be generated in the migrations directory under the application booktest directory.
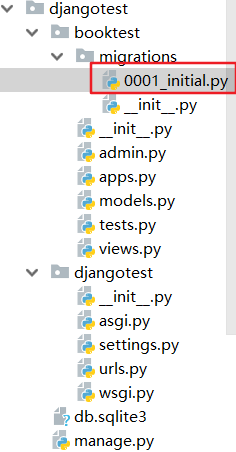
Let's open this file as follows:
# Generated by Django 3.0.2 on 2020-01-15 07:01

from django.db import migrations, models


class Migration(migrations.Migration):

    initial = True

    dependencies = [
    ]

    operations = [
        migrations.CreateModel(
            name='BookInfo',
            fields=[
                ('id', models.AutoField(auto_created=True, primary_key=True, serialize=False, verbose_name='ID')),
                ('btitle', models.CharField(max_length=20)),
                ('bpub_date', models.DateField()),
            ],
        ),
    ]
The Django framework generates the migration file according to the model class we designed. In the migration file, we can see that each element in the fields list is consistent with the BookInfo class attribute name and attribute type. At the same time, we found that there is an additional id item, which is automatically generated by Django framework. When creating a table, the id will be used as the primary key column of the corresponding table, and the primary key column will grow automatically.
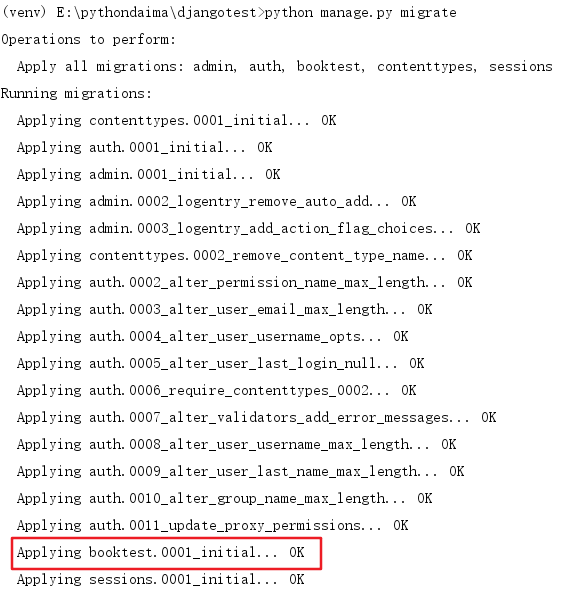
When the migration command is executed, the Django framework will read the migration file and automatically help us generate the corresponding tables in the database.
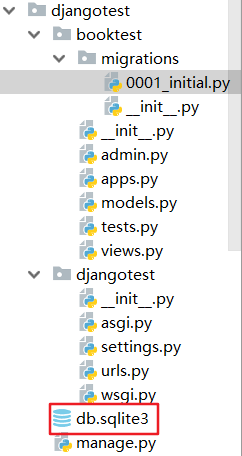
By default, Django uses SQLite3 database. In the above figure, db.sqlite3 is the database file automatically generated by Django framework. SQLite3 is a small database, which is usually used in mobile phones. Like mysql, we can operate it through sql statements.
But we usually use mysql as a case, so we need to turn the model into a table in the mysql database.
DATABASES = {
    'default': {
        'ENGINE': 'django.db.backends.mysql',
        'NAME':'bms',        # To connect to a database, you need to create a
        'USER':'root',       # User name to connect to the database
        'PASSWORD':'root',       # Password to connect to the database
        'HOST':'127.0.0.1', # Connect host, default local
        'PORT':3306           # Port default 3306
    }
}
NAME is the NAME of the database. Before MySQL connection, the database must have been created. In the above SQLite database, db.sqlite3 is the automatic creation of the project. USER and PASSWORD are the USER NAME and PASSWORD of the database respectively. After setting up, start our Django item. At present, we need to activate our mysql. Then, start the project and an error will be reported: no module named MySQL dB. This is because Django imports MySQL dB by default, but MySQL DB has a big problem with py3, so the driver we need is PyMySQL. So we also need to find "init" under the project NAME, and write:
import pymysql
pymysql.install_as_MySQLdb()
Then we should pay attention to an error report, which is as follows:
django.core.exceptions.ImproperlyConfigured: mysqlclient 1.3.13 or newer is required; you have 0.9.3.
Currently, MySQL client only supports Python 3.4, so if you use a later version of python, you need to modify it as follows:
Find e: \ pythondaima \ venv \ lib \ site packages \ Django \ DB \ backends \ MySQL \ base.. py through the path. Find the following places in this path:
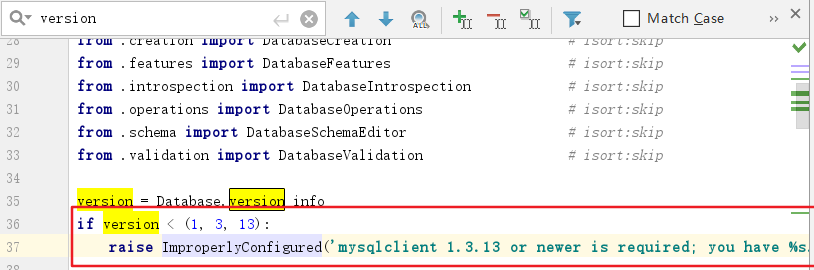
Just comment it out.
Also, as mentioned in the previous chapter, make sure that the name of the app we created is written in the installed Apus in the configuration file.
INSTALLED_APPS = [
    'django.contrib.admin',
    'django.contrib.auth',
    'django.contrib.contenttypes',
    'django.contrib.sessions',
    'django.contrib.messages',
    'django.contrib.staticfiles',
    'booktest',
]
Delete the original generated file and run two commands again:
python manage.py makemigrations
python manage.py migrate
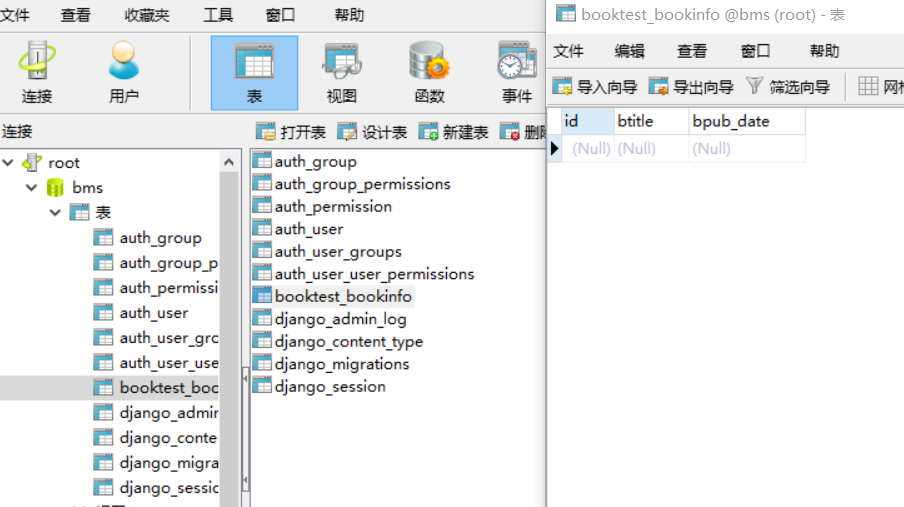
We can see that the name of the generated table is called booktest "bookinfo, booktest is the name of the application, and bookinfo is the name of the model class.
Let's get another role class:
In booktest/models.py, define the role class:
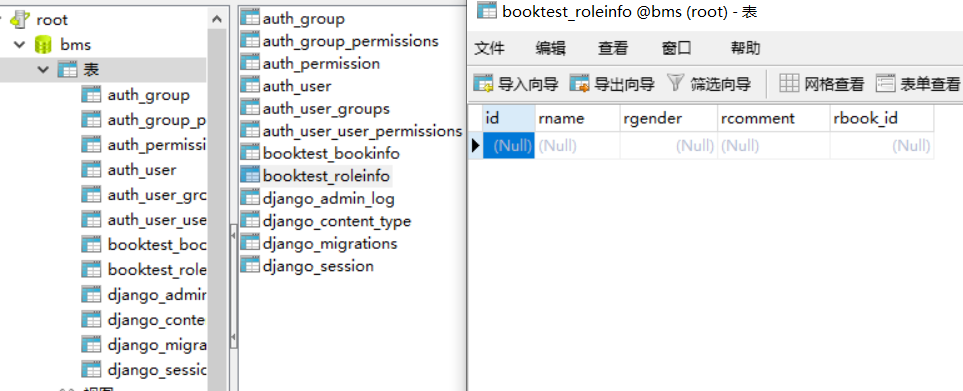
class RoleInfo(models.Model):
    '''Character model class'''
    # Role name
    rname = models.CharField(max_length=20)
    # Gender
    rgender = models.BooleanField()
    # Remarks
    rcomment = models.CharField(max_length=100)
    # Relational attribute
    rbook = models.ForeignKey('BookInfo',on_delete=models.CASCADE)
After Django 2.0, you need to add the on delete option when defining the foreign key and one-to-one relationship. In order to avoid data inconsistency between the two tables, otherwise an error will be reported.

It should be noted that there is a one to many relationship between BookInfo class and RoleInfo class. This one to many relationship should be defined in the many class, that is, RoleInfo class.
When we migrate and generate tables later, the Django framework will automatically help us establish a foreign key relationship between the book table and the role table.
python manage.py makemigrations
python manage.py migrate
1.4 operation database
1.4.1 single table operation
After data table migration, you can enter the shell of the project to perform simple API operations. If you need to exit the project, you can use the ctrl+d shortcut key or enter quit().
Command to enter the project shell:
python manage.py shell

First, introduce the class in booktest/models:
from booktest.models import BookInfo,RoleInfo
Query all book information:
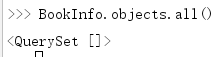
BookInfo.objects.all()
Because there is no data currently, an empty list is returned.
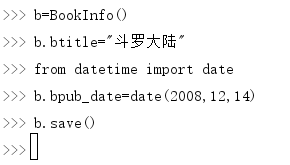
New book object:
b=BookInfo()
b.btitle="Continent of"
from datetime import date
b.bpub_date=date(2008,12,14)
b.save()
Query all book information again:
BookInfo.objects.all()

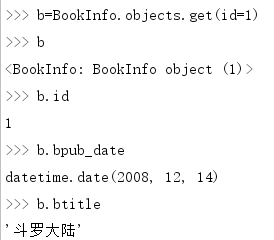
Find book information and view values:
b=BookInfo.objects.get(id=1)
b
b.id
b.btitle
b.bpub_date
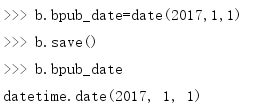
To modify book information:
b.bpub_date=date(2017,1,1)
b.save()
b.bpub_date
Delete book information:
b.delete()

1.4.2 multi table association operation
For RoleInfo, you can add, delete, modify and query in the above way.
Create a BookInfo object
b=BookInfo()
b.btitle='abc'
b.bpub_date=date(2017,1,1)
b.save()
Create a RoleInfo object
r=RoleInfo()
r.rname='a1'
r.rgender=False
r.rcomment='he is a boy'
r.rbook=b
r.save()
Books and roles are one-to-many relationships, and django provides an associated way of operation.
Get associated collection: returns all role s of the current book object.
b.roleinfo_set.all()
