zabbix (zbix) is an enterprise-level open source solution based on WEB interface to provide distributed system monitoring and network monitoring functions.
zabbix consists of two parts, zabbix server and optional component zabbix agent. zabbix server can provide remote server/network status monitoring, data collection and other functions through SNMP, zabbix agent, ping, port monitoring and other methods. It can run on Linux, Solaris, HP-UX, AIX, Free BSD, Open BSD, OS X and other platforms. zabbix agent needs to be installed on the monitored target server, which mainly completes the collection of hardware information or memory, CPU and other information related to the operating system. zabbix agent can run on Linux,Solaris,HP-UX,AIX,Free BSD,Open BSD, OS X, Tru64/OSF1, Windows NT4.0, Windows (2000/2003/XP/Vista) and other systems.
zabbix server can monitor the service status of remote server independently; it can also cooperate with zabbix agent, poll zabbix agent to receive monitoring data actively (agent mode), and passively receive data sent by zabbix agent (trapping mode). In addition, zabbix server also supports SNMP (v1,v2), which can be used in conjunction with SNMP software (such as net-snmp).
The main functions of Zabbix are:
- CPU load
- Memory usage
- Disk usage
- Network status
- Port monitoring
- Log monitoring.
Environmental deployment:
Centos 7.0 System
File Storage Directory / usr/local/src
LNMP environment
Zabbix-3.2.4
ZABBIX installation process:
First, configure the LNMP environment and verify the running status of the LNMP environment.
Please refer to the previous article. Centos 7.0 Deployment and Installation of LNMP Environment + phpmyadmin Management
[root@lnmp ~]# service mysqld restart
Shutting down MySQL. SUCCESS!
Starting MySQL.. SUCCESS!
[root@lnmp ~]# service nginx restart
Restarting nginx (via systemctl):                          [  Determine  ]
[root@lnmp ~]# service php-fpm restart
Gracefully shutting down php-fpm . done
Starting php-fpm  done
2. Create an imported zabbix database.
[root@lnmp ~]# cd /usr/local/src/
[root@lnmp src]# tar -zxf zabbix-3.2.4.tar.gz
[root@lnmp ~]# mysql -u root -p
Enter password:

mysql> create database zabbix character set utf8;   #Create a zabbix database and set it to utf8 mode by default.
Query OK, 1 row affected (0.00 sec)

mysql> grant all on zabbix.* to zabbix@'%'identified by 'admin@zabbix' with grant option; #Add the user ZABBIX who manages the ZABBIX database and assign all its permissions; and set the password to ammin@zabbix
Query OK, 0 rows affected (0.00 sec)

mysql> flush privileges;
Query OK, 0 rows affected (0.01 sec)

mysql> use zabbix;      #Switch to the zabbix database
Database changed
mysql> select user,host from mysql.user;   #View User List
+--------+-----------+
| user   | host      |
+--------+-----------+
| zabbix | %         |
| root   | 127.0.0.1 |
| root   | localhost |
+--------+-----------+
3 rows in set (0.00 sec)

mysql> source /usr/local/src/zabbix-3.2.4/database/mysql/schema.sql    #Import schema.sql file to zabbix database

mysql>source /usr/local/src/zabbix-3.2.4/database/mysql/images.sql     #Import images.sql file to zabbix database

mysql>source /usr/local/src/zabbix-3.2.4/database/mysql/data.sql       #Import the data.mysql file into the zabbix database
III. Installation of zabbix
1. Adding zabbix and groups
[root@lnmp src]# groupadd zabbix
[root@lnmp src]# useradd zabbix -g zabbix -s /bin/false
2. Installing dependency packages
[root@lnmp src]# yum install net-snmp-devel curl curl-devel mysql-devel -y
3. Installation of zabbix
[root@lnmp zabbix]# ./configure --prefix=/usr/local/zabbix --with-libcurl --with-net-snmp --with-mysql --enable-server --enable-agent
[root@lnmp zabbix]# make && make install
4. Adding service ports corresponding to zabbix
[root@lnmp zabbix]# vi /etc/services
#ZABBIX
zabbix-agent 10050/tcp # Zabbix Agent
zabbix-agent 10050/udp # Zabbix Agent
zabbix-trapper 10051/tcp # Zabbix Trapper
zabbix-trapper 10051/udp # Zabbix Trapper
:wq
5. Modify the zabbix configuration file
[root@lnmp zabbix]# vi /usr/local/zabbix/etc/zabbix_server.conf   #Modify the zabbix_server.conf configuration file
DBName=zabbix #Database name
DBUser=zabbix #Database username
DBPassword=123456 #Database password
ListenIP=127.0.0.1 #Database ip address
AlertScriptsPath=/usr/local/zabbix/share/zabbix/alertscripts     #zabbix Running Script Storage Directory
:wq
[root@lnmp zabbix]# vi/usr/local/zabbix/etc/zabbix_agentd.conf  #Modify the zabbix_agent d.conf configuration file
Include=/usr/local/zabbix/etc/zabbix_agentd.conf.d/
UnsafeUserParameters=1   #Enable custom key
:wq! #Save exit
6. Add boot-up script
[root@lnmp zabbix]# cp /usr/local/src/zabbix-3.2.4/misc/init.d/fedora/core/zabbix_server /etc/rc.d/init.d/zabbix_server #Server side
[root@lnmp zabbix]# cp /usr/local/src/zabbix-3.2.4/misc/init.d/fedora/core/zabbix_agentd /etc/rc.d/init.d/zabbix_agentd #Client
[root@lnmp zabbix]# chmod +x /etc/rc.d/init.d/zabbix_* #Add script execution privileges
[root@lnmp zabbix]# chkconfig zabbix_server on #Add boot start
[root@lnmp zabbix]# chkconfig zabbix_agentd on #Add boot start
7. Modify the installation directory of zabbix in the startup script of zabbix
[root@lnmp zabbix]#vi /etc/rc.d/init.d/zabbix_server #Editing Server Configuration Files
BASEDIR=/usr/local/zabbix/   #zabbix installation directory
:wq!    #Save exit
[root@lnmp zabbix]#vi /etc/rc.d/init.d/zabbix_agentd  #Editing Client Configuration File
BASEDIR=/usr/local/zabbix/#zabbix installation directory
:wq! #Save exit
8. Configuring web Sites
[root@lnmp zabbix]# cd /usr/local/src/zabbix-3.2.4
[root@lnmp zabbix-3.2.4]# cp -r ./frontends/php/ /usr/local/nginx/html/zabbix
[root@lnmp zabbix-3.2.4]# chown www.www -R /usr/local/nginx/html/zabbix/  #/ usr/local/nginx/html is the default site directory for Nginx. www is the running account for Nginx
[root@lnmp zabbix]# service zabbix_server start #Start the zabbix server
[root@lnmp zabbix]# service zabbix_agentd start #Start the zabbix client
9. Modify php configuration file parameters
[root@lnmp zabbix]# vi /etc/php.inipost_max_size =16M
max_execution_time =300
max_input_time =300
:wq!    #Save exit
[root@lnmp zabbix]# vi /usr/local/php/etc/php-fpm.conf #Edit modification
request_terminate_timeout = 300
:wq! #Save exit
[root@lnmp zabbix]#service php-fpm reload #Restart php-fpm
IV. Configuration of zabbix Access Interface via web
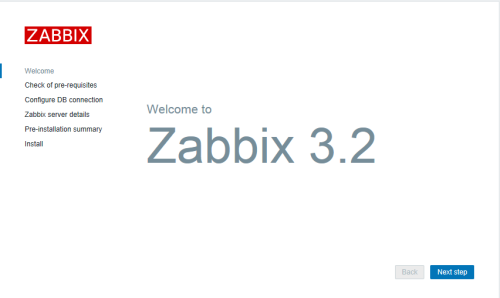
1. Open in the browser: http://172.16.10.210/zabbix As follows
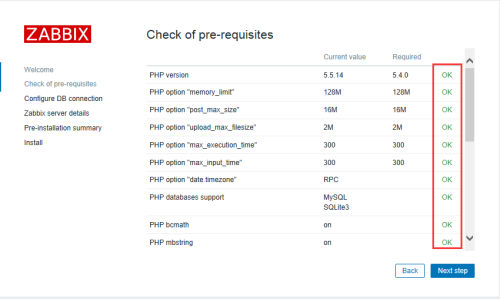
2. Check the system environment settings, all must be ok to continue Next
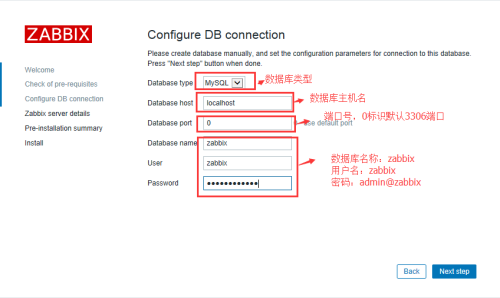
3. Configuring MySQL database information
Database: MySQL
Database host: 127.0.0.1
Database port: use default port
Database name: zabbix
User: zabbix
Password: admin@zabbix
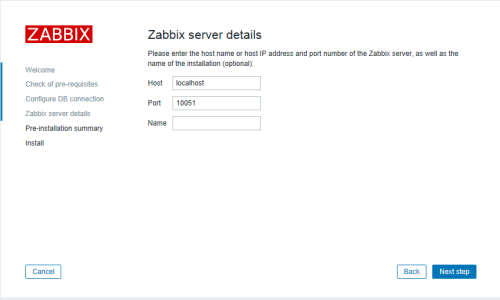
4. By default, next
5. By default, next
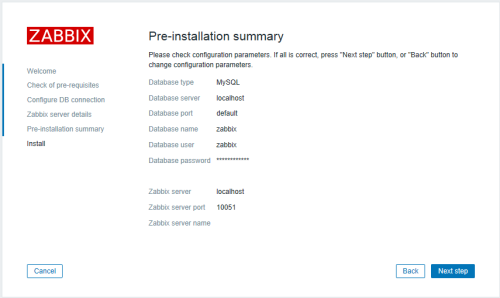
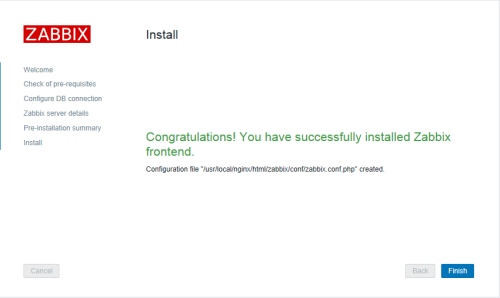
6,finish
5. Fault Handling and Chinese Display
1. Disposal of time-inconsistent faults
strtotime(): Invalid date.timezone value 'ShangHai', we selected the timezone 'UTC' for now. [zabbix.php:21 → require_once() → ZBase->run() → ZBase->authenticateUser() → CWebUser::checkAuthentication() → CWebUser::setSessionCookie() → strtotime() in include/classes/user/CWebUser.php:135]
date(): Invalid date.timezone value 'ShangHai', we selected the timezone 'UTC' for now. [zabbix.php:21 → require_once() → ZBase->run() → ZBase->processRequest() → CView->getOutput() → include() → local_generateHeader() → CView->getOutput() → include() → date() in app/views/layout.htmlpage.header.php:46]
Solution: Modify date.timezong = Asia/ShangHai in the / etc/php.ini file
[root@lnmp ~]# vi /etc/php.ini
date.timezone = Asia/ShangHai
:wq
[root@lnmp ~]# service php-fpm restart
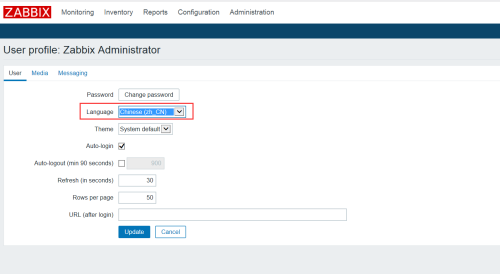
2. Chinese interface configuration, as shown below.
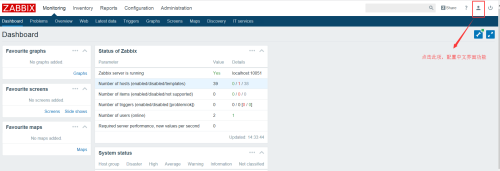
So far, the zabbix server environment and deployment work are ready to be completed. Later, the client will be deployed one after another to achieve real-time monitoring of the client, and the alarm function will be carried out by mail or micro-mail.