DR (Direct Routing) is one of the three load balancing modes and is also one of the most used. For an introduction to this mode, you can refer to the blog: https://blog.51cto.com/14227204/2436891
The environment is as follows:
1. All web nodes and schedulers are configured with VIP: when clients access VIP (virtual IP address of the cluster), if
The dispatcher forwards the request to the web node, then the web node responds directly to the client, and the client receives it
When a packet is received and the source address of the received packet is not 200.0.0.254, the return from the web server is discarded directly
Packets, to solve this problem, require 200.0.0.254 to be configured on the virtual interface of all web nodes and dispatchers
This address, and by adding a route, restricts access to VIP data locally to avoid communication disturbances.
.
2. Solve the problem of ARP response on Web nodes: 200.0.0.254 configured on all web nodes and schedulers
After this address, when the client accesses the address 200.0.0.254, all web nodes have this address, so
They all respond to ARP, which may cause client s to skip the scheduler and go directly to the web node
In this way, the dispatcher has no meaning and can not achieve the effect of load balancing, so it needs to be
Turn off partial ARP replies from the web node and only let the scheduler respond when broadcasting 200.0.0.254 address.
Node does not respond to the broadcast.
.
3. Solve the redirection optimization of ICMP that comes with the dispatcher kernel: The Linux kernel has an ICMP optimization function.
It is when the client first accesses the dispatcher that the dispatcher forwards the request to a web node, and at that time, Linux
The built-in ICMP optimization feature discovers that clients can communicate directly with the web node, and then send a data
A package tells the client that all subsequent packets accessing 200.0.0.254 will be sent directly to that web node, and so on
All subsequent access requests will be sent directly to a web node without going through the scheduler, which is definitely not possible
Thus, the effect of load balancing can not be achieved.The ICMP redirection parameter response for the Linux kernel needs to be turned off.
Dead work:
1. Self-configure addresses other than VIP
2. Preparing related packages
The configuration is as follows:
1. Configure a load dispatcher:
A virtual interface is used to bind VIP addresses for network card ens33 in response to cluster access.
[root@localhost /]# cd /etc/sysconfig/network-scripts/
[root@localhost network-scripts]# cp ifcfg-ens33 ifcfg-ens33:0
[root@localhost network-scripts]# vim ifcfg-ens33:0              # Modify ens33:0 to configure VIP
....................
IPADDR=200.0.0.254                                # Modify the following four items, note that the network card name is consistent
NETMASK=255.255.255.0
NAME=ens33:0
DEVICE=ens33:0
....................
[root@localhost network-scripts]# ifup ens33:0                 # Start virtual interface
[root@localhost network-scripts]# ifconfig ens33:0                 # See if the configuration was successful
ens33:0: flags=4163<UP,BROADCAST,RUNNING,MULTICAST>  mtu 1500
        inet 200.0.0.254  netmask 255.255.255.0  broadcast 200.0.0.255
        ether 00:0c:29:f1:61:28  txqueuelen 1000  (Ethernet)
root@localhost network-scripts]# ifconfig
ens33: flags=4163<UP,BROADCAST,RUNNING,MULTICAST>  mtu 1500
        inet 200.0.0.1  netmask 255.255.255.0  broadcast 200.0.0.255
        inet6 fe80::595f:84d:a379:7b6e  prefixlen 64  scopeid 0x20<link>
Adjust/proc response parameters (turn off redirection parameter responses for the Linux kernel):
[root@localhost /]# vim /etc/sysctl.conf                   # Write the following three lines
................
net.ipv4.conf.all.send_redirects = 0
net.ipv4.conf.default.send_redirects = 0
net.ipv4.conf.ens33.send_redirects = 0
[root@localhost /]# sysctl -p                      # Refresh configuration to take effect
net.ipv4.conf.all.send_redirects = 0
net.ipv4.conf.default.send_redirects = 0
net.ipv4.conf.ens33.send_redirects = 0
Configure load balancing policies:
[root@localhost /]# modprobe ip_vs                         # Load ip_vs module
[root@localhost /]# yum -y install ipvsadm                # Install the ipvsadm tool
[root@localhost /]# ipvsadm -C                                  # Clear Old Policy
[root@localhost /]# ipvsadm -A -t 200.0.0.254:80 -s rr           # Configure Cluster VIP and Add Related Nodes
[root@localhost /]# ipvsadm -a -t 200.0.0.254:80 -r 200.0.0.2:80 -g -w 1
[root@localhost /]# ipvsadm -a -t 200.0.0.254:80 -r 200.0.0.3:80 -g -w 1
[root@localhost /]# ipvsadm-save                             # Save Policy
-A -t localhost.localdomain:http -s rr
-a -t localhost.localdomain:http -r 200.0.0.2:http -g -w 1
-a -t localhost.localdomain:http -r 200.0.0.3:http -g -w 1
[root@localhost /]# ipvsadm-save > /etc/sysconfig/ipvsadm             # Export to Backup
[root@localhost /]# ipvsadm -ln                                # Confirm current Cluster Policy
IP Virtual Server version 1.2.1 (size=4096)
Prot LocalAddress:Port Scheduler Flags
  -> RemoteAddress:Port           Forward Weight ActiveConn InActConn
TCP  200.0.0.254:80 rr
  -> 200.0.0.2:80                 Route   1      0          0
  -> 200.0.0.3:80                 Route   1      0          0
2. Configure the web node server:
y Because the VIP address of the web node server is only the source address for sending Web response packets, there is no need to listen for client access requests (which are listened for and distributed by the dispatcher).Therefore, a virtual interface, lo:0, is used to host VIP addresses, and a routing record is added to restrict access to VIP packets locally.
[root@web1 /]# cd /etc/sysconfig/network-scripts/
[root@web1 network-scripts]# cp ifcfg-lo ifcfg-lo:0
[root@web1 network-scripts]# vim ifcfg-lo:0              # Edit this file
.................
DEVICE=lo:0                             # Remember to modify the network card name
IPADDR=200.0.0.254               # Configure VIP
NETMASK=255.255.255.255                  # Subnet mask needs to be all 1
ONBOOT=yes
[root@web1 network-scripts]# ifup lo:0                # Start virtual interface
[root@web1 network-scripts]# ifconfig lo:0           # Confirm to take effect
lo:0: flags=73<UP,LOOPBACK,RUNNING>  mtu 65536
        inet 200.0.0.254  netmask 255.255.255.255
        loop  txqueuelen 1  (Local Loopback)
[root@web1 /]# route add -host 200.0.0.254 dev lo:0               # Add VIP Local Access Route
[root@web1 /]# route -n
200.0.0.254     0.0.0.0         255.255.255.255 UH    0      0        0 lo
[root@web1 /]# vim /etc/rc.local                         #Set to automatically add this route on startup
/sbin/route add -host 200.0.0.254 dev lo:0
Adjust/proc response parameters:
[root@web1 /]# vim /etc/sysctl.conf
................
net.ipv4.conf.all.arp_ignore = 1
net.ipv4.conf.all.arp_announce = 2
net.ipv4.conf.default.arp_ignore = 1
net.ipv4.conf.default.arp_announce = 2
net.ipv4.conf.lo.arp_ignore = 1
net.ipv4.conf.lo.arp_announce = 2
[root@web1 /]# sysctl -p              # Refresh Make Configuration Effective
net.ipv4.conf.all.arp_ignore = 1
net.ipv4.conf.all.arp_announce = 2
net.ipv4.conf.default.arp_ignore = 1
net.ipv4.conf.default.arp_announce = 2
net.ipv4.conf.lo.arp_ignore = 1
net.ipv4.conf.lo.arp_announce = 2
Install httpd and create a test page:
[root@web1 /]# yum -y install httpd              # Install httpd
[root@web1 /]# echo test1.com > /var/www/html/index.html         # Create Test File
[root@web1 /]# systemctl start httpd
[root@web1 /]# systemctl enable httpd
Repeat the steps above to configure other node servers, the same virtual interface, the same/proc, the same httpd (for ease of verification, I'll change another home page file to test2.com)
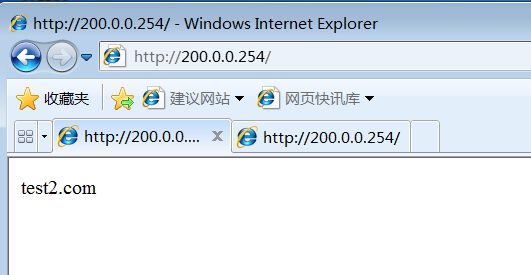
If you are visiting the same page, you can open multiple pages or refresh them later, excluding configuration errors, because it may have a time to stay connected, so there will be a delay
4. Configure NFS shared storage:
After testing the clustering effect, you need to deploy shared storage so that all web nodes can provide the same web page file to clients, and the configuration process is written at the end of this post: https://blog.51cto.com/14227204/2437018