Project packaging and Optimization - Project packaging
Objective: to be able to package projects through commands
Steps:
-
Open the terminal in the project root directory and enter the packaging command: npm run build
-
Wait until the package is completed, and the packaged content is placed in the build folder under the project root
Project packaging and Optimization - Project local Preview
Objective: to be able to preview the packaged project locally
Steps:
-
Global installation of local service package: npm i -g serve. This package provides the serve command to start the local service
-
Execute the command: serve - S. / build in the project root directory and start the server in the build directory
-
Access in browser: http://localhost:5000/ Preview project
Project packaging and Optimization - packaging volume analysis
Objective: to be able to analyze the packaged volume of the project
Analysis description: only by analyzing the packaging volume can we know which part of the project is too large and how to optimize it
Steps:
-
Install package for analyzing package volume: NPM I source map Explorer
-
In the scripts tab of package.json, add the command to analyze the package volume
"scripts": { "analyze": "source-map-explorer 'build/static/js/*.js'", } -
Package the project: npm run build (if you have already packaged, you can omit this step)
-
Run analysis command: npm run analyze
-
Analyze the package volume in the chart through the page opened by the browser
Project packaging and Optimization - production environment optimization
Objective: to optimize the redux middleware according to whether it is a production environment. Core code:
In store/index.js:
let middlewares
if (process.env.NODE_ENV === 'production') {
// Production environment, only enable thunk Middleware
middlewares = applyMiddleware(thunk)
} else {
middlewares = composeWithDevTools(applyMiddleware(thunk))
}Project packaging and Optimization - route lazy loading
Objective: to be able to lazy load routes and realize code separation
Steps:
-
In the App component, import the suspend component
-
Inside the Router, use the suspend component to wrap the component content
-
Provide the fallback attribute for the suspend component and specify the loading placeholder
-
Import the lazy function and modify it to import the routing component in lazy loading mode
Core code:
In App.js:
import { lazy, Suspense } from 'react'

//before
//import Login from '@/pages/Login/Login.jsx'
//import NotFound from './pages/NotFound/NotFound.jsx'
// Import page components now
const Login = lazy(() => import('./pages/Login'))
const Layout = lazy(() => import('./pages/Layout'))

const App = () => {
  return (
    <Router history={history}>
      <Suspense
        fallback={
          <div
            style={{
              textAlign: 'center',
              marginTop: 200
            }}
          >
            loading...
          </div>
        }
      >
        <div className="app">
          <Route exact path="/" render={() => <Redirect to="/home" />}></Route>
          <Route path="/login" component={Login}></Route>
          <AuthRoute path="/home" component={Layout}></AuthRoute>
        </div>
      </Suspense>
    </Router>
  )
}

export default App
The others are the same
Project packaging and Optimization - remove the console
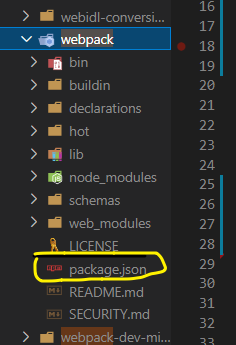
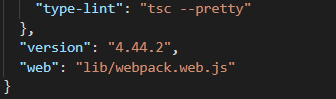
Before downloading, you'd better look at your webpack version number on node_ Find the webpack folder in modules. In package.json, the version ID is the version number. The package version you download should not exceed this version
npm i terser-webpack-plugin@4.2.3
Configure in the craco.config.js file
const TerserPlugin = require('terser-webpack-plugin')

module.exports = {
  webpack: {
    // Omit other
		plugins: [
      new TerserPlugin({
        terserOptions: {
          compress: {
            drop_console: process.env.NODE_ENV === 'production'
            // Remove all contents of the console in the production environment
          }
        }
      })
    ]
  }
}
Project packaging and Optimization - configure CDN
Objective: to be able to use CDN optimization for third-party packages
-
Don't pack in when you pack
-
Introduce external links in public/index.html
Analysis description: modify the webpack configuration through craco to realize CDN optimization
Core code:
In craco.config.js:
const path = require('path')
// HtmlWebpackPlugin
const { whenProd, getPlugin, pluginByName } = require('@craco/craco')
module.exports = {
  webpack: {
    alias: {
      '@': path.join(__dirname, 'src')
    },
    configure: (webpackConfig) => {
      let cdn = {
        js: [],
        css: []
      }
      // Configure webpack
      whenProd(() => {
        // Only in the production environment
        webpackConfig.externals = {
          react: 'React',
          'react-dom': 'ReactDOM',
          redux: 'Redux',
        }

        cdn = {
          js: [
            'https://cdn.bootcdn.net/ajax/libs/react/17.0.2/umd/react.production.min.js',
            'https://cdn.bootcdn.net/ajax/libs/react-dom/17.0.2/umd/react-dom.production.min.js',
            'https://cdn.bootcdn.net/ajax/libs/redux/4.1.0/redux.min.js'
          ],
          css: []
        }
      })

      const { isFound, match } = getPlugin(
        webpackConfig,
        pluginByName('HtmlWebpackPlugin')
      )
      if (isFound) {
        // html plugin found
        match.options.cdn = cdn
      }

      return webpackConfig
    }
  }
}
In public/index.html:
<!DOCTYPE html>
<html lang="en">
  <head>
    <meta charset="utf-8" />
    <link rel="icon" href="%PUBLIC_URL%/favicon.ico" />
    <meta name="viewport" content="width=device-width, initial-scale=1" />
    <meta name="theme-color" content="#000000" />
    <meta
      name="description"
      content="Web site created using create-react-app"
    />
    <link rel="apple-touch-icon" href="%PUBLIC_URL%/logo192.png" />
    <!--
      manifest.json provides metadata used when your web app is installed on a
      user's mobile device or desktop. See https://developers.google.com/web/fundamentals/web-app-manifest/
    -->
    <link rel="manifest" href="%PUBLIC_URL%/manifest.json" />
    <!--
      Notice the use of %PUBLIC_URL% in the tags above.
      It will be replaced with the URL of the `public` folder during the build.
      Only files inside the `public` folder can be referenced from the HTML.

      Unlike "/favicon.ico" or "favicon.ico", "%PUBLIC_URL%/favicon.ico" will
      work correctly both with client-side routing and a non-root public URL.
      Learn how to configure a non-root public URL by running `npm run build`.
    -->
    <title>React App</title>
    <% htmlWebpackPlugin.options.cdn.css.forEach(cdnURL => { %>
      <link rel="stylesheet" href="<%= cdnURL %>"></link>
    <% }) %>
  </head>
  <body>
    <noscript>You need to enable JavaScript to run this app.</noscript>
    <div id="root"></div>
    <!--
      This HTML file is a template.
      If you open it directly in the browser, you will see an empty page.

      You can add webfonts, meta tags, or analytics to this file.
      The build step will place the bundled scripts into the <body> tag.

      To begin the development, run `npm start` or `yarn start`.
      To create a production bundle, use `npm run build` or `yarn build`.
    -->
    <% htmlWebpackPlugin.options.cdn.js.forEach(cdnURL => { %>
      <script src="<%= cdnURL %>"></script>
    <% }) %>
  </body>
</html>