Open status interface
First, install the corresponding software package -- with HTTP when compiling_ gzip_ static_ Module, then add content to the configuration file, and finally access it in the browser
[root@nginx conf]# pwd
/usr/local/nginx/conf
[root@nginx conf]# vim nginx.conf
......
location / {
     root html;
     index index.html;
}
//Add three lines
        location /status {
                stub_status;
}
 ......

//Reload profile
[root@nginx conf]# nginx -s reload
Web page to view page status information
 Detailed information of status page:
| Status code | Meaning of expression |
|---|---|
| Active connections 2 | Current number of all open connections |
| accepts | How many connections were processed in total |
| handled | How many handshakes were successfully created |
| requests | How many requests were processed in total |
| Reading | The number of Header information read by nginx from the client, indicating the number of connections in the receiving request state; read |
| Writing | The number of Header information returned by nginx to the client, indicating the number of connections that have received the request and are in the process of processing the request or sending the response; write in |
| Waiting | When keep alive is enabled, this value is equal to active - (reading + writing), which means that Nginx has processed the resident connection waiting for the next request instruction; wait for |
zabbix monitors Nginx page status information
Installing ZABBIX on the Nginx server_ Agent client
1. Download the required dependent package, unzip the zabbix package into / usr/src, create the user, and unzip it.
[root@localhost ]# yum -y install gcc gcc-c++ make pcre-devel openssl openssl-devel

[root@localhost src]# useradd -r -M -s /sbin/nologin zabbix
[root@localhost src]# id zabbix
uid=989(zabbix) gid=985(zabbix) group=985(zabbix)
[root@localhost src]# tar xf zabbix-5.4.4.tar.gz
[root@localhost src]# cd zabbix-5.4.4/
2. Compile and install agent
[root@localhost zabbix-5.4.4]# ./configure --enable-agent
[root@localhost zabbix-5.4.4]# make install
#After installation, there will be an agent configuration file in / usr/local/etc /
[root@localhost zabbix-5.4.4]# ls /usr/local/etc/
zabbix_agentd.conf  zabbix_agentd.conf.d
3. Change profile and start
Change the IP addresses of the server side passive mode and active mode in the configuration file, and change the Hostname to a globally unique name. This name should also be entered later in the web interface
[root@localhost etc]# pwd
/usr/local/etc
[root@localhost etc]# vim zabbix_agentd.conf
......
Server=192.168.164.128   //Passive mode
ServerActive=192.168.164.128  //Active mode
Hostname=Nginx
......
#Turn off firewall and selinux
[root@localhost etc]# systemctl stop firewalld.service
[root@localhost etc]# setenforce 0
[root@localhost etc]# vim /etc/selinux/config
...
SELINUX=disabled
...
[root@localhost etc]# zabbix_agentd
[root@nginx etc]# ss -antl
State      Recv-Q Send-Q                          Local Address:Port                                         Peer Address:Port
LISTEN     0      128                                         *:10050                                                   *:*
LISTEN     0      128                                         *:80                                                      *:*
LISTEN     0      128                                         *:22                                                      *:*
LISTEN     0      100                                 127.0.0.1:25                                                      *:*
LISTEN     0      128                                        :::22                                                     :::*
LISTEN     0      100                                       ::1:25                                                     :::*
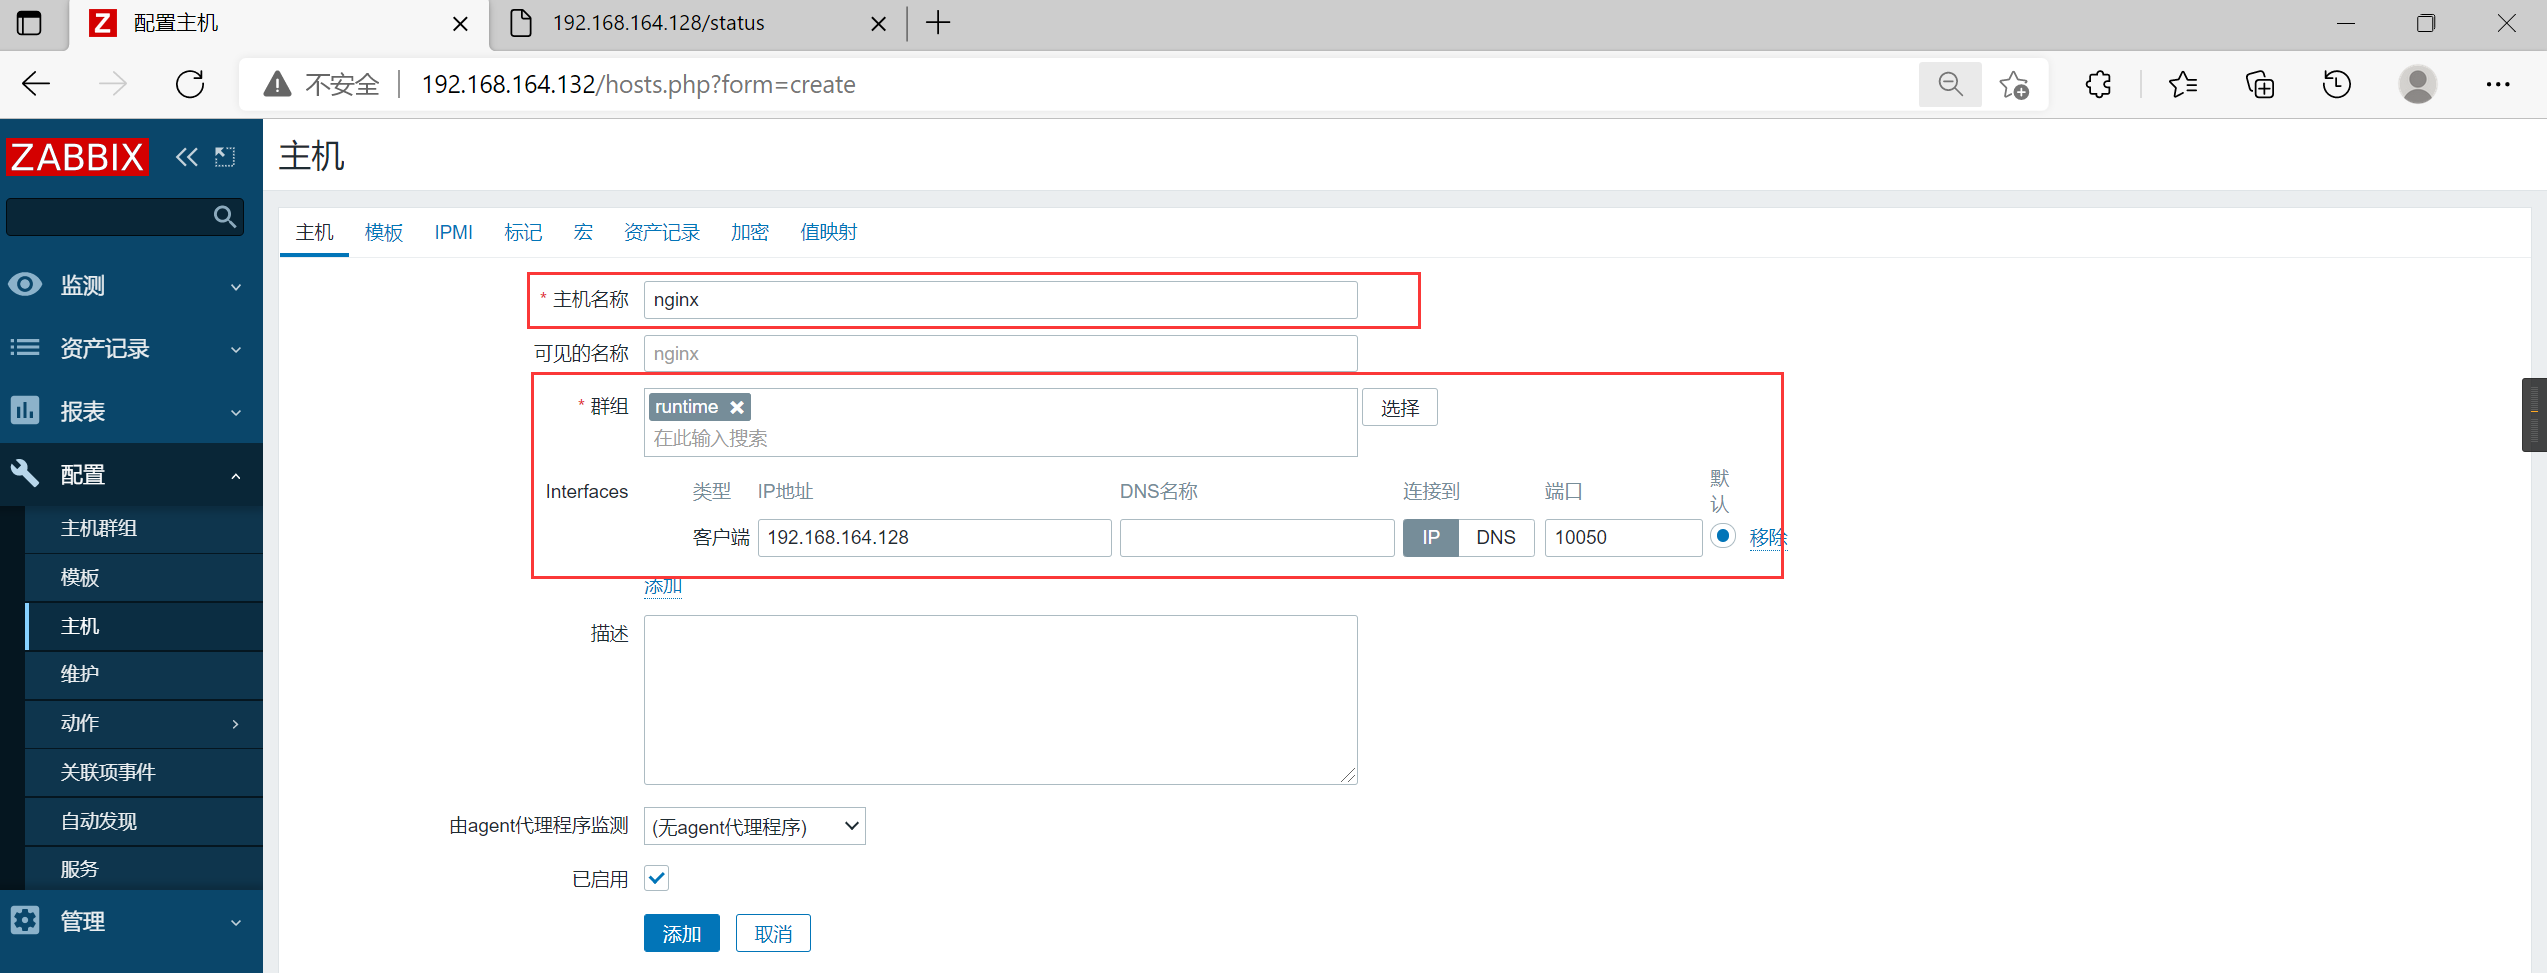
4. Add host to web interface
Configuration - Host - add a host in the upper right corner. The host name here must be the same as the hostname in the configuration file
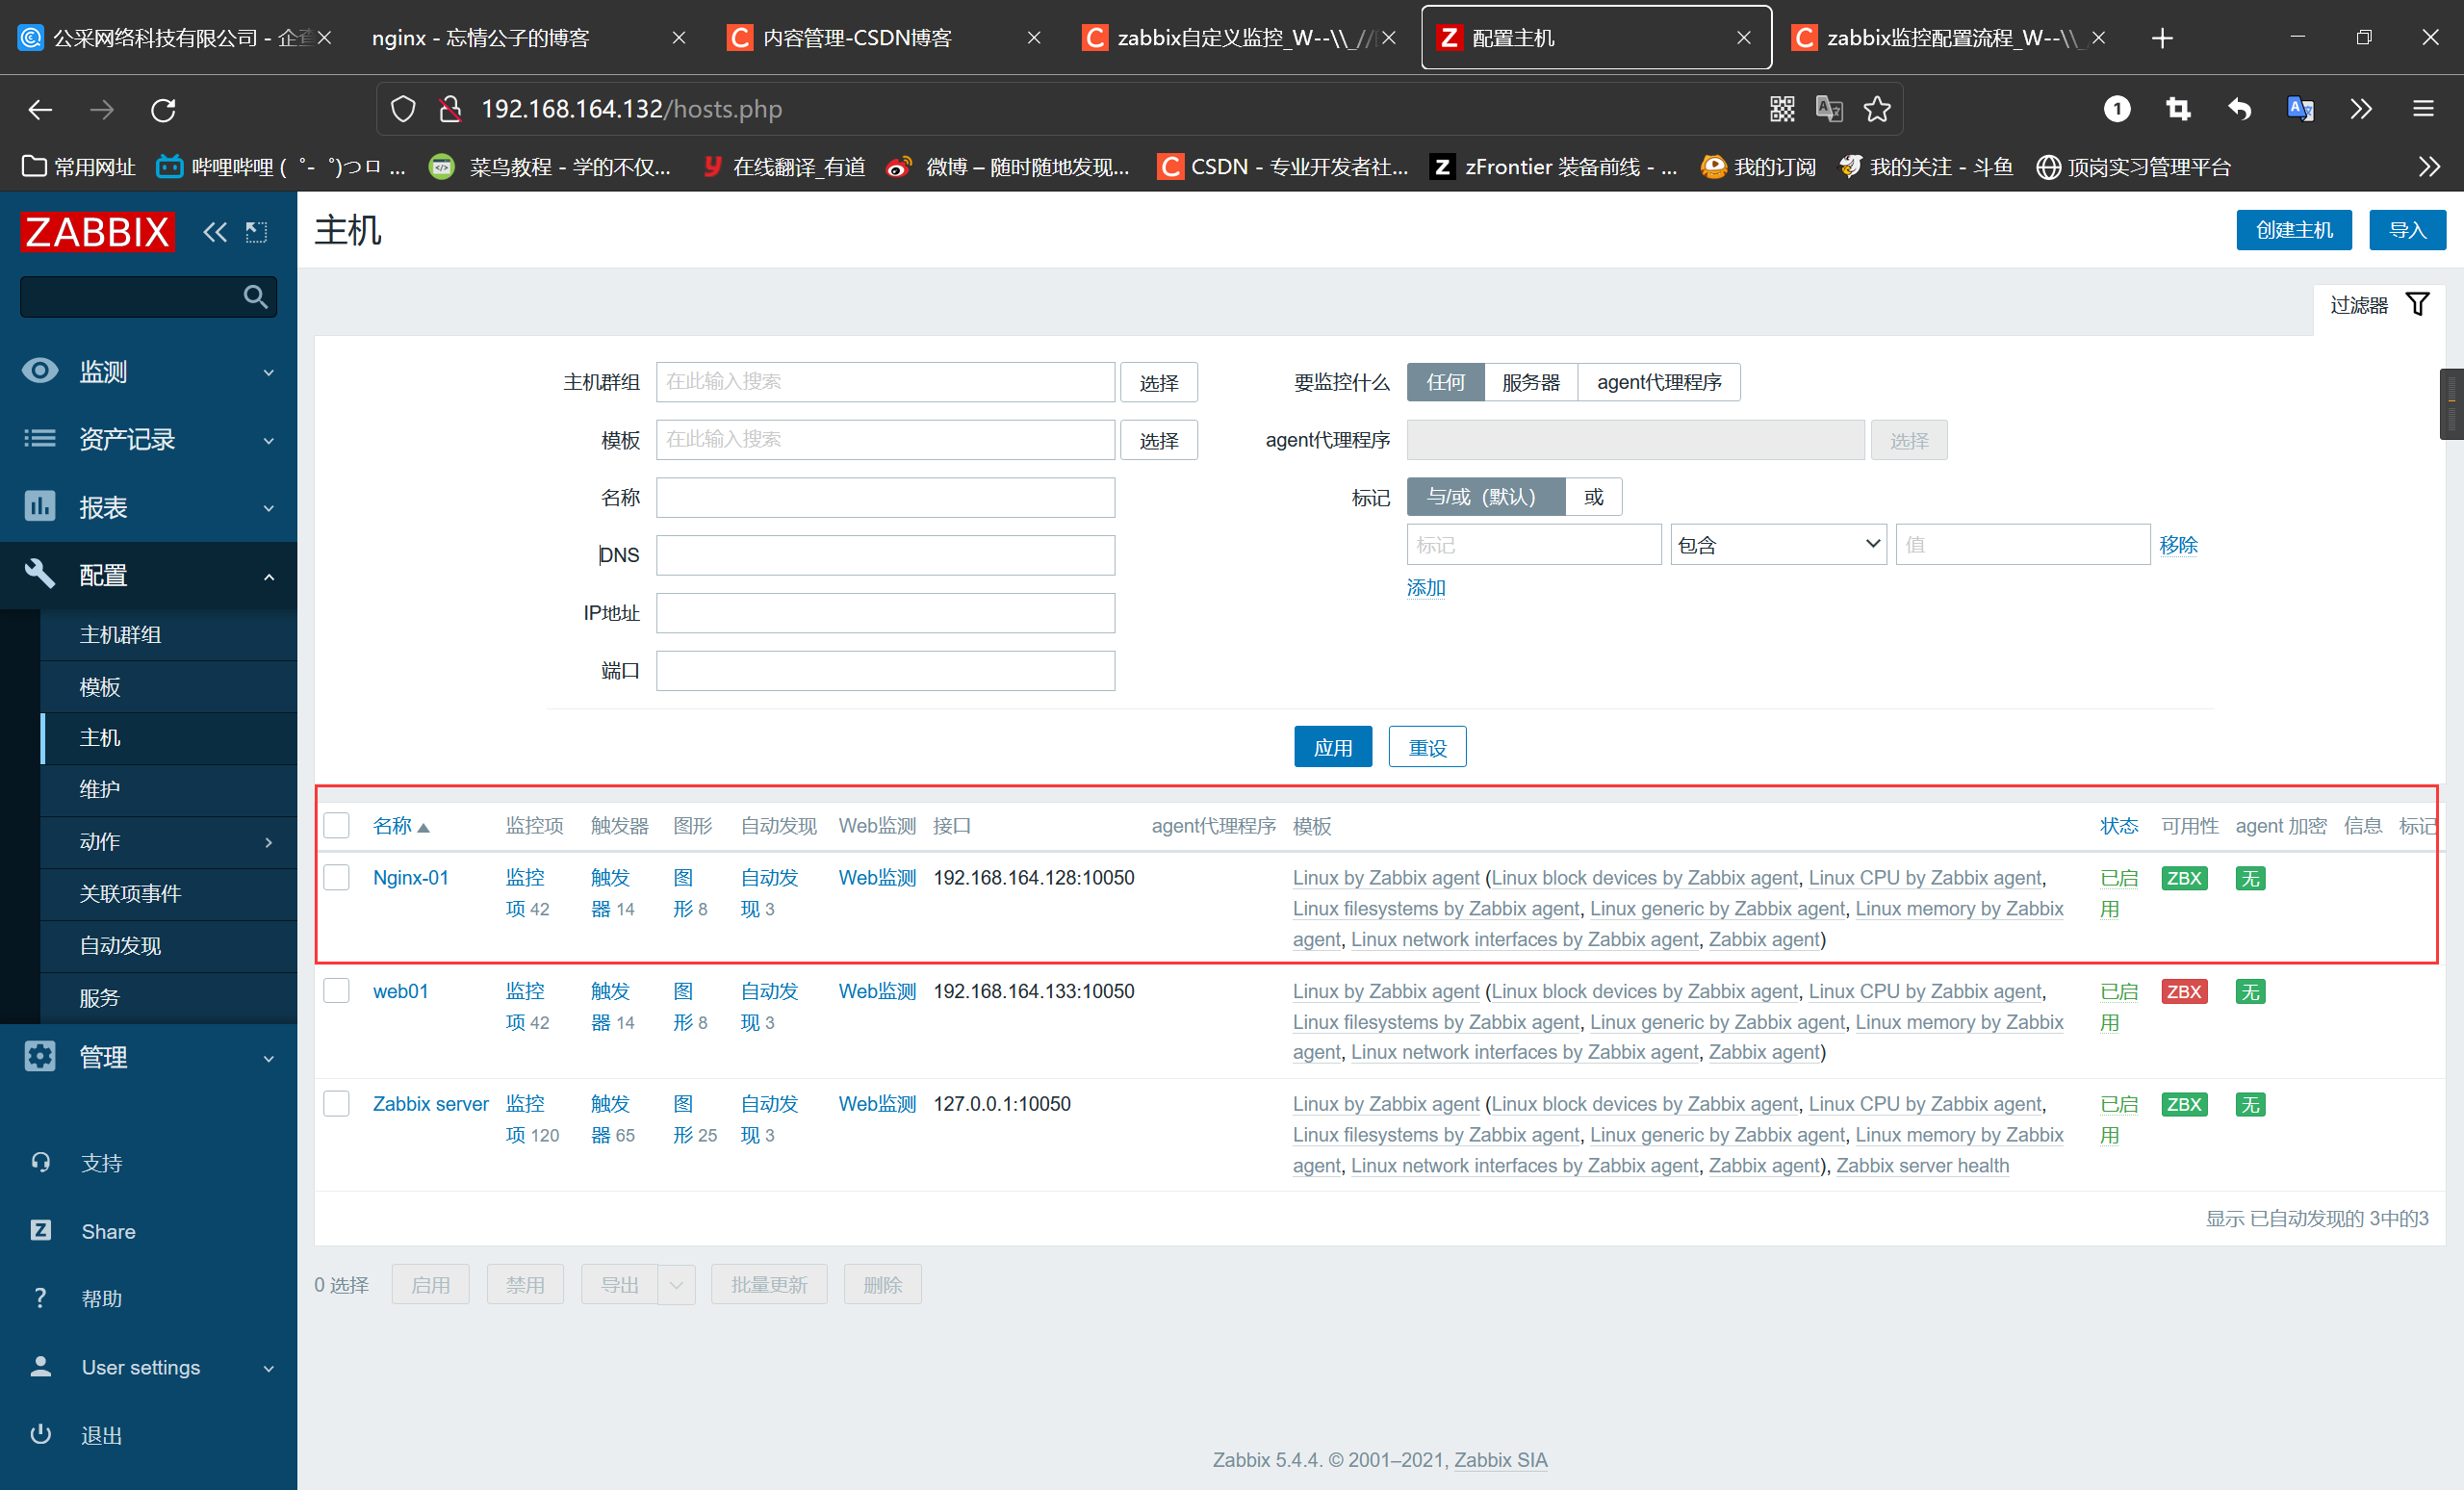
 Add a template, click the host name - select a template - select the shorter zabbix agent. Then refresh the page and the host starts
Script zabbix to monitor Nginx status
reading a lot of requests are waiting to be accepted, and the processing capacity is not enough
The smaller the waiting, the better the work saturation. Only a few people are waiting. If no one waits to say that the work is not saturated, it will not be so wasteful.
Monitoring Nginx page status information Reading, Writing and Waiting
[root@nginx scripts]# curl http://192.168.164.128/status
Active connections: 1
server accepts handled requests
 9 9 9
Reading: 0 Writing: 1 Waiting: 0
1. Script
[root@nginx scripts]# ls
reading.sh  waiting.sh  writing.sh

//Monitor Reading values
[root@nginx scripts]# cat reading.sh
#/bin/bash
Reading=$(curl  -s http://192.168.164.128/status | awk 'NR==4{print $2}')
if [ $Reading -gt 80 ];then
        echo "1"
else
        echo "0"
fi

//Monitor the value of Writing
[root@nginx scripts]# cat writing.sh
#/bin/bash
writing=$(curl  -s http://192.168.164.128/status | awk 'NR==4{print $4}')
if [ $writing -gt 50 ];then
        echo "1"
else
        echo "0"
fi


//Monitor the value of waiting
[root@nginx scripts]# cat waiting.sh
#/bin/bash
waiting=$(curl  -s http://192.168.164.128/status | awk 'NR==4{print $6}')
if [ $waiting -gt 30 ];then
        echo "1"
else
        echo "0"
fi
2. Modify profile
[root@nginx etc]# pwd
/usr/local/etc
[root@nginx etc]# vim zabbix_agentd.conf
......
UnsafeUserParameters=1
......
# Add something at the end of the configuration file
UserParameter=check_reading,/scripts/reading.sh   //Check reading and execute the script to check the readig value
UserParameter=check_waiting,/scripts/waiting.sh
UserParameter=check_writing,/scripts/writing.sh
3. Restart service
[root@nginx etc]# pkill zabbix
[root@nginx etc]# zabbix_agentd
[root@nginx etc]# ss -antl
State       Recv-Q Send-Q Local Address:Port               Peer Address:Port
LISTEN      0      128     *:10050               *:*
LISTEN      0      128     *:80                  *:*
LISTEN      0      128     *:22                  *:*
LISTEN      0      100    127.0.0.1:25                  *:*
LISTEN      0      128    :::22                 :::*
LISTEN      0      100       ::1:25                 :::*
4. Configuring triggers and alarms through the web interface
In this demonstration, only one monitoring item is added, and the other two monitoring items are consistent with this deployment.
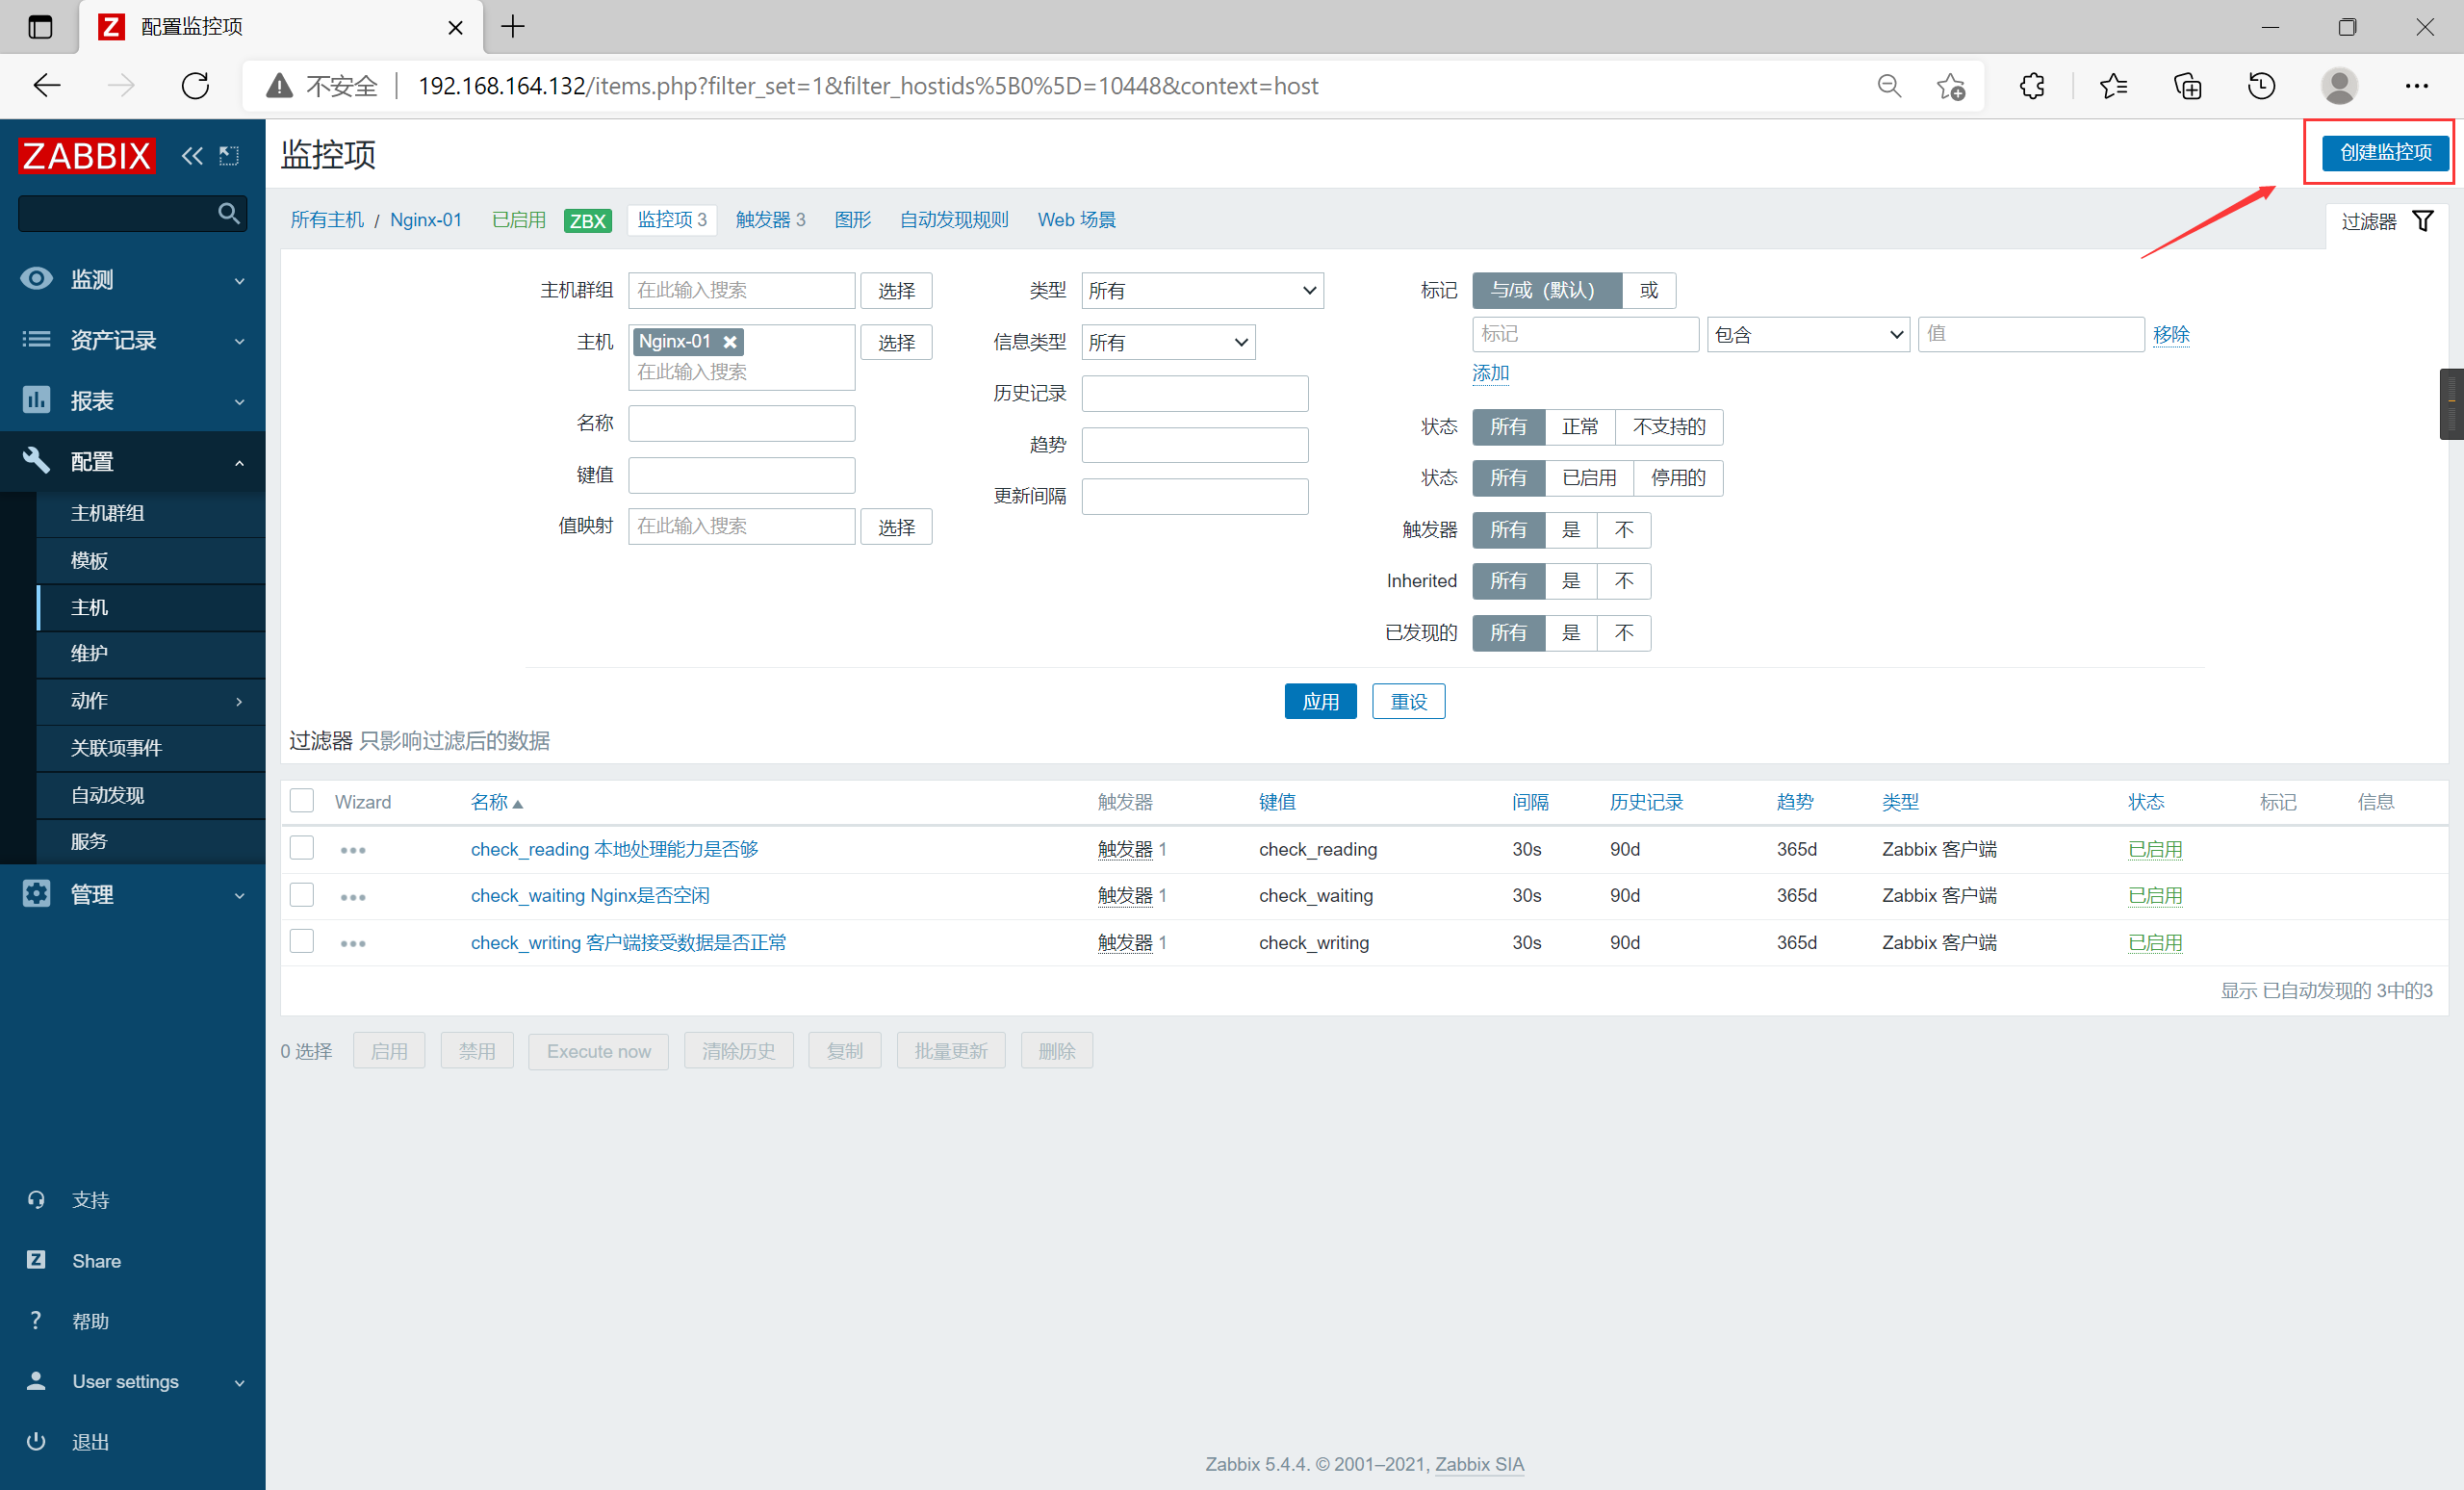
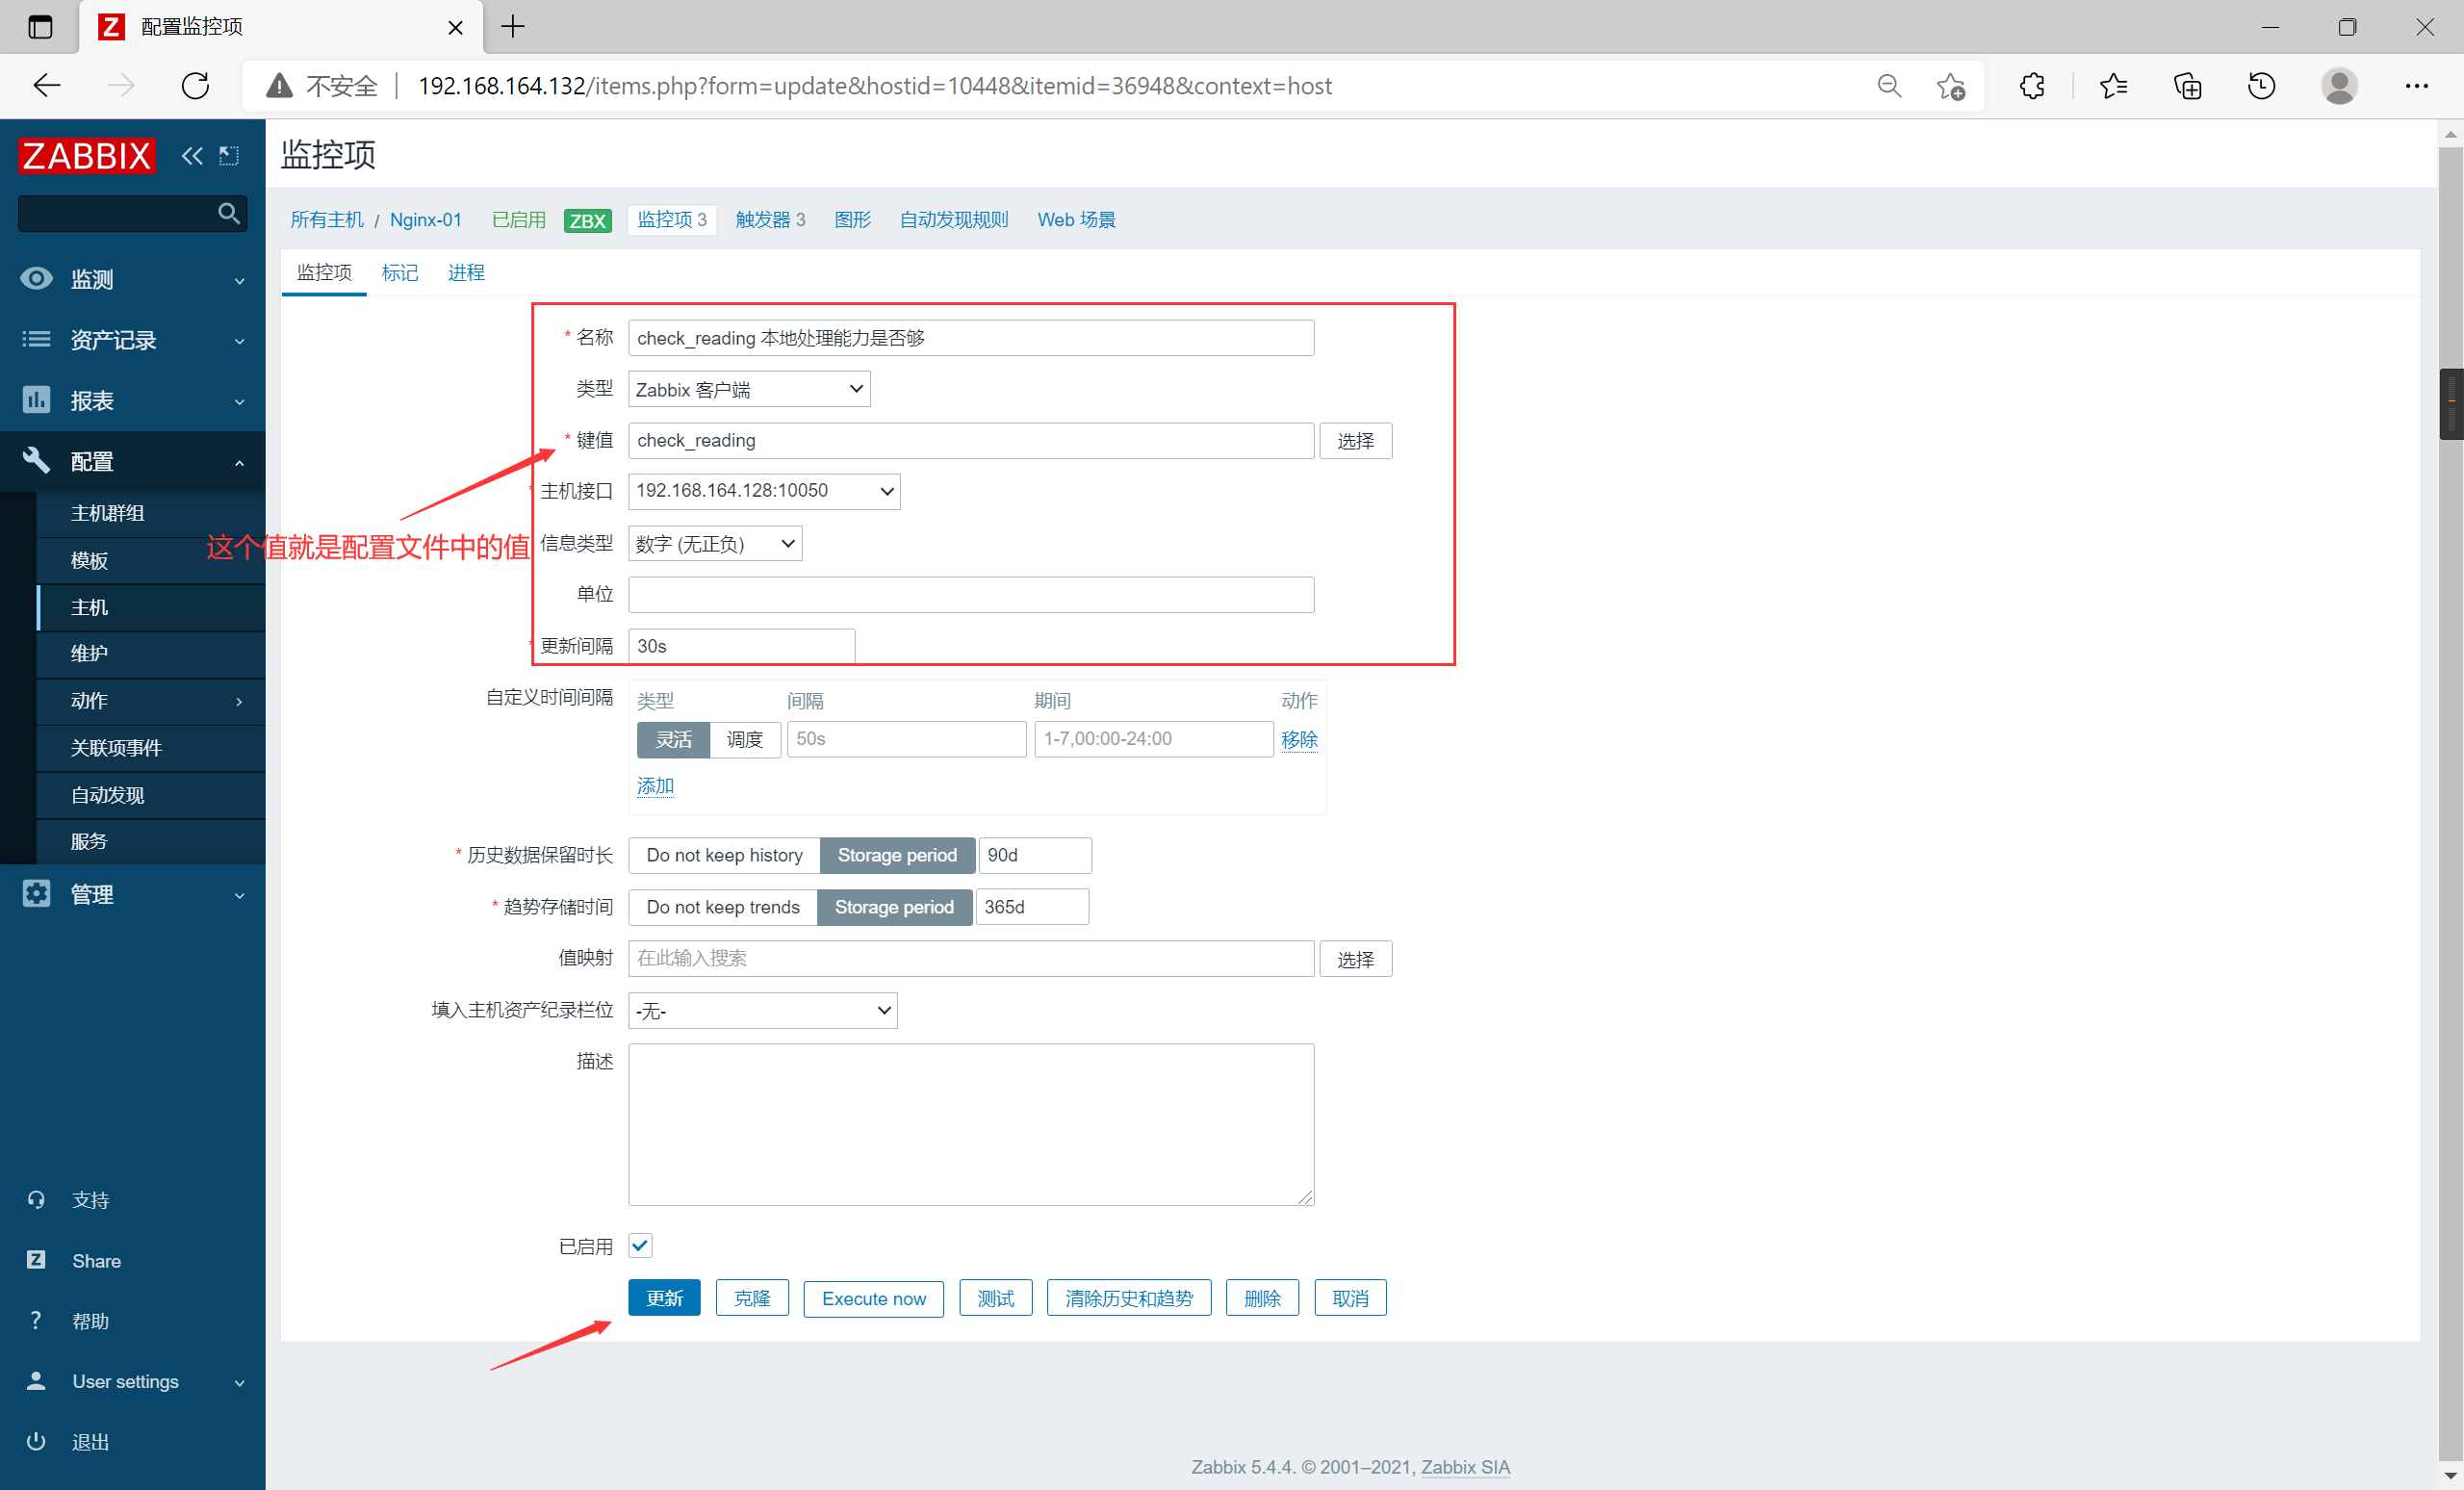
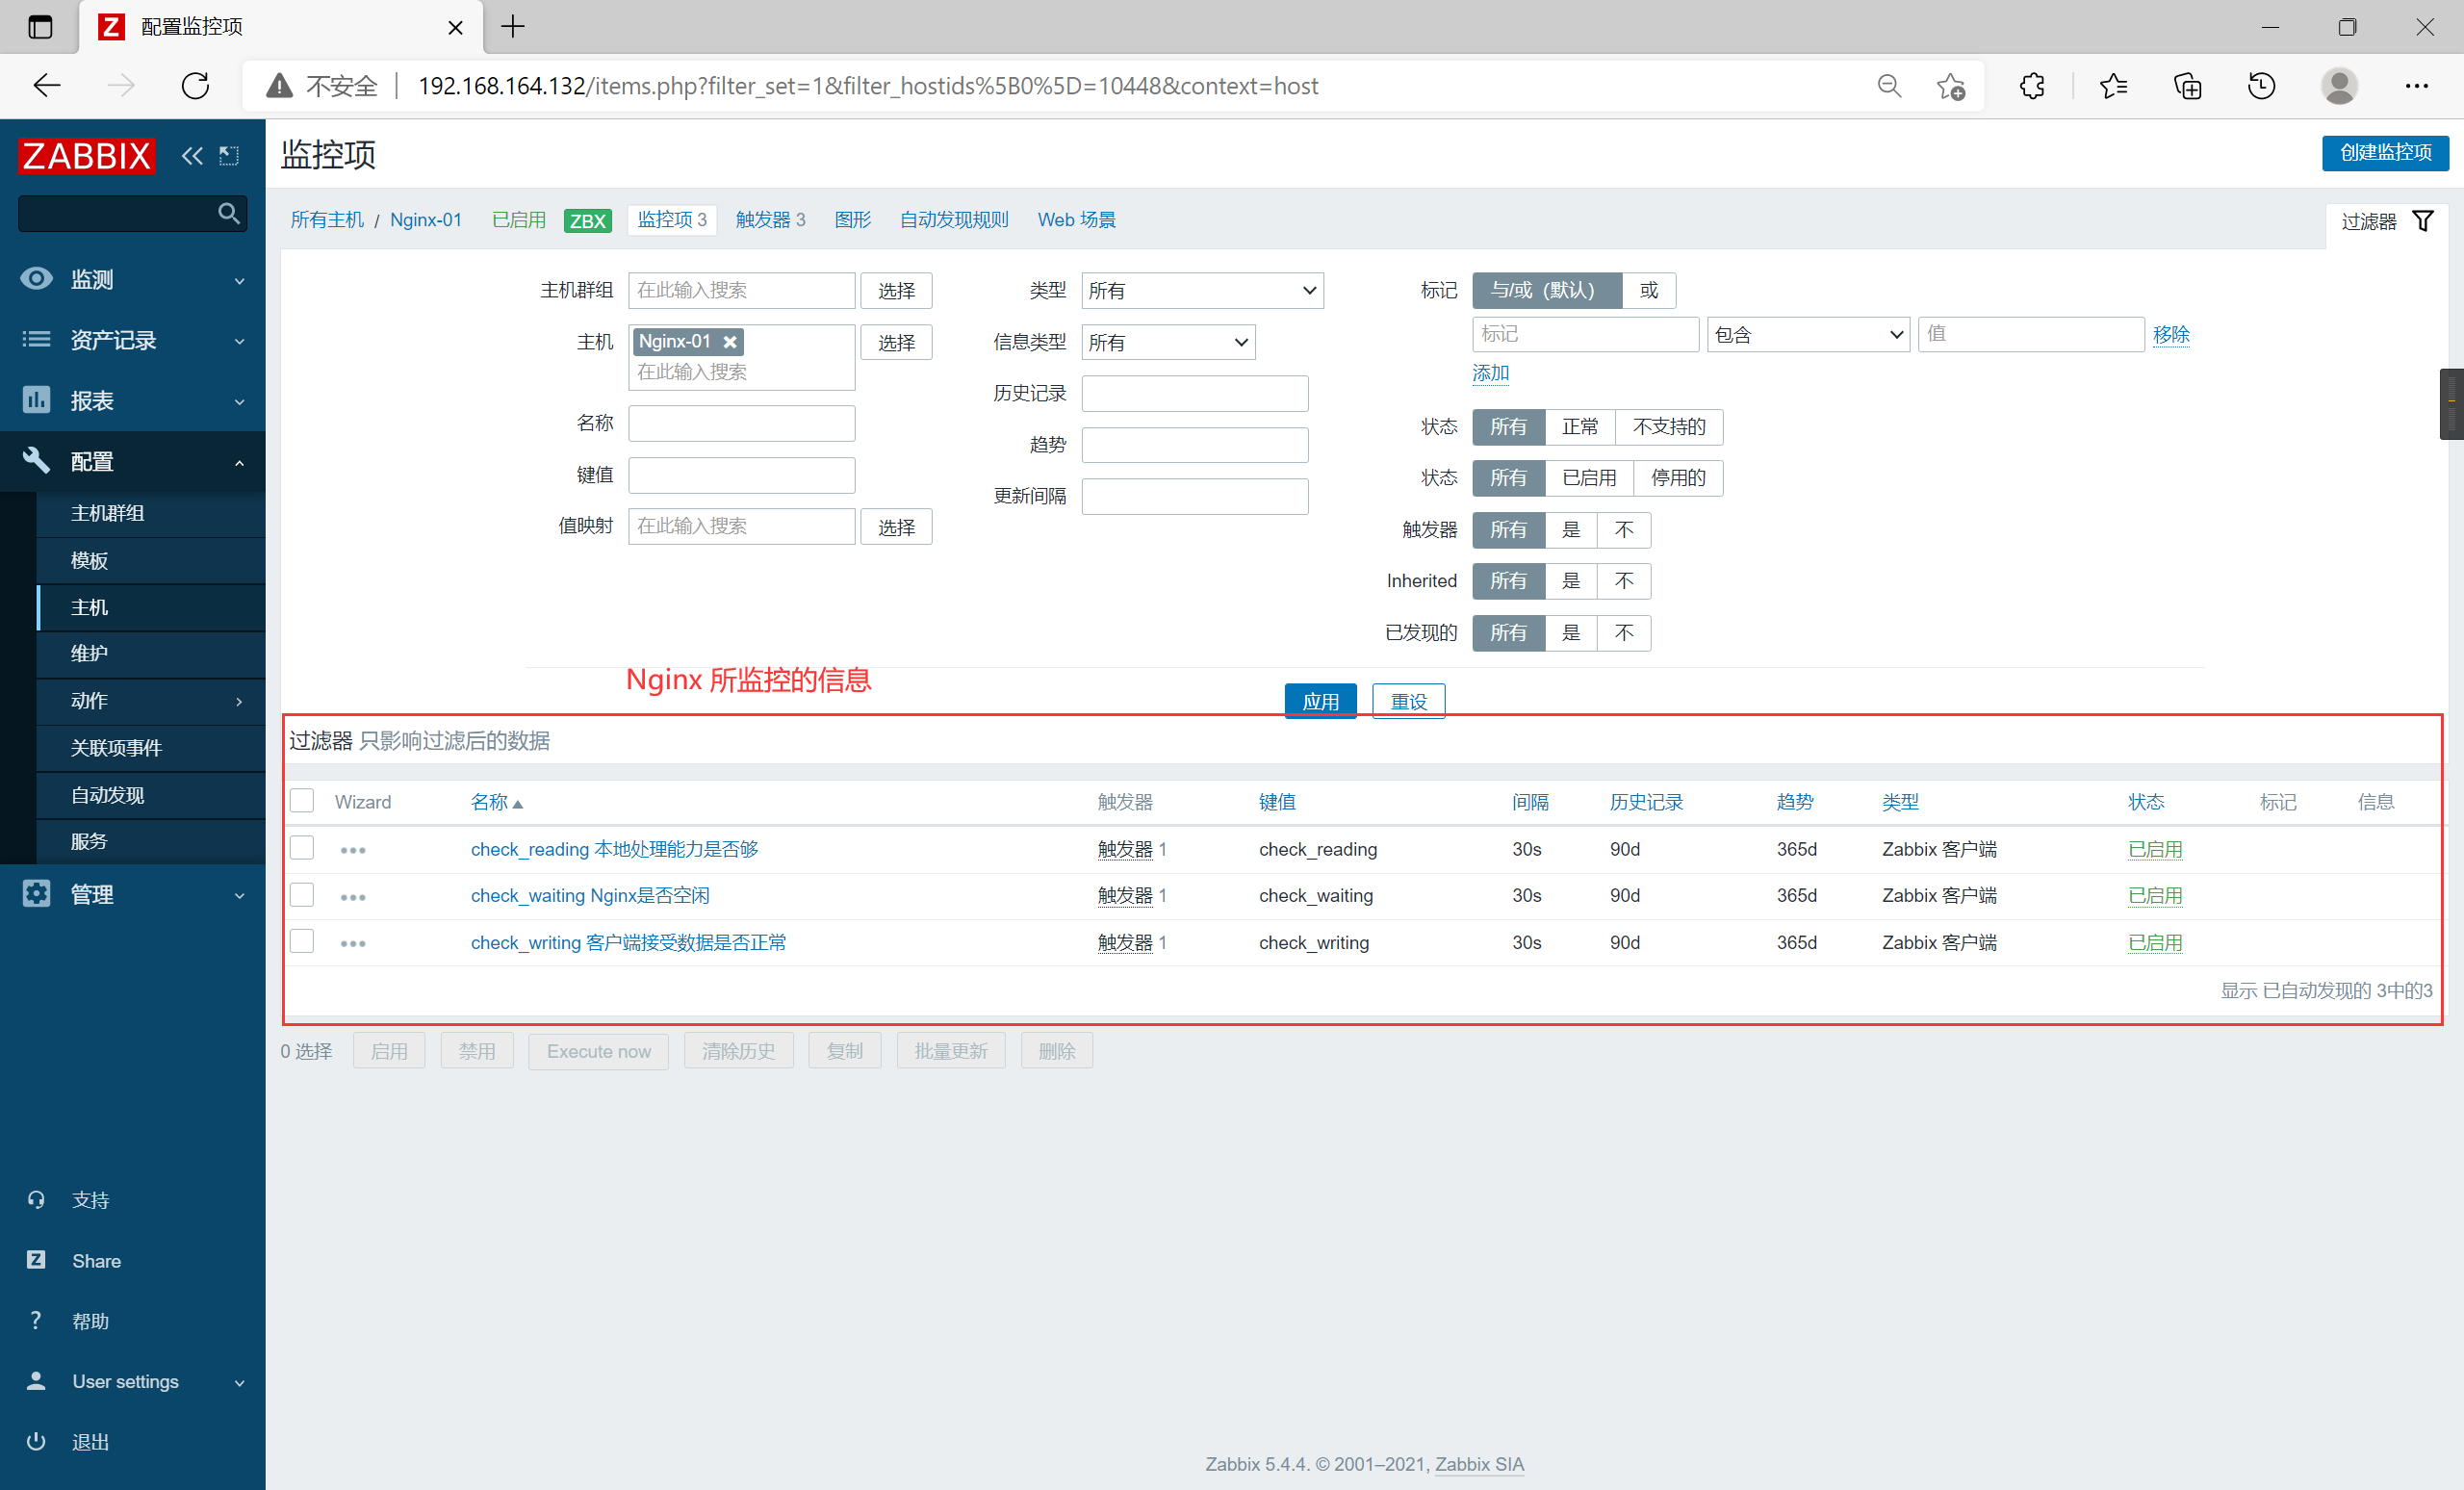
Add monitor item
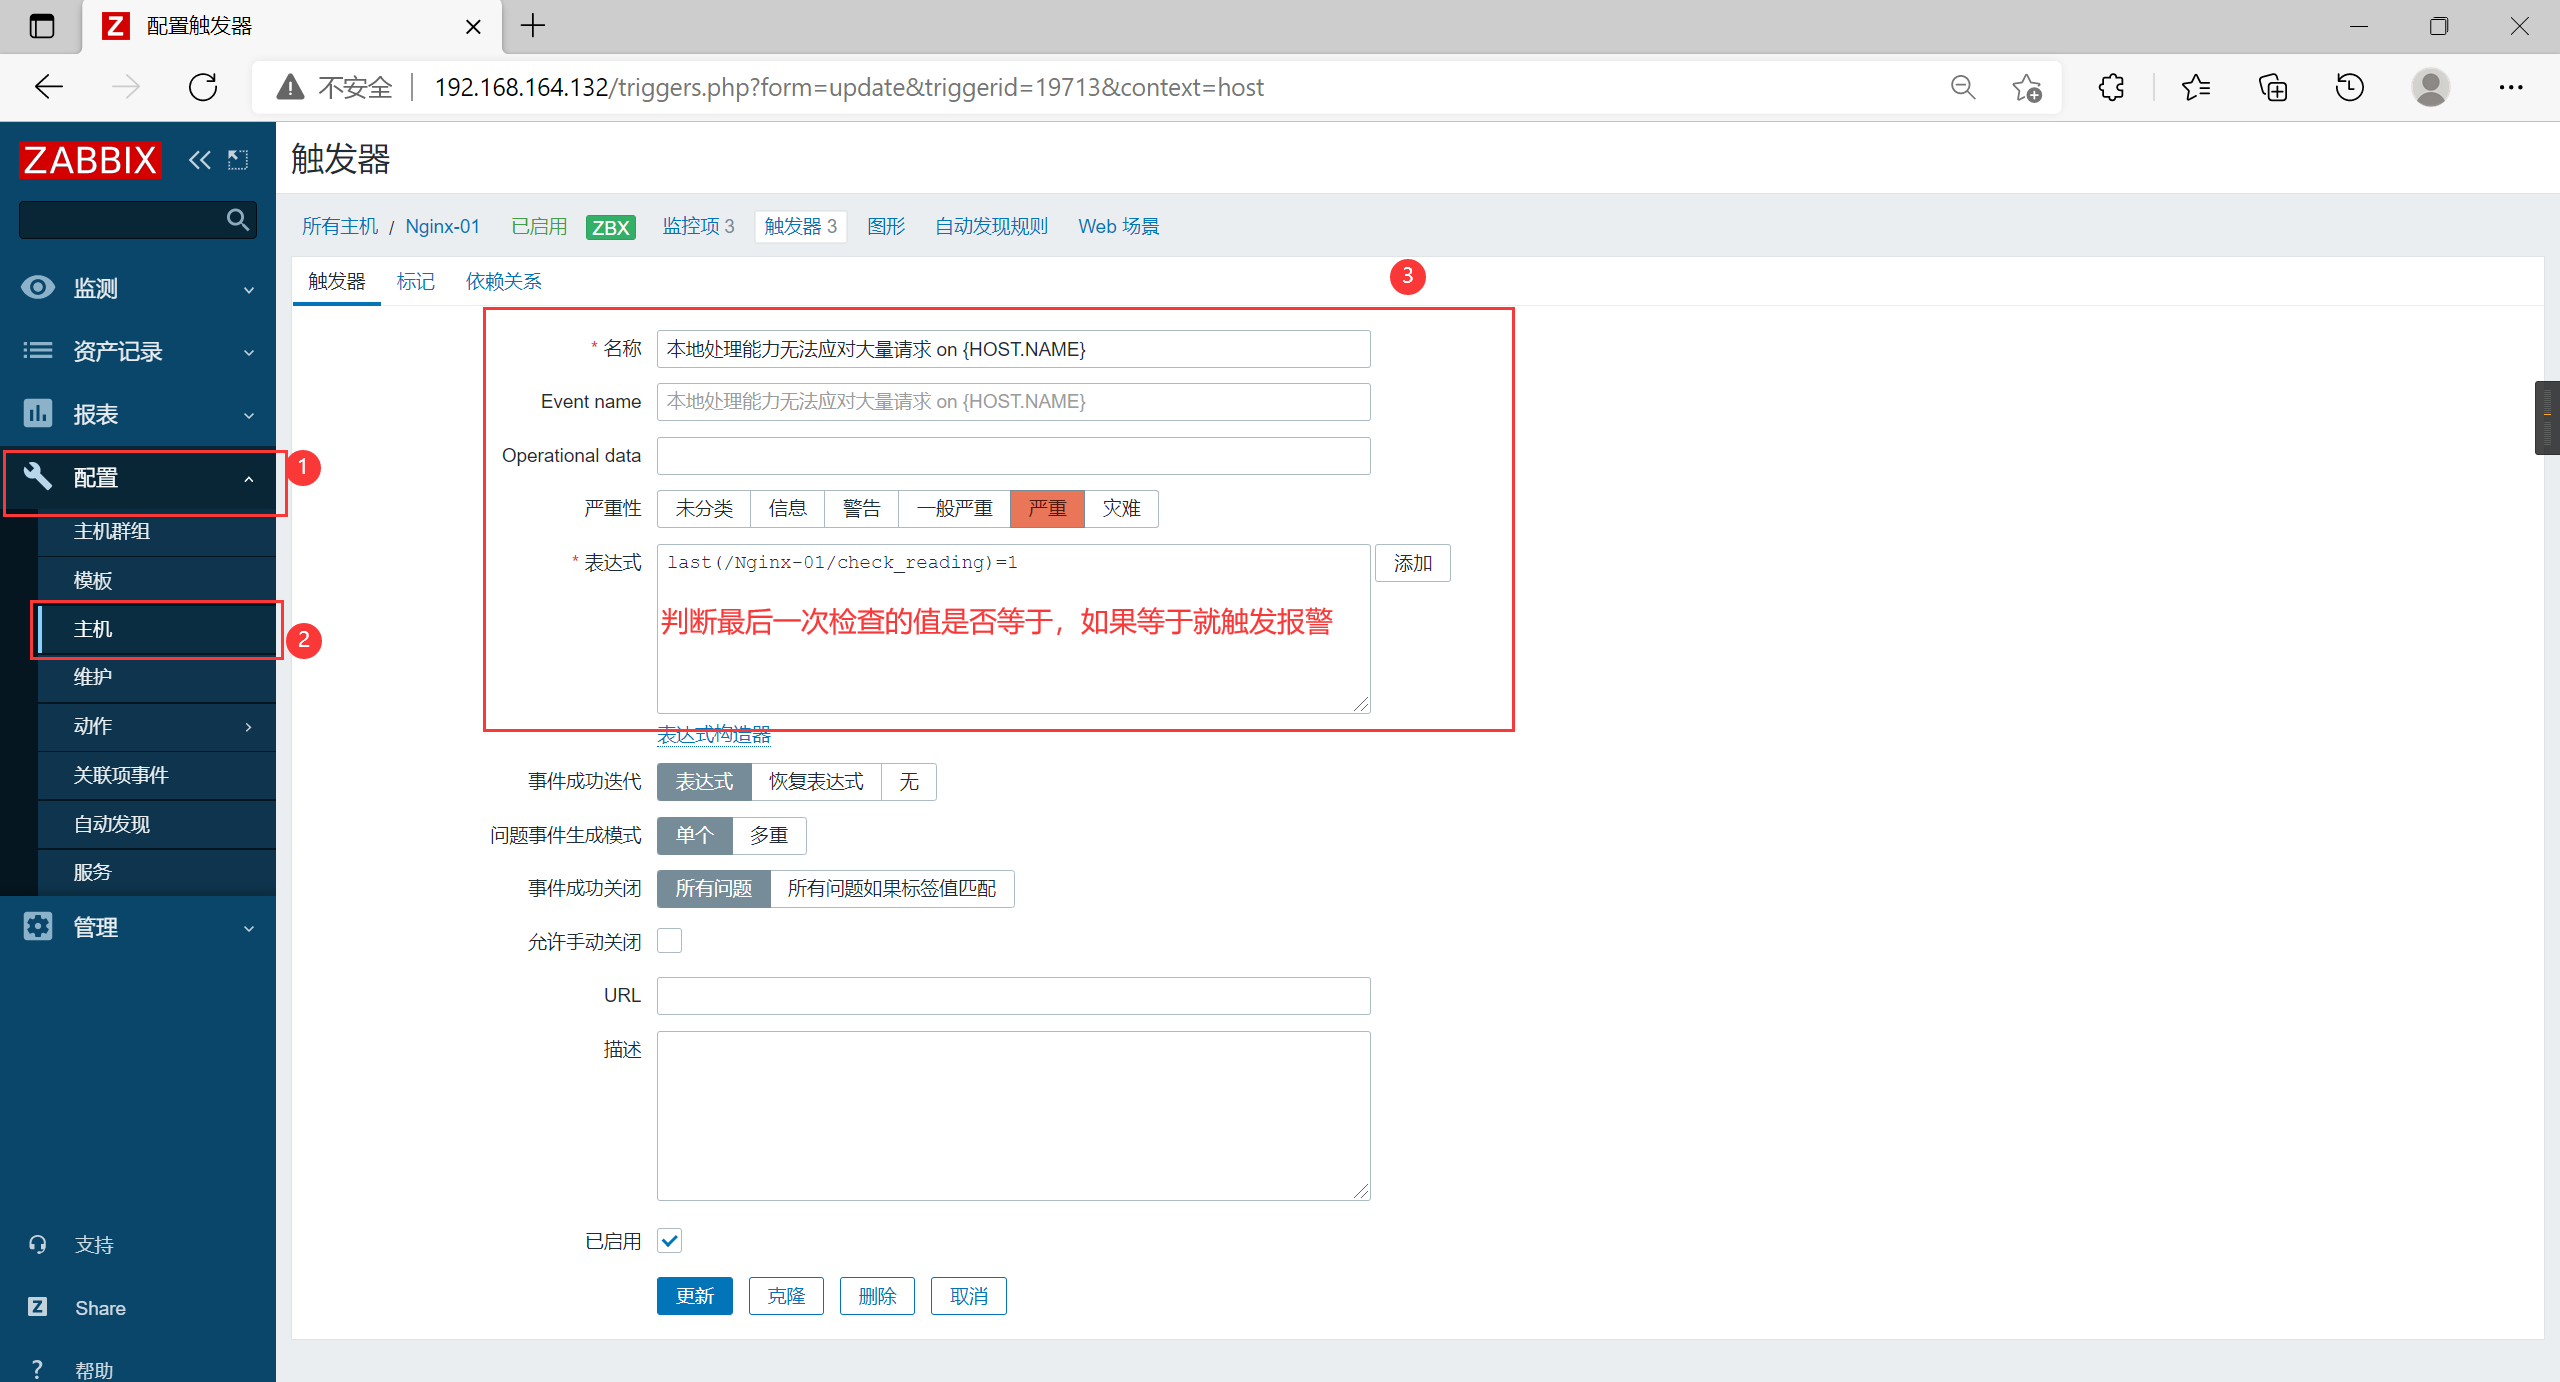
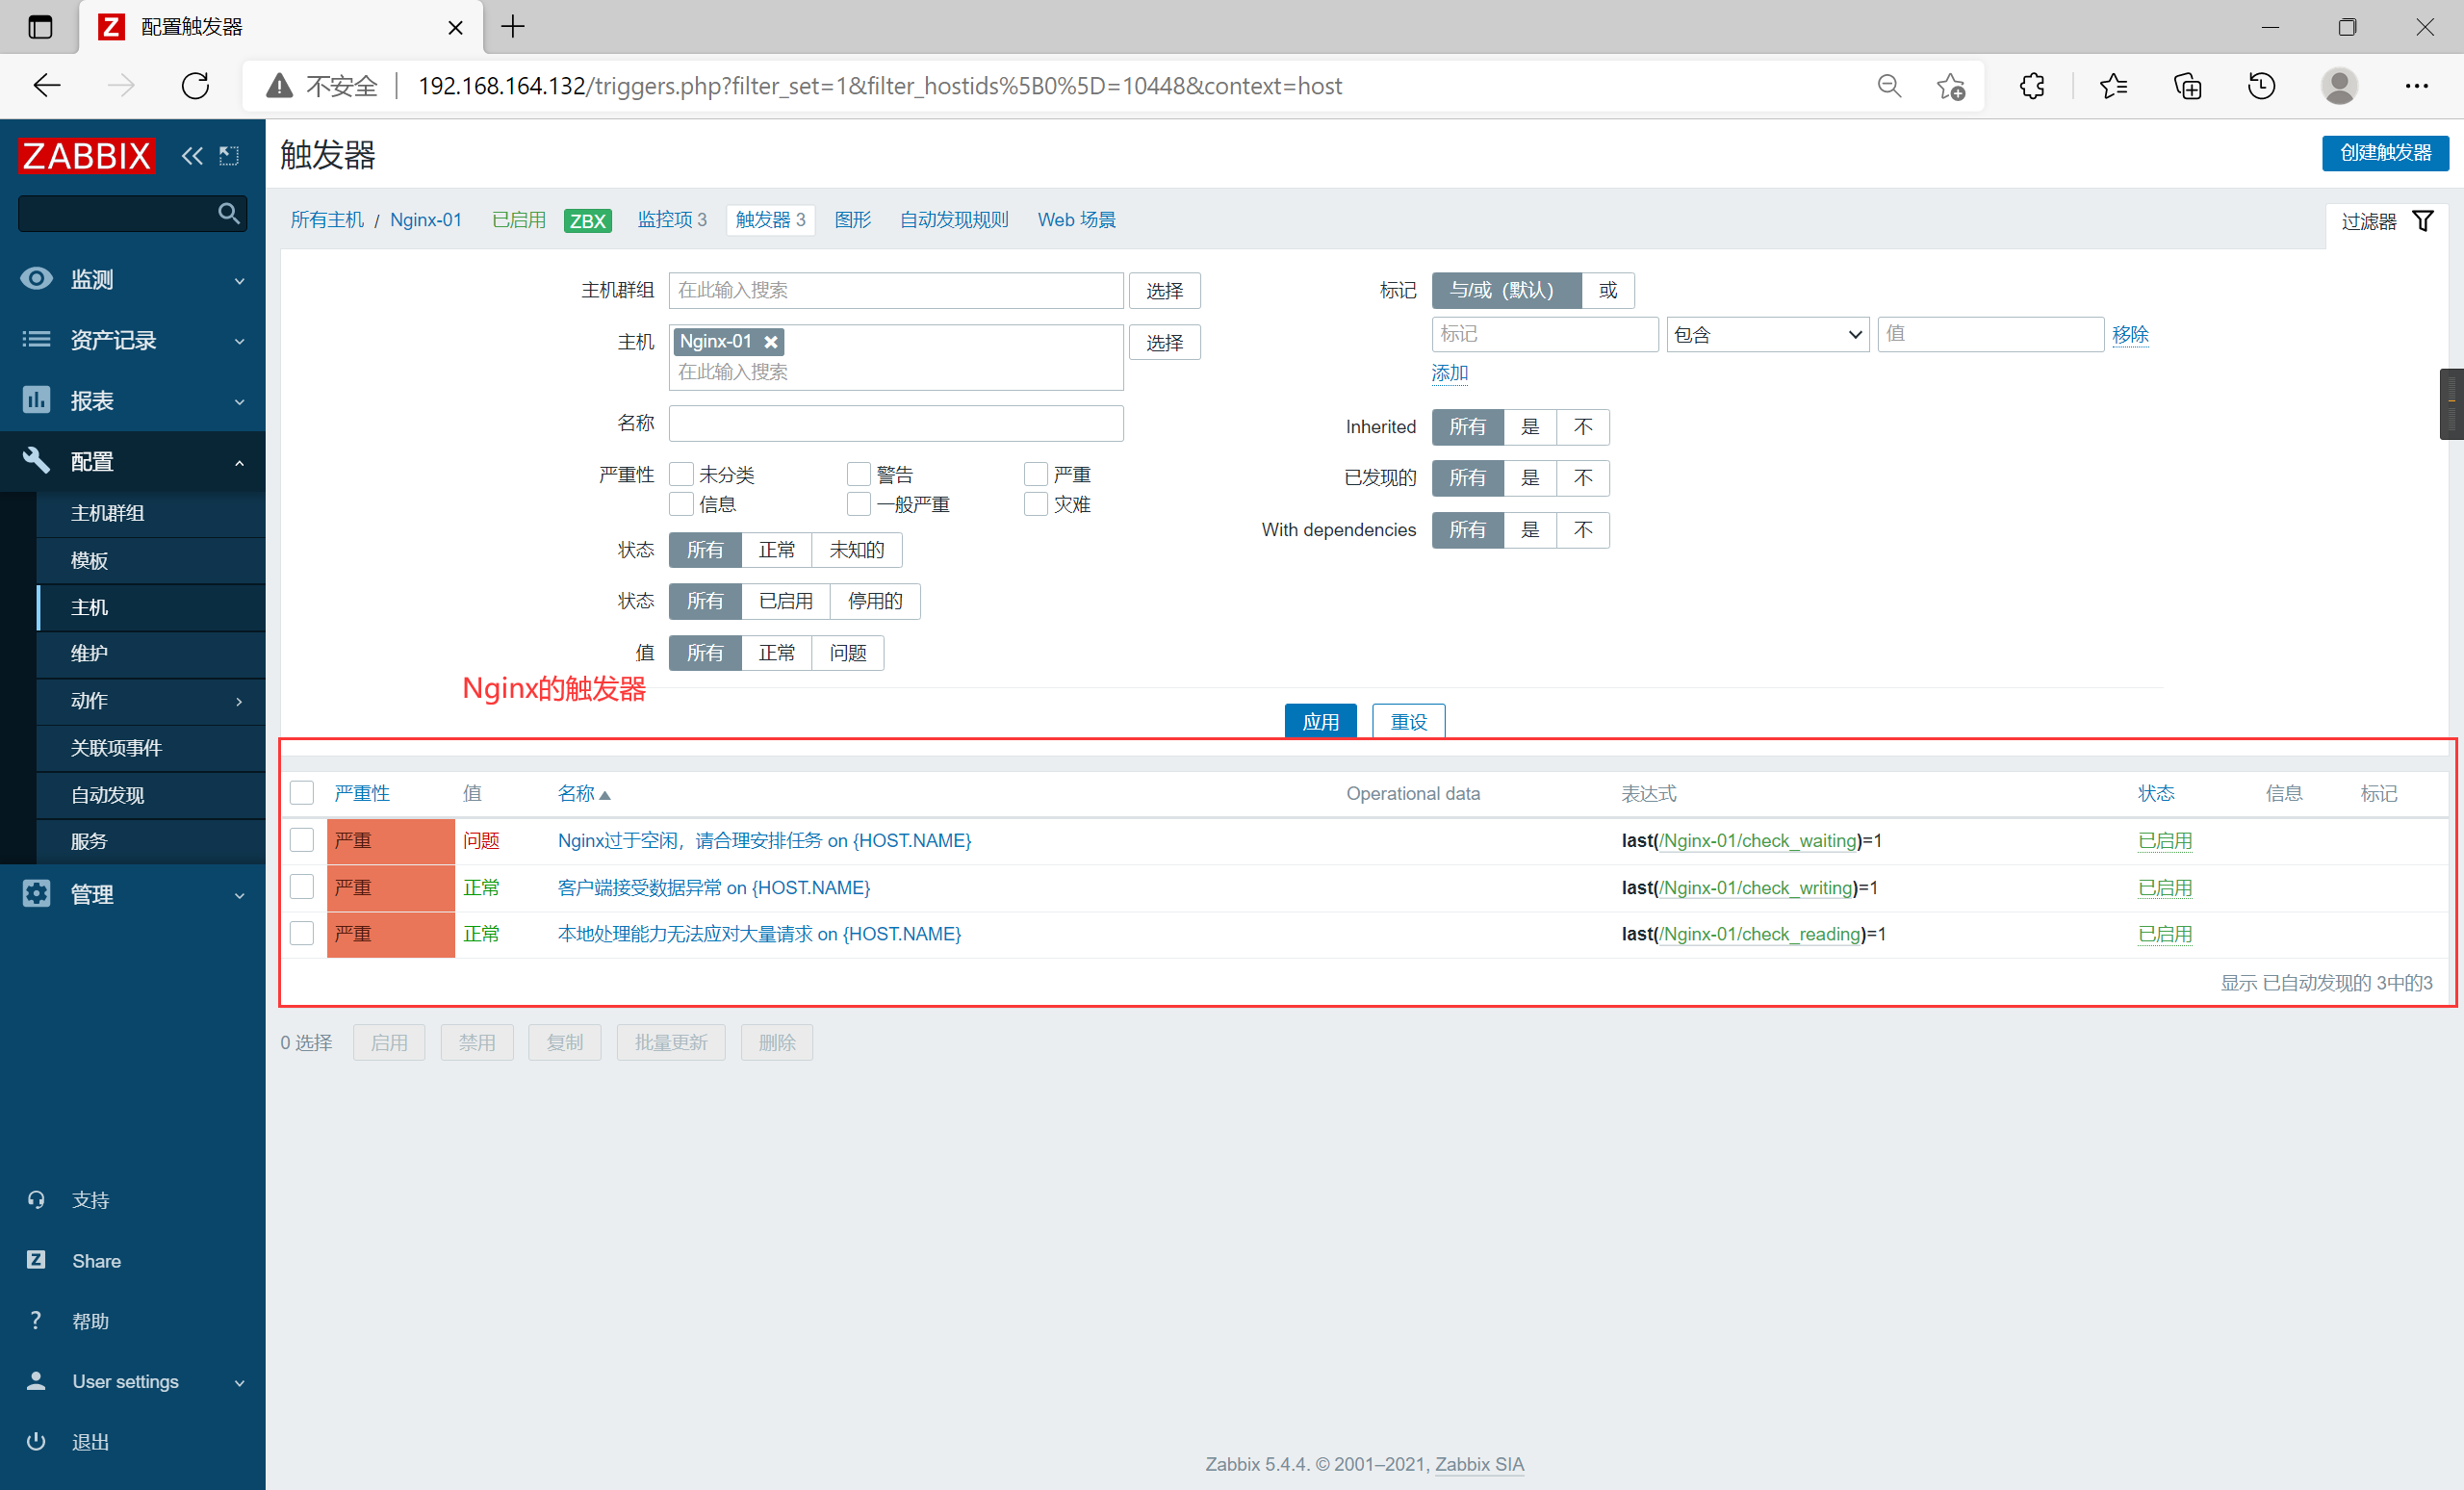
Add trigger
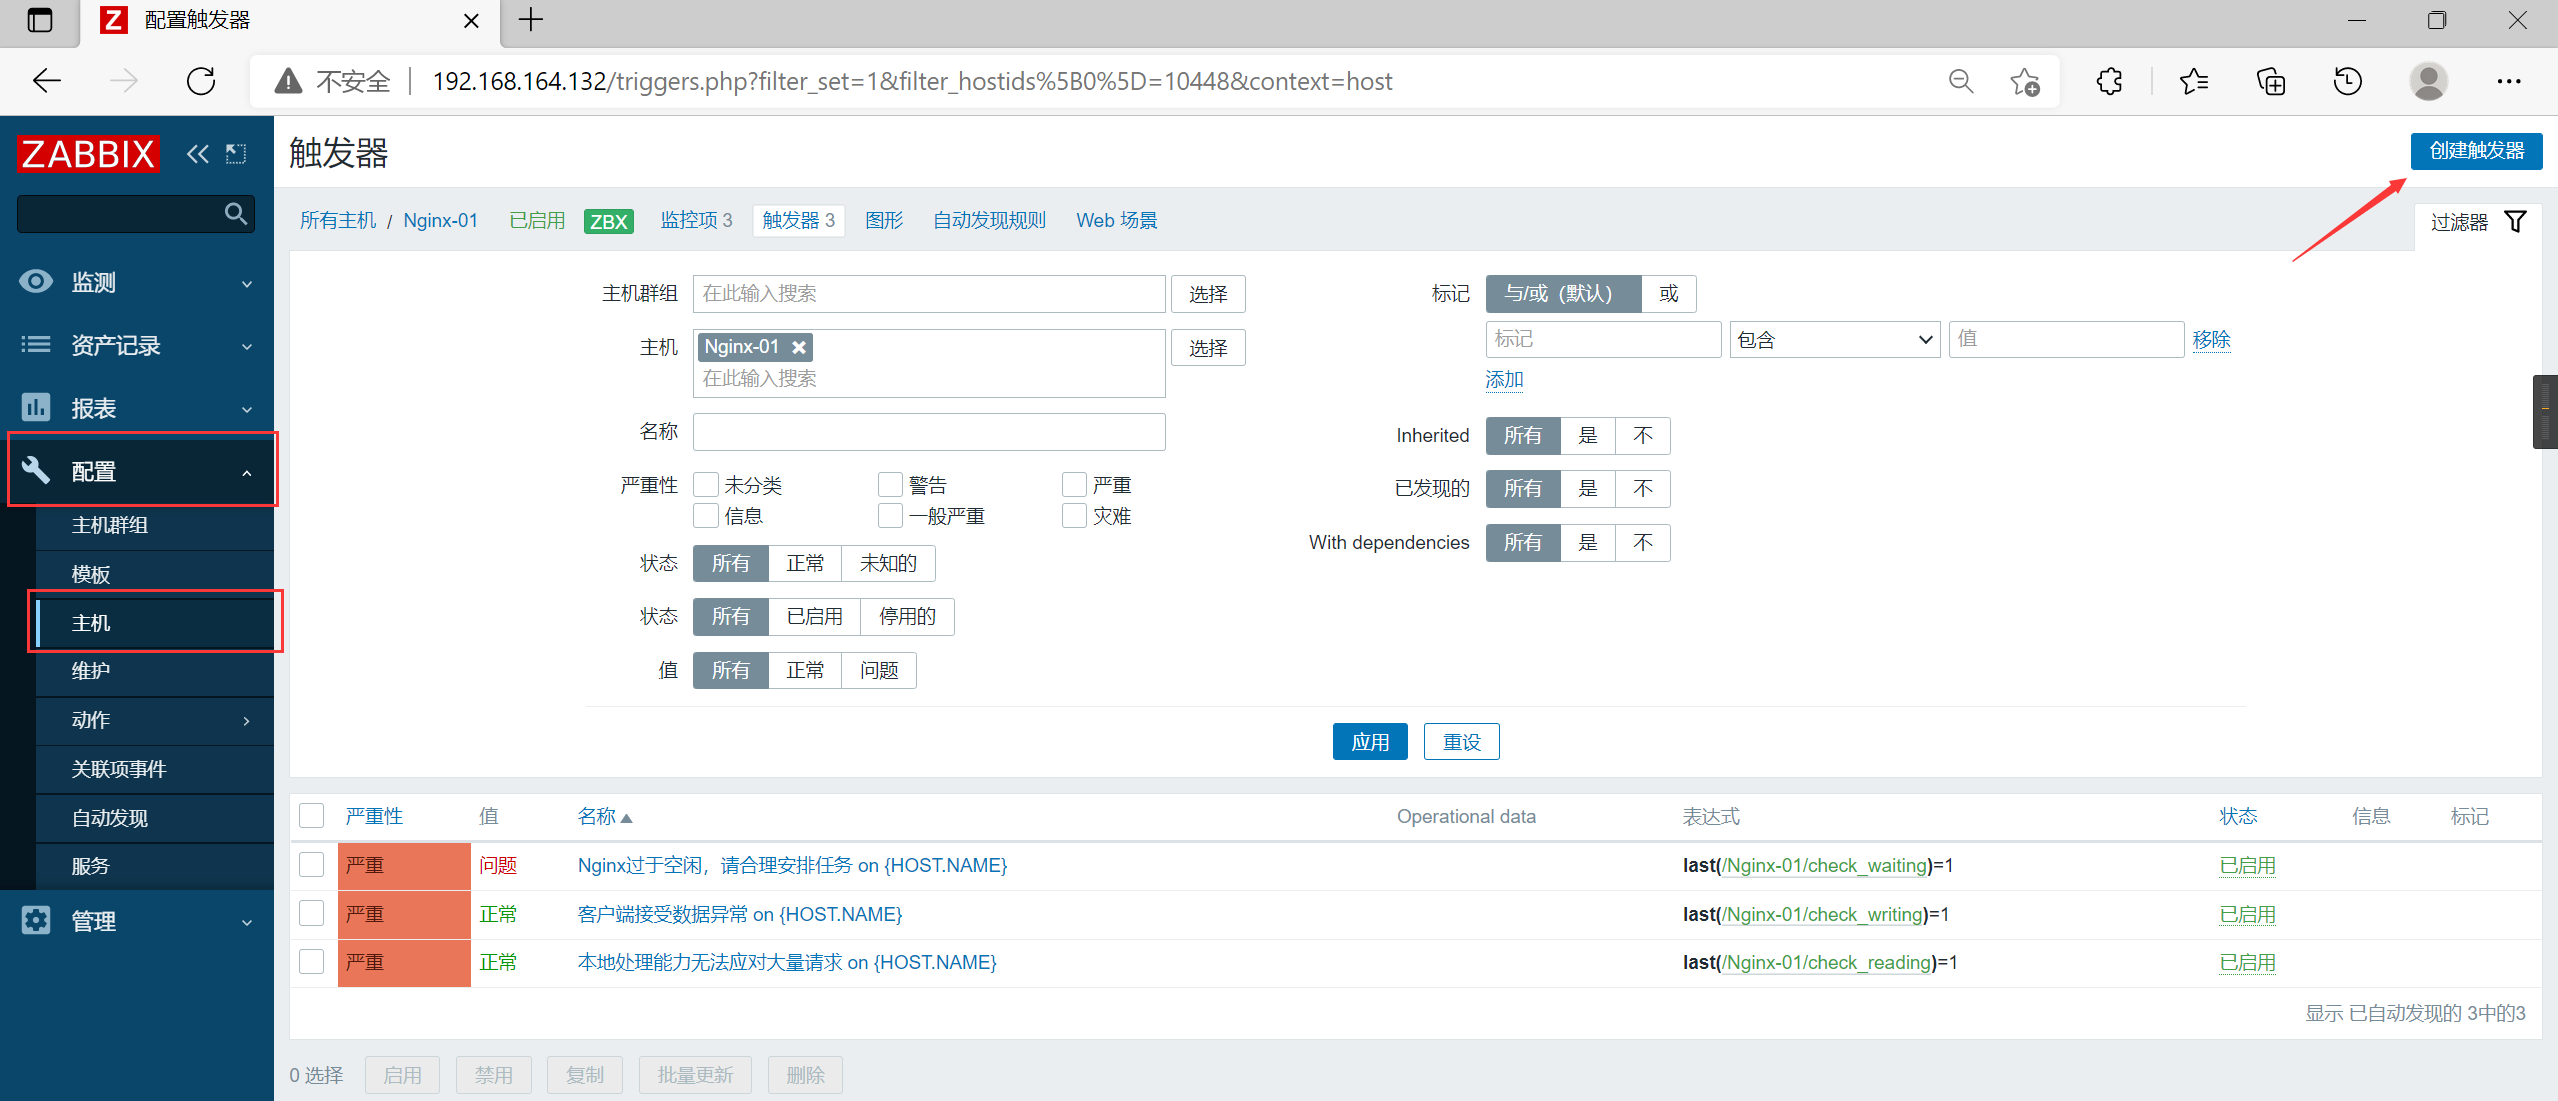
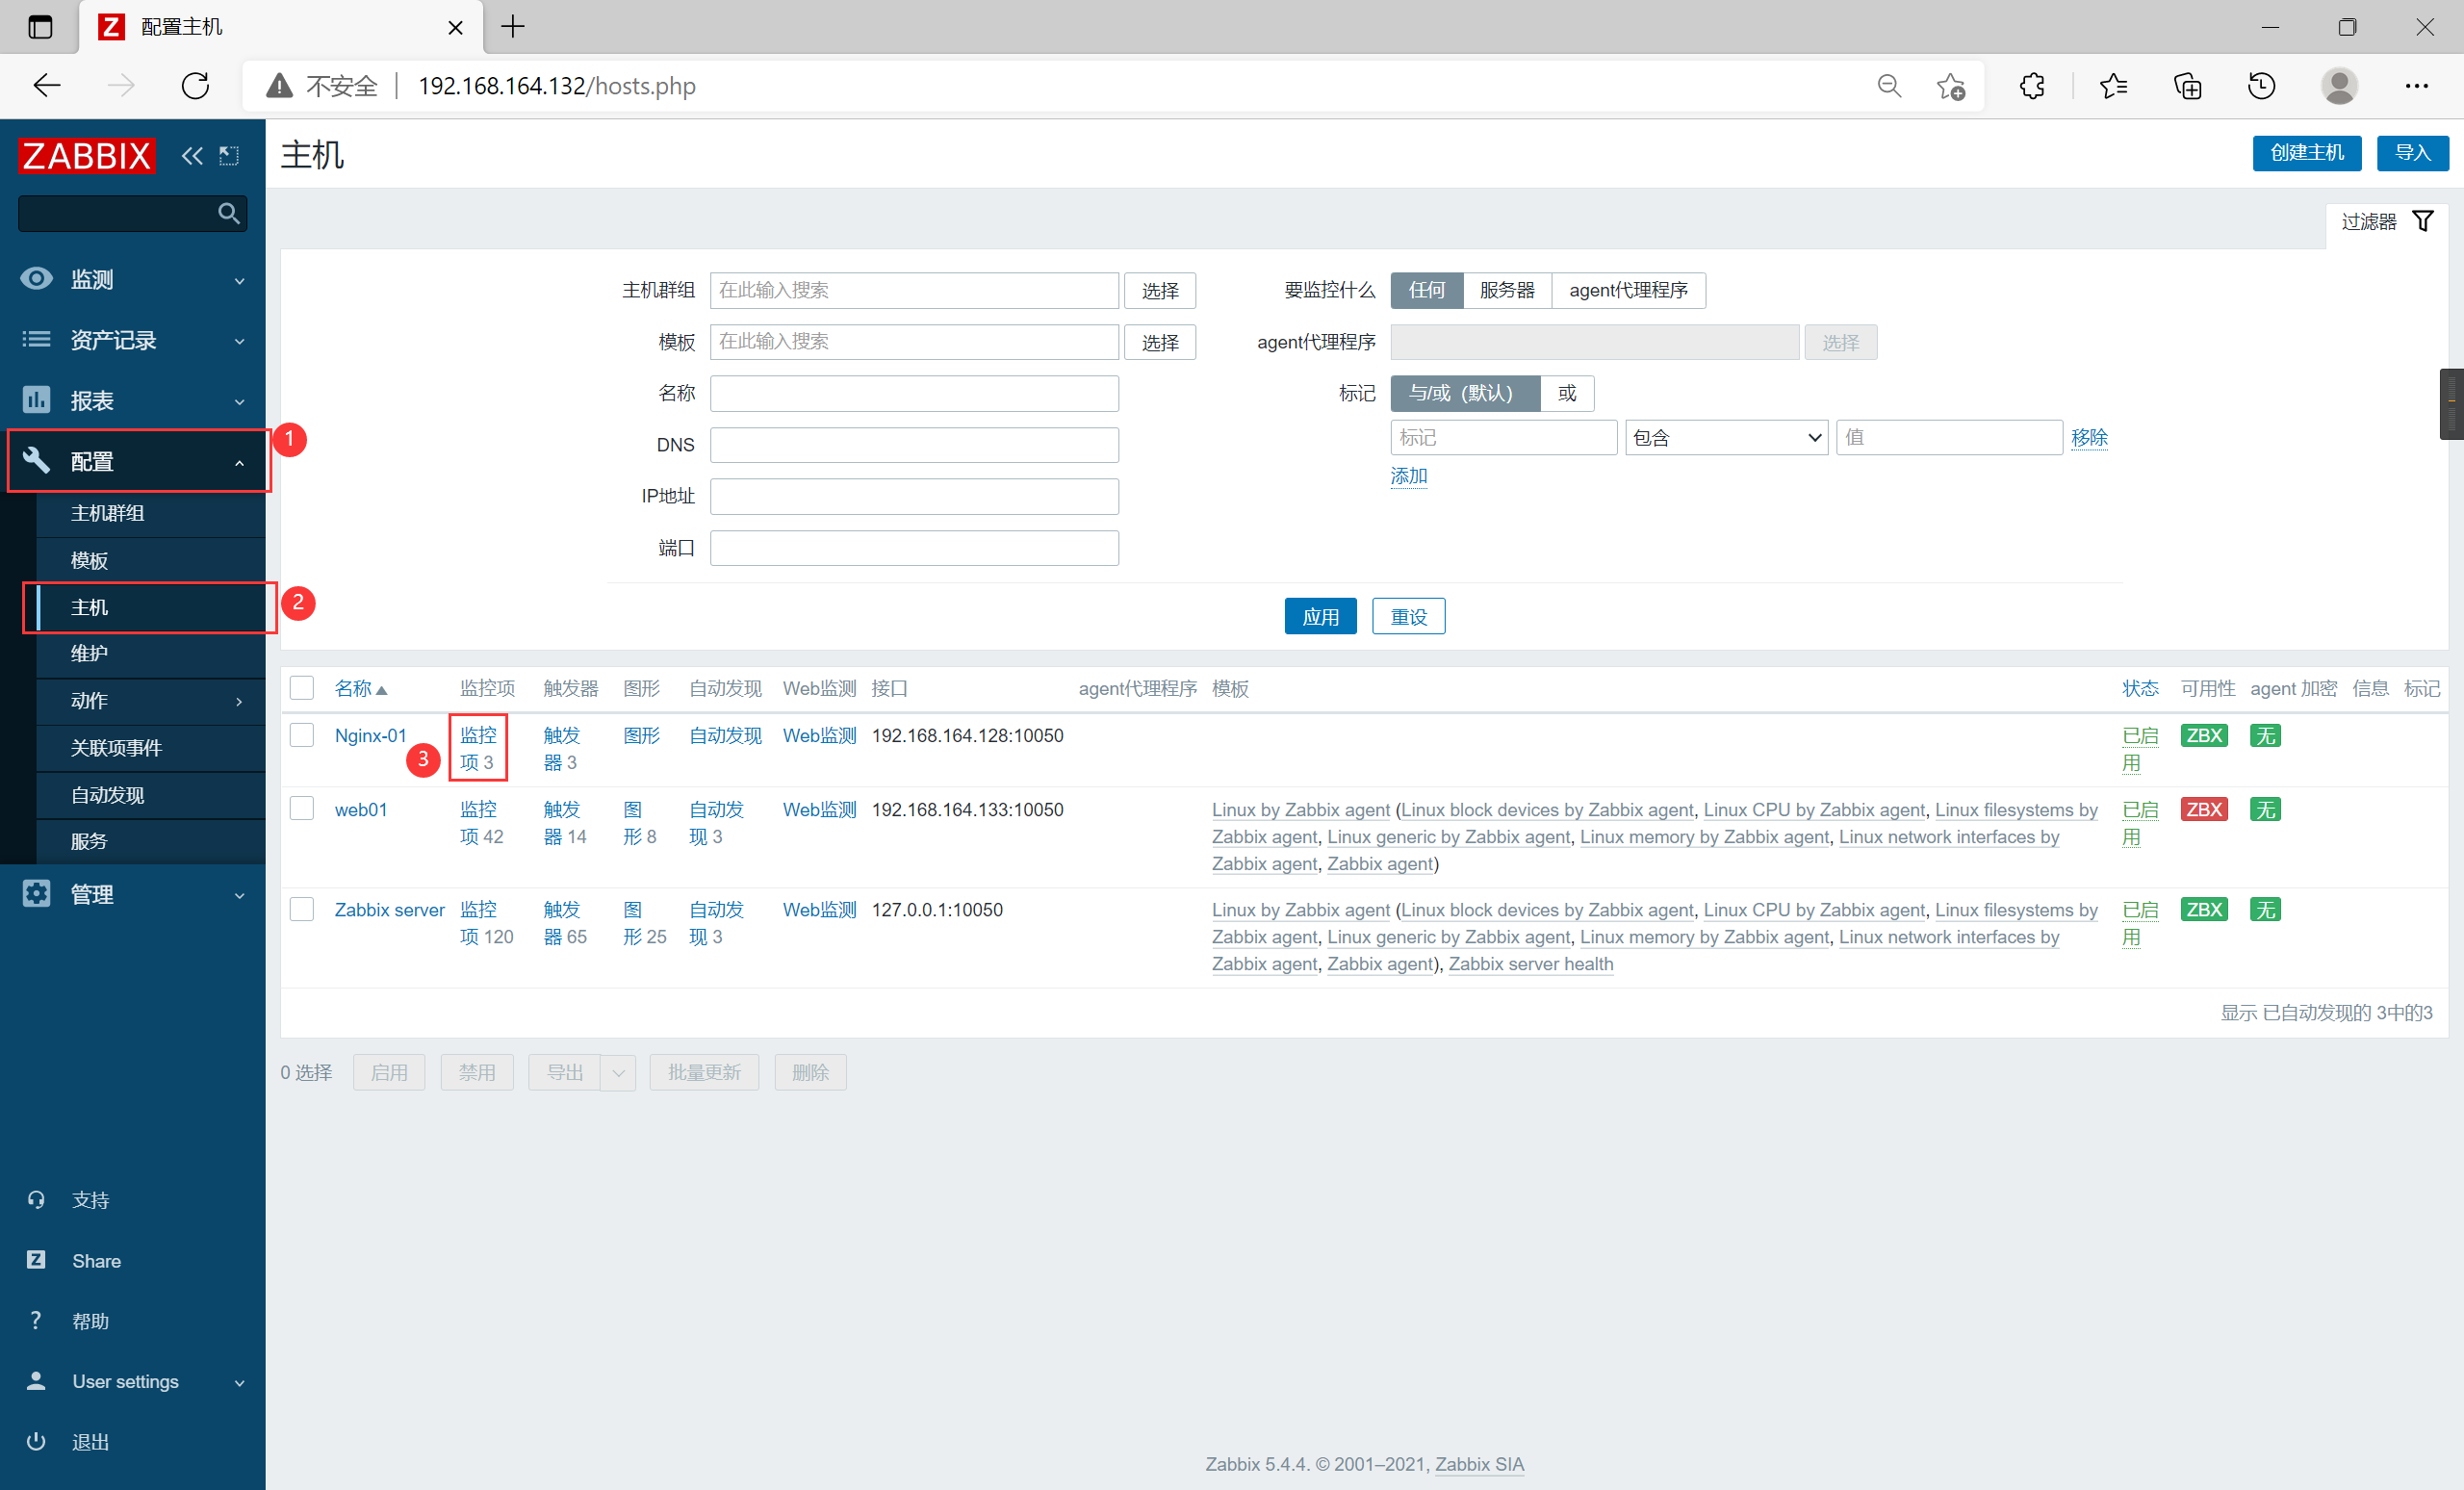
All monitoring items and triggers added by Nginx
5. Experiment
It should be because the effect of this operation is not good. Change the waiting trigger condition to trigger when it is equal to 0
[root@nginx etc]# curl http://192.168.164.128/status
Active connections: 1
server accepts handled requests
 184 184 184
Reading: 0 Writing: 1 Waiting: 0

//To achieve the effect, change greater than 30 to equal to 0 to trigger
[root@nginx scripts]# vim waiting.sh
#/bin/bash
waiting=$(curl  -s http://192.168.164.128/status | awk 'NR==4{print $6}')
if [ $waiting -eq 0 ];then
        echo "1"
else
        echo "0"
fi

//Restart zabbix
[root@nginx etc]# pkill zabbix
[root@nginx etc]# zabbix_agentd
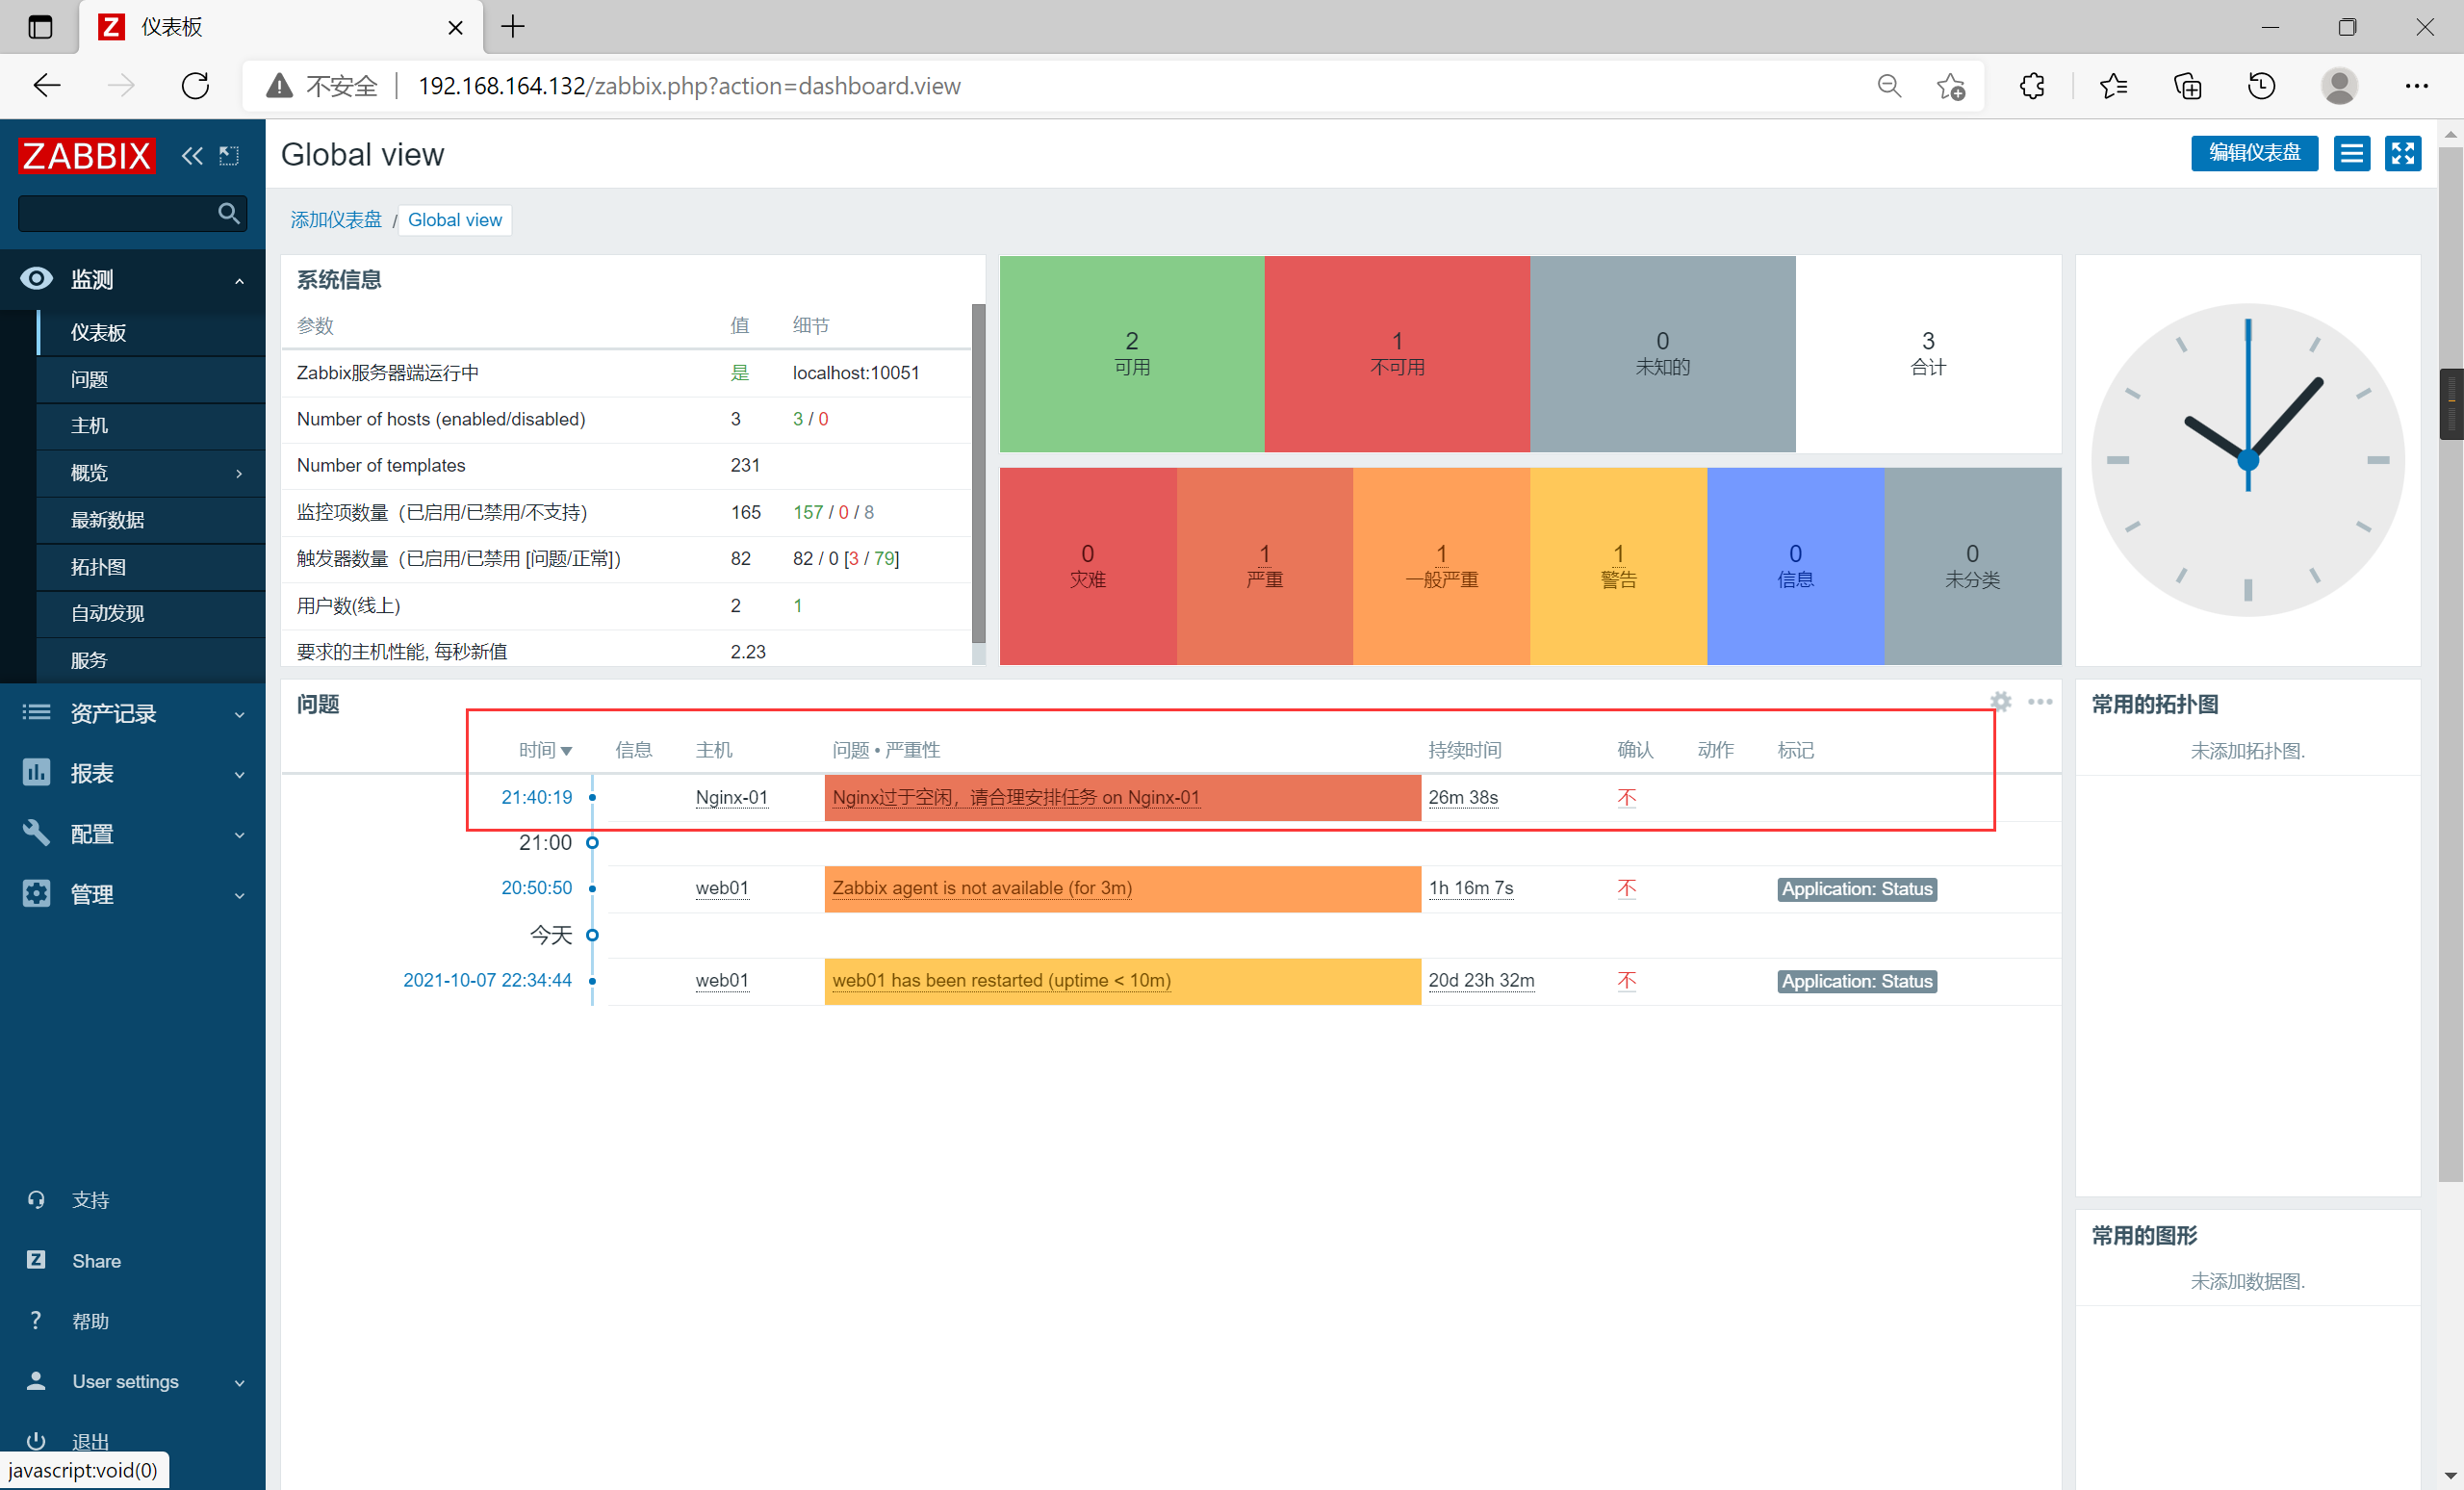
The system detects a problem and triggers an alarm