1, Server directory description
Project deployment home directory:E:\innovation
Python3.6.8 Installation directory:D:\Program Files(x86)\Python\Python36
1,back-end API service
 Code and storage
   Code directory: E:\innovation\backend
   ldap to configure: E:\innovation\backend\innovation\ldap_settings.py
   Configuration items such as database: E:\innovation\backend\innovation\secret.py
   Upload file directory: E:\innovation\media
   Cache file directory: E:\innovation\cache
   Log file directory: E:\innovation\logs
Python Virtual environment directory
   E:\innovation\virtualenvs\innovation_venv

2,Web front end
   E:\innovation\dist //Front end source code build file
Iterative deployment:
Web front end:
1,replace E:\innovation\dist catalogue
API back-end
1,replace E:\innovation\backend catalogue
    If there is a new one migrations File, you need to perform database migration
2,Perform database migration(migrations)
Open the command line tool(Windows Command Prompt)
get into E Disk:
 e:
Enter project Python Virtual environment and activate
      cd E:\innovation\virtualenvs\innovation_venv
          Scripts\activate.bat
 Enter the project code directory and perform database migration
          cd E:\innovation\backend
python manage.py migrate
Configuration and deployment of API backend services
Environment: Windows Server 2016 + SQL Server 2016 + Python 3.6 + django2 + iis10.0
1, Set project configuration
Sql Server database configuration
DATABASES = {
   'default': {
   'ENGINE': 'sql_server.pyodbc',
   'HOST': 'ocnsia11\LDC',
   # 'PORT': 1433, // when use host 'ocnsia11\LDC', the port is no not required.
   'NAME': 'innovation',
   'USER': 'Innovation',
   'PASSWORD': 'China2025',
   'OPTIONS': {
#'driver': 'SQL Server Native Client 11.0',
   'driver': 'ODBC Driver 17 for SQL Server',
   },
   },
}
Note: please ensure that ("ODBC Driver 17 for SQL Server", "ODBC Driver 13 for SQL Server") is installed on the deployed server,
"SQL Server Native Client 11.0")
reference resources:
https://github.com/michiya/django-pyodbc-azure
https://docs.microsoft.com/en-us/sql/connect/odbc/microsoft-odbc-driver-for-sql-server
https://docs.microsoft.com/en-us/sql/relational-databases/native-client/applications/installing-sql-server-native-client
Ldap For Django configuration
Third party Library: django-python 3-ldap
Note: the ldap of the docking project needs to modify part of the source code (supported by otis Technology),
ldap.py,ldap_settings.py is packaged into zip in the back-end code together with this document
Profile:
 innovation/ldap_settings.py
 Source files to be replaced:({venv_path}by python (directory of environment)
{venv_path}\lib\site-packages\django-python3-ldap\ldap.py

Description of main configuration items:
  # The URL of the LDAP server.
 LDAP_AUTH_URL = "ldap://xxxx.COM"
# Initiate TLS on connection.
 LDAP_AUTH_USE_TLS = False
# The LDAP search base for looking up users.
# LDAP_AUTH_SEARCH_BASE = "OU=users,OU=China,OU=ap,DC=otis,DC=COM"
 LDAP_AUTH_SEARCH_BASE = ["OU=users,OU=China,OU=ap,DC=otis,DC=COM", "OU=users,OU=Ch
      "OU=Otis,OU=APAC,OU=CSC_Users,OU=.Resources,DC=otis,DC=COM
# Keep ModelBackend around for per-user permissions and maybe a local
 AUTHENTICATION_BACKENDS = (
   "django_python3_ldap.auth.LDAPBackend",
   'django.contrib.auth.backends.ModelBackend',
   )
    # attributes that represent them.
    LDAP_AUTH_USER_FIELDS = {
   "username": "sAMAccountName",
   "first_name": "givenName",
   "last_name": "sn",
   "email": "mail"
}
File storage configuration
# Log,Cache,Media
MEDIA_ROOT = r"E:\innovation\media" # Upload file directory
CACHE_FILE_ROOT = r"E:\innovation\cache" # Cache file directory
LOGGING_FILE_ROOT = r"E:\innovation\logs" # Log file directory
Mail SMTP
# Email SMTP
DEFAULT_FROM_EMAIL = 'noreply@pusher.mail.xxxx.com' #Default message sender
EMAIL_HOST = 'smtpdm.aliyun.com'  #Host of SMTP mail
EMAIL_PORT = 80  #SMTP port for mail
EMAIL_USE_TLS = False
EMAIL_HOST_USER = 'noreply@pusher.mail.xxxx.com' #User name for SMTP mail
EMAIL_HOST_PASSWORD = '' #Password for SMTP mail
# ADMINS Will ReceiveServer Error Mail
SERVER_EMAIL = 'noreply@pusher.mail.xxxx.com' #Server Error email address
ADMINS = [('Fanping', 'fanping@xxxx.com'), ]  #Server Error mail recipient
2, Build Python environment and install IIS and CGI
1. Download and install python to the corresponding directory: https://www.python.org/downloads/release/python-368/
2. Create python virtual environment
1. Create directory
e:
mkdir innovation
cd E:\innovation
mkdir virtualenvs
cd E:\innovation\virtualenvs
2. Create a virtual environment
python -m venv innovation_venv
3. Activate virtual environment
cd innovation_venv\Scripts

activate.bat # activate the virtual env
3, Configuring django projects
Note: when the server is not networked; You need to download all installation packages locally and then copy them to the server for installation; Or in the case of networking, install the post talk package with pip
Copy the directory
1. Install Django project dependency package
cd Project root directory
2. Install dependent packages
pip install -r requirements.txt
3. Install wfastcgi
Execute commands in the active virtual environment
pip install wfastcgi
4. Execute orders
run wfastcgi-enable
"E:\innovation\virtualenvs\innovation_venv\Scripts\python.exe|E:\innovation\virtualenvs\innovation_venv\lib\site-packages\wfastcgi.py" can now be used as a FastCGI script processor
The above indicates that wfastcgi configuration is successful
wfastcgi is a WSGI similar to Gunicorn or uwsgi. wfastcgi is maintained by Microsoft. It is better to use it than trying to compile other linux based WSGI servers on windows.
If your Django application is only used on Windows, you can consider putting wfastcgi in the requirements.txt file.
reference resources: https://pypi.org/project/wfastcgi/
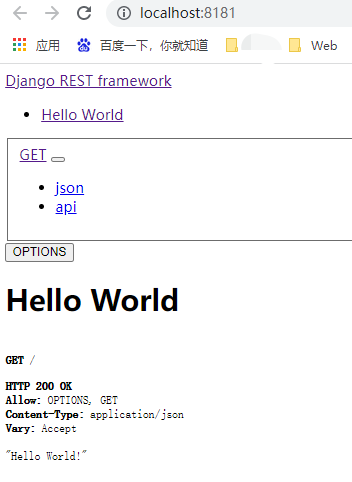
After installing and configuring the above environment, verify whether the python project can run

The above information indicates that the project is started successfully!
4, Configuring django projects in IIS
1. Install iis
I won't introduce it in detail here
How to install IIS (Internet Information Service) in Windows10: https://jingyan.baidu.com/article/eb9f7b6d9e73d1869364e8d8.html

The interface after successful installation. After successful installation, IIS can be started, and the windows desktop will generate an icon, which can be run by double clicking
2. Configure django service
Configuring FastCGI in iis
In the project root directory, create a new web. Configure the configuration file and put the following
<?xml version="1.0" encoding="UTF-8"?>
<configuration>
    <system.webServer>
        <modules>
            <remove name="WebDAVModule" />
        </modules>
        <handlers>
            <remove name="WebDAV" />
            <add name="django-innovation" path="*" verb="*" modules="FastCgiModule" scriptProcessor="E:\innovation\virtualenvs\innovation_venv\Scripts\python.exe|E:\innovation\virtualenvs\innovation_venv\lib\site-packages\wfastcgi.py" resourceType="Unspecified" requireAccess="Script" />
        </handlers>
	    <security>
            <requestFiltering>
                <requestLimits maxAllowedContentLength="419430400" />
            </requestFiltering>
        </security>
        <httpErrors errorMode="Detailed" />
        <asp scriptErrorSentToBrowser="true"/>
    </system.webServer>
    <appSettings>
       <add key="PYTHONPATH" value="E:\otis_innovation\backend" />
       <add key="WSGI_HANDLER" value="django.core.wsgi.get_wsgi_application()" />
       <add key="DJANGO_SETTINGS_MODULE" value="innovation.settings" />
       <add key="WSGI_LOG" value="E:\otis_innovation\logs\wfastcgi.log" />
    </appSettings>
    <system.web>
        <httpRuntime executionTimeout="6000" maxRequestLength="419430400" />
        <customErrors mode="Off"/>
        <compilation debug="true"/>
    </system.web>
</configuration>
scriptProcessor="E:\innovation\virtualenvs\innovation_venv\Scripts\python.exe|E:\innovation\virtualenvs\innovation_venv\lib\site-packages\wfastcgi.py"
The path here is obtained after configuring wfastcgi
Configuration Description:
1,system.webServer.handlers
    FastCgiModule
2,appSettings
 python Project configuration
3,Supports the configuration of large file upload
system.webServer.security.requestLimits
system.web.httpRuntime

Solve the timeout problem and modify the configuration:
FastCGI Settings: Activity Timeout,Idle Timeout,Request Timeout
    Application Pool:  Idle Time-out (minutes)
reference resources:
https://docs.microsoft.com/en-us/visualstudio/python/configure-web-apps-for-iis-windows?view=vs-2019
https://pypi.org/project/wfastcgi/
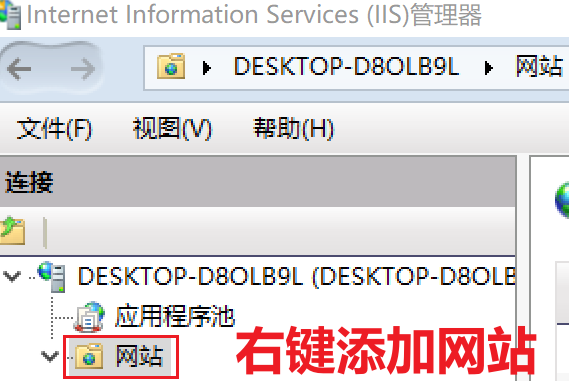
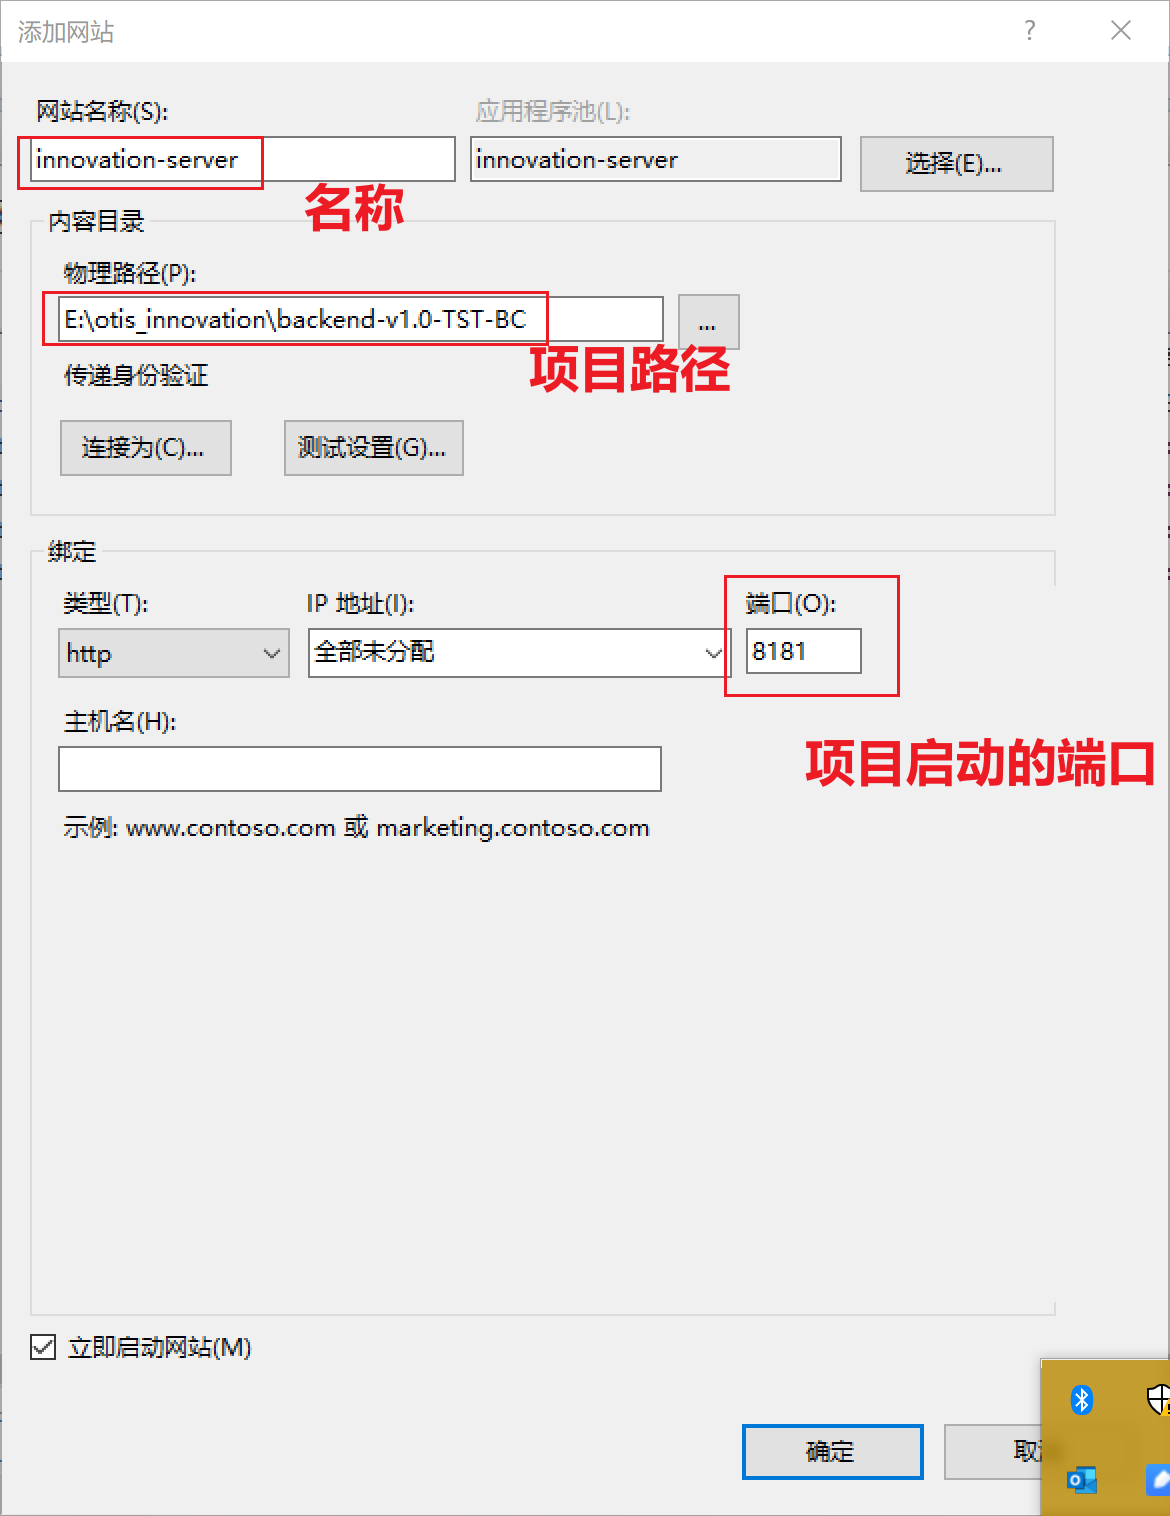
3. Create and configure a new IIS website
Open IIS manager → right click website → add website
Access project
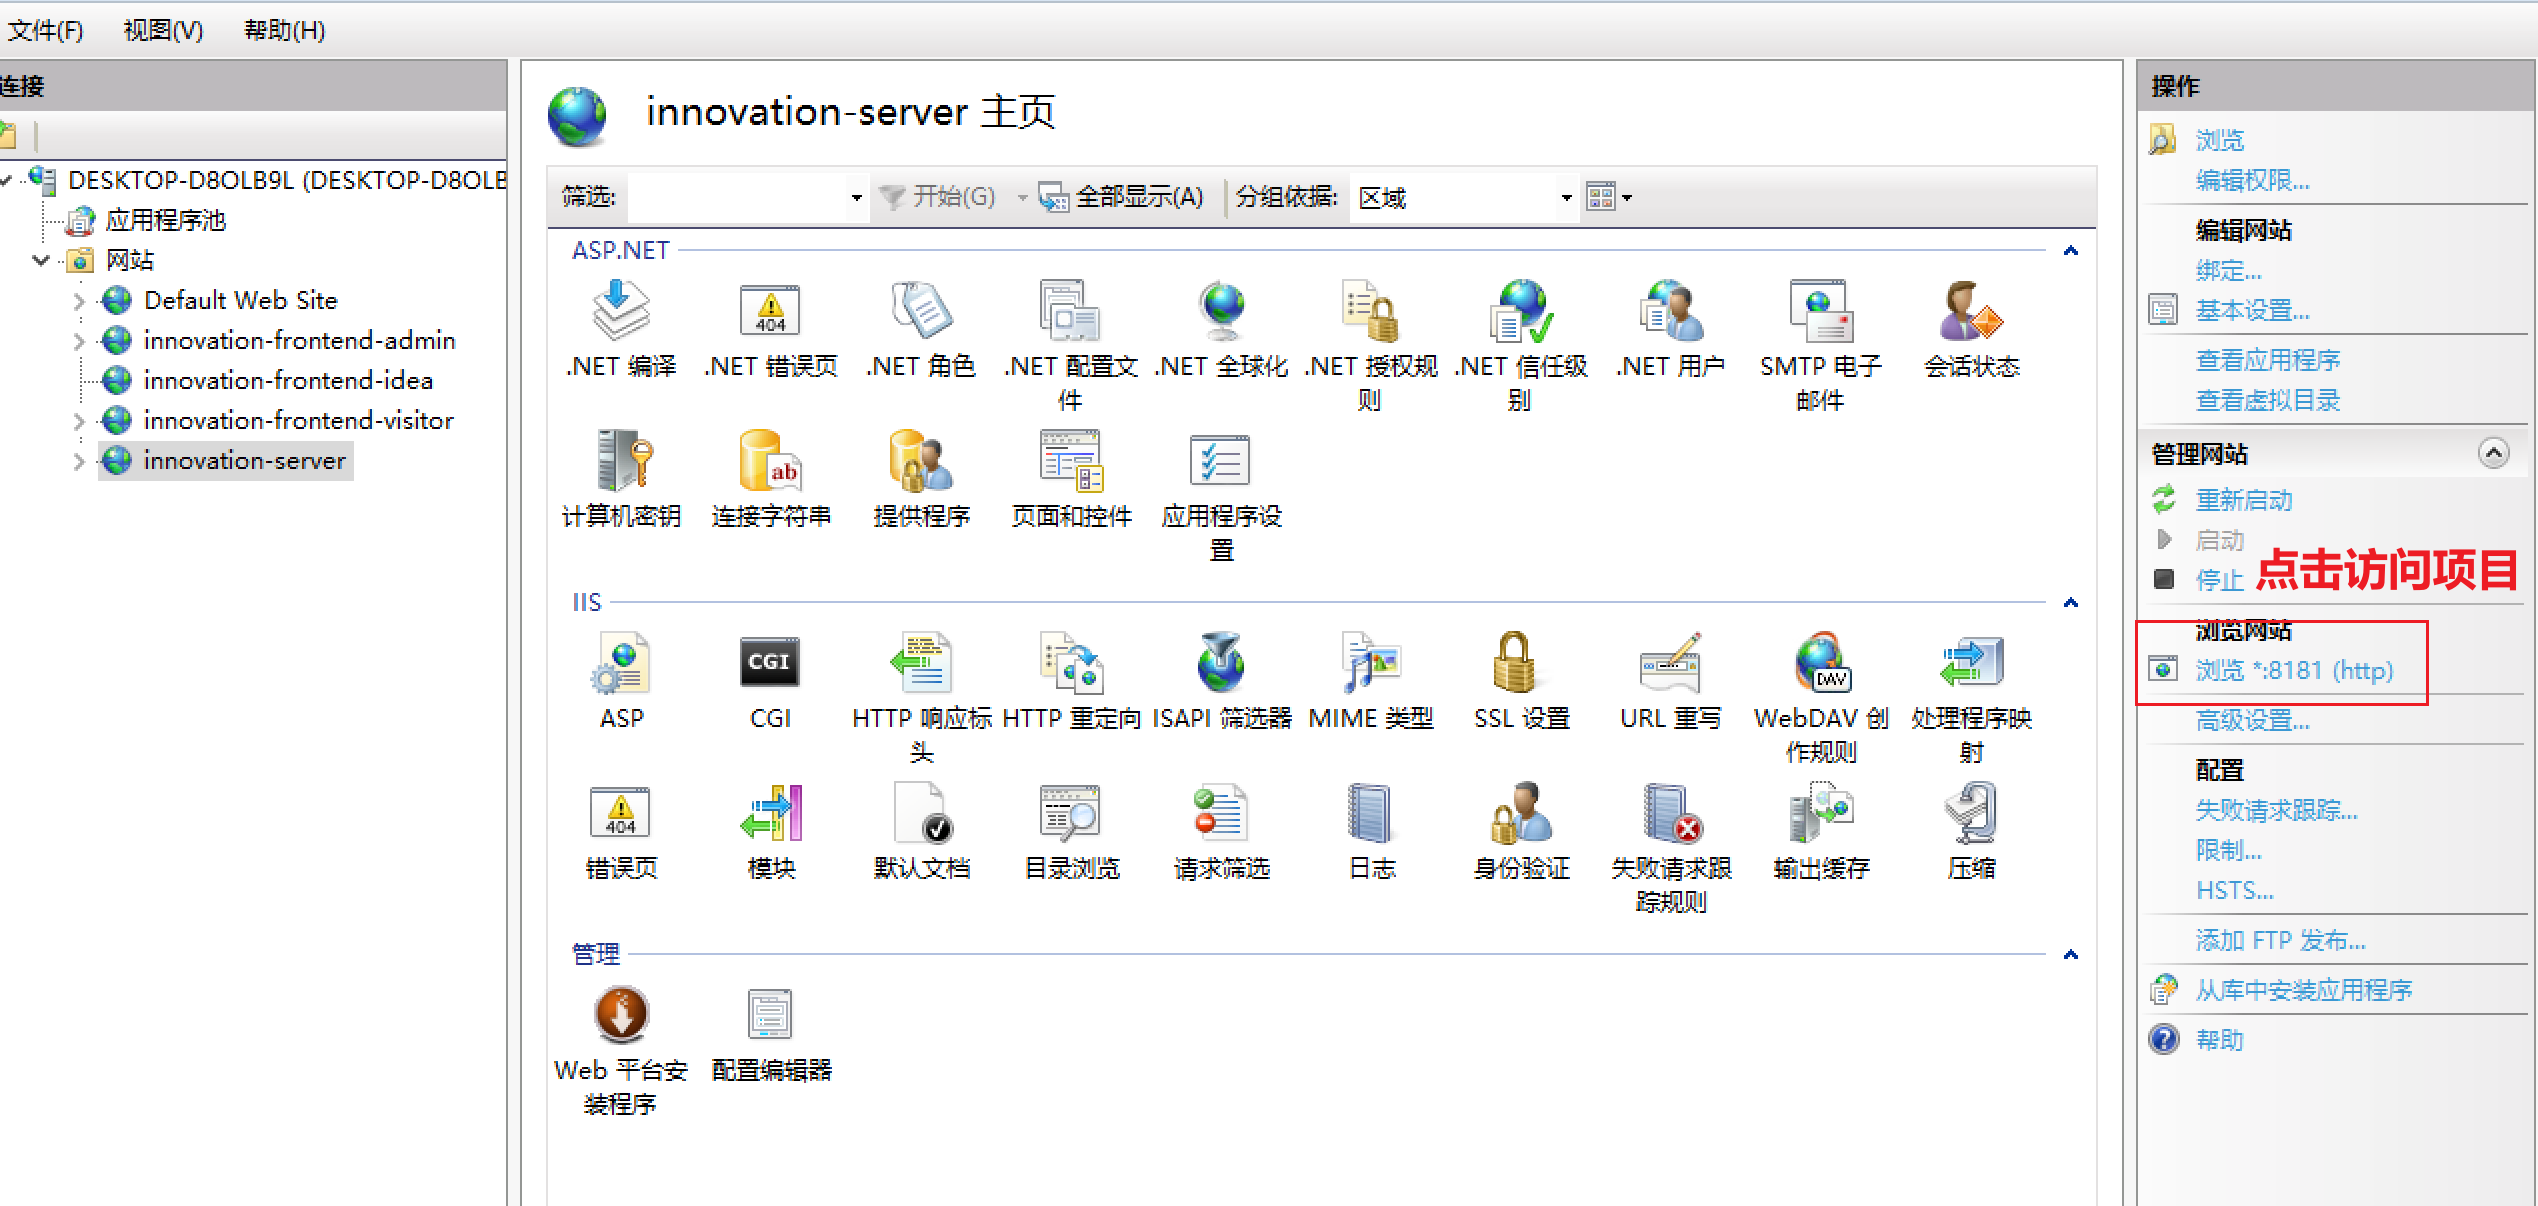
Project started successfully
So far, the backend django project configuration is completed!
The deployment of front-end projects will be introduced in the second article!
Hope to help you, welcome to leave a message and like the collection!