This is my project work a few months ago. It took me quite a while to perfect it. Blog popularity is not high, but many people take code, so it has been in a state of confidentiality. No public code. But I would appreciate it very much if it would be helpful to you and could give you some guidance.
IFE Front End Spring Task 2015 3
Comprehensive exercises
Task Description
Reference resources Design Draft Implement a simple personal task management system: the following figure

Task requirements description:
- On the far left is the task classification list, which supports viewing all tasks or all tasks under a category.
- Initially, there is a default category, and when entering the page, the default category is selected by default.
- Classification supports multiple levels.
- Classification supports adding classifications and deleting classifications. At the bottom of the left classifications, there are adding operations. After clicking, the float layer pops up to input the name of the new classifications. The new classifications will be added to the currently selected classifications. Floating layer can be designed and implemented by itself, or prompt can be used directly. When the mouse hover passes through a certain category, a deletion button appears on the right side. After clicking, a floating layer is popped up to confirm whether it is deleted or not, and the classification is deleted after confirmation. The pop-up confirmation float can be designed and implemented by itself or can be directly implemented using confirm. Subcategories cannot be added to default classifications, nor can default classifications be deleted.
- Each category name is followed by a total number of uncompleted tasks under the current category.
- List of tasks in the middle to show all unfinished tasks under the currently selected category
- Task lists are clustered by date (ascending or descending, self-defined)
- Task status is indicated by different font colors or icons. Task status has two pieces: completed or incomplete.
- The button below shows the new task. When clicked, the right column will become the new task editing interface.
- When a task is clicked, the task details are displayed on the right.
- At the top of the task list, there is a task filter item. You can choose to display all tasks in the task list, or only completed or unfinished tasks.
- On the right is the task description section.
- The first line shows the task title. For the unfinished task, there will be an operation button and an editing button to complete the task on the right side of the title line.
- When you click the Complete Task button, pop up the Floating Layer to confirm the completion of the task. After confirmation, the task is completed and the status of the middle column task is updated. The pop-up confirmation float can be designed and implemented by itself or can be directly implemented using confirm.
- After clicking on the edit task operation, the right side changes to the edit window.
- New and Edit Task Window Description
- There are three input boxes: the title input box, the completion date input box and the content input box.
- Heading Input Box: Enter a heading for a single line. You need to set a rule of heading input restriction (such as word count) by yourself, and give good tips.
- Date Input Box: A single-line input box that inputs dates in the required format, such as yyyy-mm-dd
- Content input box: Multi-line input box, set a limit of content input (such as number of words), and give good tips.
- Confirmation button: Confirm the addition or modification.
- Cancel button: Cancel new additions or modifications.
Task realization requirements:
- The height and width of the entire interface remain the same as the size of the browser window. When the window width changes, the content of the interface changes adaptively.
- The left list and the middle list keep a fixed width (set by themselves) and the right adaptive.
- You need to set a minimum width and height by yourself. When the browser window is smaller than the minimum, the height and width of the interface content no longer follow the change, allowing the browser to scroll.
- Task data is stored locally.
- No class libraries or frameworks are used.
- Be as consistent as possible Code specification Requirements.
- Browser compatibility requirements: Chrome, IE8+.
Be careful
The design draft is only a wireframe prototype sketch, and all visual designs need not follow the sketch strictly. If you have design ability, you are welcome to achieve more beautiful, if not, you can also follow the wireframe. The following contents can be used on their own:
- background color
- Font size, color, line height
- Wire frame thickness, color
- Icons, pictures
- High width, inner and outer margin
Solution
The whole environment should be implemented through back-end interaction. But the simple implementation is the ajax method.
The project requires no class library framework, but the $d class library in Task 2 was written by itself. You can test the reliability of the $d library, so it's not a big problem to use.
To-do list is a fairly typical data structure. When redesigning the data structure, it is obvious that the operation should be triggered by object-oriented thinking.
Basic Styles and Interactions
The first problem is high self-filling.
As with width, an element can set percentage height only when the parent height has a numerical value.
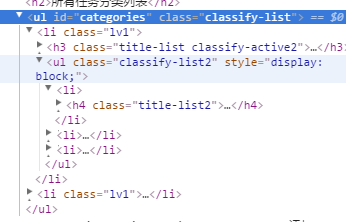
Category List
The method of classification list should be ul-li system
- ul.classify-list
- li
- h3.title-list
- a.title1: Click on the label, including the category level headings, and add an activation style to h3 when clicking.
- a.close: Close the delete button (hide normally, show when the mouse is out of date)
- ul classify-list2
- li (below is the title structure of the secondary classification)
Among them, the special category is "default classification", which cannot be deleted.
Click on the title to show the activation style:
I think this only needs to consider the current click-on logic. When clicking on the second-level classification and then clicking on the other first-level classification, the activation style is displayed on the first-level classification clicked. The original secondary classification activation mode disappeared.
$('.title1').on('click',function(){
        $('.title-list').removeClass('classify-active');
        $(this.parentNode).addClass('classify-active');
    });

    $('.title2').on('click',function(){
        $('.title-list').removeClass('classify-active');
        $('.title-list',this.parentNode.parentNode.parentNode.parentNode).addClass('classify-active');

        $('.title-list2').removeClass('classify-active2');
        $(this.parentNode).addClass('classify-active2');
    });
Note: The effect of two clicks is different, so consider writing a toggle method.
//toggle method:
$d.prototype.toggle=function(_event){
    var _arguments=Array.prototype.slice.call(arguments).slice(1,arguments.length);//The arguments of toggle are converted into arrays and stored so that they can be called in other functions.
    //console.log(_arguments);
    //Private counters, which are enjoyed by a set of objects.
    function addToggle(obj){
        var count=0;
        addEvent(obj,_event,function(){
            _arguments[count++%_arguments.length].call(obj);
        });
    }

    each(this.objs,function(item,index){
        addToggle(item);
    });
};

    //Use examples:
    $('.title1').toggle('click',function(){
        $('.classify-list2',this.parentNode.parentNode).obj.style.display='block';
    },function(){
        $('.classify-list2',this.parentNode.parentNode).obj.style.display='none';
    });
Then write a hover method
//hover method
$d.prototype.hover=function(fnover,fnout){
    var i=0;
    //For the contents of the returner array
    each(this.objs,function(item,index){
        addEvent(item,'mouseover',fnover);
        addEvent(item,'mouseout',fnout);
    });
    return this;
};

//Use examples
$('.title-list').hover(function(){
        if($('.classify-close',this.parentNode).obj){
            $('.classify-close',this.parentNode).move({'opacity':100});
        }
    },function(){
        if($('.classify-close',this.parentNode).obj){
            $('.classify-close',this.parentNode).move({'opacity':0});
        }
    });
There is also a state where if you click on a category, there is no subcategory below, and nothing is displayed.
$('.title1').toggle('click',function(){
        if($('.classify-list2',this.parentNode.parentNode).obj){
            $('.classify-list2',this.parentNode.parentNode).obj.style.display='block';
        }
    },function(){
        if($('.classify-list2',this.parentNode.parentNode).obj){
            $('.classify-list2',this.parentNode.parentNode).obj.style.display='none';
        }
    });
The basic logic is as follows
To Do List
The filter bar has three buttons and a search box, of which the three buttons should be active
    $('.todo-btn').on('click',function(){
        $('.todo-btn').removeClass('todo-btn-active');
        $(this).addClass('todo-btn-active');
    });
The basic structure behind this is that both completed and incomplete should be displayed in different styles
<div class="todo-content">
                    <ul class="todo-date">
                        <span>2017-1-24</span>
                        <li class="completed"><a href="javascript:;">Task 1</a></li>
                        <li class="uncompleted"><a href="javascript:;">Task 2</a></li>
                        <li class="completed"><a href="javascript:;">Task 3</a></li>
                    </ul>

                    <ul class="todo-date">
                        <span>2017-1-25</span>
                        <li class="completed"><a href="javascript:;">Task 1</a></li>
                        <li class="completed"><a href="javascript:;">Task 2</a></li>
                        <li class="uncompleted"><a href="javascript:;">Task 3</a></li>
                    </ul>
                </div>
This is roughly what the interface looks like.
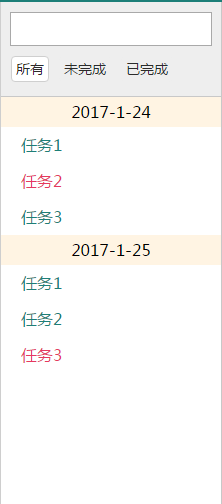
The filter bar is required to enter or click the button through the keyUp event. The box below dynamically displays the results.
These interactions are set up through data characteristics, so there is no need to write them here.
Main display area
Similar to Ps sketchpad. Pay attention to the Sketchpad to allow vertical scrollbars to appear.
    <div class="content">
                <div class="content-outer">
                    <div class="content-info">
                        <div class="content-header">
                            <h3>To-do headings</h3>
                            <a href="javascript:;">edit</a>
                        </div>
                        <div class="content-substract">
                            Task date: 2017-1-25
                        </div>
                    </div>

                    <div class="content-content">
                        <div class="content-paper">
                            <h4>Ah! Today is a good day.</h4>
                            <p>complete task3 Design and style implementation.</p>
                        </div>
                    </div>
                </div>

            </div>
Layout Style
.content{
    width: auto;
    height: inherit;
    padding-left: 512px;
}
.content-outer{
    height: 100%;
    position: relative;
}
.content-info{
    height: 91px;
}
.content-content{
    position: absolute;
    width: 100%;
    top:91px;
    bottom: 0;
    background: #402516;
    overflow-y: scroll;
}
The absolute positioning method is used to realize the highly adaptive content of the drawing board area. Then, the paper realizes the region extension through fixed margin.
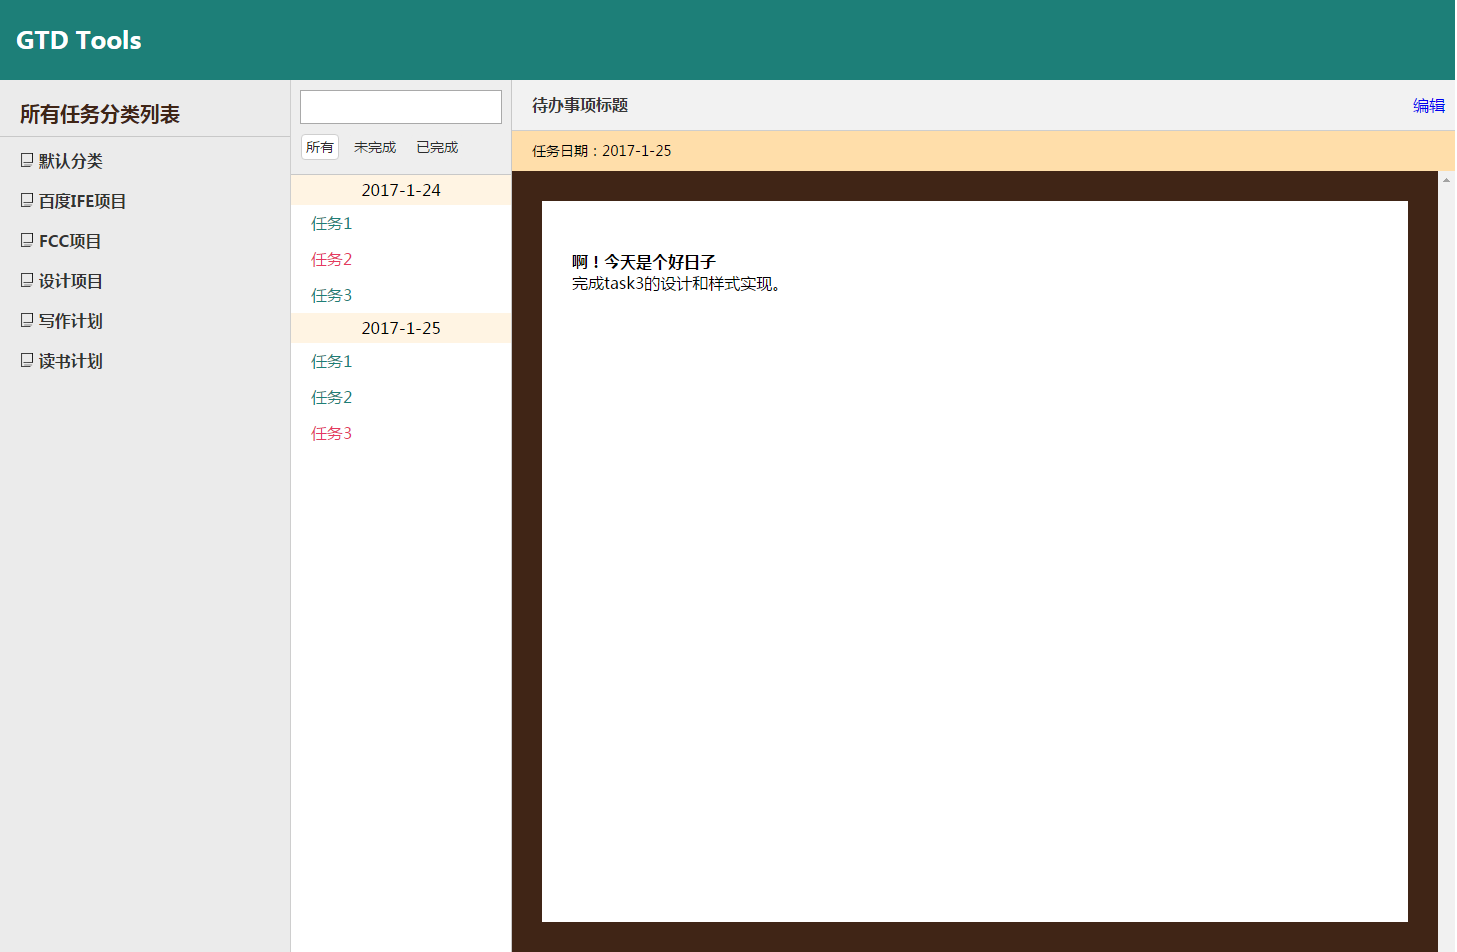
Then the whole interface comes out.
Front-end component development
Strictly speaking, the name "front-end component development" is inaccurate. The control logic of the components in this project is only involved, and the logic of the data structure is not shown.
Static Modal Bullet Window
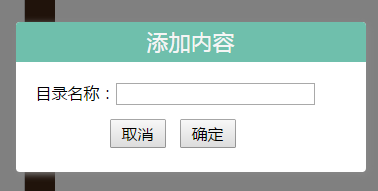
Add a "Add" button to the categorization list and taskbar, and pop up a modal pop-up window when required.
Bullet windows provide the most basic functions: an input box, customize your category name or task name, a cancel button, and a confirmation button.
The modal elastic window is composed of two parts.
- Cover layer (black, translucent)
- Bullet form
The method of dynamic creation can add id to the specified bullet window, both of which are implemented by absolute positioning.
            <div class="add-mask"></div>
            <div id="(Customization)" class="add">
                <div class="add-title">
                    <h4>Adding content</h4>
                </div>
                <div class="add-content">
                    <span>Name:</span>
                    <input type="text" name="" value="">
                    <div class="btns">
                        <button id="exit" type="button">cancel</button>
                        <button id="submit" type="button">Determine</button>
                    </div>
                </div>
            </div>
This should be placed directly before the end of the body tag.
Component structure
Write an object-oriented component, and you can imagine how it's called.
// Take adding classifications as an example:
var addCategoryModal=new Modal();

// Initialization
addCategoryModal.init({
  //Here put the configuration.
});
// Generation window
categoryModal.create();
New generates a new component and initializes it, passing in the necessary parameters. If no configuration is passed, the component has its own configuration.
function Modal(){
    this.settings={
        // Here is the default configuration
    };
}
The roll-in configuration overlay can be achieved by an extension function:
function extend(obj1,obj2){
    for(var attr in obj2){
        obj1[attr]=obj2[attr];
    }
}
// ...
//Here is to override the internal configuration with a custom option configuration
Modal.prototype.init=function(option){
    extend(this.settings,option);
};
Then the framework is built.
What configurations do bullet windows need?
In this project, you only need to specify the pop-up window prompt content title and pop-up window type (here are three, one is the directory addCtategory, the other is the task addMission, and the last is the general prompt box tips).
Among them, type will become the id value of the top container of the modal elastic window.
Component Implementation
The generation window is nothing more than adding a node to the DOM.
Modal.prototype.create=function(){
    var oDialog=document.createElement('div');

    oDialog.className='add';
    oDialog.id=this.settings.type;
    if(this.settings.type=='tips'){
        oDialog.innerHTML =
            '<div class="add-title">'+
                '<h4>Information Tips</h4>'+
            '</div>'+
            '<div class="add-content">'+
                '<span>'+this.settings.tips+'</span>'+
                '<div class="btns">'+
                    '<button id="exit" type="button">Oh I see</button>'+
                '</div>'+
            '</div>';
    }else{
        oDialog.innerHTML =
            '<div class="add-title">'+
                '<h4>Adding content</h4>'+
            '</div>'+
            '<div class="add-content">'+
                '<span>'+this.settings.title+'Name:</span>'+
                '<input class="input" type="text" value="">'+
                '<div class="btns">'+
                    '<button id="exit" type="button">cancel</button>'+
                    '<button class="submit" type="button">Determine</button>'+
                '</div>'+
            '</div>';
    }

    // Display effect
    document.body.appendChild(oDialog);
    $('.add-mask').obj.style.display='block';

    //Bullet window position specified, absolutely centered
    var clientWidth=document.documentElement.clientWidth;
    var clientHeight=document.documentElement.clientHeight;

    oDialog.style.left=(clientWidth)/2-175+'px';
    oDialog.style.top=(clientHeight)/2-75+'px';

    //close button
    function remove(){
        document.body.removeChild(oDialog);
        $('.add-mask').obj.style.display='none';
        $(this).un('click',remove);
    }
    $('#exit').on('click',remove);
};
Okay. Let's add a click event to a # addCategory button:
$('#addCategory').on('click',function(){
        var categoryModal=new Modal();
        categoryModal.init(
            {
                type:newCategory,
                title:'Catalog'
            }
        );
        categoryModal.create();
    });
The effect comes out:
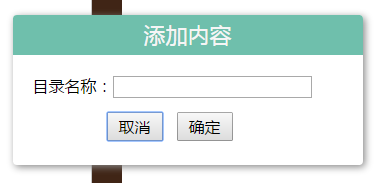
Component improvement
To make this component have basic functions, we need to write the mask layer, cancel the button and so on.
Note: The following effects are all accomplished in the create method
Mask
Mask (. mask): The mask is hidden and does not require dynamic display.
.add-mask{
    position: absolute;
    left: 0;
    top:0;
    right: 0;
    bottom:0;
    background: rgba(0,0,0,0.5);
    z-index: 99;/*Note that the level of add s should be greater than 99*/
}
<div class="add-mask" style="display:none;"></div>
Then add a display effect:
    // Display effect
    document.body.appendChild(oDialog);
    $('.add-mask').obj.style.display='block';
Cancel button (#exit)
In the spirit of cleanliness, except to remove oDialog from the document.
    //close button
    function remove(){
        document.body.removeChild(oDialog);
        $('.add-mask').obj.style.display='none';
    }
    $('#exit').on('click',remove);
Then the cancellation will be finished.
Confirmation button
Determine that the button can also write a way to close the spring window manually:
Modal.prototype.exit=function(){
    document.body.removeChild($('.add').obj);
    $('.add-mask').obj.style.display='none';
}
Actually
At this point, it can be considered that the static modal spring window is completed.
Effect:
markdown component
Although the task requirements do not need any framework, our requirements have begun to exceed the requirements of the task itself in the current time, and are barely acceptable without jQuery, but the front-end rendering of your content part, marke.js is obviously the best choice. For the use of marked.js, you can refer to Mark.js Simple Manual.
In fact, this is the third time that mark.js has been used in the project, and it works.
Of course, if you don't want to do anything, you can skip this section.
Introduce marked.js and highlight.js
Now drag it in. It also refers to a style library that basically matches the current page style.
    <link rel="stylesheet" type="text/css" href="css/css.css"/>
    <link rel="stylesheet" type="text/css" href="css/solarized-dark.css"/>


    <script type="text/javascript" src="js/dQuery.js"></script>

    <script type="text/javascript" src="js/marked.js"></script>
    <script type="text/javascript" src="js/highlight.pack.js"></script>
    <script >hljs.initHighlightingOnLoad();</script>

    <script type="text/javascript" src="js/js.js"></script>
Then?
// Rendering Page Module var rendererMD = new marked.Renderer(); marked.setOptions({ renderer: rendererMD, highlight: function (code,a,c) { return hljs.highlightAuto(code).value; }, gfm: true, tables: true, breaks: false, pedantic: false, sanitize: false, smartLists: true, smartypants: false }); //Used for testing results $('.content-paper').obj.innerHTML=marked('# Complete markdown module development\n---\nRendered by **marked**.\n\n```javascript\nfunction(){\n console.log("Hello!Marked.js!");\n}\n```\nThis is a response picture test:\n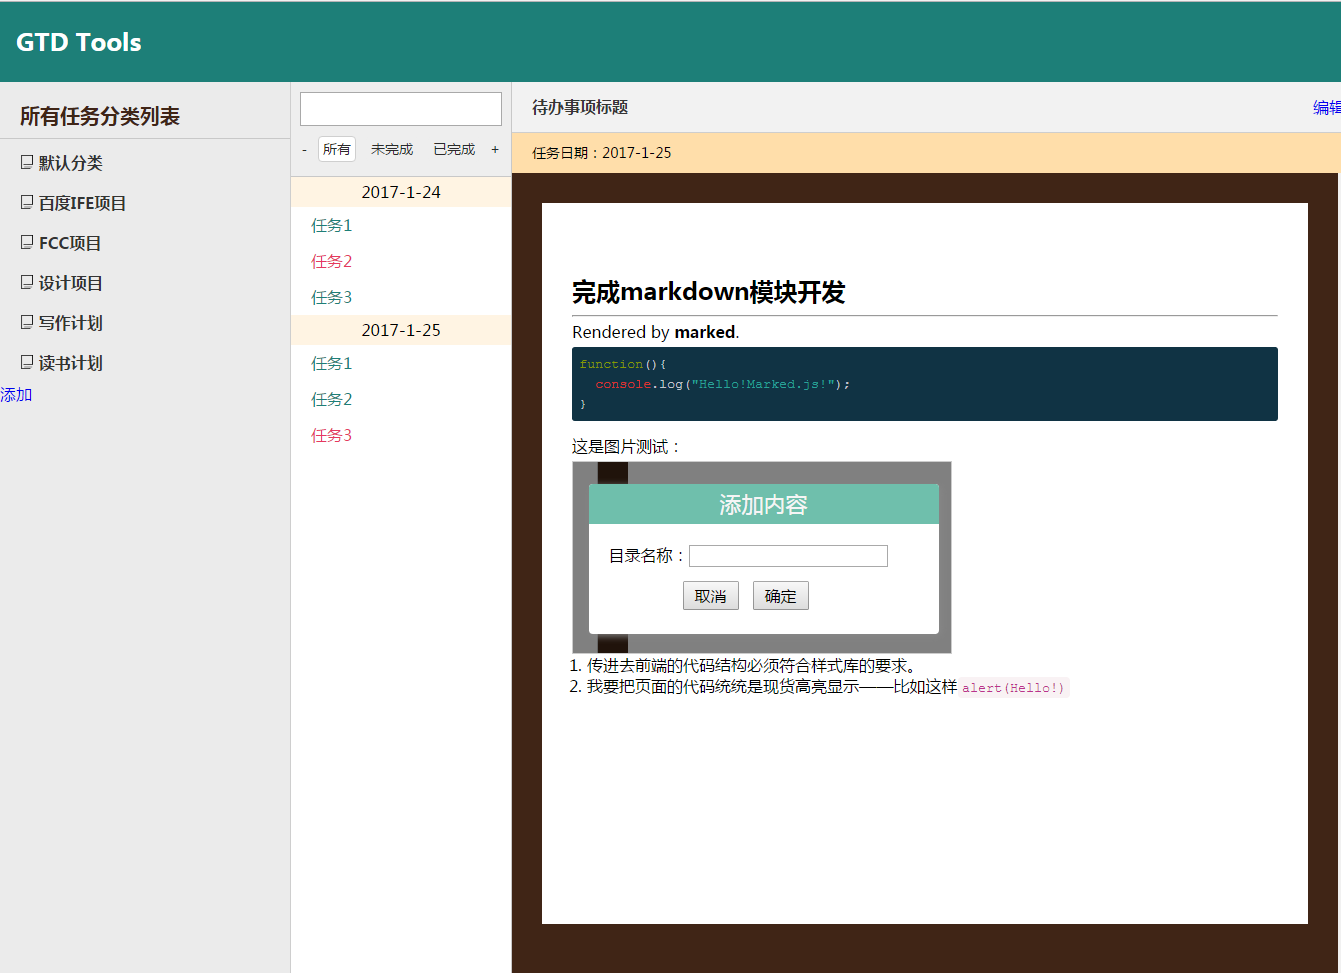\n1\. The code structure passed into the front end must meet the requirements of the style library.\n2\. I'm going to highlight all the code on the page in stock -- like this`alert(Hello!)`');
Rewrite Style Library
Despite the support of the style library, this style library only defines color matching. The default style of the browser was destroyed by the original css-reset.
The most common effect of markdown is to highlight the code and display it with pictures.
Projects in the past( Node.js Blog Building ) I've rewritten a fairly beautiful style library (based on marked.js style library and bootstrap style library code and pre part) using marked.js. Now summarize the main points of rewriting CSS as left:
- Responsive pictures
.content-paper img{
  display: block;
  max-width: 100%;
  height: auto;
  border: 1px solid #ccc;
}
- List effects (including ol-li, in fact)
.content-paper ul li{
  list-style: disc;
  margin-left: 15px;
}
.content-paper ol li{
  list-style: decimal;
  margin-left: 15px;
}
- Text spacing, line spacing, e.g., P tag, h1-h6 spacing, etc. Size is best displayed by EM and percentage, for example, my p-tagged font size is 1.05em.
The results are as follows:
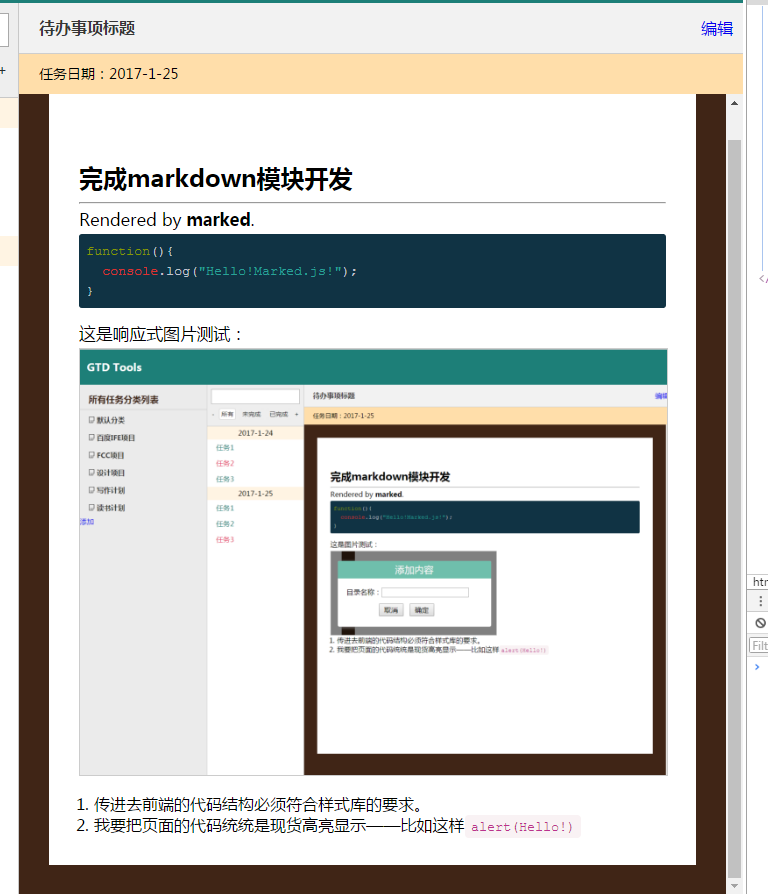
The effect is immediate.
Search (filter) components
The search component does only one thing: it binds keyUp event bindings to find data sets by listening to the content of the input.search box based on the text nodes in the ul.todo-content window.
If we write according to the idea of encapsulating objects, one is the listening module, the other is the display module. For convenience, add the same name id to each element.
thinking
In terms of implementation, it seems simple to find the text node in # todo-content and convert it into an array:
// Search component
function Search(listener,shower){
    this.listener=$(listener);
    this.shower=$(shower);
}
Search.prototype.filter=function(){
    var value=this.listener.obj.value;
    var content=this.shower.obj.innerText;
    console.log(content.split('\n'));
};

$(funciton(){
  $('#search').on('keyup',function(){
        var search=new Search('#search','#todo-content');
        search.filter();
    });
});
Unfortunately, however, something happened:

The date of the assignment was typed out. There is also an empty text.
Because the html code structure is like this:
            <div id='todo-content' class="todo-content">
                    <ul class="todo-date">
                        <span>2017-1-24</span>
                        <li class="completed"><a href="javascript:;">Task 1</a></li>
                        <li class="uncompleted"><a href="javascript:;">Task 2</a></li>
                        <li class="completed"><a href="javascript:;">Task 3</a></li>
                    </ul>

                    <ul class="todo-date">
                        <span>2017-1-25</span>
                        <li class="completed"><a href="javascript:;">Task 1</a></li>
                        <li class="completed"><a href="javascript:;">Task 2</a></li>
                        <li class="uncompleted"><a href="javascript:;">Task 3</a></li>
                    </ul>
                </div>
In this case, look for VAR search = new Search (' search',' todo-content li'); then do a for loop on the Li object. If none is available, set display to none:
// Search component
function Search(listener,shower){
    this.listener=$(listener);
    this.shower=$(shower);
}

Search.prototype.filter=function(){
    var value=this.listener.obj.value;

    var content=[];
    for(var i=0;i<this.shower.objs.length;i++){
        this.shower.objs[i].style.display='block';
        content.push(this.shower.objs[i]);
        if(this.shower.objs[i].innerText.indexOf(value)==-1){
            this.shower.objs[i].style.display='none';
        }
    }
};

// call
var search=new Search('#search','#todo-content li');
$('#search').on('keyup',function(){
    search.filter();
});
Effect:
Implementation of other components
At present, the search component has a big problem, that is, it can not achieve two-way data binding.
The input box search component is an independent criterion. The following three buttons share a common set of judgment information.
The idea is to make use of data attributes of html elements. Add data-search and data-query attributes to all nodes, and the initial two attributes of all html elements are true. When different buttons are clicked, the query method is executed to set the data-xxx of eligible elements to true. Then render render, and the. hide style is not added until both attributes are true (the hide style is display none).
// Search component
function Search(listener,shower){
    this.listener=$(listener);
    this.shower=$(shower);
    this.key='all';
}

Search.prototype.filter=function(){
    var value=this.listener.obj.value;
    // Set all to true first
    for(var j=0;j<this.shower.objs.length;j++){
        this.shower.objs[j].setAttribute('data-search', "true");
    }
    //Search conditions that bind the current button
    this.query(this.key);


    for(var i=0;i<this.shower.objs.length;i++){
        if(this.shower.objs[i].innerText.indexOf(value)==-1){
            this.shower.objs[i].setAttribute('data-search', 'false');
        }
    }

    this.renderer();

};

Search.prototype.query=function(key){
    this.key=key;
    for(var j=0;j<this.shower.objs.length;j++){
            //this.shower.objs[i].style.display='block';
        this.shower.objs[j].setAttribute('data-key',"true");
    }
    this.renderer();


    for(var i=0;i<this.shower.objs.length;i++){
        this.shower.objs[i].setAttribute('data-key',"true");
        if(key!=='all'){
            if(this.shower.objs[i].className!==key){
                this.shower.objs[i].setAttribute('data-key',"false");
            }
        }
    }
    this.renderer();
};
// Finally, the rendering method
Search.prototype.renderer=function(){
    for(var i=0;i<this.shower.objs.length;i++){
        var a=this.shower.objs[i].getAttribute('data-search');
        var b=this.shower.objs[i].getAttribute('data-key');
        if(a=="true"&&b=="true"){
            $(this.shower.objs[i]).removeClass('hide');
        }else{
            $(this.shower.objs[i]).addClass('hide');
        }
    }
};
So the search mechanism is just a few lines.
var search=new Search('#search','#todo-content li');
    $('#search').on('keyup',function(){
        search.filter();
    });

    $('#completed').on('click',function(){
        search.query('completed');
    });

    $('#all').on('click',function(){
        search.query('all');
    });

    $('#uncompleted').on('click',function(){
        search.query('uncompleted');
    });
The ultimate effect:
Data visualization
Data visualization is a big pit.
The basic logic is:
- Classification module obtains data from the back end and displays them according to the data.
- When the classification is selected, the first-level task information under the classification is exposed to the task module.
- Click on the Create Module to create a level classification according to the current level, and if there is no click, create a level classification.
- Task modules are reorganized and arranged according to the "Create Date" logic based on the exposed information.
- The filter component finds the exposed information and rearranges it according to the filter rules
- According to the result of click-through of classification blocks, a task currently selected is exposed to the information content module on the right side.
- The right information content module renders and displays the content with markdown according to the information exposed by the task module.
Obviously, using object-oriented thinking is the best.
Design of original data structure
It involves the design of stepless trees.
Throughout the previous logic, what features do you need for each data?
With a good data structure, it is also convenient to render after the front-end is obtained. Let's be intuitive and organize information in the way of array + object.
var json=[
  {
    "categoryName":Catalogue Name of Level I,
    "id":Unique Pipeline Number or Timestamp
    "missions"(Tasks under this directory): [
      {
      "id":task id
        "title":Task Name,
        "createTime":Push time,
        "isCompleted":Completion or not,
        "content":Text content of tasks
      },
      //...
    ],// No is an empty array []

    "list"(Direct subcategories of the directory):[
      {
        "categoryName":Secondary directory name,
        "id":...
        . . .
      }
    ]//No is an empty array [].
  },
  {
    "categoryName":Catalogue Name of Level I2
    "mission":[
      //...
    ],
    "list":[
      //...
    ]
  },
  //...
]
For front-end rendering that does not use real back-end support, processing such data is cumbersome.
Next is rendering.
Rendering Classification Module
The ul of multilevel classification is as follows:
Construct an object:
/*Recursive implementation to obtain stepless tree data and generate DOM structure*/
function Data(data){
    this.data=data;
}

Data.prototype.renderTree=function(selector){
    var _this=this;
    var result='';
    (function getTree(_data){
        var obj=_data;
        for(var i=0;i<obj.length;i++){
            var str='';
            if(obj==_this.data){//If it's a top-level heading, use a larger display
                str=
                '<li class="lv1"><h3 class="title-list">'+
                    '<a '+'data-id="'+obj[i]["id"]+'"'+' class="title1" href="javascript:;"><img src="images/dirs.png"> '+obj[i]["categoryName"]+'</a>'+
                    '<a class="classify-close" href="javascript:;"><img src="images/close.png"></a>'+
                '</h3>';
            }else{
                str='<li>'+
                    '<h4 class="title-list2">'+
                        '<a '+'data-id="'+obj[i]["id"]+'"'+' class="title2" href="javascript:;"><img src="images/dir.png" alt=""> '+obj[i]["categoryName"]+'</a>'+
                        '<a class="classify-close2" href="javascript:;"><img src="images/close.png"></a>'+
                    '</h4>';
            }


            result+=str;
            if(obj[i]["list"]!==[]){
                //Note: The surface here is not finished yet.
                result+='<ul class="classify-list2">';
                getTree(obj[i]["list"]);
                result+='</ul></li>';
            }else{
                result+='</li>';
            }


        }
    })(_this.data);

    $(selector).obj.innerHTML=result;
};
For example, I want to render data under ul#categories:
var _data=new Data(json);
_data.renderTree('#categories');
Improvement of Dynamic Interaction
Remember dynamic interaction. Previous DOM operations were extremely disgusting (four parentNode s appeared in a row) and were written to death. Now we implement a function to find the first ancestor class name based on the tag:
function getAcient(target,className){
    //console.log(target.parentNode.classList);
    var check=false;
    for(var i=0;i<target.parentNode.classList.length;i++){
        if(target.parentNode.classList[i]==className){
            check=true;
            break;
        }
    }

    if(check){
        return target.parentNode;
    }else{
        return getAcient(target.parentNode,className);
    }
}

// For example, getAcient(document.getElementById('li1'),'ul1')
// Represents finding the closest ancestor of an element of # li1, whose class name includes. ul.
With it, most of the previous nausea writing can be replaced.
Click any a under li.lv1 to respond to the content
$('.lv1').delegate('a','click',function(){
        $('.title-list').removeClass('classify-active');
        $('.title-list2').removeClass('classify-active2');
        // Top-level additive class
        $('h3',getAcient(this,'lv1')).addClass('classify-active');
        if(this.parentNode.className!=="title-list"){
            $(this.parentNode).addClass('classify-active2');
        }
    });

    $('.title2').on('click',function(){
        $('.title-list').removeClass('classify-active');
        $('.title-list2').removeClass('classify-active2');
        $(this.parentNode).addClass('classify-active2');
    });
Now, on the contrary, toggle is not very intuitive when adding data. For the sake of simplicity of the code, it is deleted.
Next, encapsulate all the functions involved in the effect as a method of Data, rendering the interaction effect once every time renderTree() method is executed.
Data.prototype.renderCategoryEfect=function(){
    $('.title2').on('click',function(){
        $('.title-list').removeClass('classify-active');
        $('.title-list2').removeClass('classify-active2');
        $(this.parentNode).addClass('classify-active2');
    });

    // $('.title2').toggle('click',function(){
    //  if($('.classify-list2',this.parentNode.parentNode).obj){
    //      $('.classify-list2',this.parentNode.parentNode).obj.style.display='block';
    //  }
    //
    // },function(){
    //  if($('.classify-list2',this.parentNode.parentNode).obj){
    //      $('.classify-list2',this.parentNode.parentNode).obj.style.display='none';
    //  }
    // });


    // $('.title1').toggle('click',function(){
    //  if($('.classify-list2',this.parentNode.parentNode).obj){
    //      $('.classify-list2',this.parentNode.parentNode).obj.style.display='block';
    //  }
    // },function(){
    //  if($('.classify-list2',this.parentNode.parentNode).obj){
    //      $('.classify-list2',this.parentNode.parentNode).obj.style.display='none';
    //  }
    // });

    $('.title-list2').hover(function(){
        if($('.classify-close2',this.parentNode).obj){
            $('.classify-close2',this.parentNode).move({'opacity':100});
        }
    },function(){
        if($('.classify-close2',this.parentNode).obj){
            $('.classify-close2',this.parentNode).move({'opacity':0});
        }
    });


    $('.title-list').hover(function(){
        if($('.classify-close',this.parentNode).obj){
            $('.classify-close',this.parentNode).move({'opacity':100});
        }
    },function(){
        if($('.classify-close',this.parentNode).obj){
            $('.classify-close',this.parentNode).move({'opacity':0});
        }
    });
};
The delegate listening event is not written in here because it involves the interaction of other objects.
After this step, at least the code on the desktop has been greatly simplified.
Add data
When you click on Add Classification, a modal pop-up window comes out and the content is input in the modal pop-up window. Add a directory to the corresponding data structure:
The push method, of course.
            var obj={
                "categoryName":value,//Data obtained through input boxes
                "id":Date.parse(new Date()),
                "missions":[],
                "list":[]
            };
This requires an id value.
Data.prototype.setCategoryActiveId=function(id){
    this.category.id=id;
};
When the information in the catalog is clicked, the data-id value is obtained from the corresponding a tag.
Find the data-id value, otherwise set the data-id to null.
Write an addCategory method for a Data object. Add it to the click event.
Data.prototype.addCategory=function(id,category){
    var data=this.data;
    var arr=[];
    if(id==null){
        arr=data;
    }else{
        (function findPositon(_id,_data){
            for(var i=0;i<_data.length;i++){
                console.log(_data[i]["id"])
                if(_data[i]["id"]==_id){
                    arr=_data[i]["list"];
                }

                if(_data[i]["list"]!==[]){
                    findPositon(_id,_data[i]["list"]);
                }
            }
        })(id,this.data);
    }
    console.log(arr);
    arr.push(category);
};
Then in the listening event, write a method to save the data-id value of corresponding a when clicked:
Data.prototype.setCategoryActiveId=function(id){
    this.category.id=id;
};


//. . .
//Monitoring data through event brokers
    $('.lv1').delegate('a','click',function(){
        $('.title-list').removeClass('classify-active');
        $('.title-list2').removeClass('classify-active2');
        // Top-level additive class
        $('h3',getAcient(this,'lv1')).addClass('classify-active');
        if(this.parentNode.className!=="title-list"){
            $(this.parentNode).addClass('classify-active2');
        }
        dataRenderer.setCategoryActiveId(this.getAttribute('data-id'));
    });
Note that the content will be lost after each rendering.
So add classifications and sum them up to do a couple of things:
$('#newCategory .submit').on('click',function(){
            // Get the ID of the activated a tag (which already exists in `category.id'when you click)
            var idName=dataRenderer.category.id;
            //get data
            var value=$('#newCategory .input').obj.value;
            //To construct directory information, mission s and list s are, of course, empty.
            var obj={
                "categoryName":value,
                "id":Date.parse(new Date()),
                "missions":[],
                "list":[]
            };
            //Add it in!
            dataRenderer.addCategory(idName,obj);
            //Perform rendering based on updated data
            dataRenderer.renderTree('#categories');
            // Add basic effects.
            dataRenderer.renderCategoryEfect();
            // Event monitoring, without this step, you can no longer update information
            $('.lv1').delegate('a','click',function(){
                $('.title-list').removeClass('classify-active');
                $('.title-list2').removeClass('classify-active2');
                // Top-level additive class
                $('h3',getAcient(this,'lv1')).addClass('classify-active');
                if(this.parentNode.className!=="title-list"){
                    $(this.parentNode).addClass('classify-active2');
                }

                //Get the data-id value of a tag in hand
                dataRenderer.setCategoryActiveId(this.getAttribute('data-id'));
            });
            // Modal Bullet Window Closed
            document.body.removeChild($('.add').obj);
            $('.add-mask').obj.style.display='none';
        });
    });
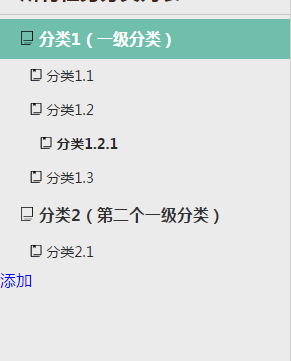
After numerous unsuccessful attempts and transposition thinking, the results of the directory tree come out at last:
It would have been enough just to make a secondary catalogue. Now we finally have a multi-level directory
Deletion of classification
The long and entangled classification module is not over yet, but the idea has become clearer and clearer. Next, click x to delete the classification.
The id value under this category can be obtained by dom lookup (the first element of the parent of the closing button). Then write a method to find the reference location of the id directory and erase it with splice! (cannot be weighted with filter)
The core of the method is a recursion, a loop.
//Delete classifications according to id values:
Data.prototype.deleteCategory=function(id){
    var _this=this;
    var parentDataArr=[];//Describes the array of data to be deleted.
    var childData={};//Describe the object to be deleted
    (function findPosition(_id,_data){
        for(var i=0;i<_data.length;i++){
            //console.log(_data[i]["id"])
            if(_data[i]["id"]==_id){
                parentDataArr=_data;
                childData=_data[i];
            }

            if(_data[i]["list"]!==[]){
                findPosition(_id,_data[i]["list"]);
            }
        }
    })(id,_this.data);

    for(var i=0;i<parentDataArr.length;i++){
        if(parentDataArr[i]==childData){
            parentDataArr.splice(i,1);
        }
    }
};
How to call it?
The main thing is to bind again after rendering - write a function!
function close(){
        $('.classify-close2').on('click',function(){
            // Get the id value
            var dataId=this.parentNode.childNodes[0].getAttribute('data-id');
            // Delete the directory where the id resides from the data
            dataRenderer.deleteCategory(dataId);
            // Rendering
            dataRenderer.renderTree('#categories');
            dataRenderer.renderCategoryEffect();
            //Binding events again
            close();
        });

        $('.classify-close').on('click',function(){
            var dataId=this.parentNode.childNodes[0].getAttribute('data-id');
            dataRenderer.deleteCategory(dataId);

            dataRenderer.renderTree('#categories');
            dataRenderer.renderCategoryEffect();

            close();
        });

        $('.lv1').delegate('a','click',function(){
            $('.title-list').removeClass('classify-active');
            $('.title-list2').removeClass('classify-active2');

            $('h3',getAcient(this,'lv1')).addClass('classify-active');
            if(this.parentNode.className!=="title-list"){
                $(this.parentNode).addClass('classify-active2');
            }

            dataRenderer.setCategoryActiveId(this.getAttribute('data-id'));
        });

    };

    close();
This close function is not an execution function because it needs to be called again when added. Now that the close function already contains the event proxy, the delegate proxy can be deleted after adding the directory.
    var dataRenderer=new Data(json);
    // Rendering directory tree
    dataRenderer.renderTree('#categories');
    dataRenderer.renderCategoryEffect();

    // Delete classification logic
    function close(){
        $('.classify-close2').on('click',function(){
            // Get the id value
            var dataId=this.parentNode.childNodes[0].getAttribute('data-id');
            // Delete the directory where the id resides from the data
            dataRenderer.deleteCategory(dataId);
            // Rendering
            dataRenderer.renderTree('#categories');
            dataRenderer.renderCategoryEffect();
            //Binding events again
            close();
        });

        $('.classify-close').on('click',function(){
            console.log(1);
            var dataId=this.parentNode.childNodes[0].getAttribute('data-id');
            dataRenderer.deleteCategory(dataId);

            dataRenderer.renderTree('#categories');
            dataRenderer.renderCategoryEffect();

            close();
        });
        // Event proxy
        $('.lv1').delegate('a','click',function(){
            $('.title-list').removeClass('classify-active');
            $('.title-list2').removeClass('classify-active2');

            $('h3',getAcient(this,'lv1')).addClass('classify-active');
            if(this.parentNode.className!=="title-list"){
                $(this.parentNode).addClass('classify-active2');
            }

            dataRenderer.setCategoryActiveId(this.getAttribute('data-id'));
        });
    }

    close();

    // Add Classification Logic
    $('#addCategory').on('click',function(){
        var categoryModal=new Modal();
        categoryModal.init(
            {
                type:'newCategory',
                title:'Catalog'
            }
        );
        categoryModal.create();

        // Adding Categories
        $('#newCategory .submit').on('click',function(){
            var idName=dataRenderer.category.id;
            var value=$('#newCategory .input').obj.value;

            var obj={
                "categoryName":value,
                "id":Date.parse(new Date()),
                "missions":[],
                "list":[]
            };

            dataRenderer.addCategory(idName,obj);
            dataRenderer.renderTree('#categories');
            dataRenderer.renderCategoryEffect();
            // Binding Delete Category
            close();
            // Set the current active id to null, which is the details
            dataRenderer.setCategoryActiveId(null);
            // Modal Bullet Window Closed
            categoryModal.exit();
        });
    });
The effect will come out, but there is still a detail problem.
By clicking, the id value of the directory element is automatically obtained, but what happens when I want to create a first-level directory?
Let me click on all categories and set the id value of the Data object to null.
Data.prototype.clearCategoryId=function(){
    $(this.category.id+' *').removeClass('classify-active');
    $(this.category.id+' *').removeClass('classify-active2');
    this.category.id=null;
};
Then it's removed when it's deleted.
Default classification
According to the requirement, the default classification can not be deleted (no deletion button, can not be deleted naturally), can not add sub-classification (add classification error prompt), but the tasks under the flag can add task content. In fact, it is a matter of judgment.
In fact, this is a special classification data structure. Let's set its id value to zero.
For example:
var json =
    [
        {
            "id":0,
            "categoryName":"Default classification (non-operational subclassification)",
            "missions":[
                {
                    "title":"Default Classification Example",
                    "createTime":"1970-1-1",
                    "isCompleted":"true",
                    "content":"Complete the writing of default classification instructions"
                },
                // ...

            ],
            "list":[]
        },
      // ...
The method designed above is enough to render the default classification.
First, in the renderTree method, the id value is judged. If it is `0', the delete button will not be rendered.
Data.prototype.renderTree=function(selector){
    var _this=this;
    var result='';
    (function getTree(_data){
        var obj=_data;
        for(var i=0;i<obj.length;i++){
            var str='';
            if(obj==_this.data){//Use larger fonts for top-level headings
                if(obj[i]["id"]=='0'){//id 0 can only be displayed at the first level of design data
                    str=
                    '<li class="lv1"><h3 class="title-list">'+
                        '<a '+'data-id="'+obj[i]["id"]+'"'+' class="title1" href="javascript:;"><img src="images/dirs.png"> '+obj[i]["categoryName"]+'</a>'+
                    '</h3>';
                }else{
                    str=
                    '<li class="lv1"><h3 class="title-list">'+
                        '<a '+'data-id="'+obj[i]["id"]+'"'+' class="title1" href="javascript:;"><img src="images/dirs.png"> '+obj[i]["categoryName"]+'</a>'+
                        '<a class="classify-close" href="javascript:;"><img src="images/close.png"></a>'+
                    '</h3>';
                }
              // Brief introduction
Next, click on the category add to determine whether the id value is `0', and if yes, render the pop-up box:
// Add Classification Logic
    $('#addCategory').on('click',function(){
        var categoryModal=new Modal();
        var idName=dataRenderer.category.id;

        if(idName=='0'){
            categoryModal.init(
                {
                    type:'tips',
                    tips:'Subcategories cannot be added to the default directory!'
                }
            );
            categoryModal.create();
        }else{
            categoryModal.init(
                {
                    type:'newCategory',
                    title:'Catalog'
                }
            );
            categoryModal.create();
        }
      // Brief introduction
Effect:
Rendering of Taskbar
Data objects expose task content to the middle taskbar
Once you get the Data.category.id, you get the mission of the data set.
This method does not make much sense independently, but is written out for testing.
Data.prototype.findMission=function(id){
    var _this=this;
    var arr=[];

    (function findPosition(_id,_data){
        //console.log(_data);
        for(var i=0;i<_data.length;i++){
            //console.log(_data[i]["id"])
            if(_data[i]["id"]==_id){
                arr=_data[i]["missions"];
            }

            if(_data[i]["list"]!==[]){
                findPosition(_id,_data[i]["list"]);
            }
        }
    })(id,_this.data);
    return arr;
};
Then add the following sentence to the event broker:
console.log(dataRenderer.findMission(this.getAttribute('data-id')));
Every time you click on the title of the catalog, you see the content of the task under the category in console!.
Organize information rendering based on content
Listed in the middle is a task list that displays all unfinished tasks under the currently selected category.
This is a stack of dishes in React.js. But if you don't use a framework, it's a bit more cumbersome.
Normally, top-down rendering is the best.
When there is no idea, it's a good choice to incorporate React's ideas.
Input data, first make an array of date classification. Query whether the date exists in the array. If not, the object generates an ul information and appends it to the array. Otherwise, it appends to the corresponding elements of the array:
Data.prototype.renderMissions=function(selector){
    $(selector).obj.innerHTML='';
    //Get the original array
    var categoryId=this.category.id;
    var _this=this;
    var data=[];
    (function findPosition(_id,_data){
        for(var i=0;i<_data.length;i++){
            //console.log(_data[i]["id"])
            if(_data[i]["id"]==_id){
                data=_data[i]["missions"];
            }

            if(_data[i]["list"]!==[]){
                findPosition(_id,_data[i]["list"]);
            }
        }
    })(categoryId,_this.data);
    this.missions.arr=data;//data is stored in an object to facilitate other method calls.
    //Processing arrays
    var arr=[];
    if(data.length!==0){// The data data you get may be empty arrays, which are not equal to each other, so you use the length to judge.
        for(var i=0;i<data.length;i++){
            // Mr. Cheng li Data: A Data Name, Each Close Button
            var li=document.createElement('li');
            li.innerHTML='<a href="javascript:;">'+data[i]["title"]+'</a><a class="mission-close" href="javascript:;"><img src="images/close.png" alt="delete"></a>';
            // Search component requirements
            li.setAttribute('data-key', 'true');
            li.setAttribute('data-search',"true");

            if(data[i]["isCompleted"]){
                li.className='completed';
            }else{
                li.className='uncompleted';
            }

            var bCheck=true;
            for(var j=0;j<arr.length;j++){
                if(arr[j].getAttribute('data-date')==data[i]["createTime"]){
                    arr[j].appendChild(li);
                    bCheck=false;
                    break;
                }
            }
            // If you can't find it, add a new ul
            if(bCheck){
                var ul=document.createElement('ul');
                ul.className='todo-date';
                ul.innerHTML = '<span>'+data[i]["createTime"]+'</span>';
                ul.setAttribute('data-date', data[i]["createTime"]);
                ul.appendChild(li);
                arr.push(ul);
            }
        }
        // Finally, the ul is added to the specified container through a loop
        arr.forEach(function(item,index){
            $(selector).obj.appendChild(item);
        });

        // After rendering the content, we need to bind the effects here, such as mouse hover effect, deletion logic and so on.


    }else{// Render the prompt if it is an empty array
        $(selector).obj.innerHTML='<p style="margin-top:20px;text-align:center;color:#666; "> There is no task under this category yet! </p>';
    }

};
// ...
// Call in delegate:
dataRenderer.renderMissions('#todo-content');
Effect:
Add or delete tasks
The basic logic of adding tasks is to find the missions array under the classification of the current task (we added it to Date.missions.arr when we rendered the task), and add a task information as follows:
{
  "id":Date.parse(new Date()),
  "createTime":friendlyDate(),
  "title": The name you set,
  "isCompleted":false,
  "content":''
}
Among them, the date should be converted into a friendly format (xxxx-y-z):
function friendlyDate(){
  var cDate=new Date().toLocaleDateString().replace(/\//g,'-');
  return cDate;
}
The problem with adding tasks is that if I don't click on anything, the directory information this.missions.arr is an empty object. If I delete a category
The interaction of deletion tasks is more complex. First, there must be a close button in a similar task. When the mouse hovers over the corresponding li tag, the button is displayed. When you click this button, you can get the id value of the task, then find the task object in this.minssions.arr, delete it, and render it.
At this stage, there is no need to consider the issue of directories.
To sum up, these two methods are as follows:
Data.prototype.deleteMission=function(id){
    var arr=this.missions.arr;
    for(var i=0;i<arr.length;i++){
        if(arr[i]["id"]==id){
            arr.splice(i,1);
        }
    }
    this.renderMissions('#todo-content');
};

Data.prototype.addMission=function(option){
    var arr=this.missions.arr;

    arr.push(option);
    this.renderMissions('#todo-content');
};
So how to call it? Similar to task tree logic, it's even simpler:
$('#addMission').on('click',function(){
        var missionCategory=dataRenderer.missions.arr;
        var missionModal=new Modal();

        if(missionCategory===null){
            missionModal.init({
                type:'tips',
                tips:'You haven't chosen a category yet!'
            });
            missionModal.create();
        }else{
            //console.log(missionId);
            missionModal.init(
                {
                    type:'newMission',
                    title:'task'
                }
            );
            missionModal.create();
            $('#newMission .submit').on('click',function(){
                var value=$('#newMission .input').obj.value;
                var option={
                  "id":Date.parse(new Date()),
                  "createTime":friendlyDate(),
                  "title":value,
                  "isCompleted":false,
                  "content":''
                };
                dataRenderer.addMission(option);
                missionModal.exit();
            });
        }
    });
Classification-Task Area Interactive Logic
Now I have written many methods. Consider how to write more convenient and friendly.
The initial task area should be rendered according to Data.category.id. If no directory has been selected, then the contents of the directory should not be displayed.
That is to say, every time the directory id value changes, the Data.renderMissions method needs to be executed.
Since it's so troublesome, it's better to write the renderMissions method into the content. This is a value consideration in software design. However, considering the principle of "high cohesion", these logic still have to be reflected in the main code, so do not delete.
For example, I need to click on "All Categories" to do four things:
$('#category-all').on('click',function(){
        dataRenderer.clearCategoryId();
        dataRenderer.missions.arr=null;
        dataRenderer.renderMissions('#todo-content');
        search.clear();
    });
The flow of data should be to clean the id, trigger the current classification as null, trigger the rendering task area.
At the same time, the key in the search component should be cleaned up as'all'.
Second, when the search bar is not empty to delete the task classification, what will be the status?
Naturally, you clean up the data in the input box and set the activation style of all buttons to activation.
When the search box has content to delete the task, also clean the input box, all buttons are set to activate the style.
Thirdly, after the task tree is added to the DOM structure of the web page, the effect must be bound.
Data.prototype.renderCategoryEffect=function(){
    // Add hover effect
    $('.mission-close').hover(function(){
        $(this).move({
            'opacity':100
        });
    },function(){
        $(this).move({
            'opacity':0
        });
    });

    $('.mission-close').on('click',function(){
        var missionId=this.parentNode.childNodes[0].getAttribute('data-missionId');
        _this.deleteMission(missionId);
        $('.todo-btn').removeClass('todo-btn-active');
        $('#all').addClass('todo-btn-active');
        $('#search').obj.value='';
        _this.missions.id=null;
    });
    // Activation Style
    $('#todo-content').delegate('a','click',function(){
        if(this.className!=='mission-close'){
            $('#todo-content a').removeClass('missions-active');
            $(this).addClass('missions-active');
        }else{

        }
    });
};
This section can be rendered as an internal method of the task tree as a Data object.
To sum up, that is:
- Each time the task tree is rendered, the content of the search component is initialized.
- Each time the directory id value changes, the Data.renderMissions method needs to be executed.
- After rendering the task tree, you need to bind several function buttons (delete buttons,)
Put an effect:
Task content area
Let's end the complicated task rendering process and go to the task content rendering.
Click on the task title to get the content
The a tag of the current task binds a corresponding id value. Write a getContent method to get the entire task specific object:
Data.prototype.getContent=function(id){
    var arr=this.missions.arr;
    console.log(arr);
    for(var i=0;i<arr.length;i++){
        if(id==arr[i]["id"]){
            return arr[i];
        }
    }
};
Now we're going to get the content under this id task.
// Activation Style
    $('#todo-content').delegate('a','click',function(){
        if(this.className!=='mission-close'){
            $('#todo-content a').removeClass('missions-active');
            $(this).addClass('missions-active');

            // The following is the content display area
            var idName=this.getAttribute('data-missionid');
            var content=dataRenderer.getContent(idName);
            console.log(content.content);
        }
    });
Would you like to write a rendering method?
The answer is don't toss and turn. Use marked.js directly!
// Activation Style
    $('#todo-content').delegate('a','click',function(){
        if(this.className!=='mission-close'){
            $('#todo-content a').removeClass('missions-active');
            $(this).addClass('missions-active');

            // The following is the content display area
            var idName=this.getAttribute('data-missionid');
            var content=dataRenderer.getContent(idName);
            $('.content-substract').obj.innerHTML=content.createTime;
            $('.content-header h3').obj.innerHTML=content.title;
            $('.content-paper').obj.innerHTML=marked(content.content);
        }
    });
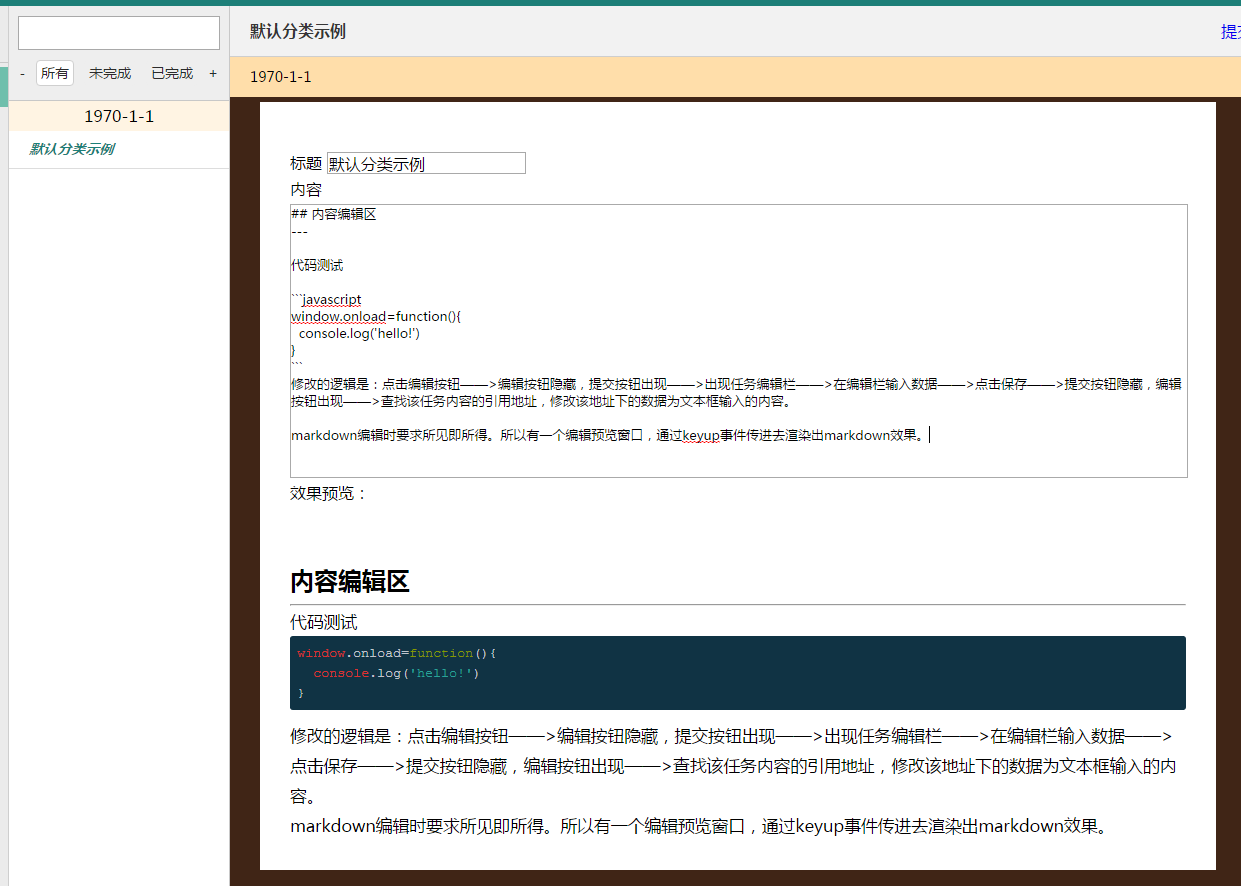
Task Content Editor Bar
Previously, data display has been done, but the function of data modification has not yet been done.
The logic of modification is: click Edit button - > Hide edit button, submit button appears - > appear task edit bar - > input data in edit bar - > Click Save - > submit button hides, Edit button appears - > find the reference address of the task content, modify the data under this address to input text box. Input content.
Markdown requires WYSIWYG when editing. So there's an edit preview window that passes in the keyup event to render the markdown effect.
$('#edit').on('click',function(){
        var idName=dataRenderer.missions.id;
        var content=dataRenderer.getContent(idName);

        var str=
        'Title <input id="content-title" value='+content.title+' type="text"/><br><p style="line-height:30px; font-size:16px">content</p><textarea id="content-edit" rows="16" cols="80">'+content.content+'</textarea>'+
        '<p style="line-height:30px; font-size:16px">Effect Preview:</p><div class="edit-view"></div>';

        $('.content-paper').obj.innerHTML=str;

        this.style.display='none';
        $('#content-submit').obj.style.display='block';
        // Real-time Preview
        $('#content-edit').on('keyup',function(){
            $('.edit-view').obj.innerHTML = marked(this.value);
        });

    });

    $('#content-submit').on('click',function(){
        var idName=dataRenderer.missions.id;
        var content=dataRenderer.getContent(idName);
        var value=$('#content-edit').obj.value;
        var title=$('#content-title').obj.value;


        content.content=value;
        content.title=title;
        $('#edit').obj.style.display='block';
        this.style.display='none';

        $('.content-substract').obj.innerHTML=content.createTime;
        $('.content-header h3').obj.innerHTML=content.title;
        $('.content-paper').obj.innerHTML=marked(content.content);
        $('.missions-active').obj.innerText=title;
    });
Markup completed
Initially created tasks are marked as incomplete. Now to complete a function is to click on the button I have completed, the task becomes completed.
$('#hascompleted').on('click',function(){
        var idName=dataRenderer.missions.id;
        var content=dataRenderer.getContent(idName);

        content.isCompleted=true;
        $($('.missions-active').obj.parentNode).removeClass('uncompleted');
        $($('.missions-active').obj.parentNode).addClass('completed');

    });
Task Content and Classification-Interactive Logic of Task Area
The project spends most of its time thinking about data structures and interactions.
Only when the task area is clicked, the task content appears. When the task tree is re-rendered, the view of the task content area is refreshed to a welcome page.
Edit buttons are not allowed when the welcome page is rendered
Welcome page is actually a simple description document.
For example, when rendering the task content, I have completed the button to render according to isCompleted.
Local storage
Local storage depends on local Storage.
localStorage is an object, but the storage it can accept is a string, so json data must be checked by json beforehand.
At the beginning of the document:
var data=null;
    if(localStorage.djtaoTodo){
        data=eval(localStorage.djtaoTodo);
        console.log('old');
    }else{
        console.log('new');
        localStorage.djtaoTodo=JSON.stringify(json);
        data=json;
    }

var dataRenderer=new Data(data);
...
Then, when the page is refreshed or closed, the data data data of the dataRenderer is stored in the directory of the localStorage.
window.onunload=function(){
    localStorage.djtaoTodo=JSON.stringify(dataRenderer.data);
};
This solves the problem of local storage. So far, the items on the to-do list have been completed.