Article directory
This paper uses the demo of account transfer to demonstrate the declarative transaction control of spring based on xml and annotation respectively. Describes the declarative transaction control configuration steps.
1. Declarative transaction control based on XML
1.1 environment construction
- 1.1 import necessary jar package coordinates
    <dependencies>
        <dependency>
            <groupId>org.springframework</groupId>
            <artifactId>spring-context</artifactId>
            <version>5.0.2.RELEASE</version>
        </dependency>

        <dependency>
            <groupId>org.springframework</groupId>
            <artifactId>spring-jdbc</artifactId>
            <version>5.0.2.RELEASE</version>
        </dependency>

        <dependency>
            <groupId>org.springframework</groupId>
            <artifactId>spring-tx</artifactId>
            <version>5.0.2.RELEASE</version>
        </dependency>

        <dependency>
            <groupId>org.springframework</groupId>
            <artifactId>spring-test</artifactId>
            <version>5.0.2.RELEASE</version>
        </dependency>

        <dependency>
            <groupId>mysql</groupId>
            <artifactId>mysql-connector-java</artifactId>
            <version>5.1.6</version>
        </dependency>

        <dependency>
            <groupId>org.aspectj</groupId>
            <artifactId>aspectjweaver</artifactId>
            <version>1.8.7</version>
        </dependency>

        <dependency>
            <groupId>junit</groupId>
            <artifactId>junit</artifactId>
            <version>4.12</version>
        </dependency>
    </dependencies>
- 1.2 create database test and account entity class account table, including id, name and money3 fields
CREATE databbase test;

USE DATABASE;

CREATE TABLE account (
	id INT NOT NULL AUTO_INCREMENT,
	NAME VARCHAR (20),
	money DOUBLE,
	PRIMARY KEY (id)
) CHARACTER
SET utf8 COLLATE utf8_general_ci;

INSERT INTO `account` VALUES ('1', 'Leaf', '100');
INSERT INTO `account` VALUES ('2', 'Green hand', '100');
public class Account implements Serializable {
    private Integer id;
    private String name;
    private Double money;
    //get, set and toString methods are omitted here
}
- 1.3 write dao interface and implementation class, define query and update methods
public interface IAccountDao {
    //Query account by Id
    Account findAccountById(Integer accountId);

    //Update account
    void updateAccount(Account account);
}
Use in persistence layer implementation class JdbcTemplate Operation
public class AccountDaoImpl implements IAccountDao {
    //Inject JdbcTemplate
    private JdbcTemplate jdbcTemplate;
    public void setJdbcTemplate(JdbcTemplate jdbcTemplate){
        this.jdbcTemplate = jdbcTemplate;
    }

    @Override
    public Account findAccountById(Integer accountId) {
        List<Account> accounts = jdbcTemplate.query("select * from account where id=?",
                new BeanPropertyRowMapper<Account>(Account.class), accountId);
        return accounts.isEmpty()?null:accounts.get(0);
    }

    @Override
    public void updateAccount(Account account) {
        jdbcTemplate.update("update account set money = ? where id = ?",account.getMoney(),account.getId());
    }
}
- 1.4 write business layer interface and implementation class, define transfer method transfer(), three parameters in the method, respectively representing transfer out account, transfer in account and transfer amount.
public interface IAccountService {

    Account findAccountById(Integer accountId);

    void transfer(Integer sourceId,Integer targetId,Double money);
}
public class AccountServiceImpl implements IAccountService{

    private IAccountDao accountDao;
    public void setAccountDao(IAccountDao accountDao){
        this.accountDao = accountDao;
    }

    @Override
    public Account findAccountById(Integer accountId) {
        return accountDao.findAccountById(accountId);
    }

    @Override
    public void transfer(Integer sourceId, Integer targetId, Double money) {
        //Query two accounts according to id
        Account source = accountDao.findAccountById(sourceId);
        Account target = accountDao.findAccountById(targetId);
        if(source!=null&&target!=null){
            //Modify the amount of two accounts
            if(source.getMoney()<money){
                System.out.println("Sorry, your credit is running low");
            }else{
                source.setMoney(source.getMoney() - money);
                target.setMoney(target.getMoney() + money);
                //Update account
                accountDao.updateAccount(source);
                int i = 1/0;//Simulated abnormality
                accountDao.updateAccount(target);
            }
        }else{
            System.out.println("No account found!");
        }
    }
}
- 1.5 create spring configuration file, configure business layer and persistence layer
<?xml version="1.0" encoding="UTF-8"?>
<beans xmlns="http://www.springframework.org/schema/beans"
       xmlns:xsi="http://www.w3.org/2001/XMLSchema-instance"
       xmlns:aop="http://www.springframework.org/schema/aop"
       xmlns:tx="http://www.springframework.org/schema/tx"
       xsi:schemaLocation="
        http://www.springframework.org/schema/beans
        http://www.springframework.org/schema/beans/spring-beans.xsd
        http://www.springframework.org/schema/tx
        http://www.springframework.org/schema/tx/spring-tx.xsd
        http://www.springframework.org/schema/aop
        http://www.springframework.org/schema/aop/spring-aop.xsd">
    <!--To configure service-->
    <bean id="accountService" class="com.wink.service.impl.AccountServiceImpl">
        <property name="accountDao" ref="accountDao"/>
    </bean>
    <!--To configure dao-->
    <bean id="accountDao" class="com.wink.dao.impl.AccountDaoImpl">
        <property name="jdbcTemplate" ref="jdbcTemplate"/>
    </bean>
    <!--To configure JdbcTemplate data source-->
    <bean id="jdbcTemplate" class="org.springframework.jdbc.core.JdbcTemplate">
        <property name="dataSource" ref="dataSource"/>
    </bean>
    <!--Configure data sources-->
    <bean id="dataSource" class="org.springframework.jdbc.datasource.DriverManagerDataSource">
        <property name="driverClassName" value="com.mysql.jdbc.Driver"/>
        <property name="url" value="jdbc:mysql:///test"/>
        <property name="username" value="root"/>
        <property name="password" value="root"/>
    </bean>
</bean>
1.2 transaction control configuration steps
- After the above basic environment is built, you can configure the transaction control. Generally, the transaction control configuration includes these steps:
1) Configure transaction manager; 2) configure transaction notification; 3) configure transaction properties; 4) configure AOP; -
Configure the transaction notification. At this time, we need to import the constraint tx namespace and constraint of the transaction. At the same time, we need to configure the transaction notification using the tx:advice tag of aop
Properties:
transaction manager: provide a transaction manager reference for transaction notifications - Configure the properties of the transaction, which are inside the notification tx:advice tag of the transaction, and have the following properties:
| attribute | describe | Default and description |
|---|---|---|
| isolation | Isolation level used to specify transactions | DEFAULT, indicating the DEFAULT isolation level of the database |
| propagation | Propagation behavior used to specify transactions | REQUIRED, indicating that there must be transactions, adding, deleting and changing options, and support can be selected as the query method |
| read-only | Used to specify whether the transaction is read-only. Only the query method can be set to true | false for reading and writing |
| timeout | Timeout used to specify transactions | -1. It means never timeout. If a value is specified, in seconds |
| rollback-for | Used to specify an exception. When the exception is generated, the transaction rolls back. When other exceptions are generated, the transaction does not roll back | No default value means that any exception will be rolled back |
| no-rollback-for | Used to specify an exception. When the exception is generated, the transaction is not rolled back. When other exceptions are generated, the transaction is rolled back | No default value means that any exception will be rolled back |
The following is the configuration of things in bean.xml:
    <!--Configure transaction manager-->
    <bean id="transactionManager" class="org.springframework.jdbc.datasource.DataSourceTransactionManager">
        <!--Inject data source-->
        <property name="dataSource" ref="dataSource"/>
    </bean>
    <!--Configure notifications for transactions-->
    <tx:advice id="txAdvice" transaction-manager="transactionManager">
    	<!--Configure the properties of a transaction-->
        <tx:attributes>
            <tx:method name="*" read-only="false" propagation="REQUIRED"/>
            <tx:method name="find*" read-only="true" propagation="SUPPORTS"/>
        </tx:attributes>
    </tx:advice>
    <!--To configure AOP-->
    <aop:config>
        <!--To configure AOP Common pointcut expressions in-->
        <aop:pointcut id="pt" expression="execution(* com.wink.service.impl.*.*(..))"/>
        <!--Configure correspondence between transaction notification and pointcut expression-->
        <aop:advisor advice-ref="txAdvice" pointcut-ref="pt"/>
    </aop:config>
Test at last
@RunWith(SpringJUnit4ClassRunner.class)
@ContextConfiguration(locations = "classpath:bean.xml")
public class testTX {
    @Autowired
    private IAccountService as;

    @Test
    public void testTransfer(){
        as.transfer(1,2,100.0);
        System.out.println(as.findAccountById(1));
        System.out.println(as.findAccountById(2));
    }
}
At this time, you will think that the running result will be that the balance of account 1 is 0, and the balance of account 2 is 200. No, because a by zero exception is defined in the transfer method of the business layer implementation class AccountServiceImpl, int i = 1/0; therefore, the balance of each account is unchanged at this time, which means that the control of things is successful
Note out int i = 1/0, run again, transfer succeeded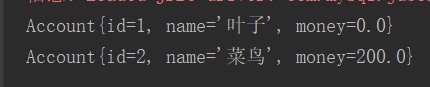
2. Declarative transaction control based on annotation
This is modified according to the above xml based configuration.
- First, use annotations to configure persistence layer and business layer implementation classes, as well as data injection
@Repository("accountDao")
public class AccountDaoImpl implements IAccountDao {
    //Inject JdbcTemplate
    @Autowired
    private JdbcTemplate jdbcTemplate;
}
/*----------------------------------------------------*/

@Service("accountService")
public class AccountServiceImpl implements IAccountService{
    @Autowired
    private IAccountDao accountDao;
}
- Then use @ Transactional annotation to configure things in the business layer
@Service("accountService")
//Configuration of read-only transactions
@Transactional(propagation= Propagation.SUPPORTS,readOnly=true)
public class AccountServiceImpl implements IAccountService{

    //Read write transaction configuration is required
    @Transactional(propagation= Propagation.REQUIRED,readOnly=false)
    public void transfer(Integer sourceId, Integer targetId, Double money) {

	}
}
- Configure the package to be scanned in the configuration file and enable spring's support for annotation transactions
The configuration file also contains the following configuration:
    <!-- To configure spring Packages to scan when creating containers-->
    <context:component-scan base-package="com.wink"/>

    <!--To configure JdbcTemplate data source-->
    <bean id="jdbcTemplate" class="org.springframework.jdbc.core.JdbcTemplate">
        <property name="dataSource" ref="dataSource"/>
    </bean>
    <!--Configure data sources-->
    <bean id="dataSource" class="org.springframework.jdbc.datasource.DriverManagerDataSource">
        <property name="driverClassName" value="com.mysql.jdbc.Driver"/>
        <property name="url" value="jdbc:mysql:///test"/>
        <property name="username" value="root"/>
        <property name="password" value="root"/>
    </bean>

    <!--Configure transaction manager-->
    <bean id="transactionManager" class="org.springframework.jdbc.datasource.DataSourceTransactionManager">
        <!--Inject data source-->
        <property name="dataSource" ref="dataSource"/>
    </bean>

    <!-- open spring Support for annotation transactions-->
    <tx:annotation-driven transaction-manager="transactionManager"/>
3. Support for purely annotated transactions
According to the above annotation based configuration, the configuration in bean.xml will be changed to annotation configuration step by step.
First, create the database configuration file JDBC config.properties
jdbc.driver=com.mysql.jdbc.Driver
jdbc.url=jdbc:mysql:///test
jdbc.username=root
jdbc.password=root
Then create the JdbcConfig class to configure the database
public class JdbcConfig {
    @Value("${jdbc.driver}")
    private String driver;

    @Value("${jdbc.url}")
    private String url;

    @Value("${jdbc.username}")
    private String username;

    @Value("${jdbc.password}")
    private String password;

    //Create a JdbcTemplate
    @Bean(name = "jdbcTemplate")
    public JdbcTemplate createJdbcTemplate(DataSource dataSource){
        return new JdbcTemplate(dataSource);
    }

    //Create data source object
    @Bean(name = "dataSource")
    public DataSource createDataSource(){
        DriverManagerDataSource ds = new DriverManagerDataSource();
        ds.setDriverClassName(driver);
        ds.setUrl(url);
        ds.setUsername(username);
        ds.setPassword(password);
        return ds;
    }
}
Then create a transaction related configuration class to configure the transaction manager
public class TransactionConfig {
    @Bean("transactionManager")
    public PlatformTransactionManager createTransactionManager(DataSource dataSource){
        return new DataSourceTransactionManager(dataSource);
    }
}
Finally, create a spring configuration class to replace bean.xml
@Configuration
@ComponentScan("com.wink")
@Import({JdbcConfig.class,TransactionConfig.class})
@PropertySource("classpath:jdbcConfig.properties")
@EnableTransactionManagement
public class SpringConfiguration {
}
Summary: spring's declarative transaction control based on xml, annotation, and pure annotation has been introduced. The steps of transaction configuration: (1) configure transaction manager; (2) configure transaction notification; (3) configure transaction properties; (4) configure common pointcut expression in AOP; (5) configure the correspondence between transaction notification and pointcut expression

