1. Introduction
Previous Chapter: Custom View Practice Paper (1) - Customize Single View
We implemented a custom single View, so let's look at the custom ViewGroup in this chapter.
2. Customize ViewGroup
Custom ViewGroups can also be divided into two categories, one inheriting the existing ViewGroups in the system (for example, LinearLayout) and the other directly inheriting the ViewGroups. Let's look at them separately.
2.1 Inheritance system already has ViewGroup
This way you can extend the functionality of the existing ViewGroup s on your system, most often by combining Views.Form a new layout by combining different views to achieve the effect of multiple reuses.For example, the navigation bar at the bottom of WeChat is composed of an ImageView above and a TextView below.As follows: 
Here's a simple implementation of this layout, which combines an ImageView with a TextView, and then customizes the properties to modify the icon and title:
2.1.1 Defines the xml layout of the combined View
First, let's define the layout of this View, which is an ImageView above and a TextView below, wrapped outside with LinearLayout.Very simple, named navigation_button.xml:
<?xml version="1.0" encoding="utf-8"?>

<LinearLayout
    xmlns:android="http://schemas.android.com/apk/res/android"
    xmlns:tools="http://schemas.android.com/tools"
    android:layout_width="wrap_content"
    android:layout_height="wrap_content"
    android:gravity="center"
    android:orientation="vertical">

    <ImageView
        android:id="@+id/iv_icon"
        android:layout_width="wrap_content"
        android:layout_height="wrap_content"/>

    <TextView
        android:id="@+id/tv_title"
        android:layout_width="wrap_content"
        android:layout_height="wrap_content"/>

</LinearLayout>
2.1.2 Write Java code to combine View s
Next, we'll write Java code that combines View s, and since the layout above uses LinearLayout to wrap, our classes here also inherit from LinearLayout.
public class NavigationButton extends LinearLayout {//Inherited from LinearLayout

    private ImageView mIconIv;
    private TextView mTitleTv;

    public NavigationButton(Context context) {
        super(context);
        init(context);
    }

    public NavigationButton(Context context, AttributeSet attrs) {
        super(context, attrs);
        init(context);
    }

    public NavigationButton(Context context, AttributeSet attrs, int defStyleAttr) {
        super(context, attrs, defStyleAttr);
        init(context);
    }

    //Initialization
    public void init(Context context) {
        //Load Layout
        LayoutInflater.from(context).inflate(R.layout.navigation_button, this, true);
        mIconIv = findViewById(R.id.iv_icon);
        mTitleTv = findViewById(R.id.tv_title);
    }

    //Provide an interface to modify the title
    public void setText(String text) {
        mTitleTv.setText(mText);
    }
}
Overrides the three construction methods and loads the layout file in them, providing an interface for setting the name of the title.
2.1.3 Custom Properties
For ease of use, we usually customize attributes, which define two attributes: icon and title.Define attrs_navigation_button.xml in the values directory:
<?xml version="1.0" encoding="utf-8"?>
<resources>
    <declare-styleable name="NavigationButton">
        <attr name="icon" format="reference"/>
        <attr name="text" format="string"/>
    </declare-styleable>
</resources>
2.1.4 Resolving custom attributes
Modify NavigationButton above:
public class NavigationButton extends LinearLayout {

    private ImageView mIconIv;
    private TextView mTitleTv;
    private Drawable mIcon;
    private CharSequence mText;

    public NavigationButton(Context context) {
        super(context);
        init(context);
    }

    public NavigationButton(Context context, AttributeSet attrs) {
        super(context, attrs);

        //Resolve Custom Properties
        TypedArray typedArray = context.obtainStyledAttributes(attrs, R.styleable.NavigationButton);
        mIcon = typedArray.getDrawable(R.styleable.NavigationButton_icon);
        mText = typedArray.getText(R.styleable.NavigationButton_text);
        //Recycle resources as soon as they are available
        typedArray.recycle();

        init(context);

    }

    public NavigationButton(Context context, AttributeSet attrs, int defStyleAttr) {
        super(context, attrs, defStyleAttr);
        init(context);
    }

    public void init(Context context) {
        LayoutInflater.from(context).inflate(R.layout.navigation_button, this, true);
        mIconIv = findViewById(R.id.iv_icon);
        mTitleTv = findViewById(R.id.tv_title);

        //Set related properties
        mIconIv.setImageDrawable(mIcon);
        mTitleTv.setText(mText);
    }

    public void setText(String text) {
        mTitleTv.setText(mText);
    }
}
2.1.5 Use Composite View
<?xml version="1.0" encoding="utf-8"?>
<!--Must be added schemas Claim to use custom attributes-->
<!--Add is xmlns:app="http://schemas.android.com/apk/res-auto"-->
<LinearLayout
    xmlns:android="http://schemas.android.com/apk/res/android"
    xmlns:app="http://schemas.android.com/apk/res-auto"
    xmlns:tools="http://schemas.android.com/tools"
    android:layout_width="match_parent"
    android:layout_height="match_parent"
    android:background="#fff"
    android:gravity="bottom"
    android:orientation="horizontal">

    <com.april.view.NavigationButton
        android:layout_width="0dp"
        android:layout_height="wrap_content"
        android:layout_weight="1"
        android:gravity="center"
        app:icon="@drawable/chats_green"
        app:text="WeChat">
    </com.april.view.NavigationButton>

    <com.april.view.NavigationButton
        android:layout_width="0dp"
        android:layout_height="wrap_content"
        android:layout_weight="1"
        android:gravity="center"
        app:icon="@drawable/contacts"
        app:text="Mail list">
    </com.april.view.NavigationButton>

    <com.april.view.NavigationButton
        android:layout_width="0dp"
        android:layout_height="wrap_content"
        android:layout_weight="1"
        android:gravity="center"
        app:icon="@drawable/discover"
        app:text="find">
    </com.april.view.NavigationButton>

    <com.april.view.NavigationButton
        android:layout_width="0dp"
        android:layout_height="wrap_content"
        android:layout_weight="1"
        android:gravity="center"
        app:icon="@drawable/about_me"
        app:text="I">
    </com.april.view.NavigationButton>

</LinearLayout>
The results are: 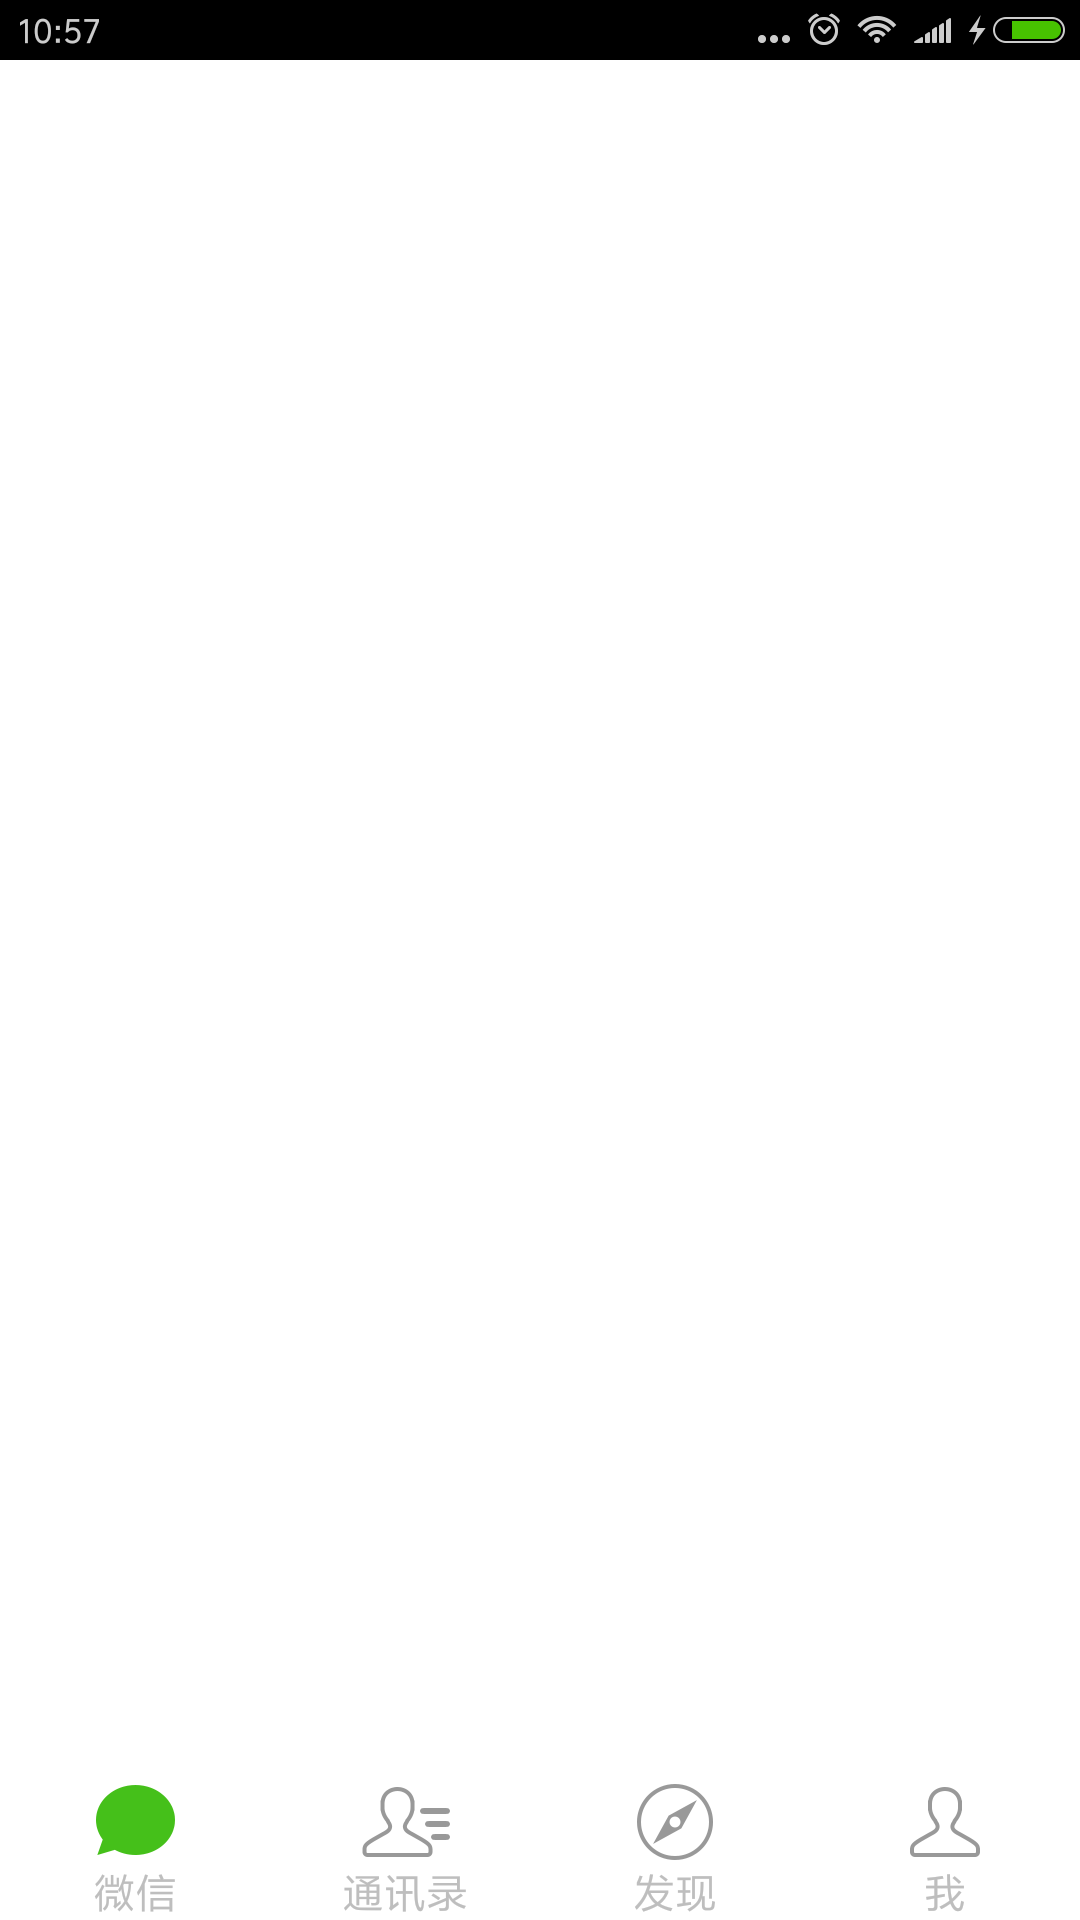
2.1.7 Summary
Combining Views is very simple, simply inheriting an existing ViewGroup from the system, assembling the layout and adding some custom attributes can be used, generally without the need to process measurements, layouts, drawings, and so on.
By combining views to achieve new effects, you can make this View reusable and easier to maintain and modify.
Of course, the above UI has a better way to do it, just for example.
2.2 Inherit ViewGroup class
Inheriting the ViewGroup class can be used to redefine a layout, but this is a complex way to implement the measurement and layout process of the ViewGroup and to handle the measurement and layout of child elements.Composite Views can also be implemented in this way, but the details that need to be addressed are more complex.
We are here to implement a streaming layout. What is a streaming layout?Streaming layout means that the views added to this container are arranged from left to right, and if the width of the current row is not enough to fit into the next View, the View is automatically placed on the next row.As shown in the following figure: 
2.2.1 Demand Analysis
Let's start with a simple analysis of this need:
- Streaming layouts require each subview to be laid out, that is, left-to-right, and if the current row is not wide enough, start with the next row.
- Streaming layouts require measuring and calculating their own width and height.
- Streaming layouts require details such as margin and padding.
- Streaming layouts need to provide some custom attributes for users to use.For example, you can set line spacing and horizontal spacing, and so on.
2.2.2 Implementation Steps
Based on the above requirements analysis, the implementation steps are as follows:
- Custom properties.
- Resolve custom attributes and provide some interfaces for setting attributes.
- Override onMeasure() to implement its own measurement process.
- Rewrite onLayout() to lay out the position of the child View.
- Use a custom View.
2.2.3 Custom Properties
Two properties are defined here: row spacing, horizontal spacing, and attrs_flow_layout.xml in the values directory:
<?xml version="1.0" encoding="utf-8"?>
<resources>
    <declare-styleable name="FlowLayout">
        <!--Horizontal spacing-->
        <attr name="horizontal_spacing" format="dimension|reference"/>
        <!--Line spacing-->
        <attr name="vertical_spacing" format="dimension|reference"/>
    </declare-styleable>
</resources>
2.2.4 Resolving custom attributes
Resolve custom attributes and provide some interfaces for setting attributes to the outside world:
public class FlowLayout extends ViewGroup {//Inherit ViewGroup

    private int mHorizontalSpacing;//Horizontal spacing
    private int mVerticalSpacing;//Line spacing
    //Default spacing
    public static final int DEFAULT_Horizontal_SPACING = 10;
    public static final int DEFAULT_Vertical_SPACING = 10;

    public FlowLayout(Context context) {
        super(context);
    }

    public FlowLayout(Context context, AttributeSet attrs) {
        super(context, attrs);

        //Resolve Custom Properties
        TypedArray typedArray = context.obtainStyledAttributes(attrs, R.styleable.FlowLayout);
        mHorizontalSpacing = typedArray.getDimensionPixelOffset(R.styleable.FlowLayout_horizontal_spacing, DEFAULT_Horizontal_SPACING);
        mVerticalSpacing = typedArray.getDimensionPixelOffset(R.styleable.FlowLayout_vertical_spacing, DEFAULT_Vertical_SPACING);
        //Recycle resources as soon as they are available
        typedArray.recycle();

    }

    public FlowLayout(Context context, AttributeSet attrs, int defStyleAttr) {
        super(context, attrs, defStyleAttr);
    }

    //Set Horizontal Spacing
    public void setHorizontalSpacing(int pixelSize) {
        mHorizontalSpacing = pixelSize;
        requestLayout();
    }

    //Set Line Spacing
    public void setVerticalSpacing(int pixelSize) {
        mVerticalSpacing = pixelSize;
        requestLayout();
    }
}
2.2.5 Override onMeasure()
See the code comment below for a more detailed analysis, and it's important to note that we support margin here, so it's complicated.
    private List<Integer> mHeightLists = new ArrayList<>();//Save maximum height of each row

    @Override
    public ViewGroup.LayoutParams generateLayoutParams(AttributeSet attrs) {
        //Because we need to support margin, we need to override the generateLayoutParams method and create the MarginLayoutParams object
        return new MarginLayoutParams(getContext(), attrs);
    }

    @Override
    protected void onMeasure(int widthMeasureSpec, int heightMeasureSpec) {
        super.onMeasure(widthMeasureSpec, heightMeasureSpec);

        // Obtaining measurement modes and sizes
        int widthSize = MeasureSpec.getSize(widthMeasureSpec);
        int heightSize = MeasureSpec.getSize(heightMeasureSpec);
        int widthMode = MeasureSpec.getMode(widthMeasureSpec);
        int heightMode = MeasureSpec.getMode(heightMeasureSpec);

        // In the case of warp_content, record width and height
        int warpWidth = 0;
        int warpHeight = 0;

        int widthUsed = getPaddingLeft() + getPaddingRight();//Width of Padding
        int lineWidth = widthUsed;//Record the width of the current line
        int lineHeight = 0;//Record the maximum height of a row

        int childCount = getChildCount();
        //Traverse sub View s for measurements
        for (int i = 0; i < childCount; i++) {

            View child = getChildAt(i);

            //Sub View is GONE skipped
            if (child.getVisibility() == View.GONE) {
                continue;
            }
            //Get a layout parameter that supports margin
            MarginLayoutParams lp = (MarginLayoutParams) child.getLayoutParams();

            //Measure the width and height of each child, and the maximum width and height available for each child is widthSize-padding-margin
            measureChildWithMargins(child, widthMeasureSpec, 0, heightMeasureSpec, 0);

            // The actual width and height occupied by the child
            int childWidth = child.getMeasuredWidth() + lp.leftMargin + lp.rightMargin;
            int childHeight = child.getMeasuredHeight() + lp.topMargin + lp.bottomMargin;

            //Determine if this line can still fit this child
            if (lineWidth + childWidth <= widthSize) {
                //If you can, add up the width of the line and record the maximum height of the line
                lineWidth += childWidth + mHorizontalSpacing;
                lineHeight = Math.max(lineHeight, childHeight);
            } else {//If the line cannot be loaded and needs to be wrapped, record the width, height, initial width, initial height of the next line

                //Compare the current line width (the current line width minus the horizontal spacing at the end) to the next line width, maximizing
                warpWidth = Math.max(lineWidth - mHorizontalSpacing, widthUsed + childWidth);
                //Wrap lines to record the initial width of new lines
                lineWidth = widthUsed + childWidth + mHorizontalSpacing;

                //Accumulate current height
                warpHeight += lineHeight + mVerticalSpacing;
                //Save the maximum height of each row, which is used when onLayout
                mHeightLists.add(lineHeight);
                //Record the initial height of the next row and set it to the current row
                lineHeight = childHeight;
            }

            // If it is the last child, compare the maximum width of the current record with the current lineWidth
            if (i == childCount - 1) {
                warpWidth = Math.max(warpWidth, lineWidth - mHorizontalSpacing);
                //Accumulated Height
                warpHeight += lineHeight;
            }
        }
        //Save the corresponding measurement width according to the measurement mode
        //That is, if MeasureSpec.EXACTLY uses the width and height passed in directly from the parent ViewGroup
        //Otherwise, set the width and height calculated for yourself when warp_content
        setMeasuredDimension((widthMode == MeasureSpec.EXACTLY) ? widthSize : warpWidth,
                (heightMode == MeasureSpec.EXACTLY) ? heightSize : warpHeight);
    }
2.2.6 Override onLayout()
    @Override
    protected void onLayout(boolean changed, int l, int t, int r, int b) {
        int width = getWidth();
        int line = 0;//Current line number
        int widthUsed = getPaddingLeft() + getPaddingRight();//Width of Padding
        int lineWidth = widthUsed;//Record the width of the current line
        int left = getPaddingLeft();
        int top = getPaddingTop();

        int childCount = getChildCount();
        //Traverse all sub View s
        for (int i = 0; i < childCount; i++) {
            View child = getChildAt(i);

            //child is GONE skipped
            if (child.getVisibility() == View.GONE) {
                continue;
            }

            //Get a layout parameter that supports margin
            MarginLayoutParams lp = (MarginLayoutParams) child.getLayoutParams();
            //Get the measured width of the child
            int childWidth = child.getMeasuredWidth();
//            int childHeight = child.getMeasuredHeight();

            //To determine if this line can still fit the child, add the margin value
            if (lineWidth + childWidth + lp.leftMargin + lp.rightMargin <= width) {
                //Add up the width of the line if you can fit it
                lineWidth += childWidth + mHorizontalSpacing;
            } else {//If it cannot be loaded and needs to be wrapped, record the width of the new line and set the new left, top position
                //Reset left
                left = getPaddingLeft();
                //top accumulates the maximum height and spacing of the current row
                top += mHeightLists.get(line++) + mVerticalSpacing;
                //Start a new line, record width
                lineWidth = widthUsed + childWidth + mHorizontalSpacing;
            }
            //Calculate the left,top,right,bottom of a child
            int lc = left + lp.leftMargin;
            int tc = top + lp.topMargin;
            int rc = lc + child.getMeasuredWidth();
            int bc = tc + child.getMeasuredHeight();
            //Calculate the location of the child
            child.layout(lc, tc, rc, bc);
            //left moves one horizontal space to the right
            left = rc + mHorizontalSpacing;
        }
    }
2.2.7 Use Custom View
<LinearLayout
    xmlns:android="http://schemas.android.com/apk/res/android"
    xmlns:app="http://schemas.android.com/apk/res-auto"
    android:layout_width="match_parent"
    android:layout_height="match_parent"
    android:background="#fff">

    <com.april.view.FlowLayout
        android:layout_width="250dp"
        android:layout_height="wrap_content"
        android:background="#0ff"
        android:padding="5dp"
        app:horizontal_spacing="10dp"
        app:vertical_spacing="20dp">

        <TextView
            android:layout_width="wrap_content"
            android:layout_height="wrap_content"
            android:background="@drawable/shape_bg"
            android:text="Android"/>

        <TextView
            android:layout_width="wrap_content"
            android:layout_height="wrap_content"
            android:background="@drawable/shape_bg"
            android:text="Source Code Analysis"/>

        <TextView
            android:layout_width="wrap_content"
            android:layout_height="wrap_content"
            android:background="@drawable/shape_bg"
            android:text="custom View"/>

        <TextView
            android:layout_width="wrap_content"
            android:layout_height="wrap_content"
            android:background="@drawable/shape_bg"
            android:text="Inheritance system already exists View"/>

        <TextView
            android:layout_width="wrap_content"
            android:layout_height="wrap_content"
            android:background="@drawable/shape_bg"
            android:text="inherit View class"/>

        <TextView
            android:layout_width="wrap_content"
            android:layout_height="wrap_content"
            android:background="@drawable/shape_bg"
            android:text="inherit ViewGroup class"/>

        <TextView
            android:layout_width="wrap_content"
            android:layout_height="wrap_content"
            android:background="@drawable/shape_bg"
            android:text="Inheritance system already exists ViewGroup"/>

        <TextView
            android:layout_width="wrap_content"
            android:layout_height="wrap_content"
            android:background="@drawable/shape_bg"
            android:text="Custom Properties"/>

    </com.april.view.FlowLayout>
</LinearLayout>
Run the program as follows: 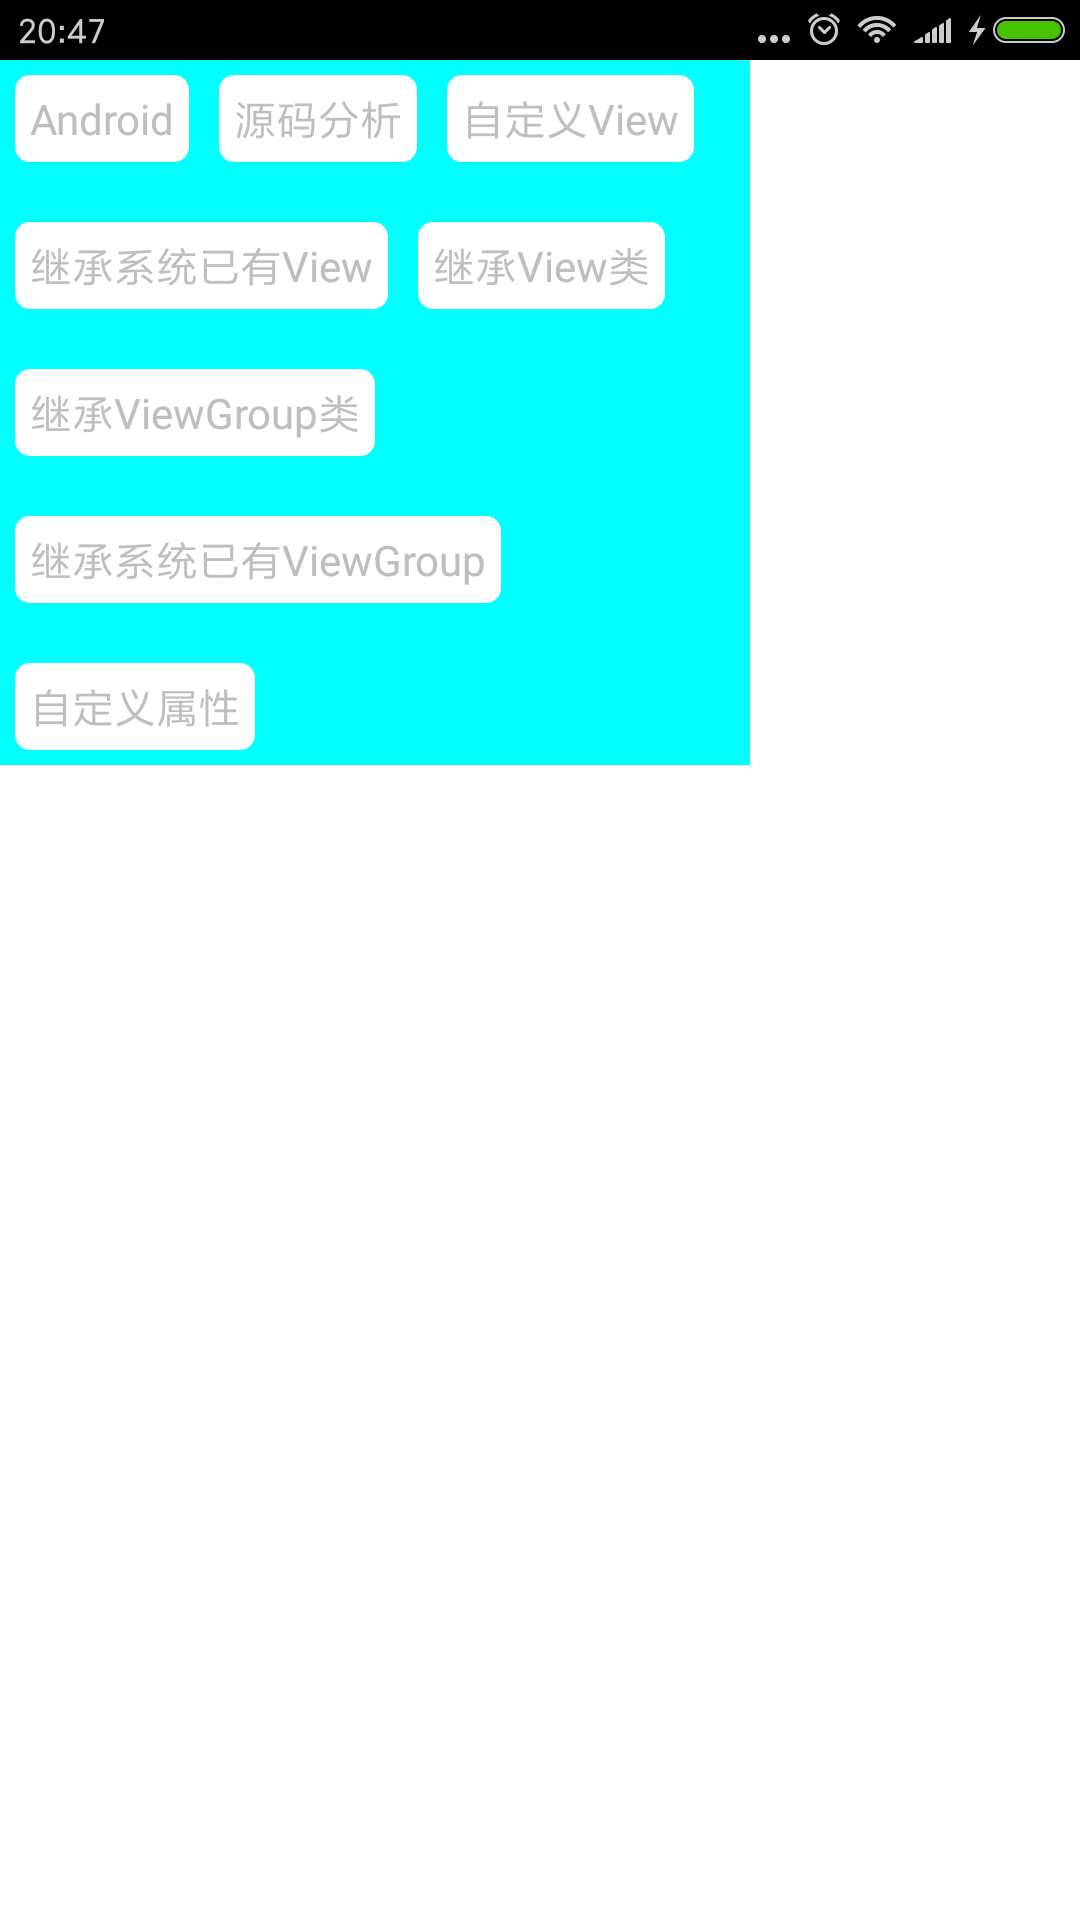
2.2.8 Summary
Inherit the ViewGroup class to implement a completely new layout, typically rewriting onMeasure() and onLayout(), and providing custom properties.However, onDraw() generally does not need to be rewritten unless some splitting line or other requirements are met.
Overall, inheriting the ViewGroup class is the most complex, and writing a good custom ViewGroup requires a lot of detail, such as margin, padding, and so on.
In addition, the FlowLayout above is actually not good enough, there are many details not yet implemented, such as support for gravity, and there may be some bug s, but as an example it is sufficient to inherit the ViewGroup class as a custom View.
If you need to use streaming layouts, the actual google also has a control for us, so you can take a look at Flexbox Layout if you're interested.