On the contrary, Android doesn't seem to have a website similar to vulnhub, with a large number of target machines practicing penetration testing. At present, I have found that XCTF has reverse and mobile problems, and OWASP MSTG CTF project. Start with MSTG!
github of CTF project click here . However, due to the large size of the project, github often fails to download. For example, I downloaded it all morning. The download speed of 50m bandwidth is only 20kb/s, which is extremely touching. But I have uploaded it to CSDN. If you need me, you can Direct download.
Function
Install UnCrackable-Level1.apk to an Android device.
adb install UnCrackable-Level1.apk
Open to run, there is root detection. Since my emulator is already root, click OK, and the program exits by itself.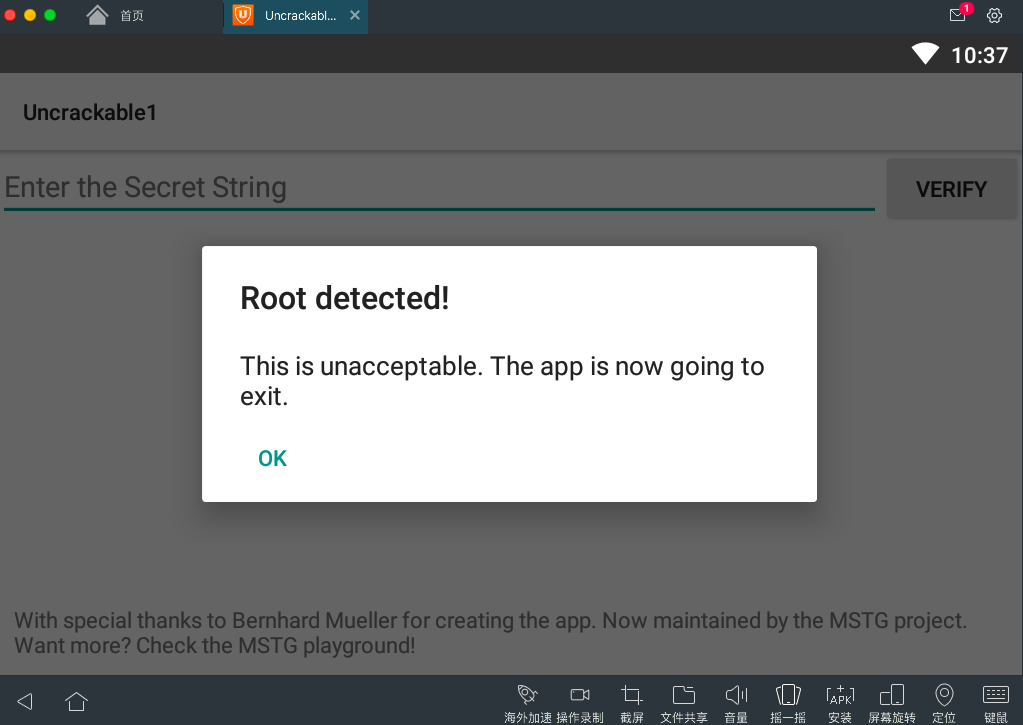
There are two ways to solve this problem:
- Turn off root
- Bypass root detection
The first method is obviously not in line with my temperament, so start detection bypass.
Decompile static analysis
I use jeb to decompile. After compiling, I use smali assembly code. Press tab to convert smali assembly into Java pseudo code.
. uncrackable1.MainActivity code section
package sg.vantagepoint.uncrackable1;

import android.app.Activity;
import android.app.AlertDialog$Builder;
import android.app.AlertDialog;
import android.content.Context;
import android.content.DialogInterface$OnClickListener;
import android.content.DialogInterface;
import android.os.Bundle;
import android.view.View;
import sg.vantagepoint.a.b;
import sg.vantagepoint.a.c;

public class MainActivity extends Activity {
    public MainActivity() {
        super();
    }

    private void a(String arg4) {
        AlertDialog v0 = new AlertDialog$Builder(((Context)this)).create();
        v0.setTitle(((CharSequence)arg4));
        v0.setMessage("This is unacceptable. The app is now going to exit.");
        v0.setButton(-3, "OK", new DialogInterface$OnClickListener() {
            public void onClick(DialogInterface arg1, int arg2) {
                System.exit(0);
            }
        });
        v0.setCancelable(false);
        v0.show();
    }

    protected void onCreate(Bundle arg2) {
        if((c.a()) || (c.b()) || (c.c())) {
            this.a("Root detected!");
        }

        if(b.a(this.getApplicationContext())) {
            this.a("App is debuggable!");
        }

        super.onCreate(arg2);
        this.setContentView(0x7F030000);
    }

    public void verify(View arg4) {
        String v4 = this.findViewById(0x7F020001).getText().toString();
        AlertDialog v0 = new AlertDialog$Builder(((Context)this)).create();
        if(a.a(v4)) {
            v0.setTitle("Success!");
            v4 = "This is the correct secret.";
        }
        else {
            v0.setTitle("Nope...");
            v4 = "That\'s not it. Try again.";
        }

        v0.setMessage(((CharSequence)v4));
        v0.setButton(-3, "OK", new DialogInterface$OnClickListener() {
            public void onClick(DialogInterface arg1, int arg2) {
                arg1.dismiss();
            }
        });
        v0.show();
    }
}
The program first runs the onCreate function, and analyzes the onCreate section by section to see what it has done.
First, if one of the A, B, and c methods in the c class meets one of the conditions, it will enter the a method of the MainActivity class and pass in the "Root detected!" string.
This is the situation when the program is opened at the beginning, so let's first look at what the a, b, c methods and MainActivity.a methods in class c have done respectively.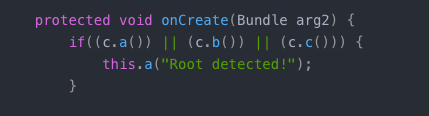
The code of class a is as follows:
package sg.vantagepoint.a;

import android.os.Build;
import java.io.File;

public class c {
    public static boolean a() {
        String[] v0 = System.getenv("PATH").split(":");
        int v1 = v0.length;
        int v3;
        for(v3 = 0; v3 < v1; ++v3) {
            if(new File(v0[v3], "su").exists()) {
                return 1;
            }
        }

        return 0;
    }

    public static boolean b() {
        String v0 = Build.TAGS;
        if(v0 != null && (v0.contains("test-keys"))) {
            return 1;
        }

        return 0;
    }

    public static boolean c() {
        String[] v0 = new String[]{"/system/app/Superuser.apk", "/system/xbin/daemonsu", "/system/etc/init.d/99SuperSUDaemon", "/system/bin/.ext/.su", "/system/etc/.has_su_daemon", "/system/etc/.installed_su_daemon", "/dev/com.koushikdutta.superuser.daemon/"};
        int v1 = v0.length;
        int v3;
        for(v3 = 0; v3 < v1; ++v3) {
            if(new File(v0[v3]).exists()) {
                return 1;
            }
        }

        return 0;
    }
}
- Method a checks whether su exists in the path. If so, it is determined that the device has been root
- Method b: check whether there are test keys in Build.TAGS. If there are, judge whether the device has been root
- c method is to detect a series of files. If one of them is found, it will determine that the device has been root.
Obviously, class c uses the three ways to detect root.
MainActivity.a method code
private void a(String arg4) {
        AlertDialog v0 = new AlertDialog$Builder(((Context)this)).create();
        v0.setTitle(((CharSequence)arg4));
        v0.setMessage("This is unacceptable. The app is now going to exit.");
        v0.setButton(-3, "OK", new DialogInterface$OnClickListener() {
            public void onClick(DialogInterface arg1, int arg2) {
                System.exit(0);
            }
        });
        v0.setCancelable(false);
        v0.show();
    }
When this method is called, the function will pop up a dialog box and display the content of the incoming string. If you click OK, the program will exit, System.exit(0).
Bypass root detection
Back in onCreate, after static analysis, there are two ways to bypass root detection.
- Use the dynamic debugging method to check which of the three methods a, b and c in class c returns 1. Select hook to modify the return value or modify the smali code to repackage to bypass root detection.
- Modify MainActivity.a function to not execute System.exit(0), but just return void. The smali code needs to be modified and repackaged.
At present, the second method is chosen because it is the simplest one. You only need to comment out the smali assembly code corresponding to System.exit(0). However, for learning purposes, I will attach the first method in the following articles.
Use apktool to decompile apk.
apktool d UnCrackable-Level1.apk -o uncrackable_dissas

smali code is located in
uncrackable_dissas/smali/sg/vantagepoint/
You can see that it is the same directory as jeb decompiler.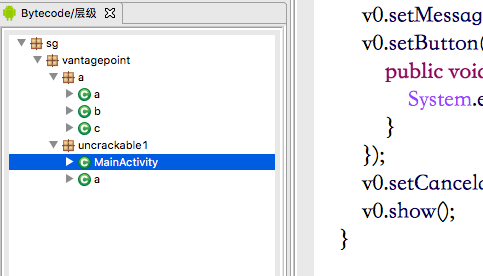
Next, I want to find the injection point of smali code. I find that this step is actually very skillful and useful. This project is relatively small, so it's faster to find. If it is a relatively large project, it is not so easy to find the injection point without certain skills.
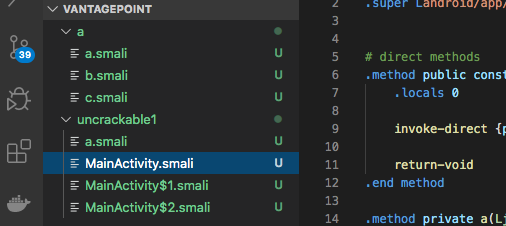
First of all, we need to determine which file the SmalI code to modify is in, mainly for Java files with anonymous inner classes. The MainActivity method is decompiled to MainActivity.smali, MainActivity $1.smali, MainActivity $2.smali. Here MainActivity $1.smali and MainActivity $2.smali are all SmalI code files of anonymous internal classes. Because they have no names, they can only be distinguished by $XXX after compilation.
Then use the smali file opened by vscode and the Java code opened by jeb for context comparison to find the injection point. ps: vscode is recommended to open smali and download the smali plug-in for perfect editing.
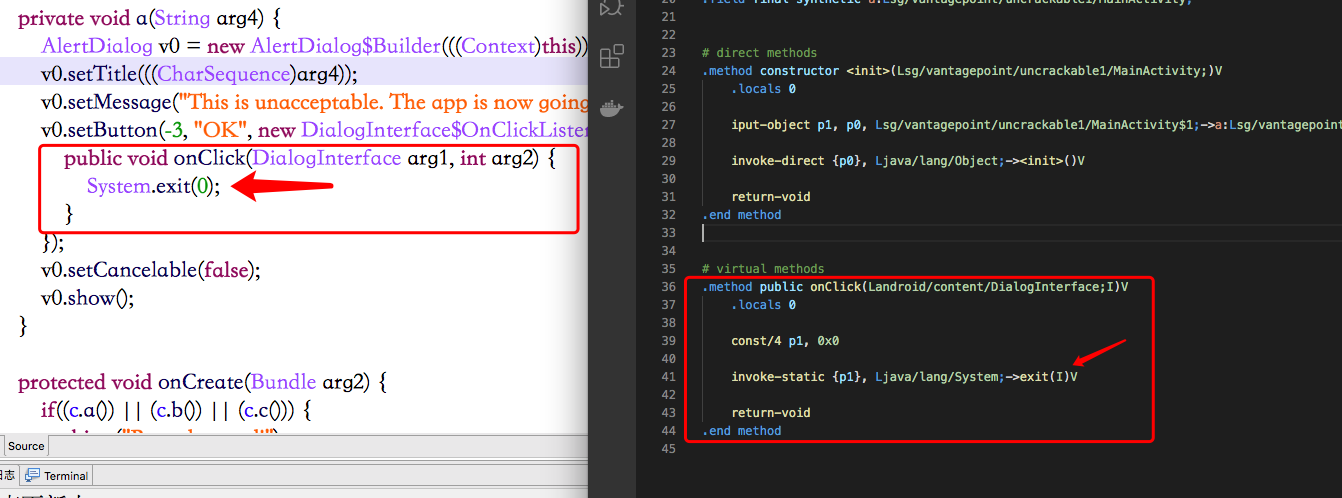
Comment line 41. After calling the MainActivity.a method, click OK and it will not exit the program. You can bypass it.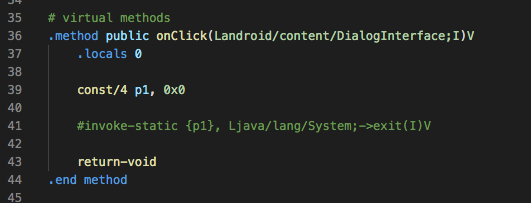
REPACK
apktool b uncrackable_dissas -o modified_uncracjable.apk
Then sign it, and you can install and run it on android devices.
I wrote about the signature One click signature tool , drag directly into the apk location to automatically complete the signature.
Click ok, the program did not exit, root detection successfully bypassed!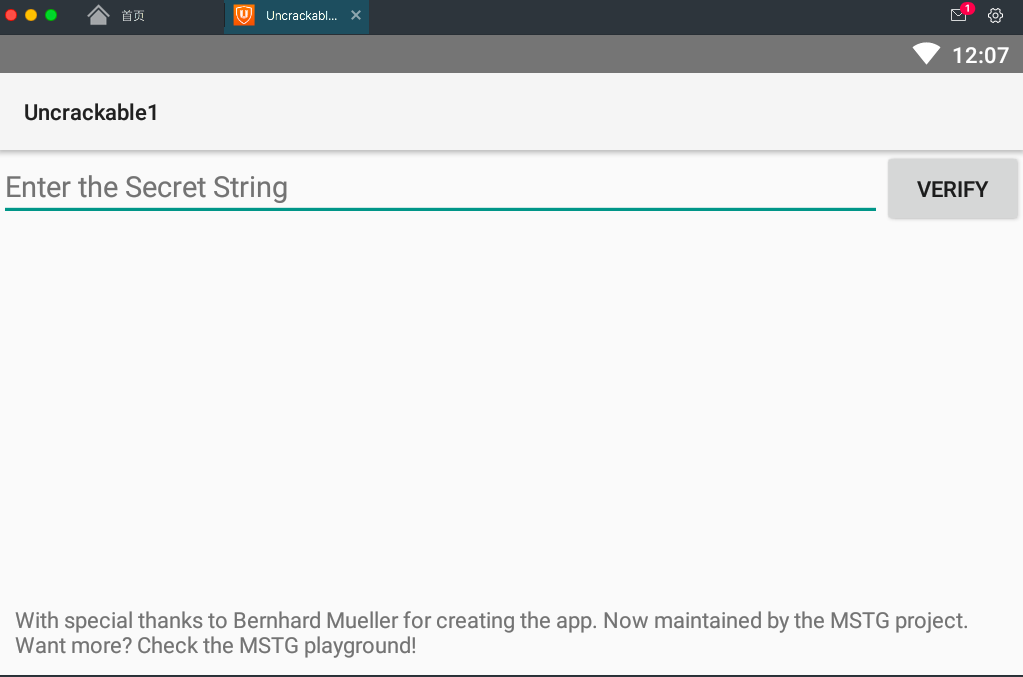
Get the FLAG!
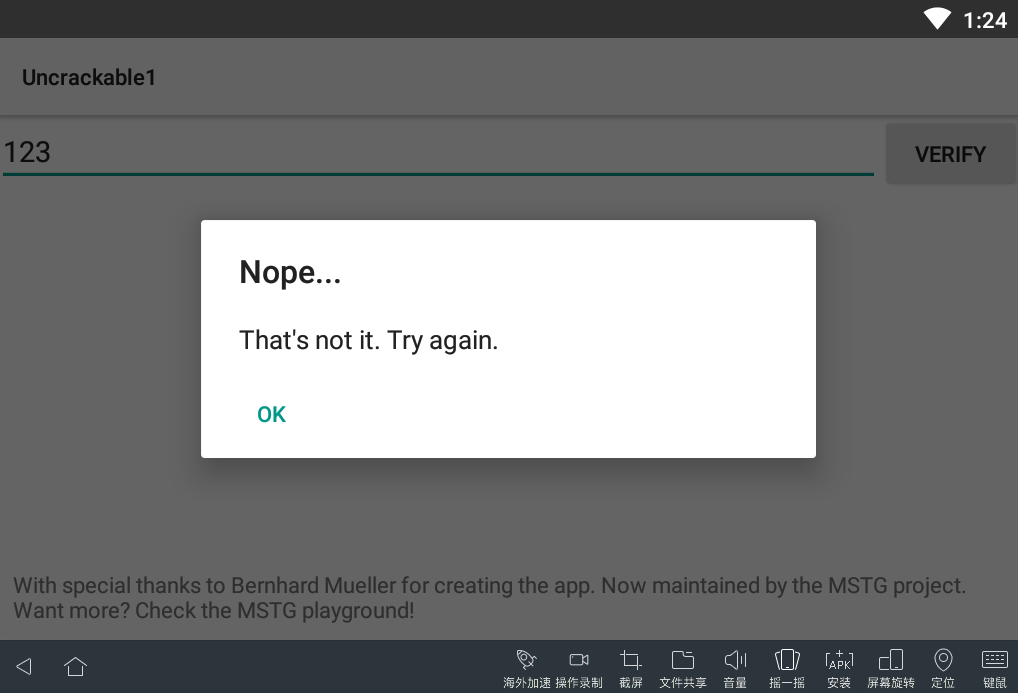
Next, find the key function in jeb, verify function is suspicious, and there is a hint of success.
The key is inside a.a(), let its return value be true.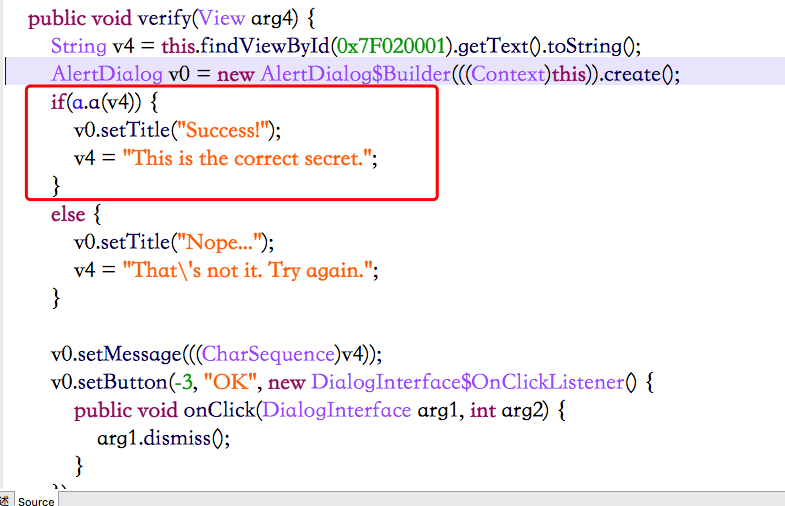
Go to the a.a function.
package sg.vantagepoint.uncrackable1;

import android.util.Base64;
import android.util.Log;

public class a {
    public static boolean a(String arg5) {
        byte[] v0_2;
        String v0 = "8d127684cbc37c17616d806cf50473cc";
        byte[] v1 = Base64.decode("5UJiFctbmgbDoLXmpL12mkno8HT4Lv8dlat8FxR2GOc=", 0);
        byte[] v2 = new byte[0];
        try {
            v0_2 = sg.vantagepoint.a.a.a(a.b(v0), v1);
        }
        catch(Exception v0_1) {
            Log.d("CodeCheck", "AES error:" + v0_1.getMessage());
            v0_2 = v2;
        }

        return arg5.equals(new String(v0_2));
    }

    public static byte[] b(String arg7) {
        int v0 = arg7.length();
        byte[] v1 = new byte[v0 / 2];
        int v2;
        for(v2 = 0; v2 < v0; v2 += 2) {
            v1[v2 / 2] = ((byte)((Character.digit(arg7.charAt(v2), 16) << 4) + Character.digit(arg7.charAt(v2 + 1), 16)));
        }

        return v1;
    }
}
The internal implementation of the function is relatively simple, mainly composed of algorithms.
v1 is the string 5ujifctbmgdolxmpl12mkno8ht4lv8dlat8fxr2goc = the byte array after base64 decryption.
v0 is also a constant.
The key point here is v0_2, which is the data generated by the most intensive encryption place, and it is finally compared with the incoming arg5, so I will focus on the function generating v0_2: sg.vantagepoint.a.a.a()
Its functions are as follows:
package sg.vantagepoint.a;

import java.security.Key;
import javax.crypto.Cipher;
import javax.crypto.spec.SecretKeySpec;

public class a {
    public static byte[] a(byte[] arg2, byte[] arg3) {
        SecretKeySpec v0 = new SecretKeySpec(arg2, "AES/ECB/PKCS7Padding");
        Cipher v2 = Cipher.getInstance("AES");
        v2.init(2, ((Key)v0));
        return v2.doFinal(arg3);
    }
}
The method here has two parameters, arg2 and arg3.
First, arg2 is used to randomly generate a key key, and then the key is used to carry out AES symmetric encryption on arg3. The external parameters are compared with it.
Because the incoming v0 and v1 are constants, we need to hook this method to print out the fixed encrypted return value, which is the idea of crack.
Here we use frida tool to decrypt. The introduction and documentation of frida are in Here.
Paste script:
Java.perform(function(){
    //hook the target class
    var aes = Java.use("sg.vantagepoint.a.a");

    //hook the function inside the class
    aes.a.implementation = function(var0, var1){
        //call itself
        var decrypt = this.a(var0,var1);
        var flag = "";

        for (var i =0; i < decrypt.length; i++){
            flag += String.fromCharCode(decrypt[i]);
        }
        console.log(flag);
        return decrypt;
    }
});
Find the name of the apk running,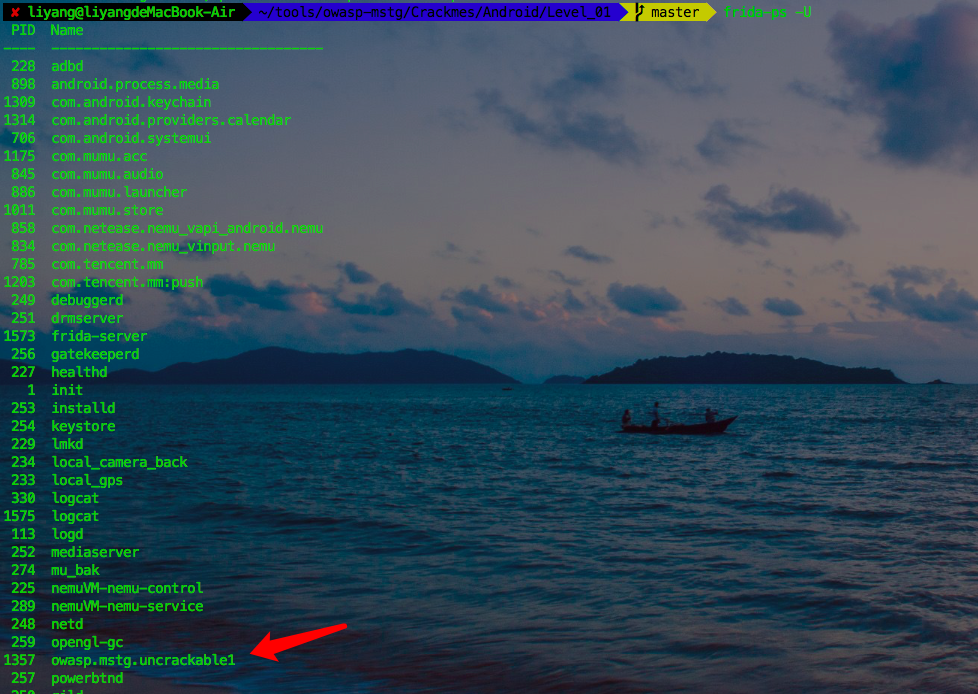
Execution
frida -U -f owap.mstg.uncrackable1 -l exploit.js --no-pause
-U represents entering USB device
-f for the specified application file
-l specify script
– no pause is automatically loaded into the main process after the application is started.
When we run the above command line, the simulator or mobile APP will load automatically,
Just type in the app
View script print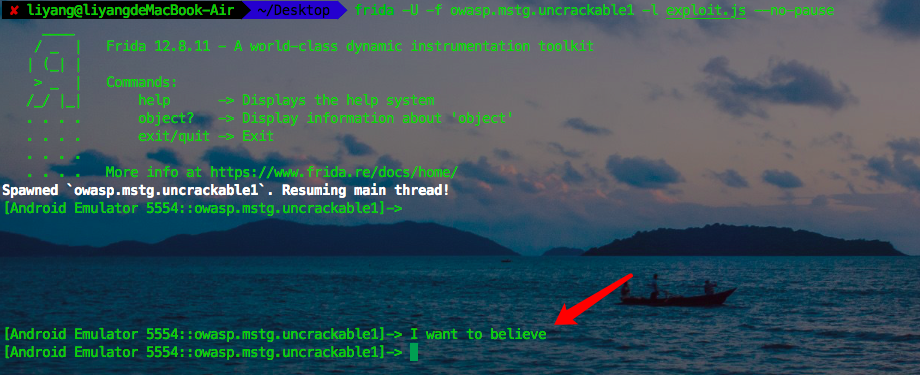
ok, the script prints out the flag.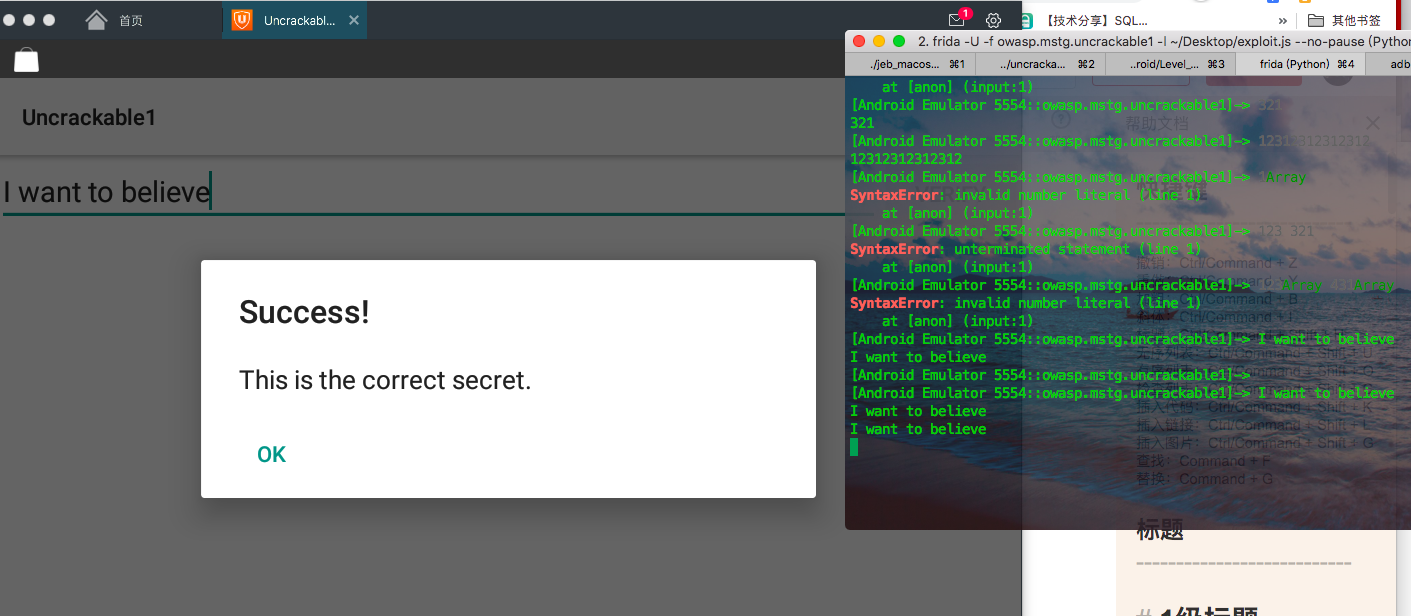
Get the flag!
summary
- When doing static analysis, think about a problem from multiple perspectives. Is there a better way to solve the current problem
- Find the skill of smali injection point, practice makes perfect, experience makes living.

