preface
This article is suitable for front-end Xiaobai, or a small partner reviewing CSS, because the author is still a front-end Xiaobai( 😁).
I've always seen these two things, but I haven't learned about them. Now I'm trying to complete the teacher's task. I knock the code while learning every day.
Personally, I think the front end is fun or fun, and the style is really difficult to adjust.
I also learned this little knowledge today. I'll share it with you while I'm more Wen.
1, Pseudo element concept
In fact, it can be understood from the literal meaning. A pseudo word is a false meaning. A pseudo element is actually a real but false element. It has content, but it does not exist in the document tree itself, nor does it have any html tags.
2, Why do we use pseudo elements?
After H5, many semantic elements have been added, such as nav, hader and footer, to make the document tree clearer and better separate style and content.
As we all know, in fact, many of the labels we write have no clear semantics, just additional elements added to achieve a certain style. Many of these styles that need additional elements can use pseudo elements to decorate the content (whether decorative pictures or sound effects) Without changing the content of HTML, which helps to better separate the content from the style.
Just like adding an element to HTML just to draw a decorative triangle, this is actually redundant for the actual content, and may have a bad impact on the automatic analysis of the semantics of web pages.
In short: pseudo element selectors can help us create new tag elements using CSS without HTML tags, thus simplifying the HTML structure.
Application scenario
Let's briefly talk about some of the most common examples, such as the small corner marker in the drop-down selection box, mask layer and clear floating
Like the drop-down box in the element component:
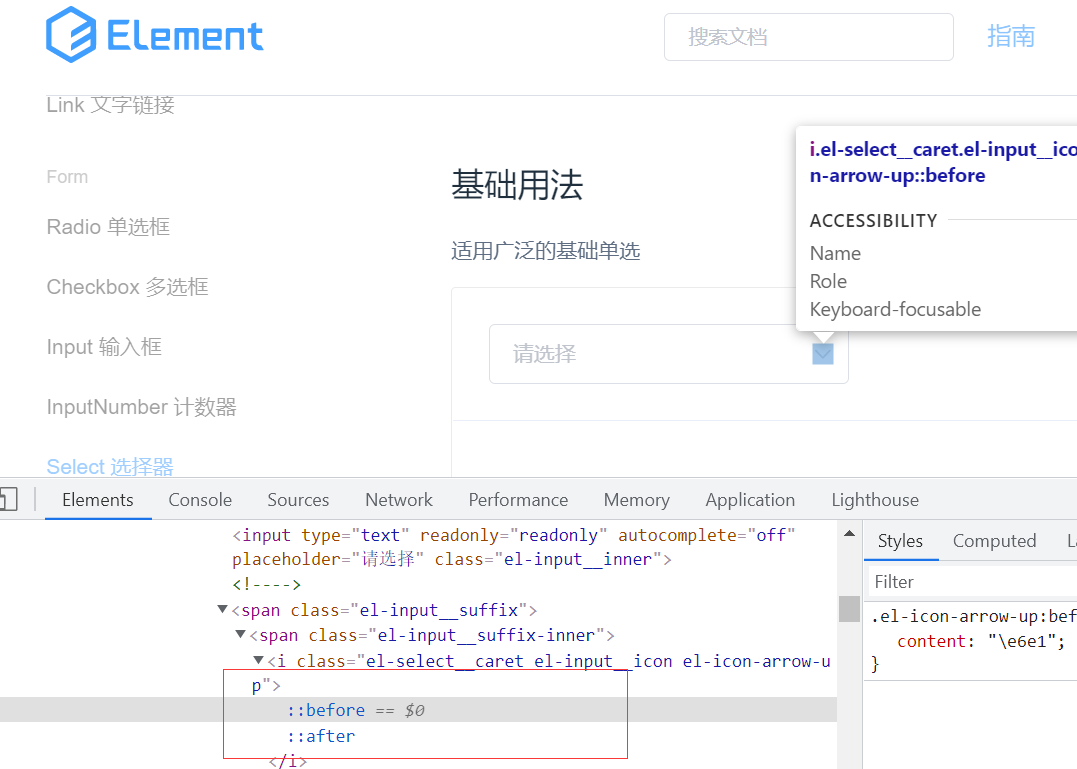
In addition, some small icons and some small triangles are also made of pseudo elements.
3, :: before and:: after
3.1,::before
The old way of writing (: before)
:: before, insert content before the inside of the element.
In CSS,:: before creates a Pseudo element , which will be the first child element to match the selected element content Attribute to add decorative content to an element. This element defaults to an inline element. In addition, the content attribute is a required attribute.
Syntax:
/* CSS3 grammar */
element::before { style }

/* (Single colon CSS2 outdated syntax (only used to support IE8) */
element:before  { style }

/* Insert content before each p element */
p::before { content: "Hello world!"; }
3.2,::after
: after inserts content after the inside of the element.
CSSPseudo element : after is used to create a pseudo element as the last child element of the selected element. Usually cooperate content Property to add decorative content to the element. This virtual element is an inline element by default.
Syntax:
element:after  { style properties }  /* CSS2 grammar */

element::after { style properties }  /* CSS3 grammar */
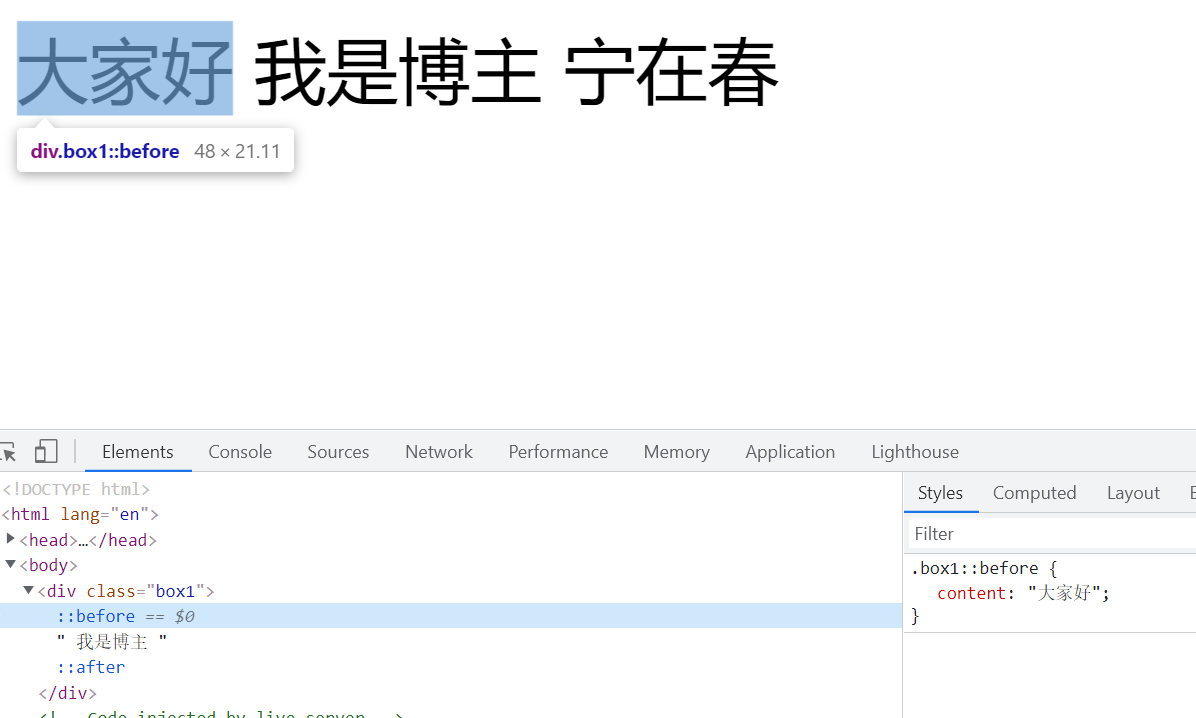
3.3 simple example
html code:
<div class="box1">
    I'm a blogger
</div>
css code:
.box1::before{
    content:"hello everyone"
}
.box1::after{
    content:"Ning Zaichun"
}
design sketch:
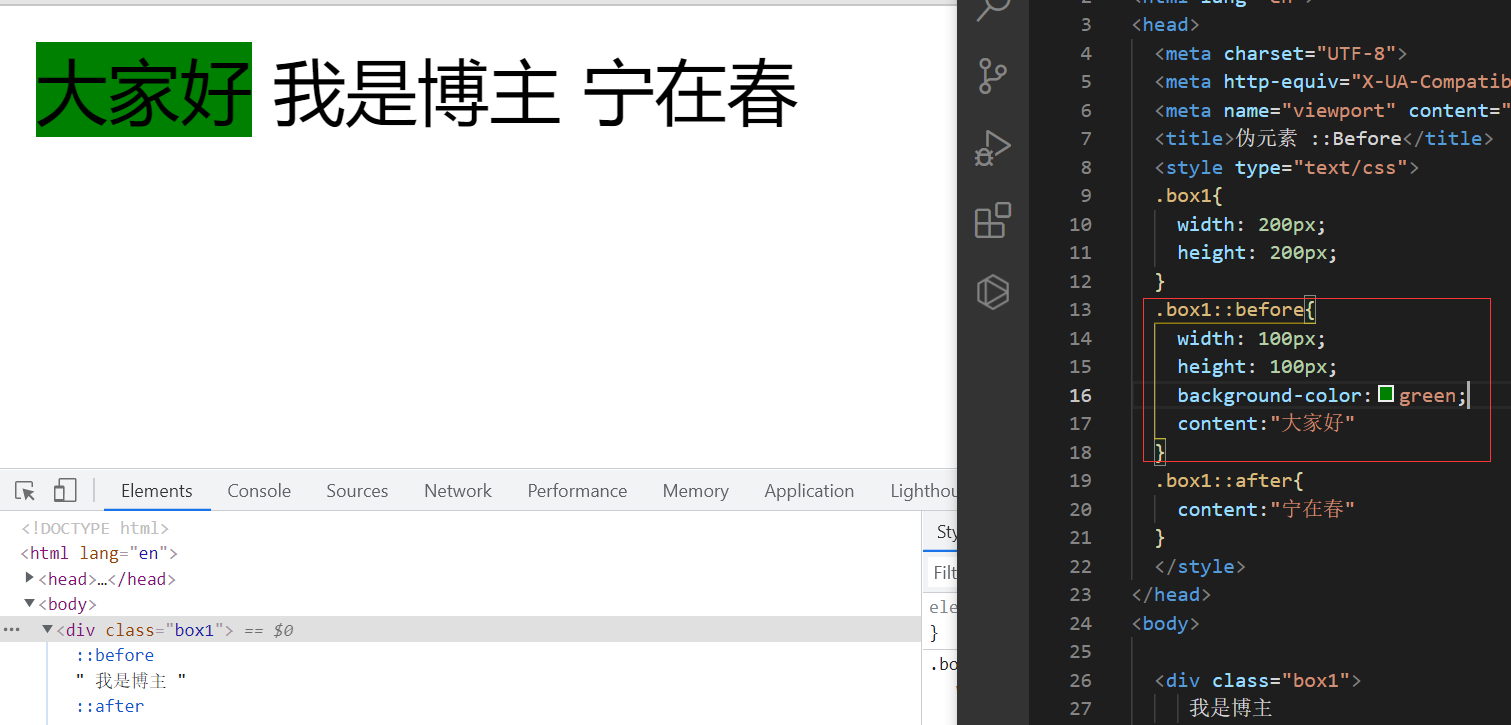
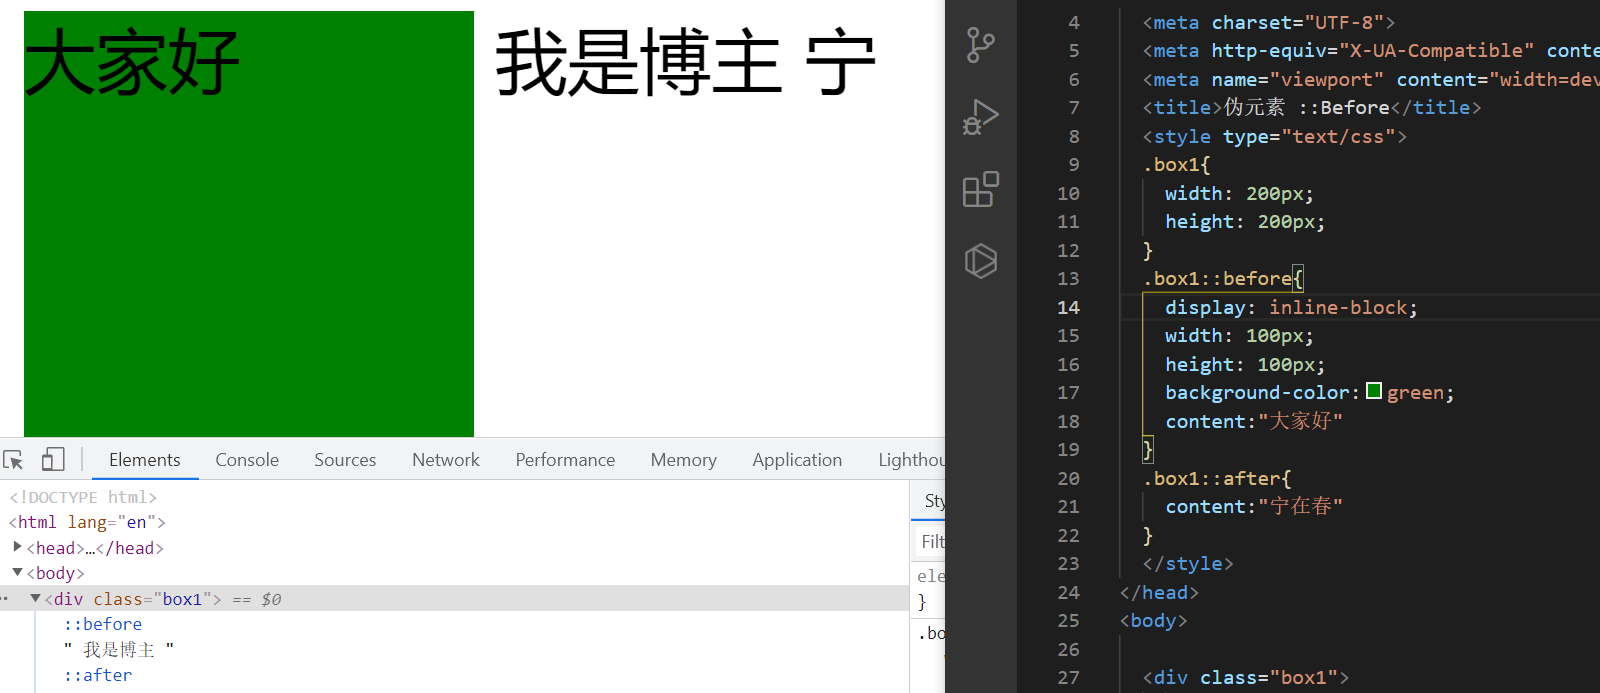
If we want to set the width and height of these pseudo elements, we must write the display: inline block attribute, otherwise it will not take effect.
Examples are as follows:
Add it and pull it
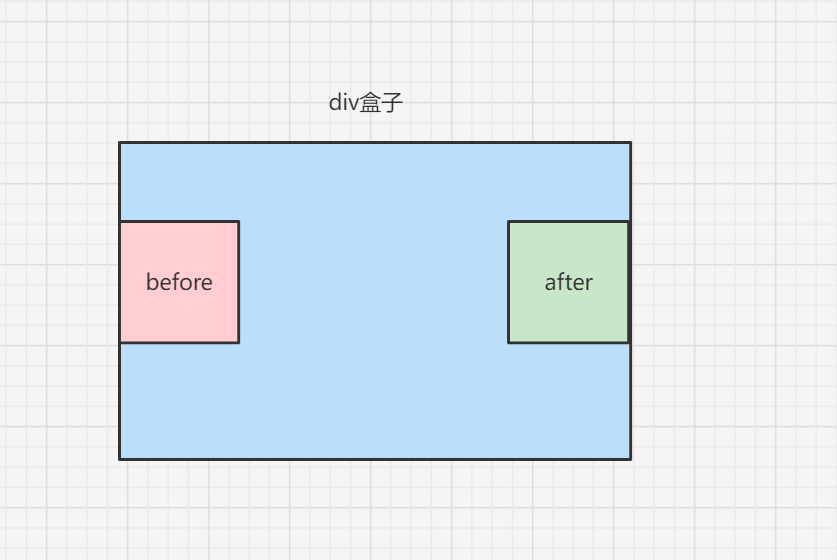
The relationship between before, box and after is roughly shown in the figure below
3.4. Precautions
- before and after will create an element, but the created element belongs to the inline element.
- In addition, the newly created element cannot be found in the document tree
- before and after must have content attribute
- Before creates an element before the parent element content, and after inserts an element after the element content
- The pseudo element selector, like the label selector, has a weight of 1
5, Pseudo element implementation case
5.1 scenario 5: pseudo element Font Icon
Is to make one like element. But I don't want to be so complicated. Here's a small rocket 🚀 Simulate it.
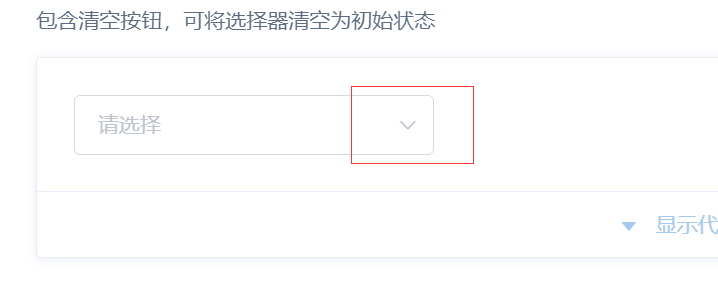
html code:
<div class="box1">
</div>
css code:
.box1{
    width: 200px;
    height: 35px;
    border: 1px solid #ccc;
}
.box1::after{
    content:"🚀"
}
The page we initialized is as follows:

We have to put it there. The first idea is to make a positioning.
The parent element of the pseudo element is the box itself. Then we only need to set the relative positioning of the parent box, and then set the absolute positioning of the pseudo element.
So we just need to modify the css style
.box1 {
    width: 200px;
    height: 35px;
    border: 1px solid #ccc;
    position: relative;
}
.box1::after {
    content: "🚀";
    right: 10px;
    position: absolute;
    top: 6px;
}
design sketch:
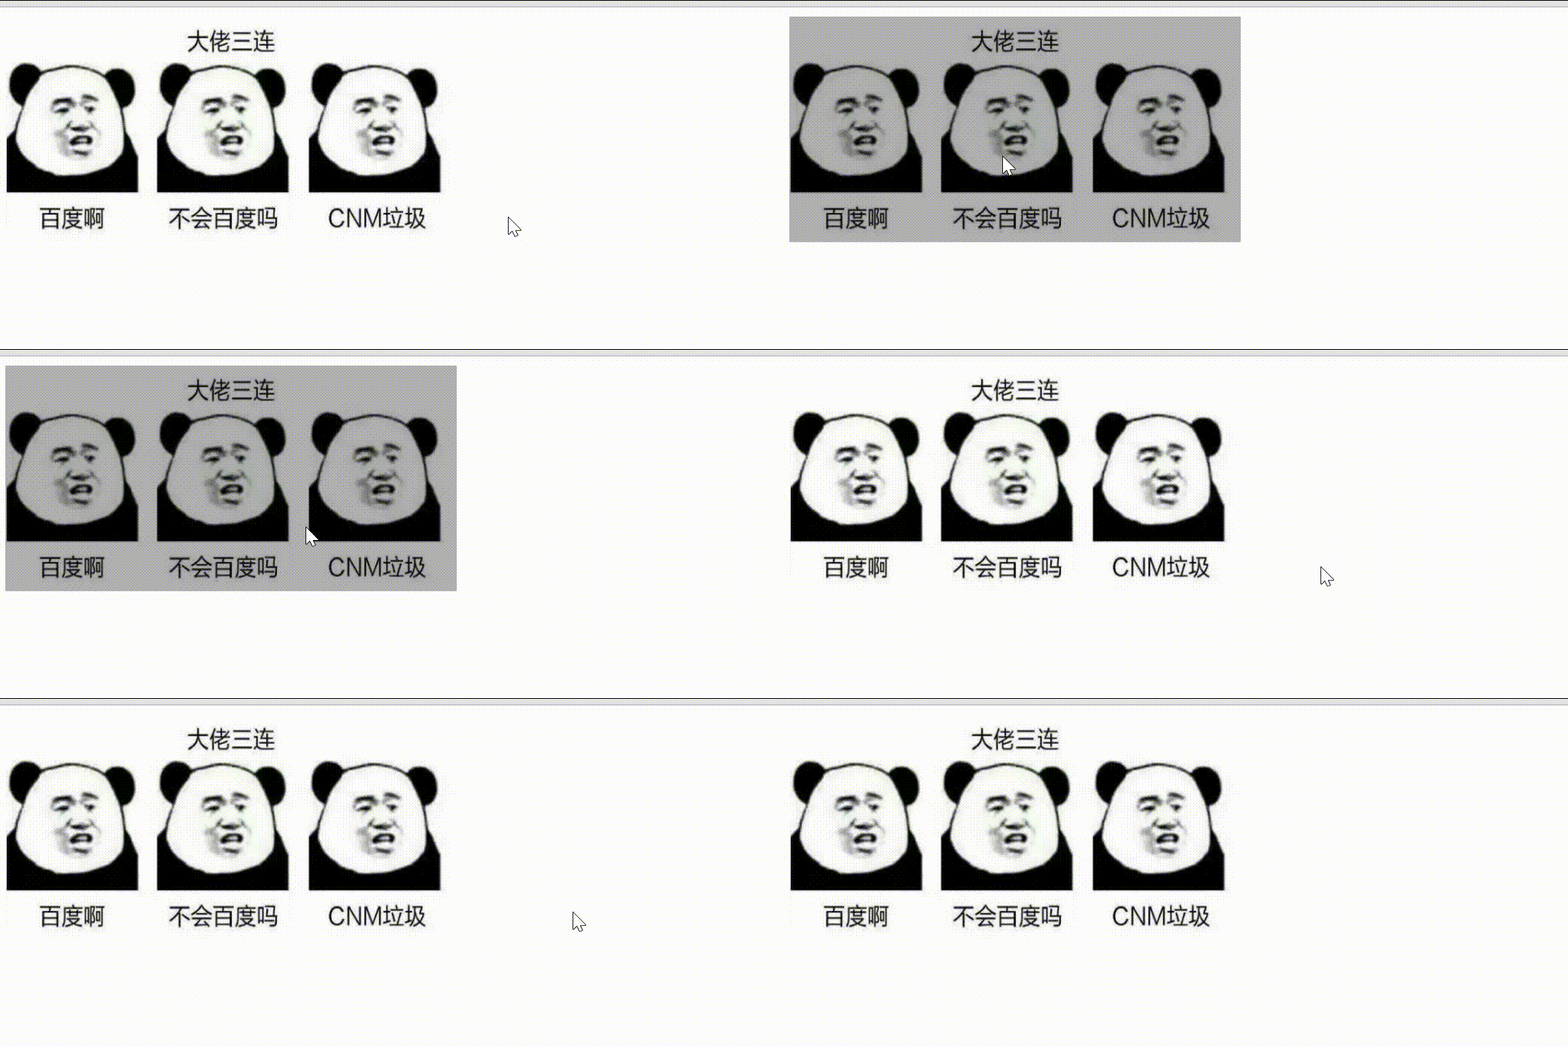
5.2 photo mask layer
html code:
<div class="box1">
    <img src="./123.jpg">
</div>
css code
.box1 {
    width: 400px;
    height: 200px;
    position: relative;
}
.box1 img{
    width: 100%;
    height: 100%;
}
.box1::before {
    content:"";
    display: none;
    position: absolute;
    top: 0;
    left: 0;
    width: 100%;
    height: 100%;
    background-color:rgb(0, 0, 0,0.3)
}
/* When we mouse over the box, the mask layer inside will be displayed */
.box1:hover::before{
    /* After that, let:: before display */
    display:block;
}
design sketch:
Post language
At present, it is still the front-end Xiaobai. I hope you will understand more and are working hard.
I feel shallow on paper. I absolutely know that I have to practice it.
Hello, I'm blogger Ning Zaichun: homepage
A young man who likes literature and art but embarks on the road of programming.
Hope: when we meet on another day, we have achieved something.