For Internet of Things applications, it is particularly necessary to build an HTML5 mobile app. In order to develop HTML 5 app, besides using React Native, stable ionic + Angular JS is currently preferred to develop iOS and Android. The function of the front-end of the app version we want to develop is the same as that of the front-end of the web page version, that is, to issue commands, control the switch and switch of the Led, and display the temperature curve in real time.
On Ionic and Cordova
Ionic is a user interface framework that can use Html5 to build hybrid mobile applications. It calls itself "a combination of local and html5". The framework provides many basic mobile user interface paradigms, such as simple entries such as lists, tabbars and toggles witches. It also provides more complex examples of visual layout, such as sliding-out menus that display content below.
Cordova is an open source A PP development framework, which aims to enable developers to develop cross-platform mobile platform applications using Web APIs such as HTML, JavaScript and CSS. Its original name is PhoneGap. After Adobe acquired Nitobi, the PhoneGap trademark was retained and the code contributed to the Apache Foundation. Apache named it Apache Callback, and later released a new version named A. Pache Cordova.
Cordova is a set of API interfaces for mobile devices, which can be accessed by JavaScript to call hardware system resources such as cameras and compasses. With some UI frameworks based on HTML5 and CSS3 technologies, such as jQuery Mobile, Dojo Mobile or SenchaTouch, developers can quickly develop cross-platform Apps without writing any native code, because Cordova itself is still a native program, and SDK of these system platforms is still needed when packaging Apps.
Installation of Ionic 2
To avoid domestic network installation errors, we use Taobao npm image to execute the following commands:
sudo npm set registry https://registry.npm.taobao.org
After downloading, install ionic and cordova packages, input terminal:
sudo npm install -g cordova ionic
After successful installation, check whether all installed package contents have been installed. Terminal input:
ionic info
According to the information prompt, packages that have not been successfully installed can be reinstalled.
Directory structure of Ionic 2
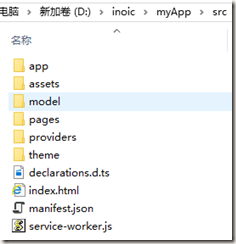
directory structure
App: System initialization
Model: A custom entity class
Pages: System Pages
Providers: Custom Services
Implementation steps
1. Create projects. Here, create a tab template project, enter the iot directory, and execute the command:
ionic start app tabs --v2 --skip-npm
Then, go into the project directory app and install the dependencies:
cnpm install
Add third-party plug-ins Echarts
First, install Echarts in the terminal using NPM
npm install echarts --save
Then, declare variables in the declarations.d.ts file
declare module 'echarts';
Next, Import on the interface that needs to be invoked
import echarts from 'echarts';
Finally, add Ttypings parsing (intelligent index for compilers)
npm install @types/echarts --save
Complete the above steps and you can call them in the interface.
2. Write data services.
We create two data services to manipulate sensor and led collections, respectively.
The content of sensor.ts:
import { Injectable } from '@angular/core';
import { Http } from '@angular/http';
import 'rxjs/add/operator/map';
@Injectable()
export class Sensor {
  data:any;
  constructor(public http: Http) {
    this.data=null;
  }
  getSensor(){
    if (this.data) {
      return Promise.resolve(this.data);
    }
    return new Promise(resolve => {
      this.http.get('http://localhost:3000/sensor')
        .map(res => res.json())
        .subscribe(data => {
          this.data = data;
          resolve(this.data);
        });
    });
  }
}
The contents of led.ts:
import { Injectable } from '@angular/core';
import { Http,Headers } from '@angular/http';
import 'rxjs/add/operator/map';
@Injectable()
export class Led {
    data: any;
  constructor(public http: Http) {this.data=null;}
    getStates(){
        if (this.data){
            return Promise.resolve(this.data);
        }
        return new Promise(resolve=>{
            this.http.get('http://1506eaee.nat123.cc:38044/led/state')
                    .map(res=>res.json())
                    .subscribe(data=>{
                        this.data=data;
                        resolve(this.data);
                    });
        });
    }
    updateStates(leds) {
        let headers=new Headers();
        headers.append('Content-Type','application/json');
        this.http.put('http://localhost:3000/led',JSON.stringify(leds),{headers:headers}).subscribe((res)=>{console.log(res.json())});
    }
}
3. Design pages. Modify src/pages/home/home.html:
<ion-header>
  <ion-navbar>
    <ion-title>temperature curve</ion-title>
  </ion-navbar>
</ion-header>
<ion-content padding>
    <div id="myChart"></div>
</ion-content>
Modify src/pages/contact/contact.html:
<ion-header>
  <ion-navbar>
    <ion-title>
      Control Led
    </ion-title>
  </ion-navbar>
</ion-header>
<ion-content>
    <ion-list>
        <ion-item>
            <ion-icon item-left name="bulb"></ion-icon>
            < ion-label > lamp switch </ion-label >
            <ion-toggle item-right color="danger" [(ngModel)]="ledState" (ionChange)="switch()"></ion-toggle>
        </ion-item>
    </ion-list>
</ion-content>
4. Modify class files.
The content of home.ts is:
import { Component,ViewChild,ElementRef } from '@angular/core';
import { NavController } from 'ionic-angular';
import { Sensor } from '../../providers/sensor';
import echarts from 'echarts';
@Component({
  selector: 'page-home',
  templateUrl: 'home.html'
})
export class HomePage {
  public sensors:any;
public a:any=1;
    temperatures:any[]=[];//Define Temperature Array
     times:any[]=[]; //Define time array
  constructor(public navCtrl: NavController,public sensorService: Sensor) {}
  ionViewDidEnter(){
    this.loadCharts();
  }
  loadCharts(){
    var myChart = echarts.init(<HTMLCanvasElement> document.getElementById('myChart'));
    this.sensorService.getSensor().then((data) => {
        for (var i in data){
         this.temperatures.push(data[i].temperature);
         this.times.push(data[i].time);
        }
    });
    myChart.setOption({
     tooltip:{},
        dataZoom:[ //zoom
          {
            type: 'slider',//Add slider
            start: 1,
            end: 100
          },
          {
            type: 'inside',//Support mouse zooming
            start: 1,
            end: 100
          }
        ],
        xAxis: { //Setting of x-axis
            //name:mydate,//x axis title, display date, do this temporarily, reflecting the date of the data
            //nameGap:'55',
            //nameRotate:'-45',
            data: this.times//The array of data used in the x-axis, previously obtained by the ajax method
        },
        yAxis: [
        {
            type : 'value',
            axisLabel : {
                formatter: '{value} °C'//Display format of y-axis data
            },
            splitLine : {show : true}//Display line divider
        }
    ],
        series: [{//The data points to be displayed
            type: 'line',
            data: this.temperatures
        }]
    });
  }
}
The contents of contact.ts are as follows:
import { Component } from '@angular/core';
import { Led } from '../../providers/led';
@Component({
  selector: 'page-contact',
  templateUrl: 'contact.html'
})
export class ContactPage {
    public ledState: boolean;
    public state;
    public x:boolean;
  constructor(public ledService: Led) {

  }
    public switch(){
            let leds={status:this.ledState};
          this.ledService.updateStates(leds);

    }
    ionViewDidLoad(){
         this.ledService.getStates().then(function(data){

        });
        this.switch();
    }
}
The final page is:
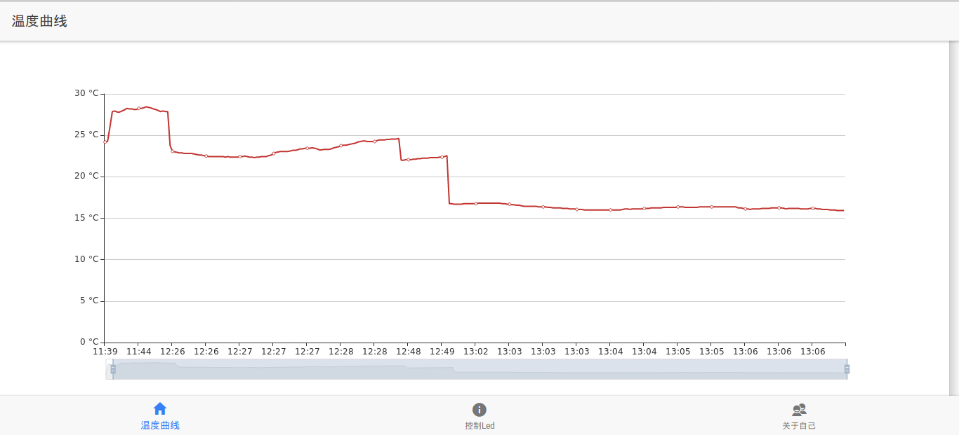
temperature curve
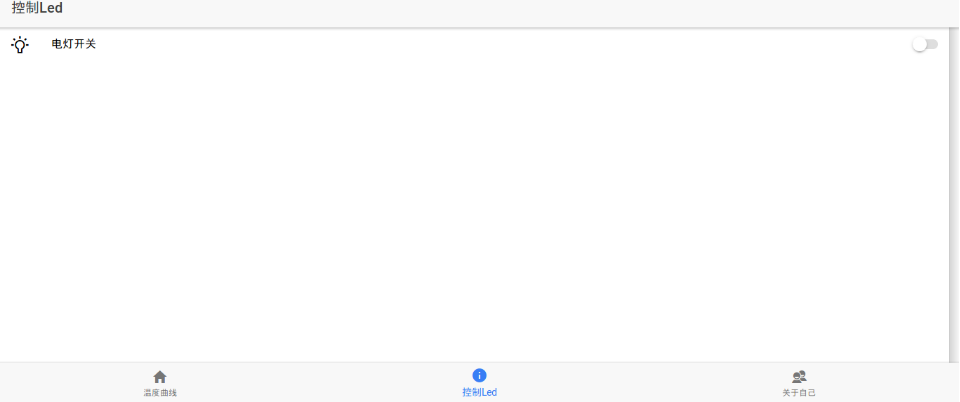
Control led