Ahead
With the expansion of the business of the project, the company decided to open another APP, but it will use some of the public components now. It is no problem to copy the past, but there is a problem. If the public components are maintained in the future, there will not be many APPs to modify, so it is thought of encapsulating them into private libraries for easy maintenance.
Dead work
1,CocoaPods Cocoapods is an excellent iOS dependency management tool, which can easily manage and update third-party libraries used in projects, and leave common components in their own projects to be managed by it.
2. Git version control management, which is used in the project gitlab Register or use an existing account.
Establish
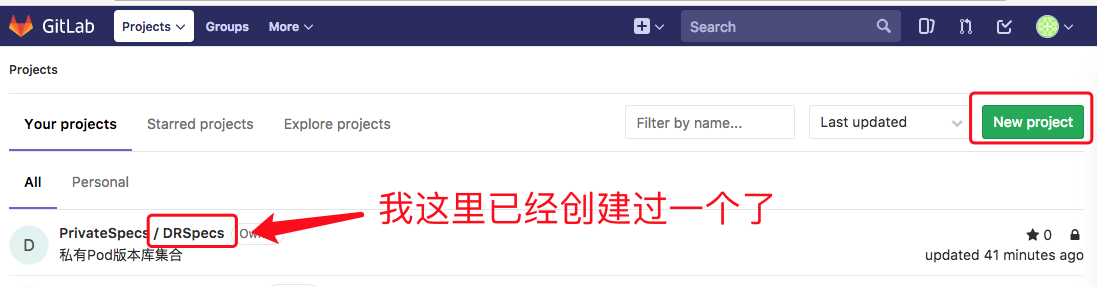
I. Creating Version Library
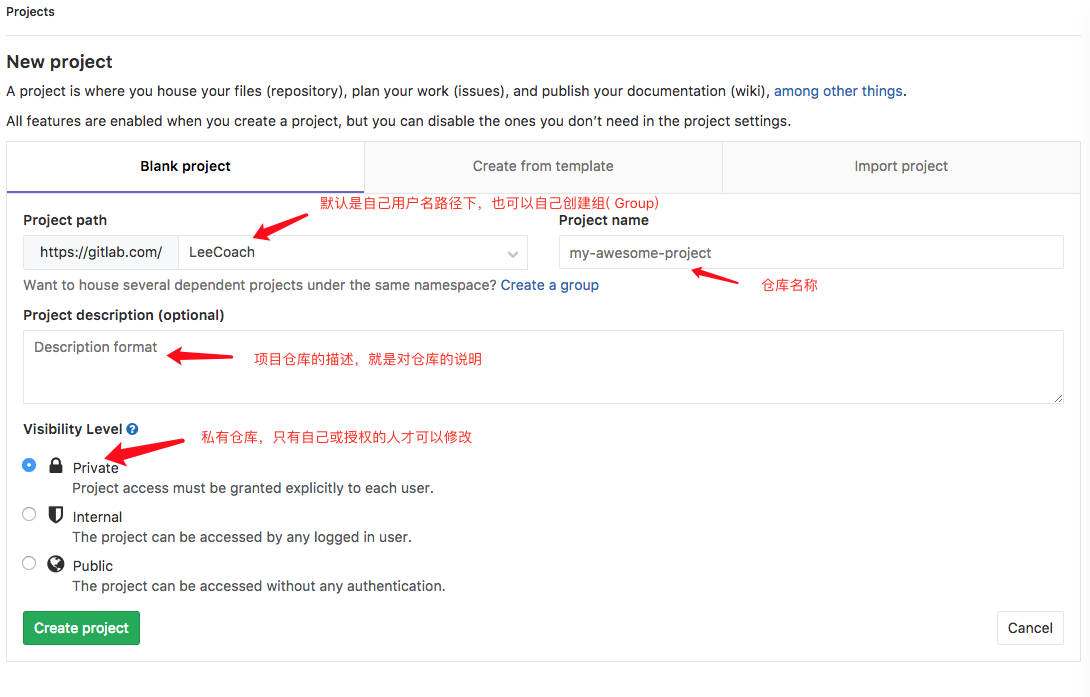
1. Create a git repository to store version description files on the home page. https://gitlab.com/ Create a remote private warehouse (free)
So the remote version library is created.
2. Add remote private version libraries to local indexes at terminals
$ pod repo add DRSpecs https://gitlab.com/PrivateSpecs/DRSpecs.gitThen you will be asked to enter your account number and password. 
In the Finder directory ~/. cocoapods/repos, master is a list of version libraries on cocoaPods 
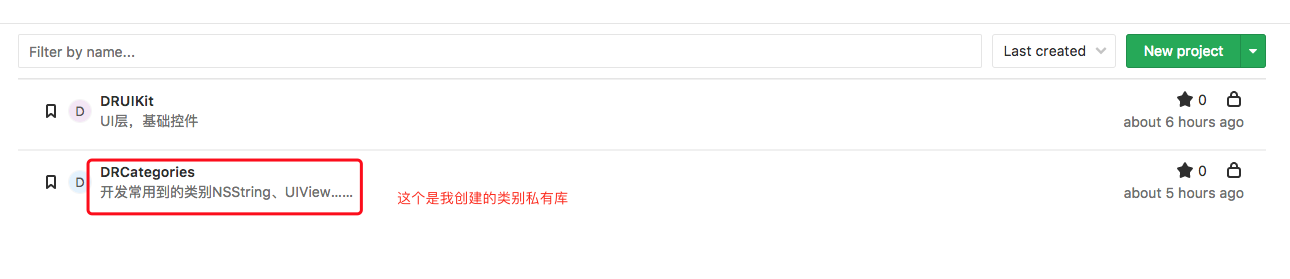
3. Creating Code Base
Here I'm separating the code from the version description file so that the structure is clearer.
Code base creation is the same as version library creation. The difference is that there are more project engineering files. The project engineering here is to edit our private version library files.
First cd to the directory where you want to create the project and then execute
$ pod lib create DRCategoriesThen it will ask you five questions:
What language do you want to use?? [ Swift / ObjC ]
Would you like to include a demo application with your library? [ Yes / No ]
Which testing frameworks will you use? [ Specta / Kiwi / None ]
Would you like to do view based testing? [ Yes / No ]
What is your class prefix?
1. What language do you use?
2. Need an example project?
3. Choose a test framework;
4. Whether to test based on View;
5. Class prefix;
Five specific questions can be seen in the official documents. I chose 1.ObjC; 2.yes; 3.Specta/Expecta; 4.yes; 5.DR. After asking these four questions, he automatically executes the pod install command to create projects and generate dependencies.
Then you can see it locally. 
Files available for external use are placed here. 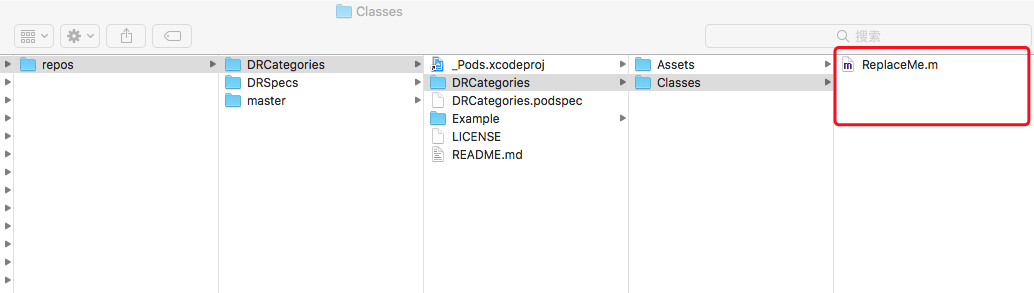
4. When the project is completed, the next step is to add library files and resources to the project. The directory created by Cocoapods itself is managed by Git locally. All we need to do is add a remote warehouse to it. Similarly, go to GitLab to get the HTTP address, and then cd to DRCategories directory.
$ git add.
$ git commit -s -m "Initial Commit of Library"
$ git remote add origin https://gitlab.com/ModulePlugin/DRCategories.git #git remote add
$ git push origin master  #Submit to the far end
5. Because the tag number is needed to get the Git version control project in the podspec file, we need to type a tag.
$ git tag -m "first release" "0.1.0"
$ git push --tags     #Push tag to remote warehouse
6. Edit the podspec file, double-click the DRCategories.podspec file directly, and open it with Xcode for editing.
Pod::Spec.new do |s|

  # ―――  Spec Metadata  ―――――――――――――――――――――――――――――――――――――――――――――――――――――――――― #
  #
  #  These will help people to find your library, and whilst it
  #  can feel like a chore to fill in it's definitely to your advantage. The
  #  summary should be tweet-length, and the description more in depth.
  #

  s.name         = "DRCategories" #Name
  s.version      = "0.1.0"        #Edition
  s.summary      = "Common categories"      #brief introduction

  # This description is used to generate tags and improve search results.
  #   * Think: What does it do? Why did you write it? What is the focus?
  #   * Try to keep it short, snappy and to the point.
  #   * Write the description between the DESC delimiters below.
  #   * Finally, don't worry about the indent, CocoaPods strips it!
  s.description  = "A collection of commonly used categories in development, including NSSting,UIView,NSObject,NSArray,NSDictionary......"  #Detailed description

  s.homepage     = "https://gitlab.com/ModulePlugin/DRCategories"   #homepage
  # s.screenshots  = "www.example.com/screenshots_1.gif", "www.example.com/screenshots_2.gif" #Screenshot address


  # ―――  Spec License  ――――――――――――――――――――――――――――――――――――――――――――――――――――――――――― #
  #
  #  Licensing your code is important. See http://choosealicense.com for more info.
  #  CocoaPods will detect a license file if there is a named LICENSE*
  #  Popular ones are 'MIT', 'BSD' and 'Apache License, Version 2.0'.
  #

  s.license      = { :type => 'MIT', :file => 'LICENSE' }         #Mozilla Public License
  # s.license      = { :type => "MIT", :file => "FILE_LICENSE" }


  # ――― Author Metadata  ――――――――――――――――――――――――――――――――――――――――――――――――――――――――― #
  #
  #  Specify the authors of the library, with email addresses. Email addresses
  #  of the authors are extracted from the SCM log. E.g. $ git log. CocoaPods also
  #  accepts just a name if you'd rather not provide an email address.
  #
  #  Specify a social_media_url where others can refer to, for example a twitter
  #  profile URL.
  #

  s.author             = { "LeeCoach" => "********@yeah.net" }     #author
  # Or just: s.author    = "LeeCoach"
  # s.authors            = { "LeeCoach" => "DRCategories" }
  # s.social_media_url   = "http://twitter.com/XXX"

  # ――― Platform Specifics ――――――――――――――――――――――――――――――――――――――――――――――――――――――― #
  #
  #  If this Pod runs only on iOS or OS X, then specify the platform and
  #  the deployment target. You can optionally include the target after the platform.
  #

  # s.platform     = :ios
   s.platform     = :ios, "8.0"  #Supported platforms and versions

  #  When using multiple platforms
  # s.ios.deployment_target = "5.0"
  # s.osx.deployment_target = "10.7"
  # s.watchos.deployment_target = "2.0"
  # s.tvos.deployment_target = "9.0"


  # ――― Source Location ―――――――――――――――――――――――――――――――――――――――――――――――――――――――――― #
  #
  #  Specify the location from where the source should be retrieved.
  #  Supports git, hg, bzr, svn and HTTP.
  #

  s.source       = { :git => "https://gitlab.com/ModulePlugin/DRCategories.git", :tag => s.version.to_s }   #Code address


  # ――― Source Code ―――――――――――――――――――――――――――――――――――――――――――――――――――――――――――――― #
  #
  #  CocoaPods is smart about how it includes source code. For source files
  #  giving a folder will include any swift, h, m, mm, c & cpp files.
  #  For header files it will include any header in the folder.
  #  Not including the public_header_files will make all headers public.
  #

  s.source_files  = "DRCategories", "DRCategories/**/*.{h,m}" #Code source file address,**/*Express Classes All files in the directory and its subdirectories are separated by commas if there are more than one directory. If you need to group the files in the project, the corresponding settings should also be made here.
  s.exclude_files = "DRCategories/Exclude"

  # s.public_header_files = "Classes/**/*.h"


  # ――― Resources ―――――――――――――――――――――――――――――――――――――――――――――――――――――――――――――――― #
  #
  #  A list of resources included with the Pod. These are copied into the
  #  target bundle with a build phase script. Anything else will be cleaned.
  #  You can preserve files from being cleaned, please don't preserve
  #  non-essential files like tests, examples and documentation.
  #

  # s.resource  = "icon.png"  #Resource path
  # s.resources = "Resources/*.png"

  # s.preserve_paths = "FilesToSave", "MoreFilesToSave"


  # ――― Project Linking ―――――――――――――――――――――――――――――――――――――――――――――――――――――――――― #
  #
  #  Link your library with frameworks, or libraries. Libraries do not include
  #  the lib prefix of their name.
  #

   s.framework  = "UIKit"  #System libraries used
  # s.frameworks = "SomeFramework", "AnotherFramework"

  # s.library   = "iconv"
  # s.libraries = "iconv", "xml2"


  # ――― Project Settings ――――――――――――――――――――――――――――――――――――――――――――――――――――――――― #
  #
  #  If your library depends on compiler flags you can set them in the xcconfig hash
  #  where they will only apply to your library. If you depend on other Podspecs
  #  you can include multiple dependencies to ensure it works.

   s.requires_arc = true      #Whether to use ARC or not, if a specific file is specified, the specific problem is to use ARC.

  # s.xcconfig = { "HEADER_SEARCH_PATHS" => "$(SDKROOT)/usr/include/libxml2" }
  # s.dependency "JSONKit", "~> 1.4"    #Dependency, other libraries that the project relies on, if there are multiple S. dependencies to fill in
7. After editing the podspec file, you need to verify that the file is available. If any WARNING or ERROR is not available, it can not be added to Spec Repo. However, xcode WARNING can exist. Verification requires execution of commands.
$ pod lib lintWhen you see
 -> DRCategories (0.0.1)

DRCategories passed validation.
When validated, the instructions are approved.
8. Submit podspec to Spec Repo
Submitting a podspec to Spec Repo requires two things: one is that the podspec must be validated correctly, and the other is to delete useless comments (which is not necessary, but for the sake of specification or deletion). Submitting podspec to our private Spec Repo requires only one command
$ pod repo push DRSpecs DRCategories.podspecAfter execution, it is successful when the following happens
Validating spec
 -> DRCategories (0.1.0)

Updating the `DRSpecs' repo

From https://gitlab.com/PrivateSpecs/DRSpecs
 * [new branch]      master     -> origin/master

Adding the spec to the `DRSpecs' repo

 - [Add] DRCategories (0.1.0)

Pushing the `DRSpecs' repo
GitLab terminal 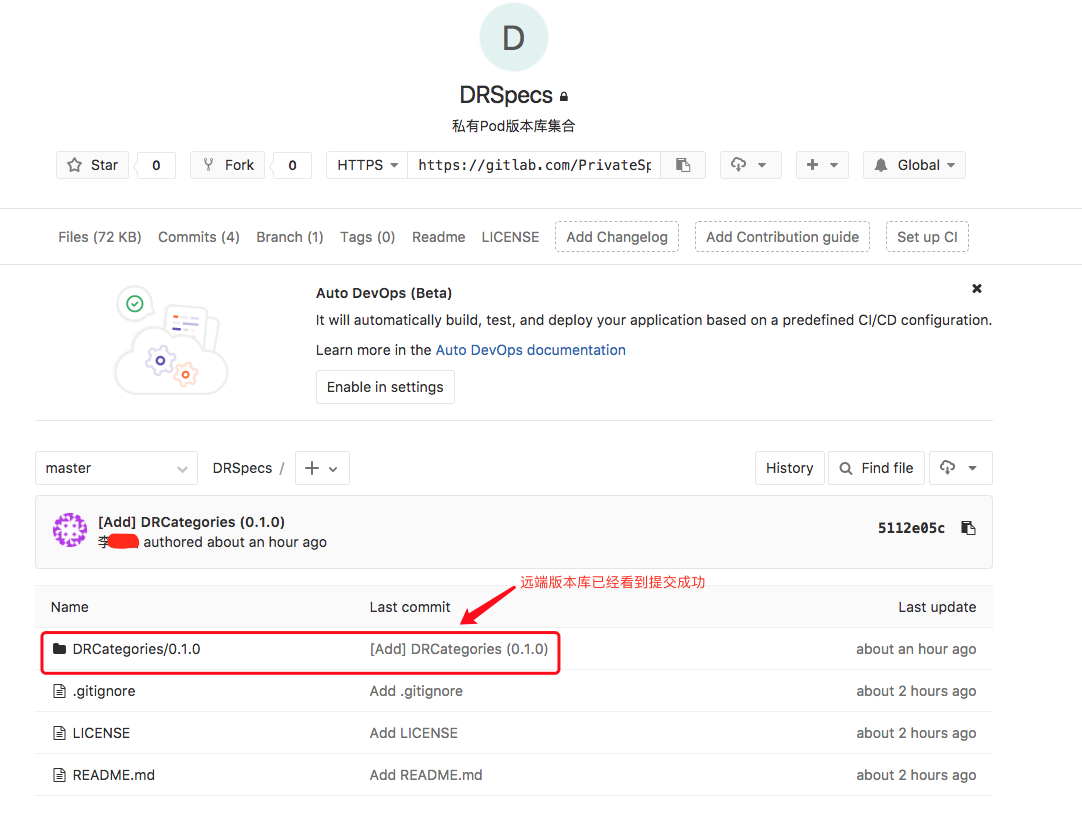
Local Repos 
II. Use of Private Warehouses
Continuous updating...