Introduction to OpenSSL
OpenSSL is a suite of cryptographic tools that implement Secure Sockets Layer (SSL v2 / v3) and Transport Layer Security (TLS v1) network protocols and their associated encryption standards.
The OpenSSL command line tool is used to use various encryption functions of the OpenSSL encryption library from shell programs.It can be used for:
- Create and manage private keys, public keys, and parameters
- Public Key Encryption Operation
- Create X.509 certificates, CSR and CRL
- Calculation of message digest
- Encrypt and decrypt with a password
- SSL / TLS client and server testing
- Handle S/MIME signed or encrypted messages
- Timestamp requests, generation and validation
openssl profile and three strategies
configuration file
/etc/pki/tls/openssl.cnf

Three strategies
 match: Require that the information requested to be filled in matches the CA setup information
 Optional: optional or optional, inconsistent with CA setup information
 supplied: this application information must be filled in
Create a private CA and request, issue a certificate file (the following actions are performed on one machine)
1. Create the required files
[root@CentOS7 ~]# cd /etc/pki/CA/
[root@CentOS7 CA]# touch index.txt Generates a certificate index database file
[root@CentOS7 CA]# Echo 01 > serial Specifies the serial number of the first issuing certificate
2.CA Self-Visa
2.1 Generate private key
[root@CentOS7 CA]# (umask 066;openssl genrsa -out private/cakey.pem 2048)
Generating RSA private key, 2048 bit long modulus
...................................................................................+++
.+++
e is 65537 (0x10001)
2.2 Generate a self-signed certificate
[root@CentOS7 CA]# openssl req -new -x509 -key private/cakey.pem -days 3650 -out cacert.pem
You are about to be asked to enter information that will be incorporated
into your certificate request.
What you are about to enter is what is called a Distinguished Name or a DN.
There are quite a few fields but you can leave some blank
For some fields there will be a default value,
If you enter '.', the field will be left blank.
-----
Country Name (2 letter code) [XX]:CN
State or Province Name (full name) []:beijing
Locality Name (eg, city) [Default City]:beijing
Organization Name (eg, company) [Default Company Ltd]:abc
Organizational Unit Name (eg, section) []:IT
Common Name (eg, your name or your server's hostname) []:hechunping
Email Address []:root@abc.com

//Option description:
-new: Generate a new certificate signing request
-x509: Dedicated to CA Generated from visa
-key: The private key file used to generate the request
-days n: Validity Period of Certificate
-out /PATH/TO/SOMECERTFILE: Save path of certificate
3. Issue Certificates
3.1 Generate a certificate request on a host that requires a certificate (this experiment is local)
3.1.1 Generate Private Key
[root@CentOS7 CA]# (umask 066;openssl genrsa -out /data/test.key 2048)
Generating RSA private key, 2048 bit long modulus
..................................................+++
...............................+++
e is 65537 (0x10001)
3.1.2 Generate Certificate Request File
[root@CentOS7 CA]# openssl req -new -key /data/test.key -out /data/test.csr
You are about to be asked to enter information that will be incorporated
into your certificate request.
What you are about to enter is what is called a Distinguished Name or a DN.
There are quite a few fields but you can leave some blank
For some fields there will be a default value,
If you enter '.', the field will be left blank.
-----
Country Name (2 letter code) [XX]:CN
State or Province Name (full name) []:beijing
Locality Name (eg, city) [Default City]:beijing
Organization Name (eg, company) [Default Company Ltd]:abc
Organizational Unit Name (eg, section) []:IT
Common Name (eg, your name or your server's hostname) []:hechunping
Email Address []:root@abc.com

Please enter the following 'extra' attributes
to be sent with your certificate request
A challenge password []:
An optional company name []:
3.2 Transfer the certificate request file to the CA (two different hosts can use the scp command to transfer)
3.3CA Sign Certificate and Issue Certificate to Requestor
[root@CentOS7 CA]# openssl ca -in /data/test.csr -out certs/test.crt -days 100
Using configuration from /etc/pki/tls/openssl.cnf
Check that the request matches the signature
Signature ok
Certificate Details:
        Serial Number: 1 (0x1)
        Validity
            Not Before: Nov 10 13:45:34 2019 GMT
            Not After : Feb 18 13:45:34 2020 GMT
        Subject:
            countryName               = CN
            stateOrProvinceName       = beijing
            organizationName          = abc
            organizationalUnitName    = IT
            commonName                = hechunping
            emailAddress              = root@abc.com
        X509v3 extensions:
            X509v3 Basic Constraints:
                CA:FALSE
            Netscape Comment:
                OpenSSL Generated Certificate
            X509v3 Subject Key Identifier:
                4C:AE:F0:13:F0:CD:8F:B5:F7:3F:1B:C8:E4:77:91:02:9E:88:6B:5A
            X509v3 Authority Key Identifier:
                keyid:E3:C1:5E:6D:94:5E:F2:AE:16:67:79:2C:69:B5:B9:10:D9:E0:51:BE

Certificate is to be certified until Feb 18 13:45:34 2020 GMT (100 days)
Sign the certificate? [y/n]:y

1 out of 1 certificate requests certified, commit? [y/n]y
Write out database with 1 new entries
Data Base Updated

//Note: By default, countryName, stateOrProvinceName, organizationName must match CA
3.4 View the information in the certificate
[root@CentOS7 CA]# openssl x509 -in certs/test.crt -noout -text|issuer|subject|serial|dates
3.5 View the status of the specified number of certificates
[root@CentOS7 CA]# openssl ca -status 01
Using configuration from /etc/pki/tls/openssl.cnf
01=Valid (V)
4. Revoke Certificate
4.1 Get serial certificates to revoke on the client
[root@CentOS7 CA]# openssl x509 -in certs/test.crt -noout -serial -subject
serial=01
subject= /C=CN/ST=beijing/O=abc/OU=IT/CN=hechunping/emailAddress=root@abc.com
4.2 On the CA, compare the serial and subject s submitted by the customer to verify that they are consistent with the information in the index.txt file
[root@CentOS7 CA]# cat index.txt
V   200218134534Z       01  unknown /C=CN/ST=beijing/O=abc/OU=IT/CN=hechunping/emailAddress=root@abc.com
4.2.1 Revoke Certificate
[root@CentOS7 CA]# openssl ca -revoke newcerts/01.pem
Using configuration from /etc/pki/tls/openssl.cnf
Revoking Certificate 01.
Data Base Updated
4.2 Specify the number of the first revoked certificate. Note: Certificate revocation list needs to be updated for the first time.
[root@CentOS7 CA]# echo 01 > crlnumber
4.3 Update Certificate Revocation List
[root@CentOS7 CA]# openssl ca -gencrl -out crl.pem
Using configuration from /etc/pki/tls/openssl.cnf
4.4 View crl files
[root@CentOS7 CA]# openssl crl -in crl.pem -noout -text
Export the requested certificate to windows for viewing
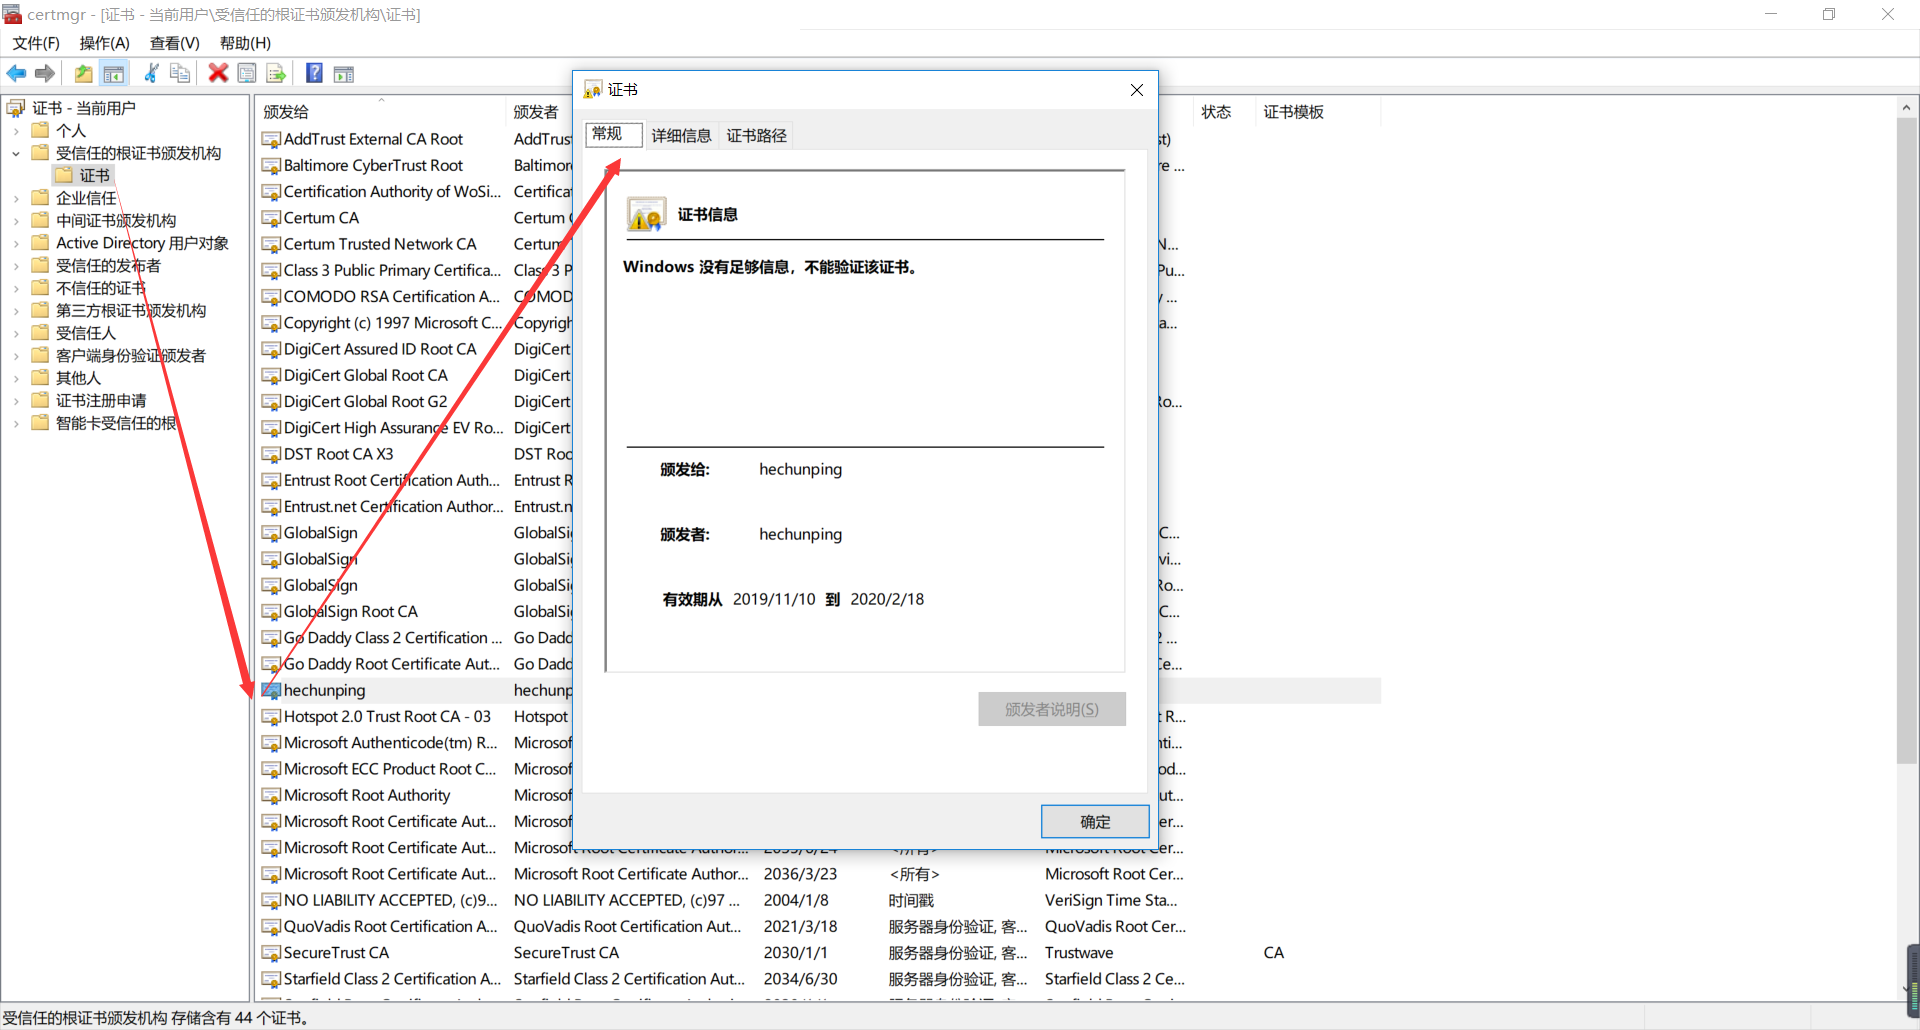
1. Press the "win+R" key on windows and run the "certmgr.msc" command.
2. Find the Trusted Root Certification Authority, right-click All Tasks ---> Import, and follow the wizard to select the certificate you requested on Linux.
3. View certificate information 