Development tool preparation
Development tool: idea2017 up
Dependency management: Maven 3 or above
JDK: above 1.8

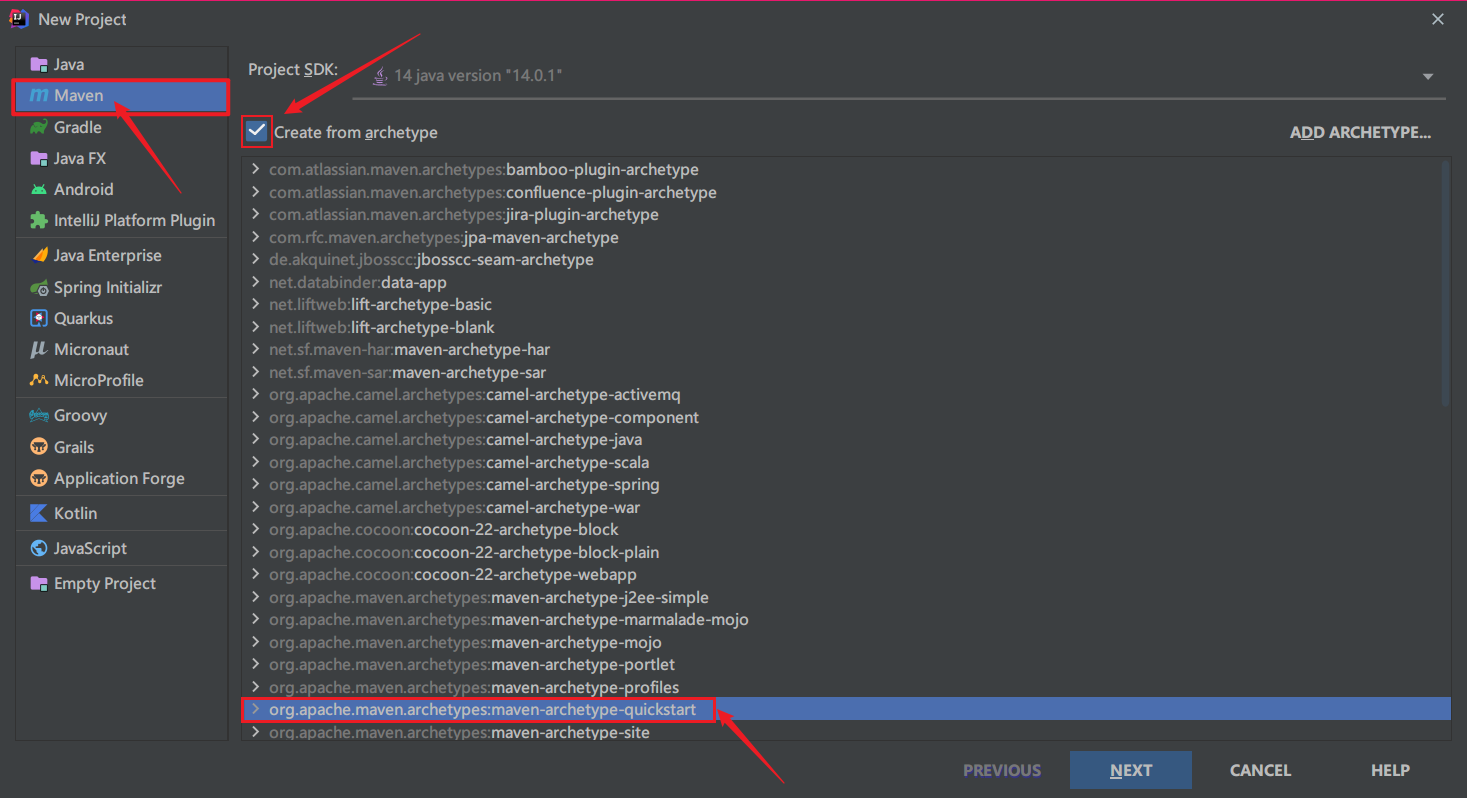
Creating a Spring project using Maven
- Select Maven
- Check Create from archetype
- Select Maven archetype QuickStart
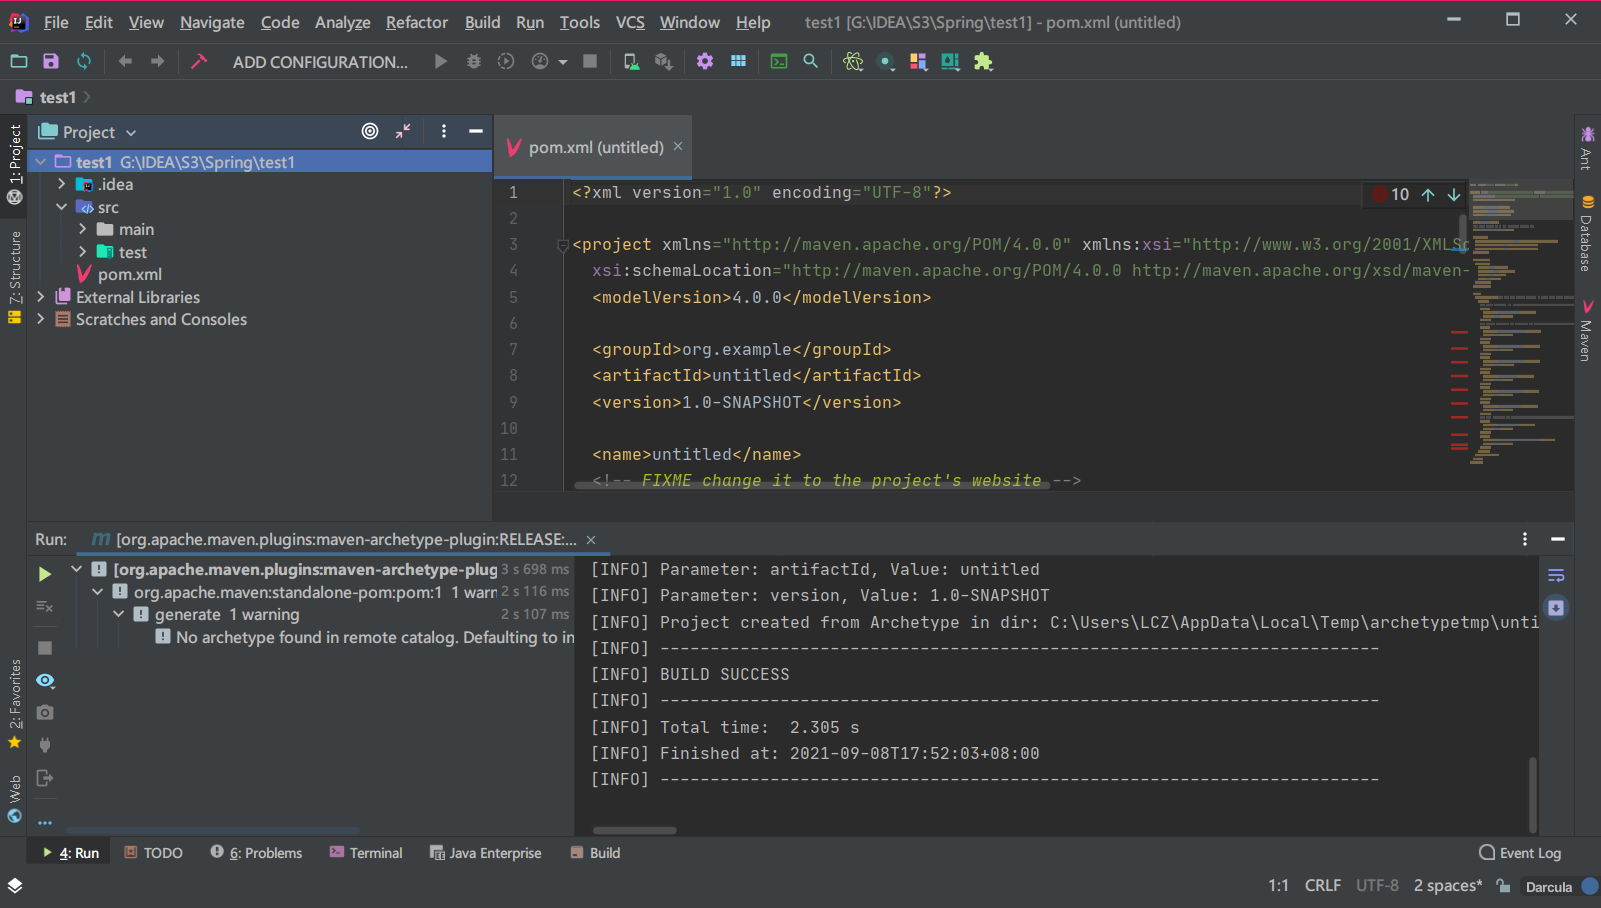
Created successfully
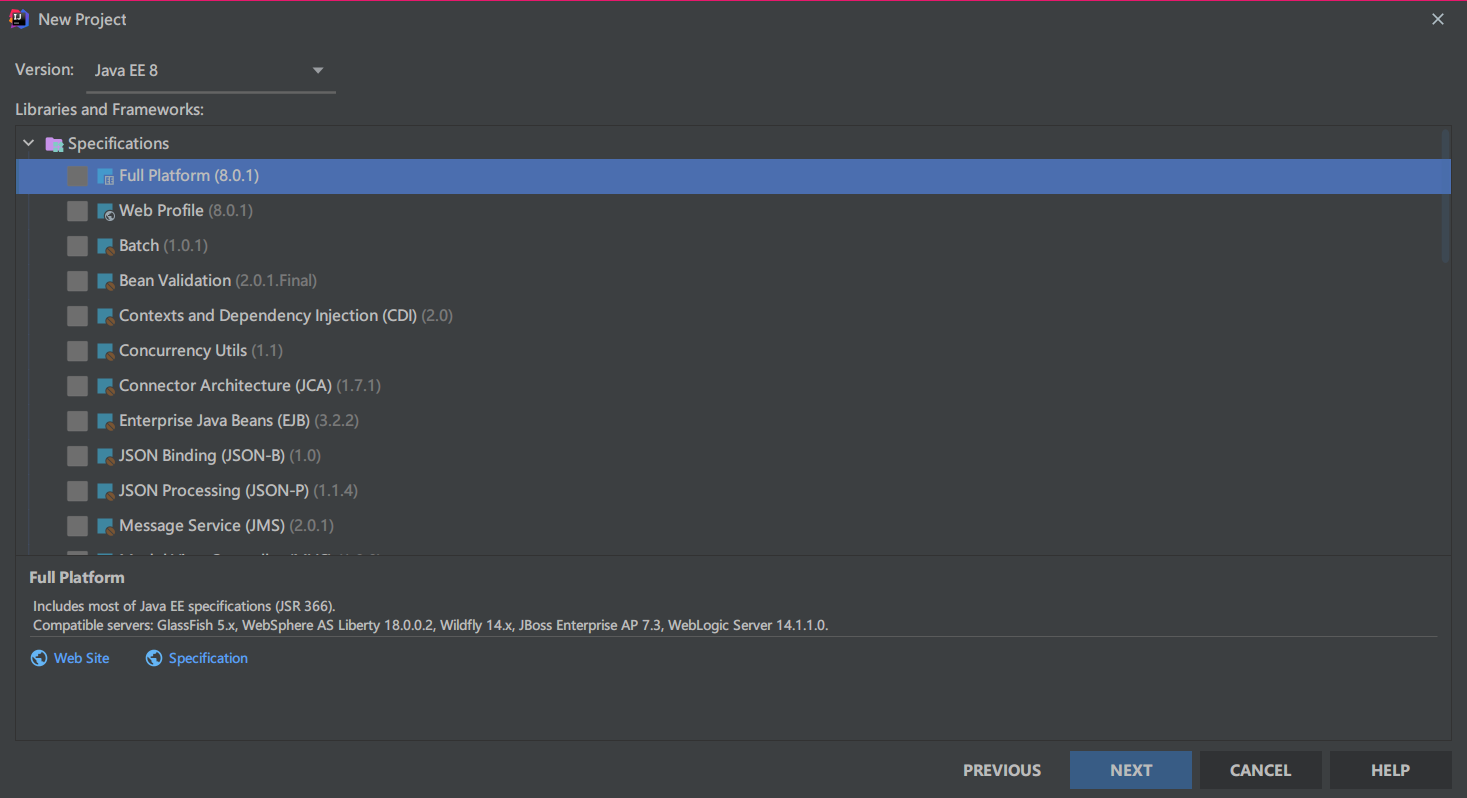
Creating a Spring project using Java Enterprise
Default

Version generally selects Java EE 8
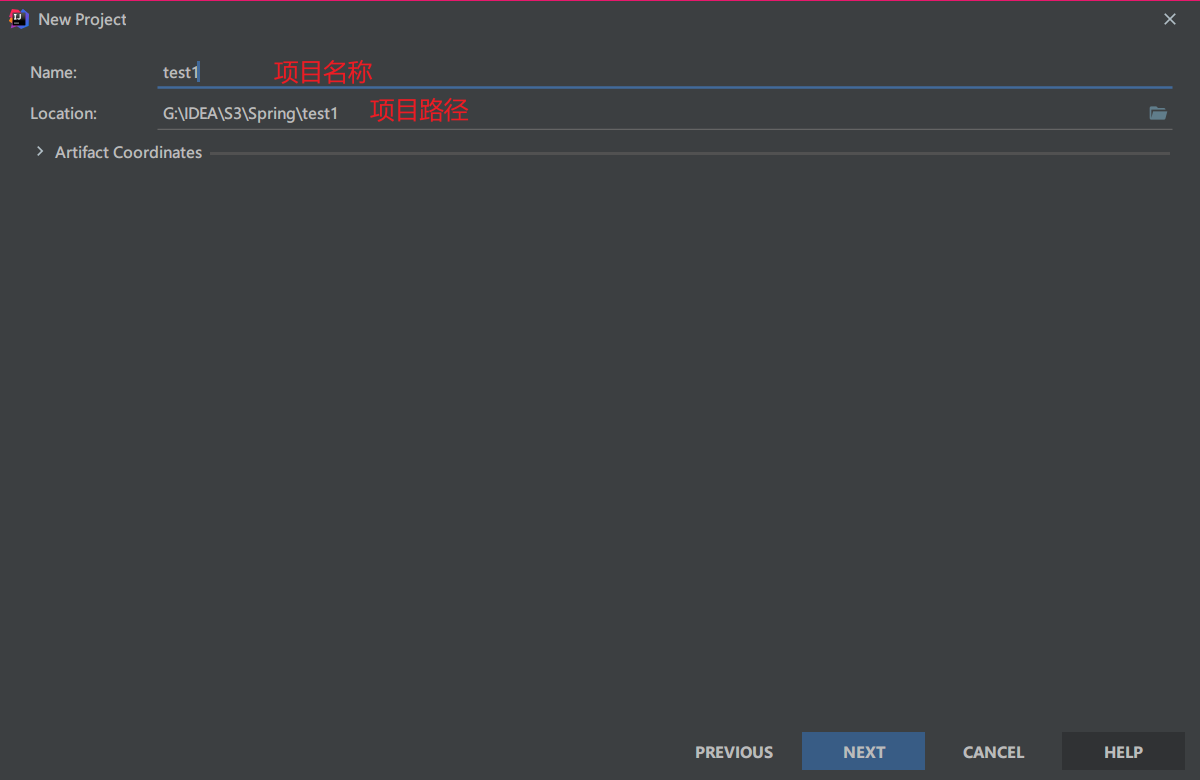
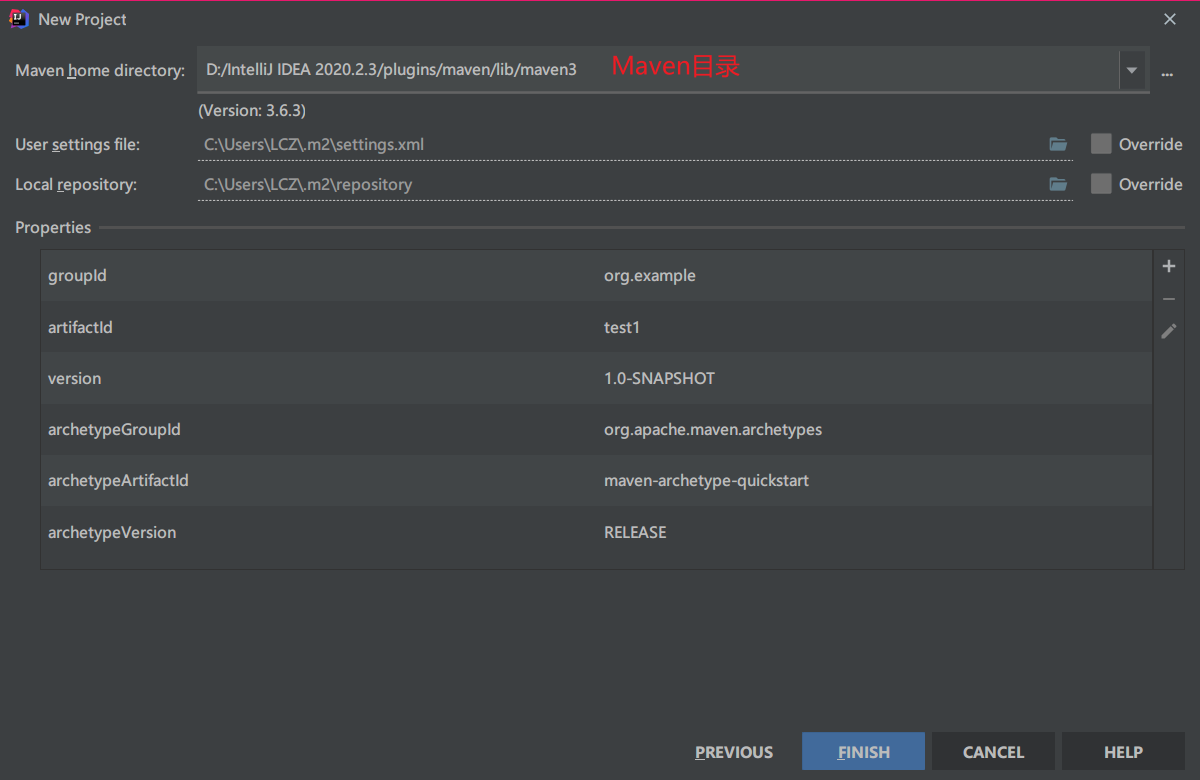
Set project information

Created successfully
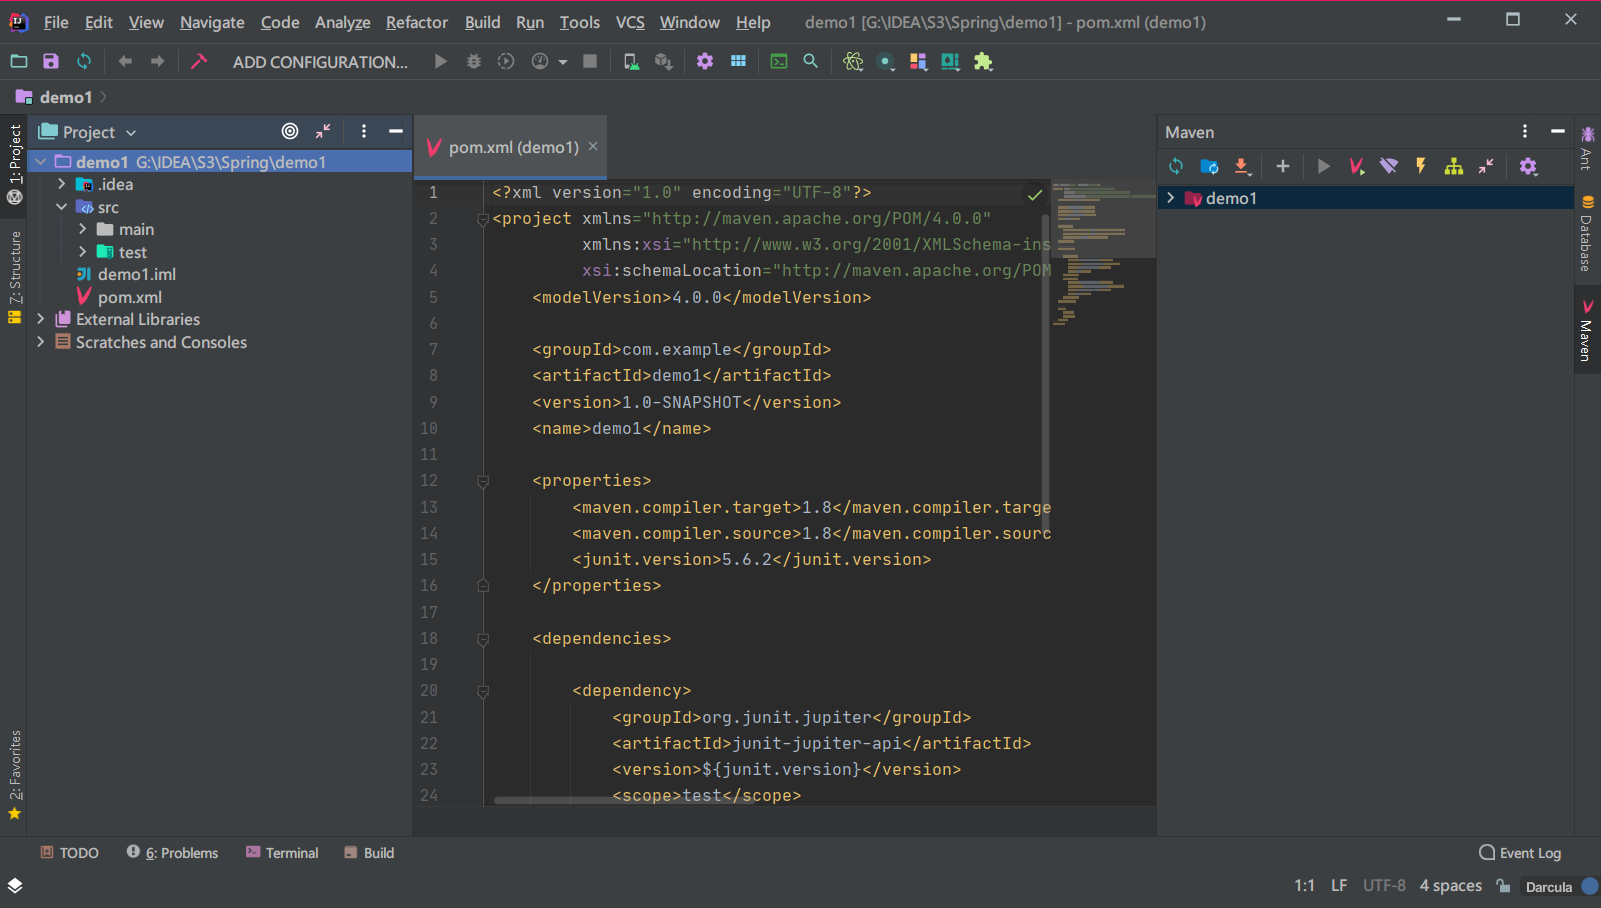
Introducing maven dependency pom.xml
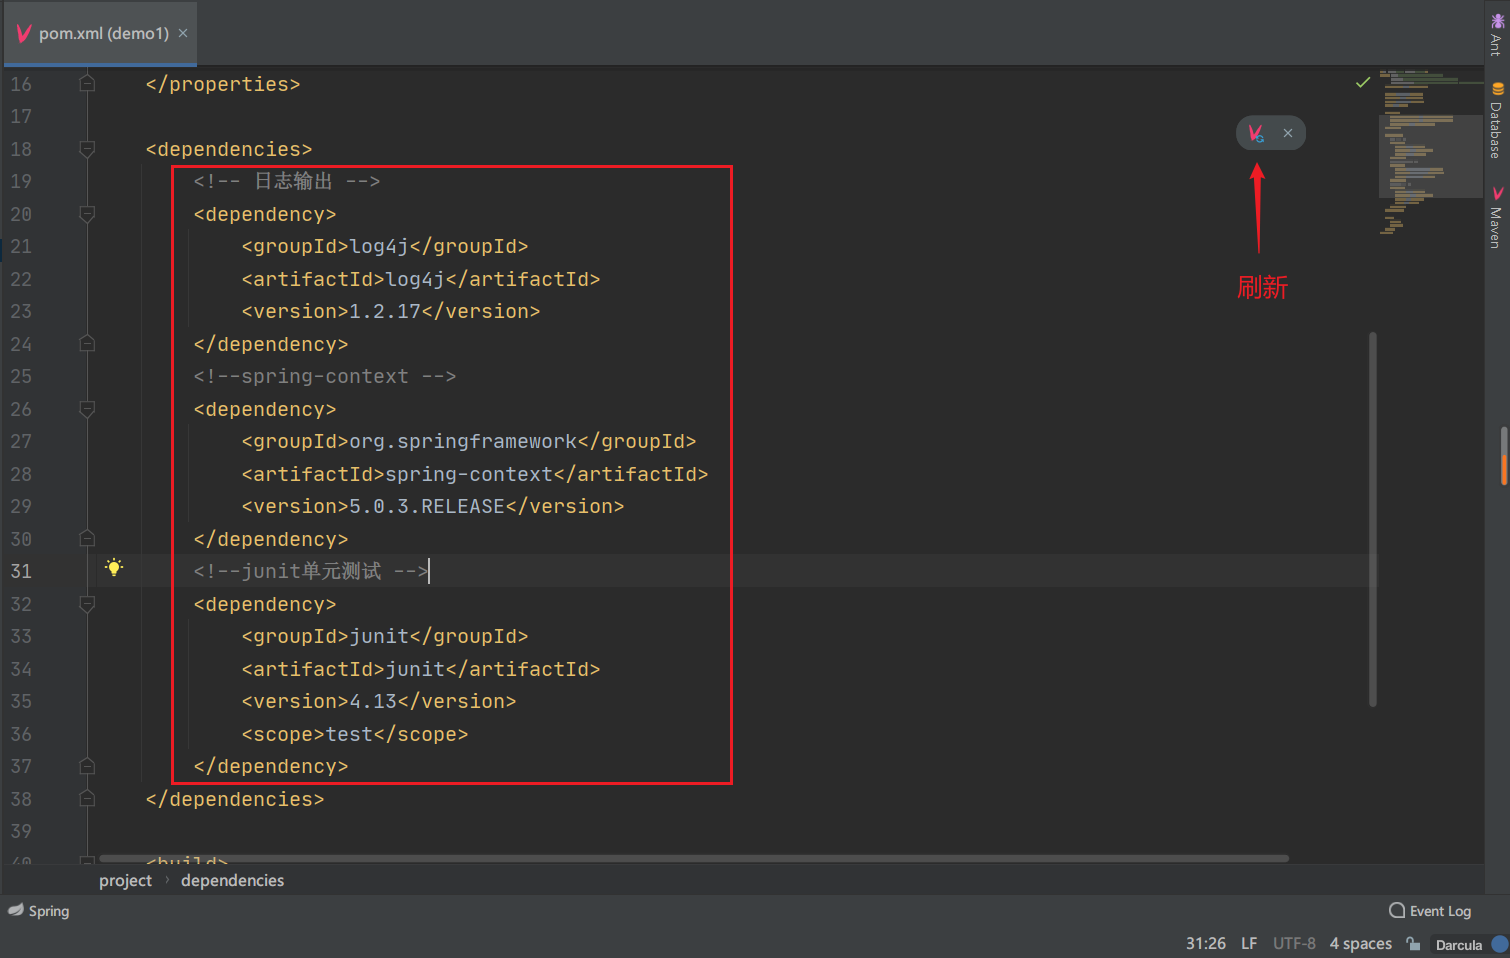
Open pom file to add dependency
<!-- Log output -->
    <dependency>
        <groupId>log4j</groupId>
        <artifactId>log4j</artifactId>
        <version>1.2.17</version>
    </dependency>
<!--spring-context -->
    <dependency>
        <groupId>org.springframework</groupId>
        <artifactId>spring-context</artifactId>
        <version>5.0.3.RELEASE</version>
    </dependency>
<!--junit unit testing  -->
	<dependency>
        <groupId>junit</groupId>
        <artifactId>junit</artifactId>
        <version>4.13</version>
        <scope>test</scope>
    </dependency>
Refresh
Check dependency

Define interface and entity classes
Interface
public interface SomeService {
    void doSome();
}
Implementation class
public class SomeServiceImpl implements SomeService {
	//Parameterless constructor
    public SomeServiceImpl() {
        System.out.println("SomeServiceImpl Nonparametric construction method");
    }

    @Override
    public void doSome() {
        System.out.println("====Business method doSome()===");
    }
}
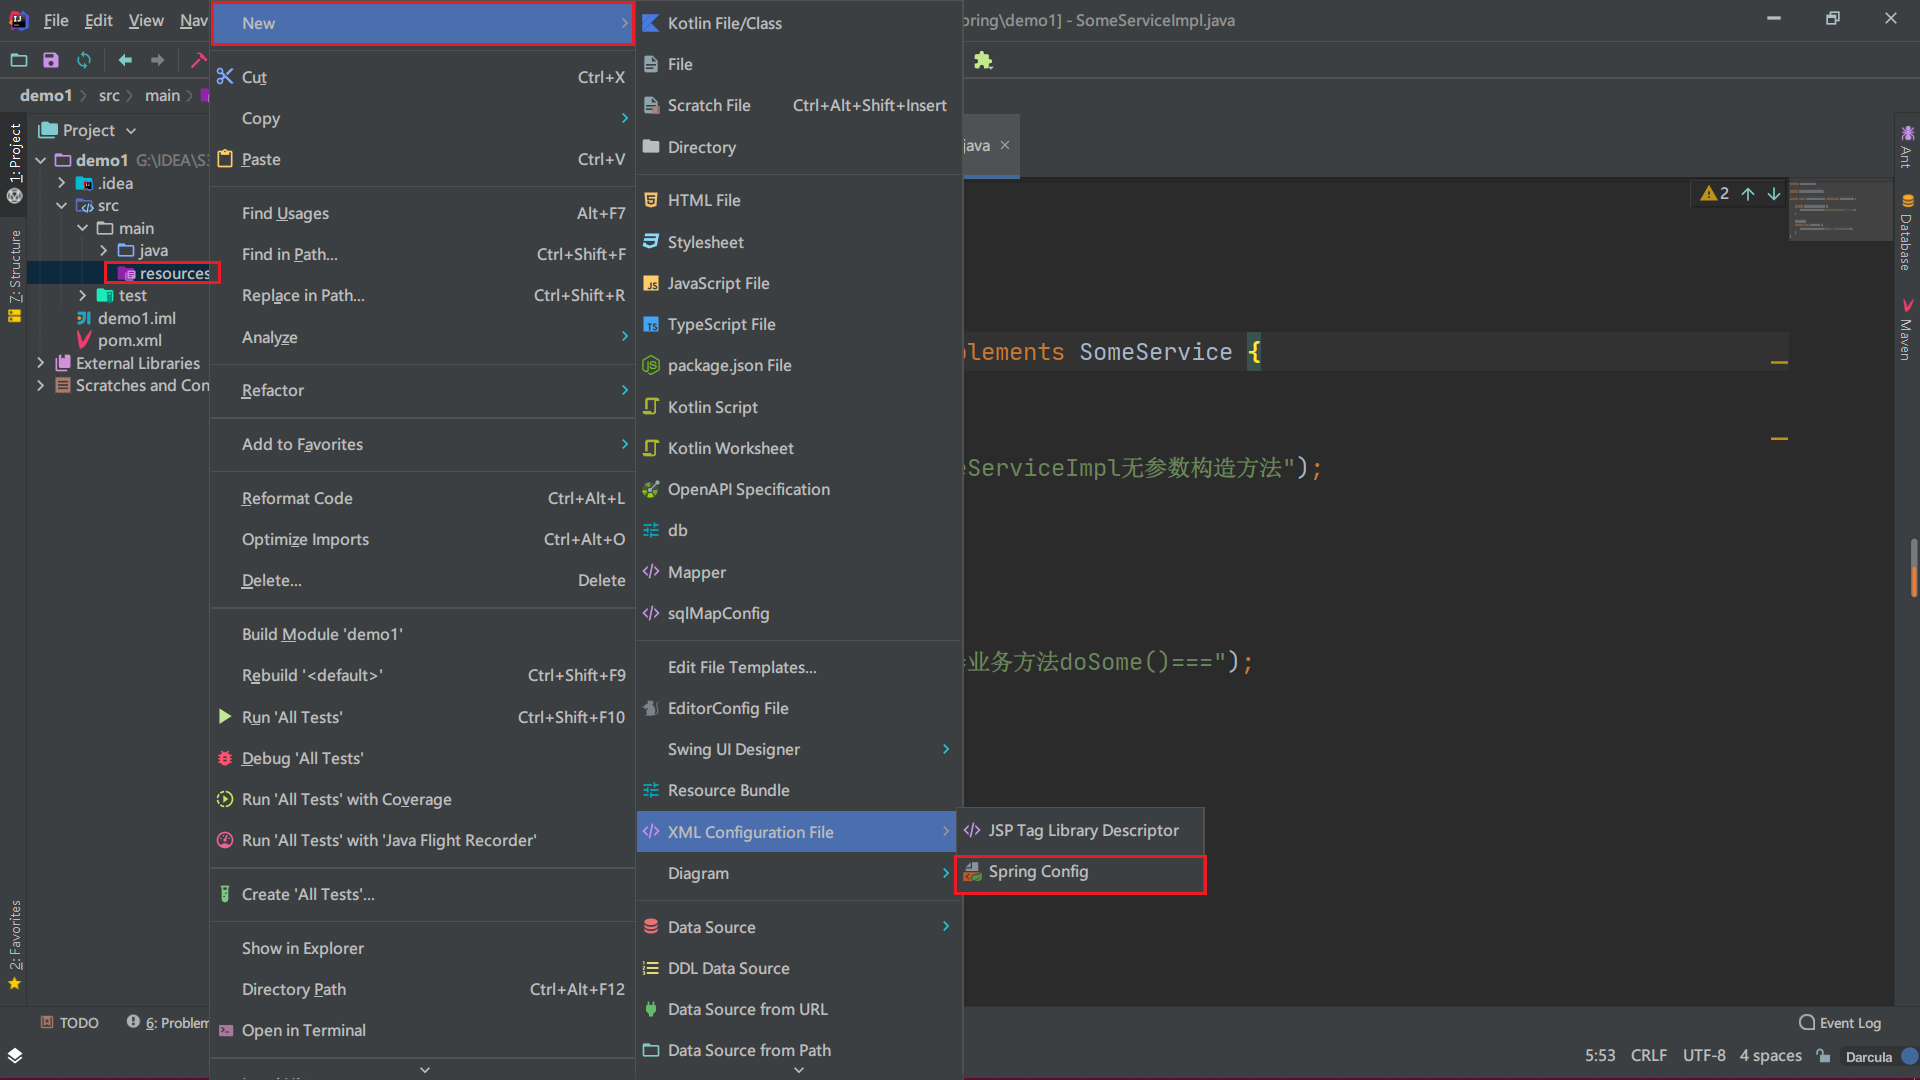
Create Spring configuration file
Now create an xml file in the src/main/resources / directory. The file name can be arbitrary, but
The name suggested by Spring is applicationContext.xml.
Note: the spring configuration can only be used normally by adding constraint files, which are xsd extensions.
The IDEA tool provides Spring templates by default
Select resources package > New > XML configuration file > spring config
Created successfully
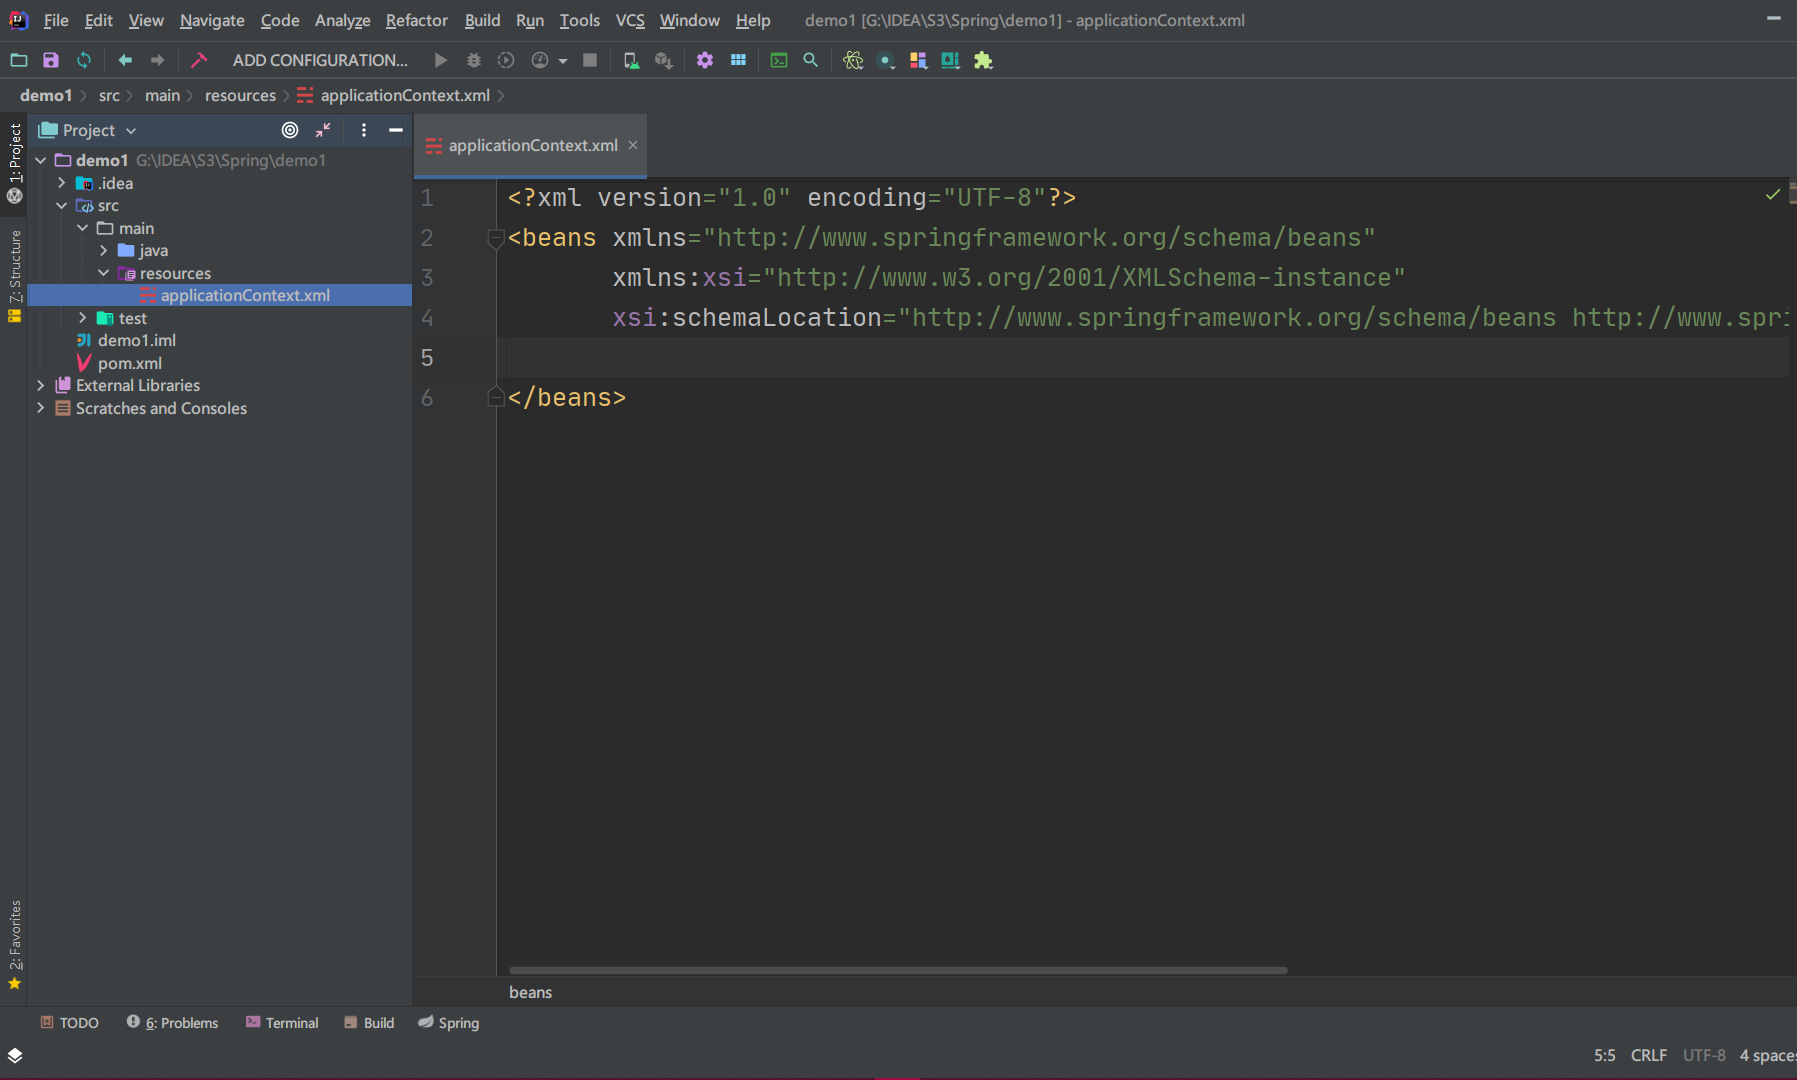
Default template description
<?xml version="1.0" encoding="UTF-8"?>
<beans xmlns="http://www.springframework.org/schema/beans"
       xmlns:xsi="http://www.w3.org/2001/XMLSchema-instance"
       xsi:schemaLocation="http://www.springframework.org/schema/beans               http://www.springframework.org/schema/beans/spring-beans.xsd">

</beans>

spring Standard profile:
1)The root tag is beans
2) beans The following is the description of the constraint file
3)beans Inside bean Statement.
4)What is? bean:  bean namely java Object, spring Container managed java Object, called bean
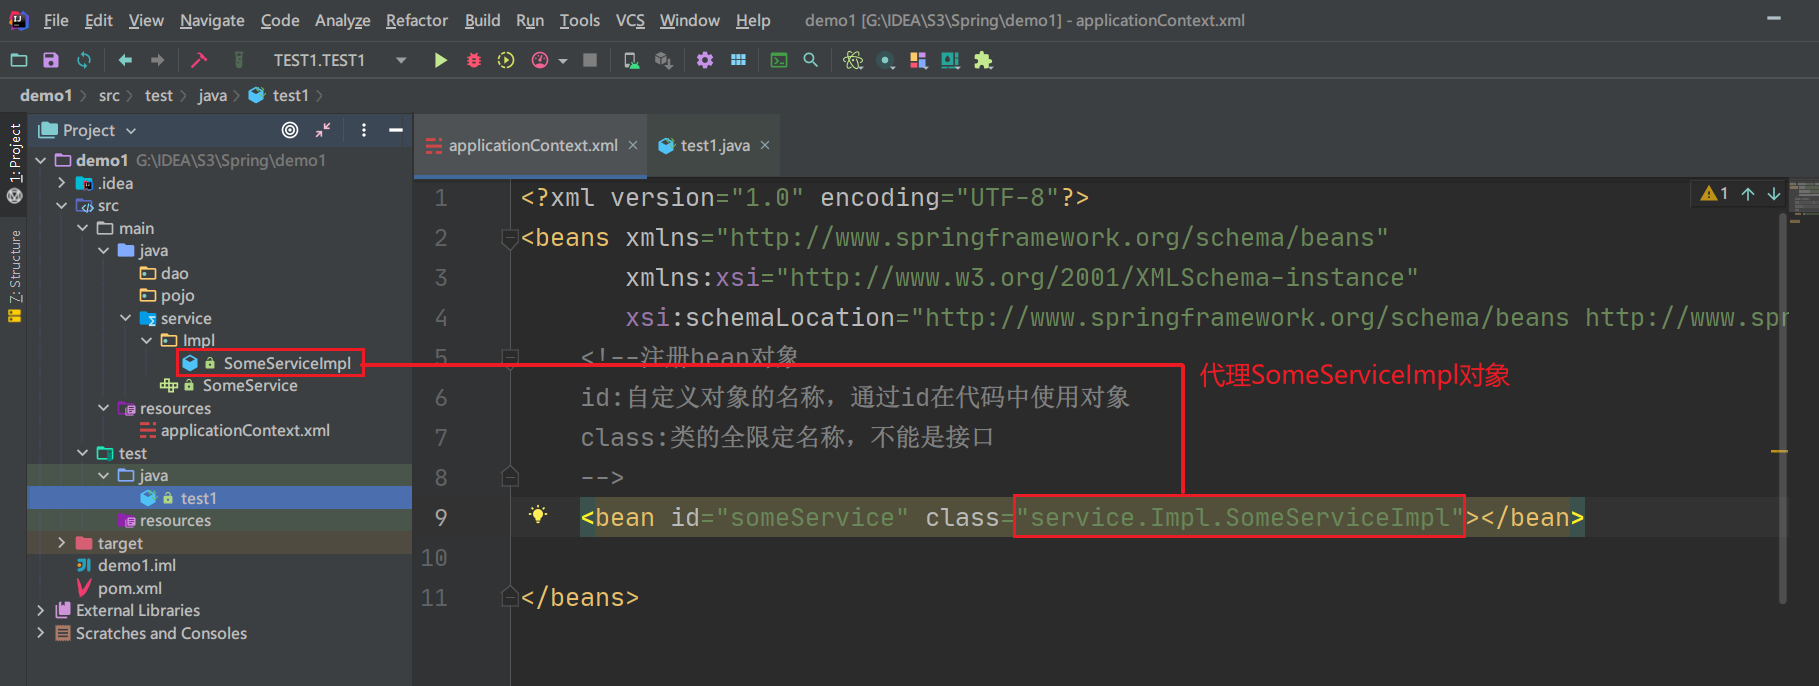
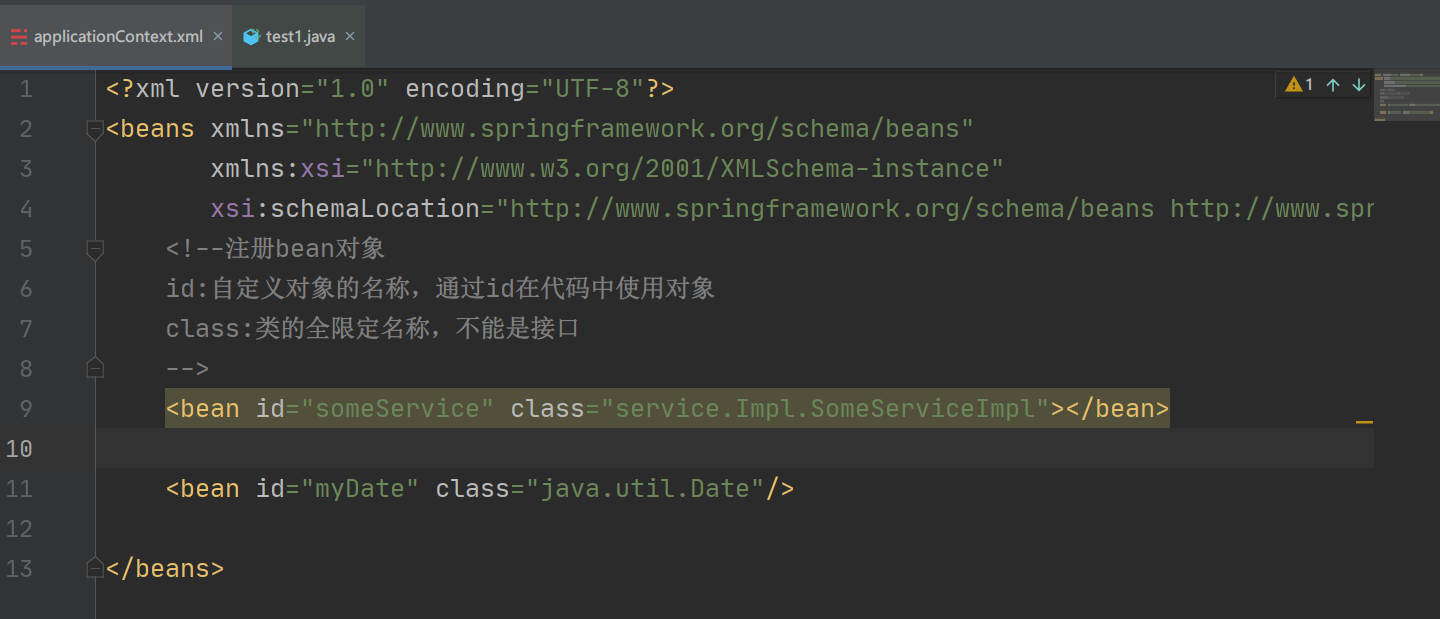
Register bean object
<?xml version="1.0" encoding="UTF-8"?>
<beans xmlns="http://www.springframework.org/schema/beans"
       xmlns:xsi="http://www.w3.org/2001/XMLSchema-instance"
       xsi:schemaLocation="http://www.springframework.org/schema/beans http://www.springframework.org/schema/beans/spring-beans.xsd">

    <!--register bean object
    id:The name of the custom object, via id Using objects in code
    class:The fully qualified name of a class. It cannot be an interface
    -->
    <bean id="someService" class="service.Impl.SomeServiceImpl"></bean>

</beans>
- Bean tag: used to define an instance object. An instance corresponds to a bean element.
- id: this attribute is the unique identifier of the Bean instance. The program accesses the Bean through the id attribute
Dependencies with beans are also associated through the id attribute. - Class: specify the class to which the Bean belongs. Note that this can only be a class, not an interface.
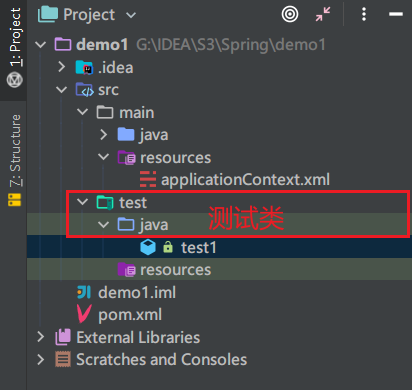
Define test class
The test class is defined in the java package under the test package under the root directory
Here we create a test1 (arbitrary name) test class
spring proxy SomeServiceImpl object
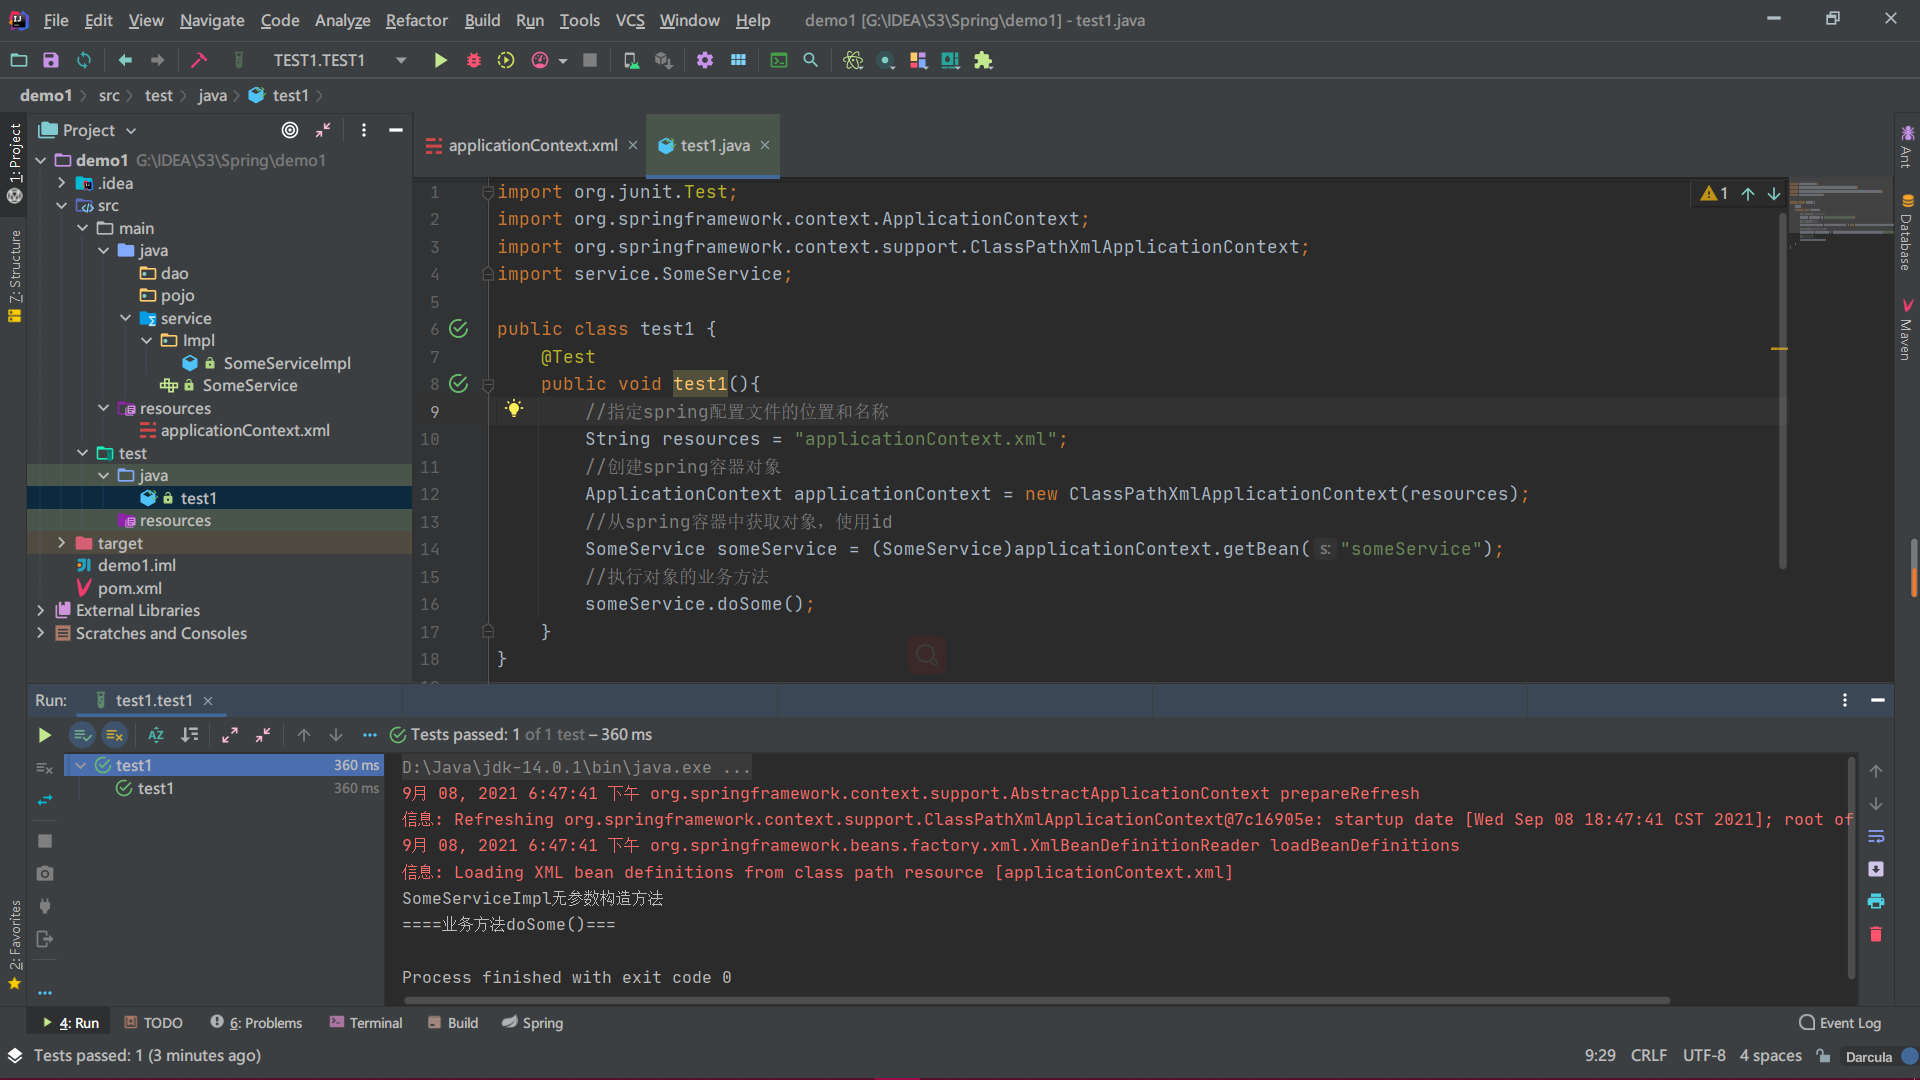
Test the proxy someServiceImpl object in the spring container
import org.junit.Test;
import org.springframework.context.ApplicationContext;
import org.springframework.context.support.ClassPathXmlApplicationContext;
import service.SomeService;

public class test1 {
    @Test
    public void test1(){
        //Specify the location and name of the spring configuration file
        String resources = "applicationContext.xml";
        //Create spring container object
        ApplicationContext applicationContext = new ClassPathXmlApplicationContext(resources);
        //Get the object from the spring container and use the id
        SomeService someService = (SomeService)applicationContext.getBean("someService");
        //Business method of execution object
        someService.doSome();
    }
}
someServiceImpl object of spring agent running successfully
Using spring to create non custom class objects
Simply put, spring can create custom objects or non custom objects.
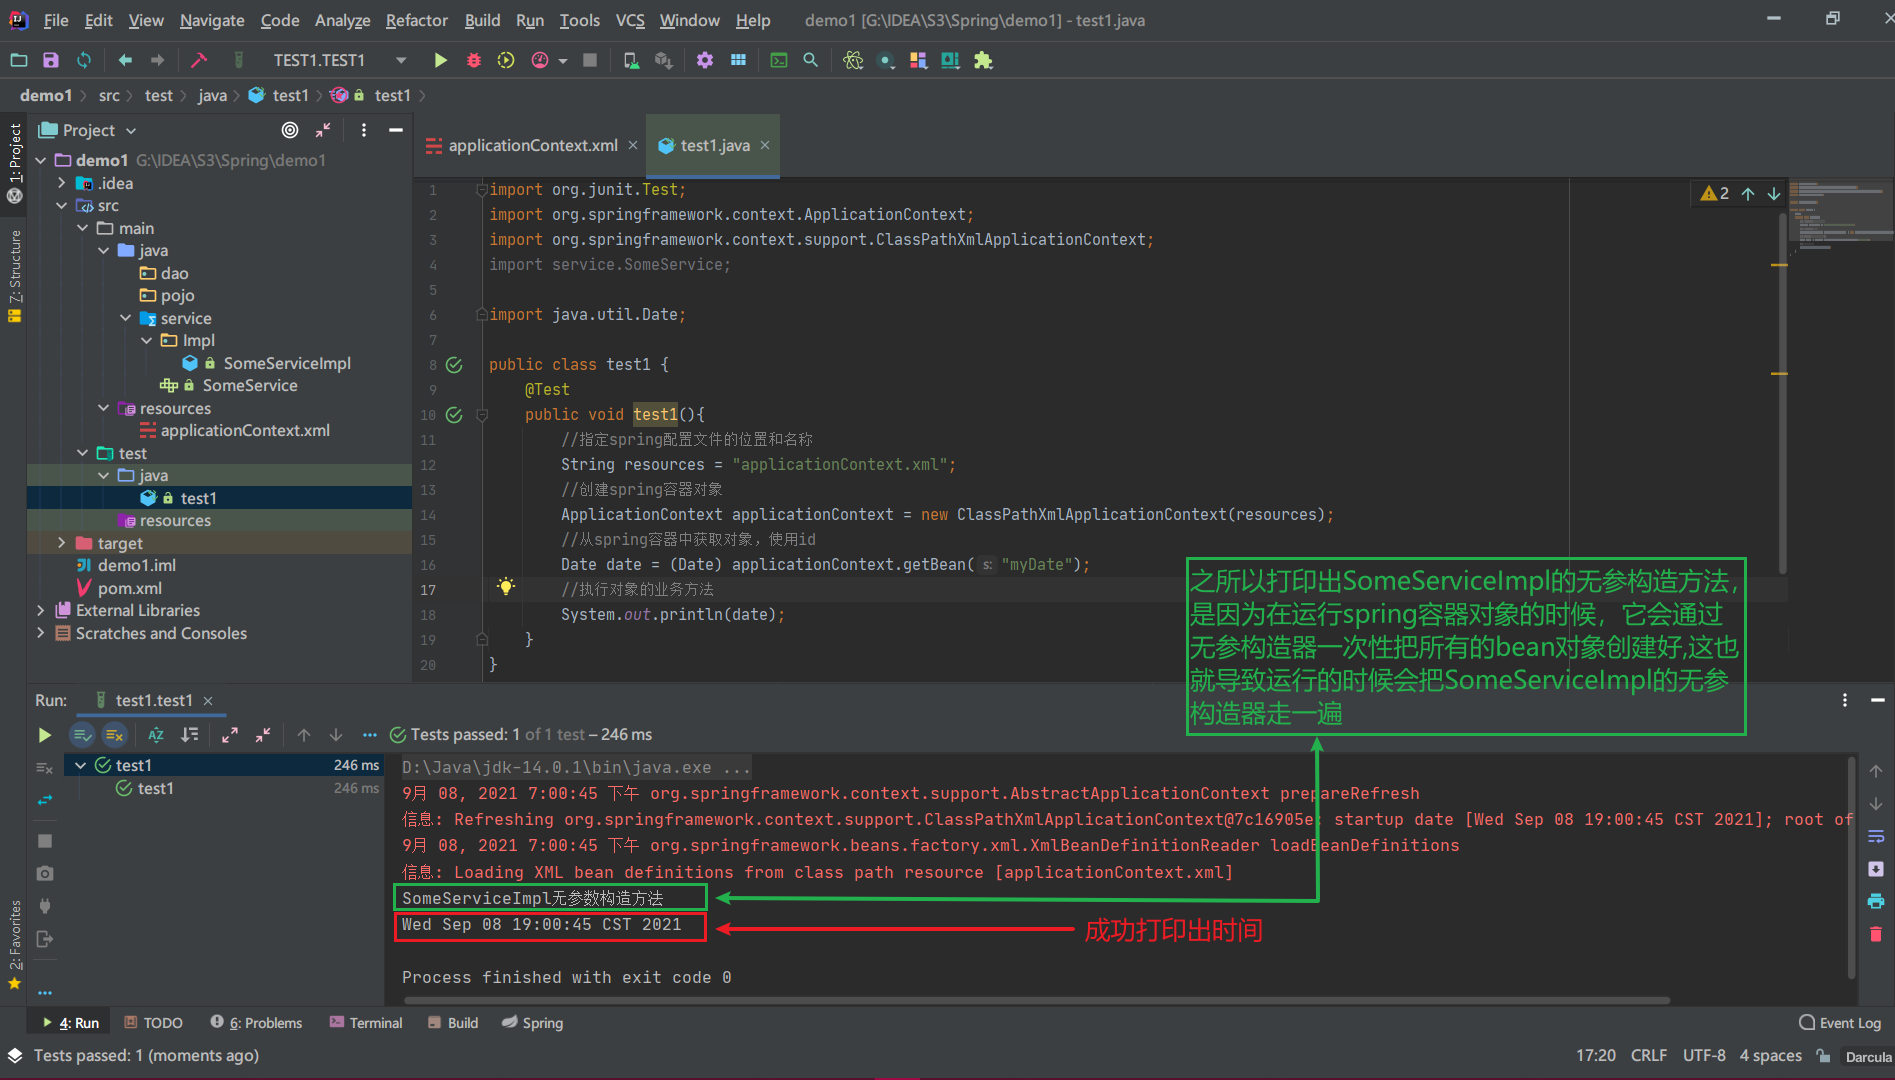
The objects created by the spring agent above are our custom objects. We can use the objects provided by the spring agent java, such as the date class (Date):
Add java.util.Date definition to the spring configuration file:
<bean id="myDate" class="java.util.Date" />
As shown in the figure
In test1 test class:
Call getBean("myDate"); Gets the date class object.
Container interfaces and implementation classes
ApplicationContext interface (container)
ApplicationContext is used to load the Spring configuration file and act as a "content" in the program
The role of the manager. There are two implementation classes:
Use Ctrl+H to view the inheritance relationship of the class
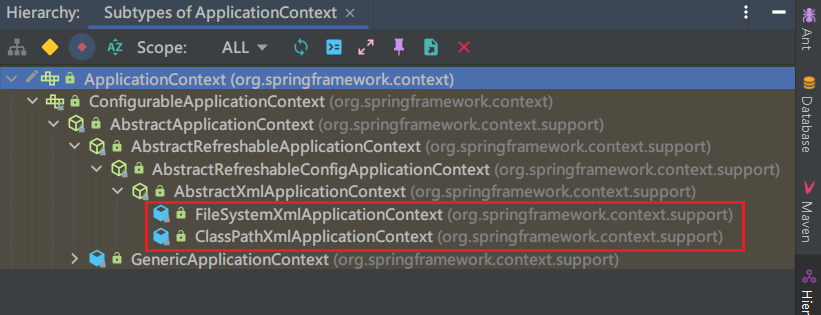
The difference between ClassPathXmlApplicationContext and FileSystemXmlApplicationContext
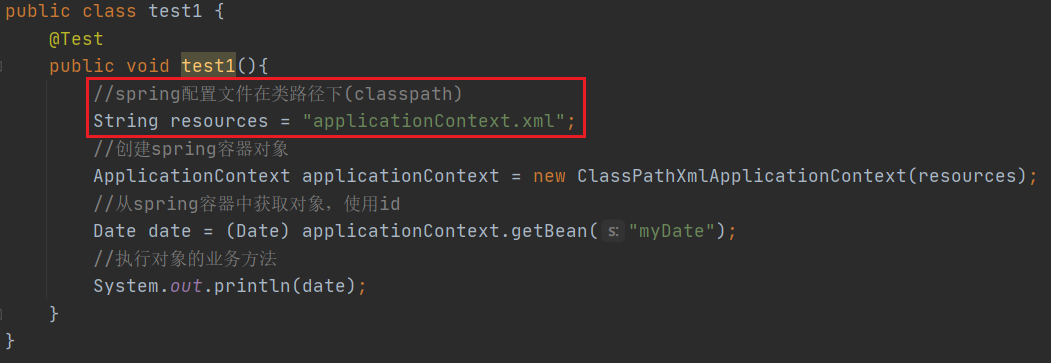
ClassPathXmlApplicationContext [only configuration files placed in the web info / classes directory can be read]
- The default is under the classpath of the project
- If you want to use an absolute path, you need to prefix file: to indicate that this is an absolute path
Use ClassPathXmlApplicationContext to specify the spring configuration file location
The default is under the classpath of the project
ApplicationContext applicationContext = new ClassPathXmlApplicationContext("applicationContext.xml");
The addition of file indicates that the spring configuration file location is specified using an absolute path
ApplicationContext applicationContext = new ClassPathXmlApplicationContext("file:G:/IDEA/S3/Spring/demo1/src/main/resources/applicationContext.xml");
FileSystemXmlApplicationContext:
- The default is the project working path, which is the root directory of the project
- File indicates the absolute path of the file
- If you want to use a classpath path, you need the prefix classpath
Use FileSystemXmlApplicationContext to specify the spring configuration file location
The default is the project working path, that is, the root directory of the project, and our configuration file is under src/main/resources in the root directory
ApplicationContext applicationContext = new FileSystemXmlApplicationContext("src/main/resources/applicationContext.xml");
The addition of file indicates the absolute path of the file
ApplicationContext applicationContext = new FileSystemXmlApplicationContext("file:G:/IDEA/S3/Spring/demo1/src/main/resources/applicationContext.xml");
To use classpath path, you need to prefix classpath, which is equivalent to ClassPathXmlApplicationContext
ApplicationContext applicationContext = new FileSystemXmlApplicationContext("classpath:applicationContext.xml");
The configuration file is under the classpath
Our configuration files are generally stored in the classpath of the project, and the ClassPathXmlApplicationContext implementation class is used for loading.
Assembly timing of objects in the ApplicationContext container
The ApplicationContext container will assemble all the objects in the container at one time when the container object is initialized. If you want to use these objects in future code, you just need to get them directly from memory. High execution efficiency. But it takes up memory.

code
public class test1 {
    //Assembly timing of objects by ApplicationContext container
    @Test
    public void test1(){
        //Get container: all objects in the container have been assembled
        ApplicationContext applicationContext = new ClassPathXmlApplicationContext("applicationContext.xml");
    }
}
java objects created using the spring container
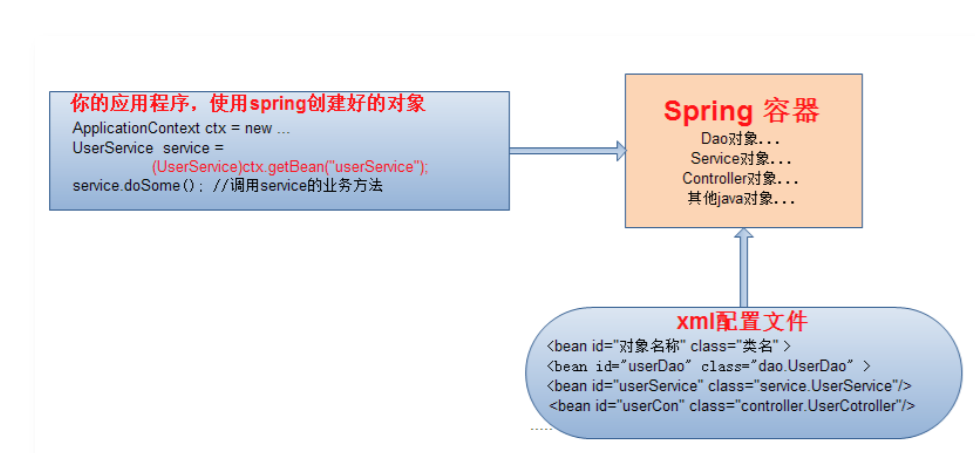
- The spring container will first read the applicationContext.xml configuration file when running
- Then create all bean objects in the configuration file at once
- Get the proxy object through applicationContext.getBean("id of bean object")