Core Animation Visual Effects
MakeDown support is not good at Blog Garden, please come in if necessary GitHub
The visual effect of the iPhone is excellent, so as an iOS engineer, we must have a certain understanding of how to deal with the visual effect. The main contents of this blog are as follows.
- fillet
- Layer border
- shadow
- layer mask
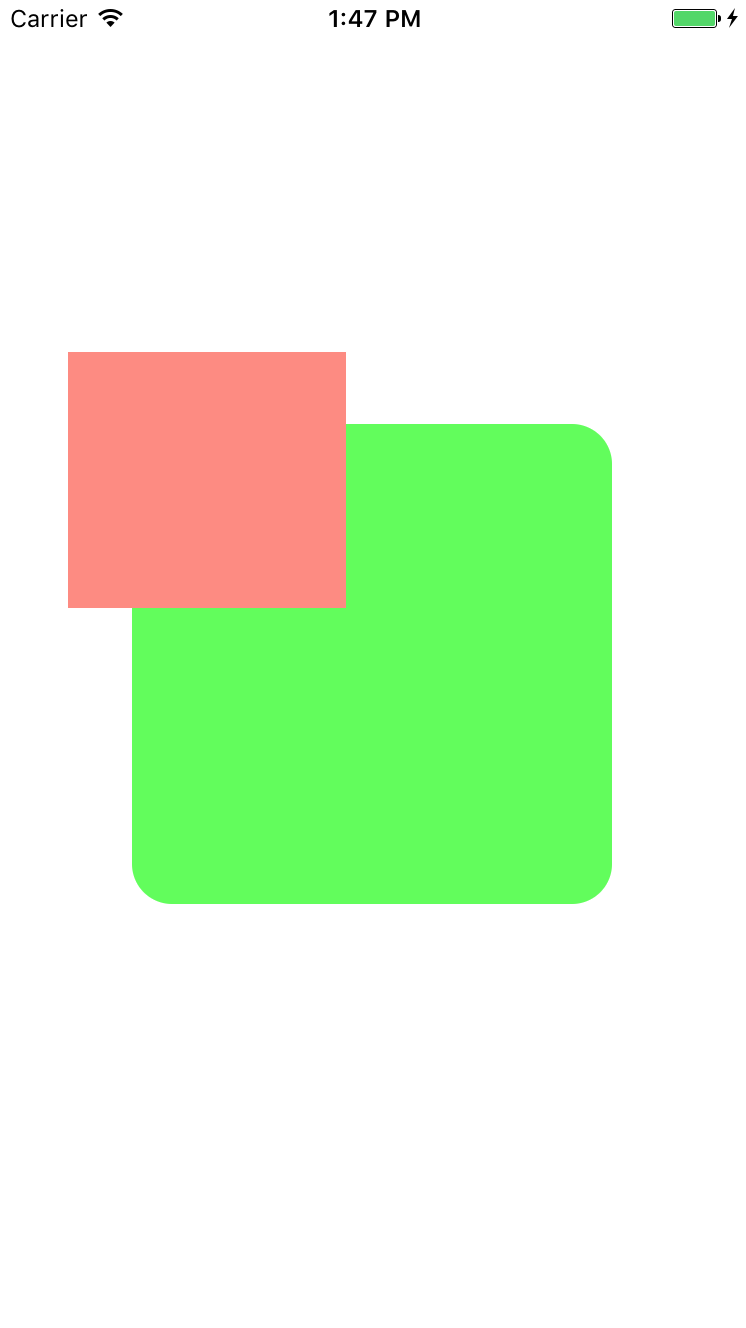
First, we add two ordinary views to the main view, and then process the corresponding visual effects later.

fillet
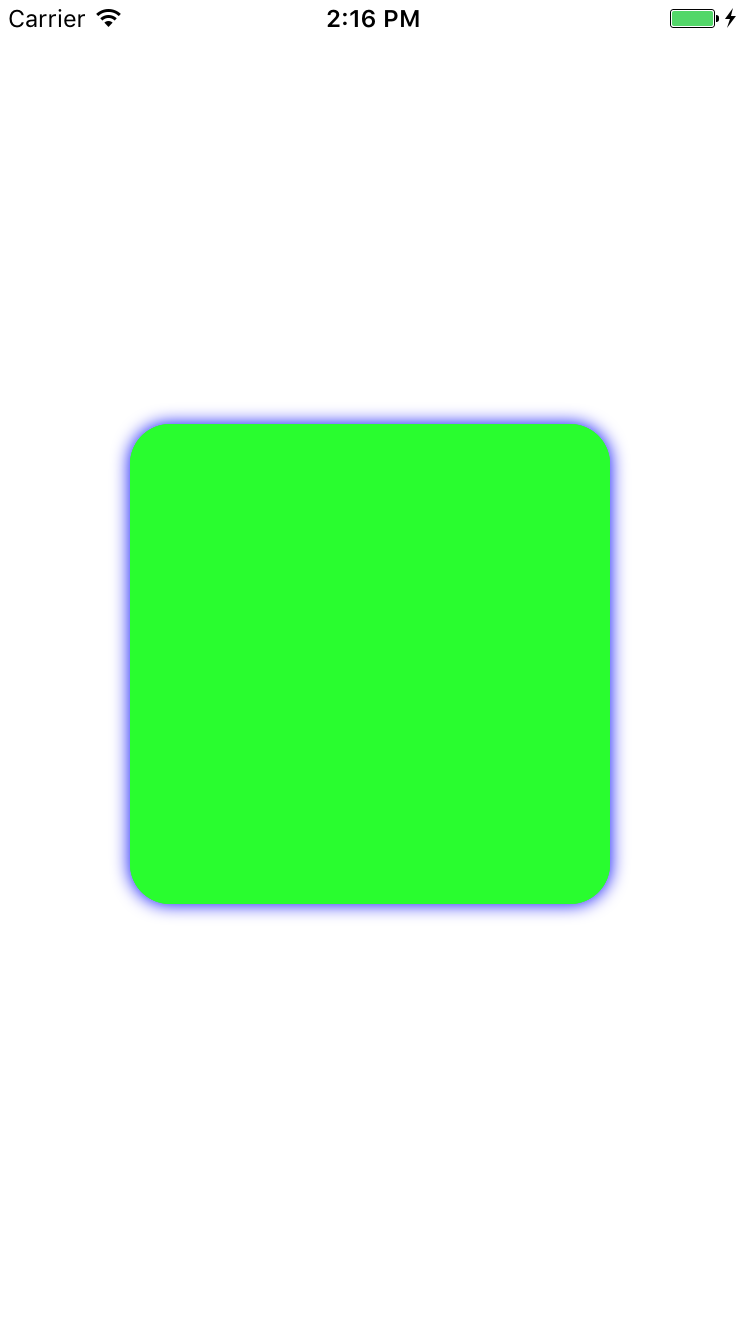
The rounded corners are unique to iOS, which makes us feel that everything we see is not so rigid. I will make the green view produce a suitable rounded corner.
The rounded corners of the green view make us feel comfortable and easy to implement, requiring only the following line of code.
self.customView.layer.cornerRadius = 20;
The green view achieves the desired effect, but the small view above obscures the rounded corners of the green view. At the same time, we don't want to remove the hour map, so we may need masksToBounds. We can set it to YES to achieve the following effect.
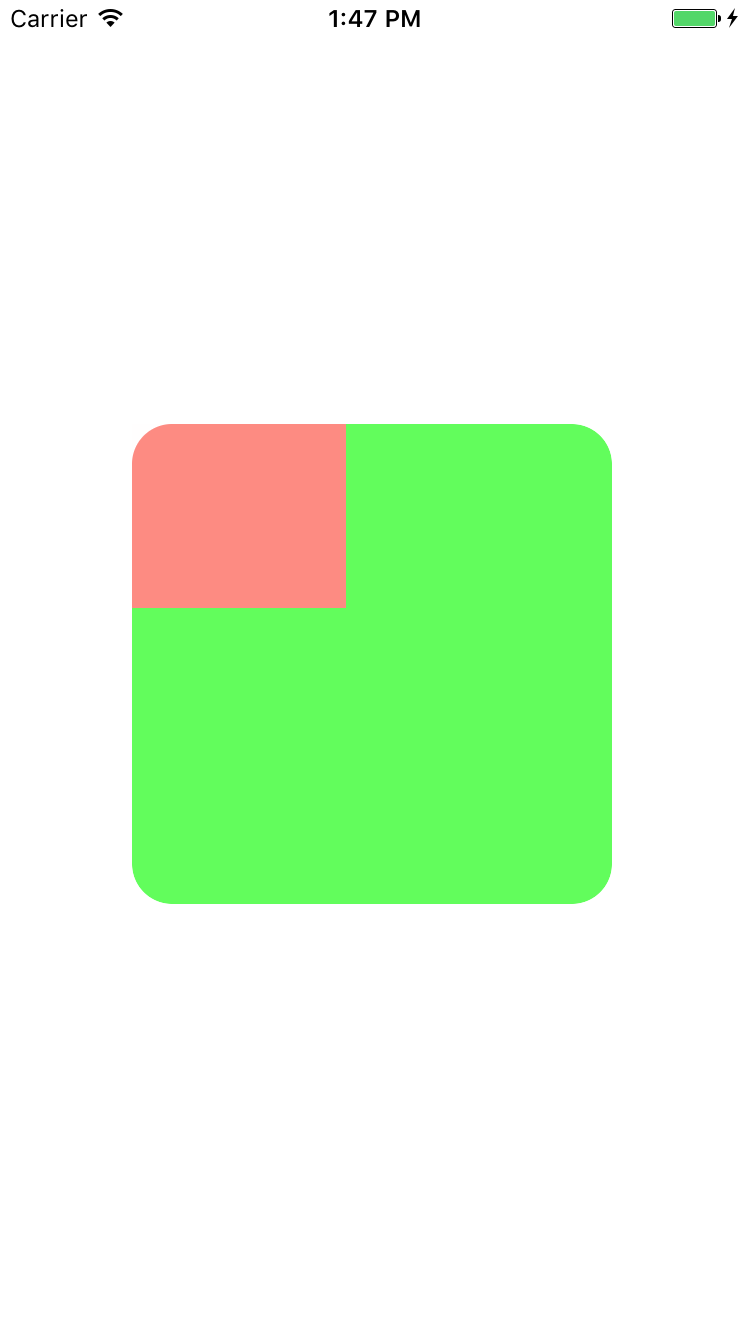
It looks very comfortable, and at the same time the effect of the small view is preserved.
Layer border
In some scenarios, we may use a frame-like effect, which makes the view look fuller, just like the image below.
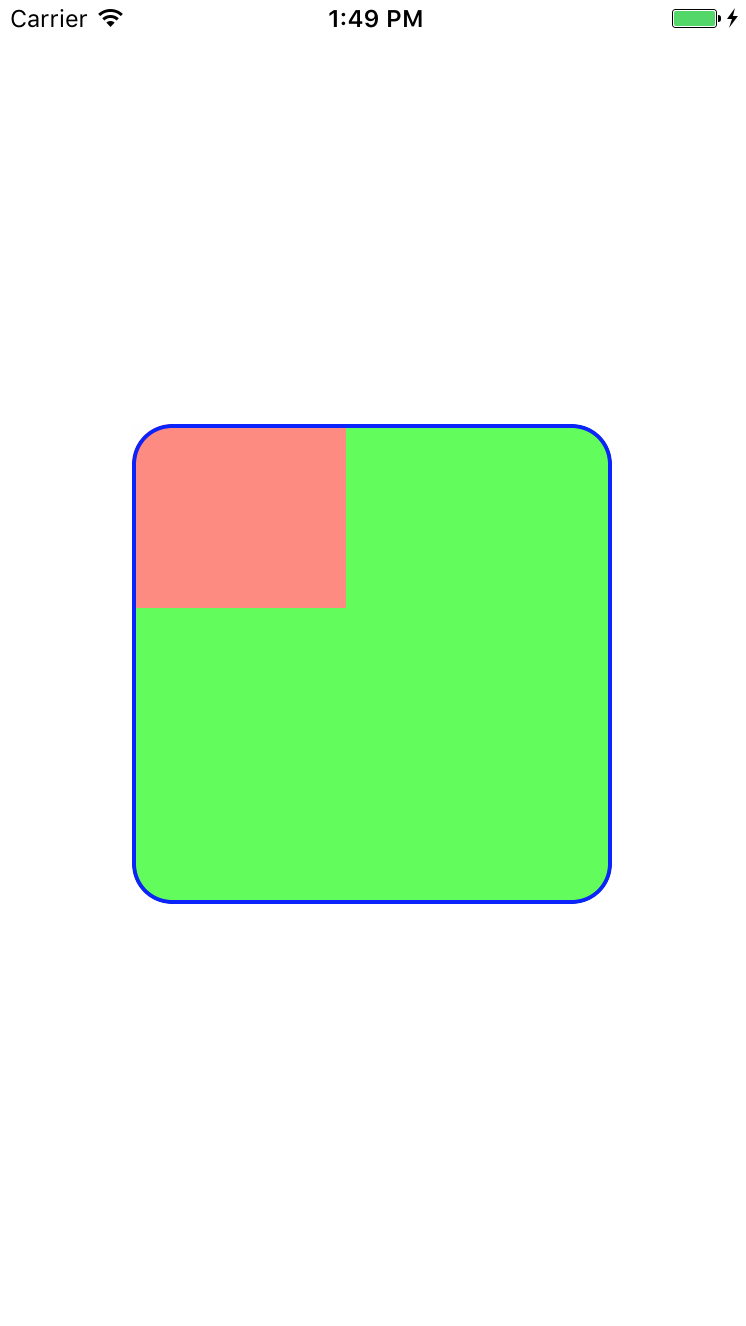
Picture 4 can highlight the content of the view contained in the frame more than picture 3-phase. It is very simple to achieve this effect.
// Border color
self.customView.layer.borderColor = [UIColor blueColor].CGColor;
// Border width
self.customView.layer.borderWidth = 2;
shadow
The above two view effect attributes are very common and very simple. Next comes a common but slightly complex attribute, shadow. First, look at the simple effect (for easy observation, I will enlarge this picture a little.)
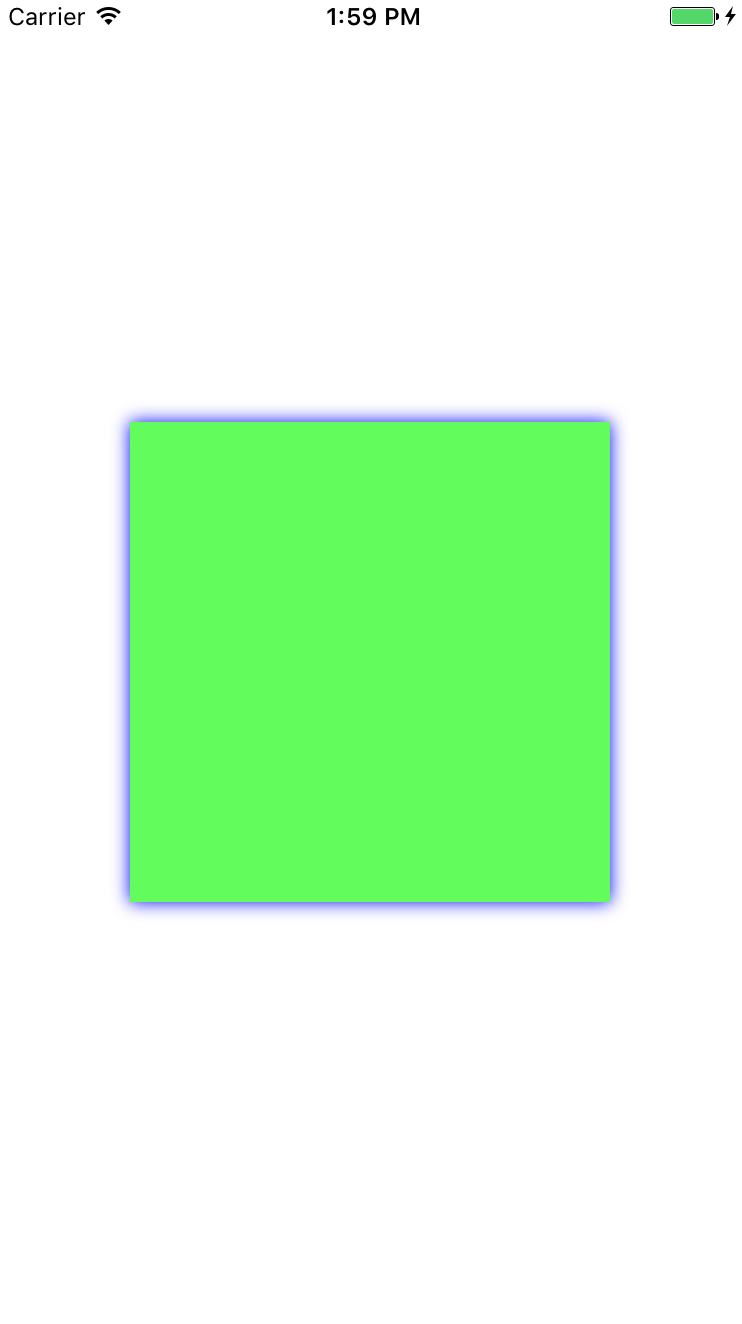
It can be found that there are blue shadows on the four sides of the green view. It seems that the green view is very conspicuous and the effect of shadows is the same, which makes the shadowed view more prominent. To achieve the effect of Picture 5, we need to add the following code.
[self.topView removeFromSuperview];// Delete small views to avoid affecting the display of Shadows
self.customView.layer.shadowOpacity = 1;// (0.0: invisible ~ 1.0: completely opaque)
self.customView.layer.shadowColor = [UIColor blueColor].CGColor;
self.customView.layer.shadowOffset = CGSizeZero;
self.customView.layer.shadowRadius = 5;// The greater the ambiguity (radius) value, the more ambiguous it is.
- shadowOpacity: This property controls the visibility of shadows, as noted, if set to 0 shadows will not be displayed.
- shadowColor: This property sets the color of the shadow.
- shadowOffset: This property sets the offset of shadows, which is CGSize type. For example (0,2) horizontal offset, vertical downward offset 2.
- shadowRadius: This property is literally understood as the radius of the shadow. The larger the value set, the wider the ambiguity area, the more obvious the ambiguity effect.
The above is the normal effect of shadows, but when I set masksToBounds to YES, the shadows will disappear. Because masksToBounds'effect is to cut out the unexpected effect of the layer.
But in reality, we have shadow effects that are used in conjunction with masksToBounds, so we need to do something else.
1) First, we set the shadow and rounded corner attributes on the main layer.
    self.customView.layer.shadowOpacity = 1;// (0.0: invisible ~ 1.0: completely opaque)
    self.customView.layer.shadowColor = [UIColor blueColor].CGColor;
    self.customView.layer.shadowOffset = CGSizeMake(0, 10);
    self.customView.layer.shadowRadius = 5;// The greater the ambiguity (radius) value, the more ambiguous it is.
2) Build a new layer with rounded corners and masksToBounds.
UIView * tempLayerTwo = [[UIView alloc]init];
tempLayerTwo.frame = self.customView.bounds;
tempLayerTwo.backgroundColor = [UIColor greenColor];
tempLayerTwo.layer.cornerRadius = 20;
tempLayerTwo.layer.masksToBounds = YES;
3) add the newly constructed layer to the main layer and run to see the effect.
[self.customView addSubview:tempLayerTwo];
Most of the basic operations and techniques of shadowing have been introduced so far, followed by a more practical attribute: shadowPath, which can draw corresponding shadows according to path.
CGMutablePathRef squarePath = CGPathCreateMutable();
CGPathAddRect(squarePath, NULL, self.customView.bounds);
self.customView.layer.shadowPath = squarePath;
CGPathRelease(squarePath);

layer mask
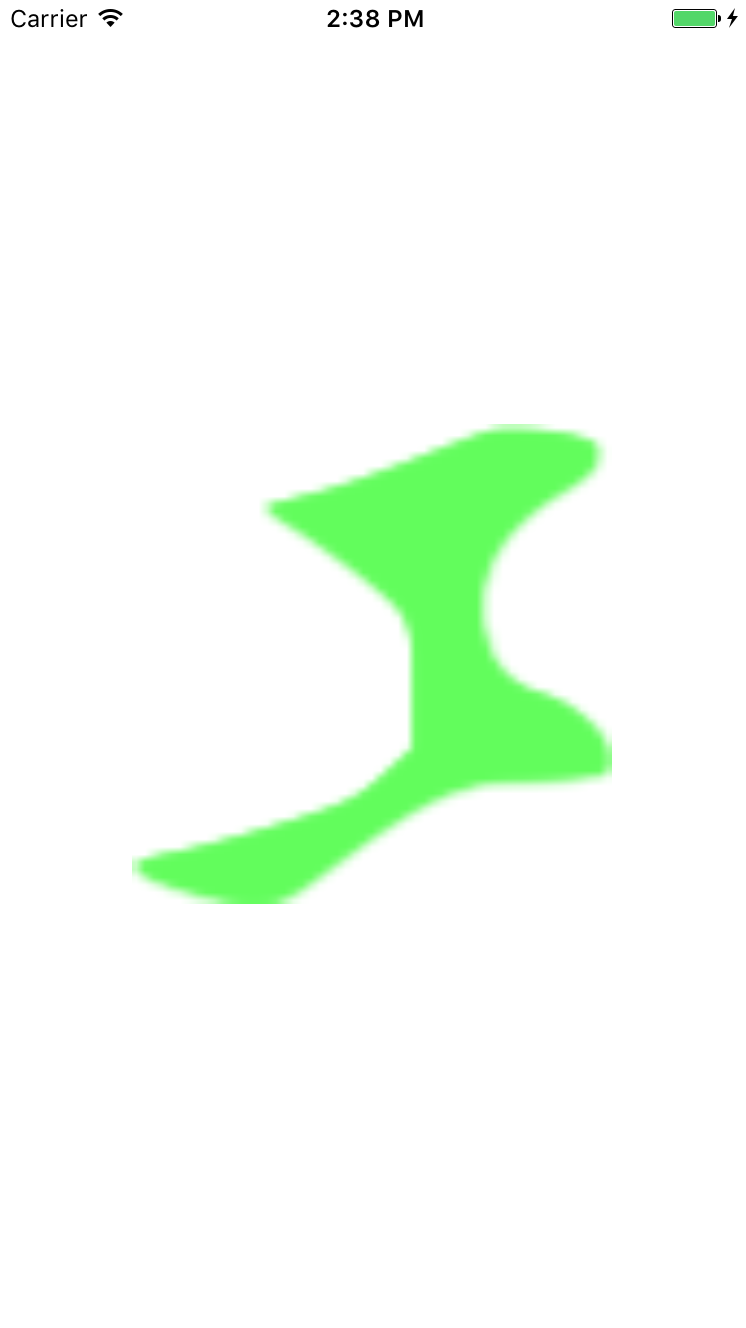
The mask sounds a little strange, but it's easy to understand. Take a chestnut for example. Now I have two layers. One is the shape of a pentagon, but the color is purple. The Pentagon of our great motherland is yellow. Coincidentally, my other layer is yellow. Then I can use the mask attribute of the yellow layer to construct simply. Make a yellow pentagon. Here we make a picture of what shape it is.

I can change the color to green by adding the following code.
CALayer * makeLayer = [[CALayer alloc]init];
makeLayer.frame = self.customView.bounds;
UIImage * makeImage = [UIImage imageNamed:@"black"];
makeLayer.contents = (__bridge id)makeImage.CGImage;

self.customView.layer.mask = makeLayer;