1. Introduction to SSM (Baidu replication)
SSM (Spring + Spring MVC + MyBatis) framework set is composed of Spring and MyBatis open source frameworks (Spring MVC is part of Spring). It is often used as a framework for web projects with simpler data sources.
2. Construction of SSM framework
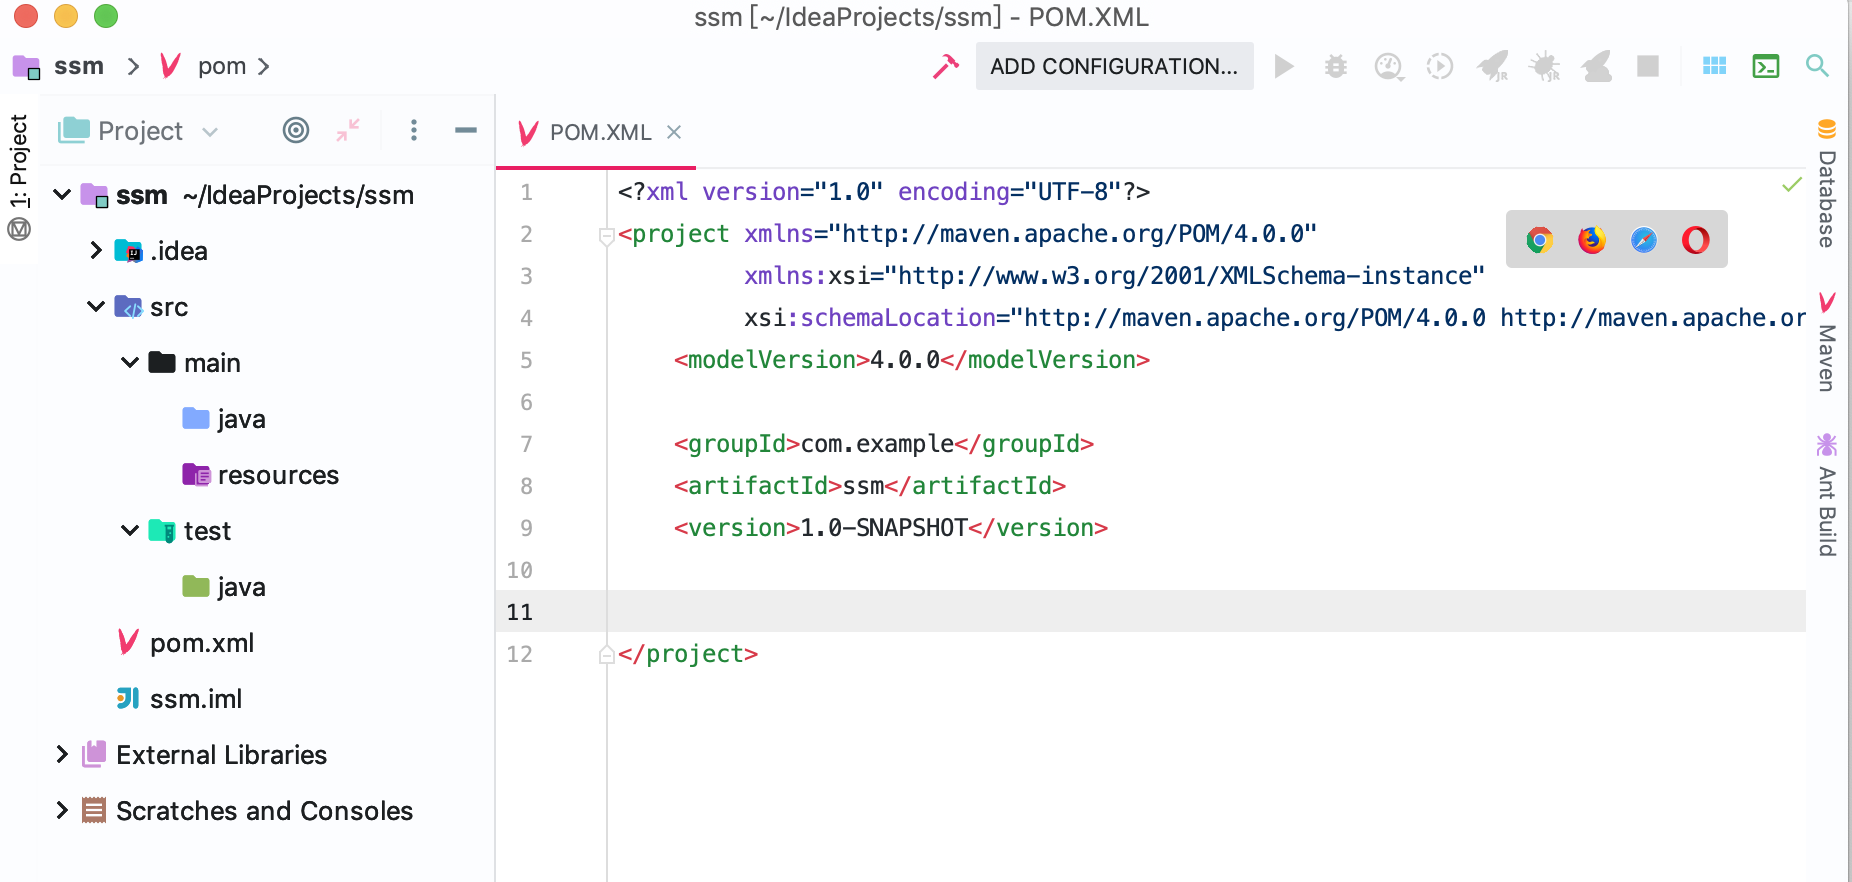
2.1 Create new projects
First, open the window to create the project and prepare to create a new maven project
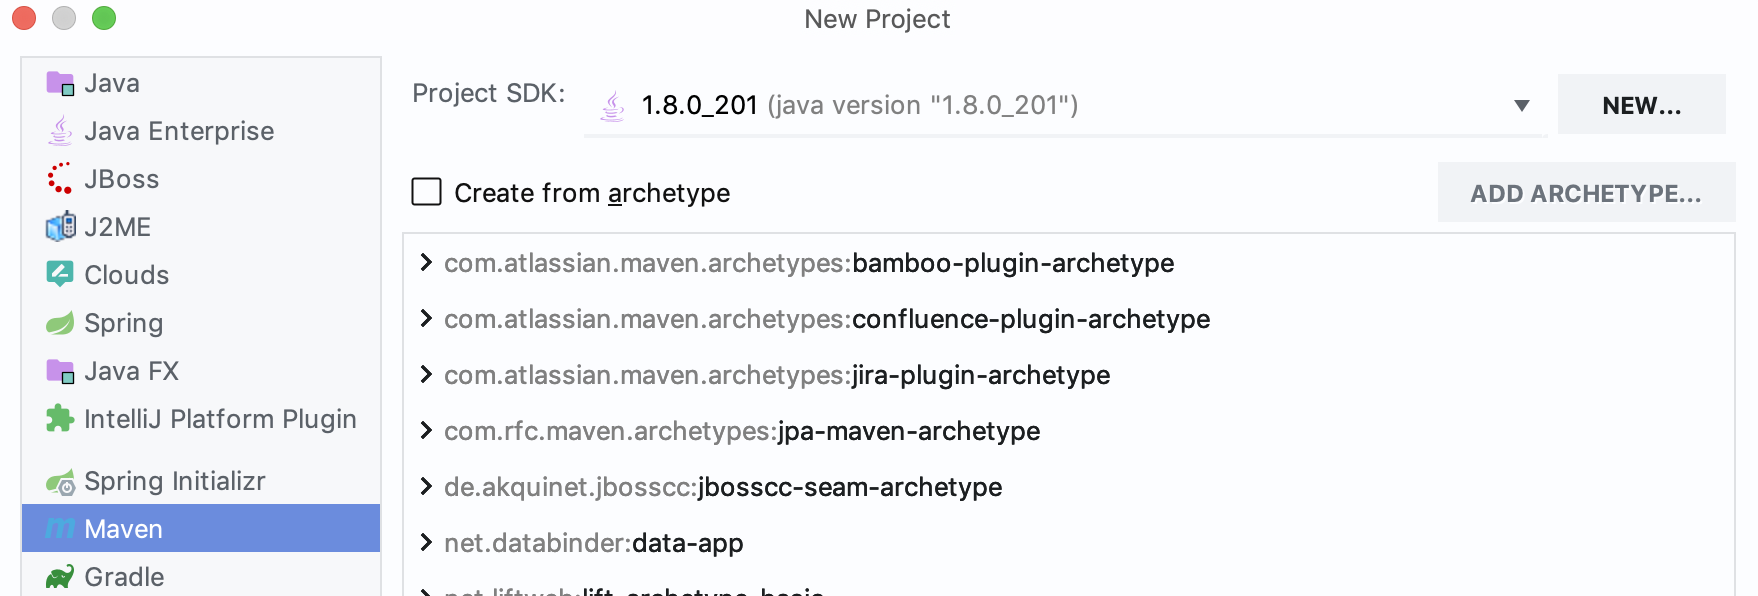
Next, enter the name of the project

Finally, click NEXT to create a new project.
2.2 Integrating Spring MVC
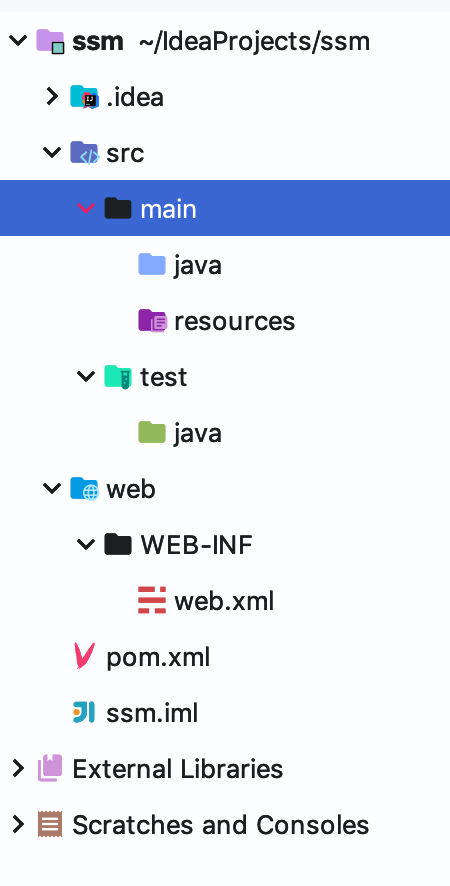
The newly created project directory is as follows, missing web modules
Click on the File-Project Structure menu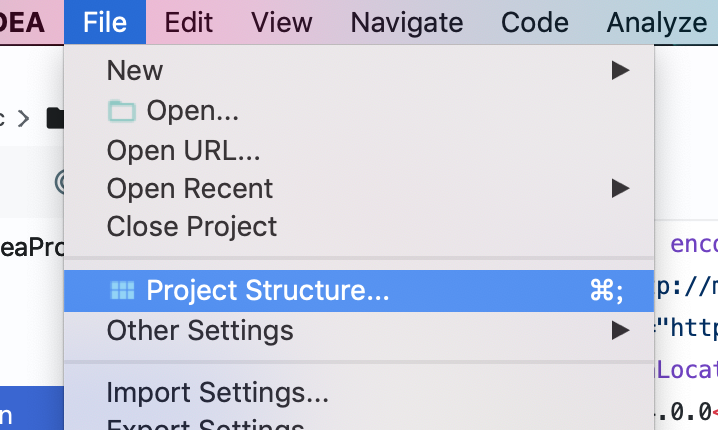
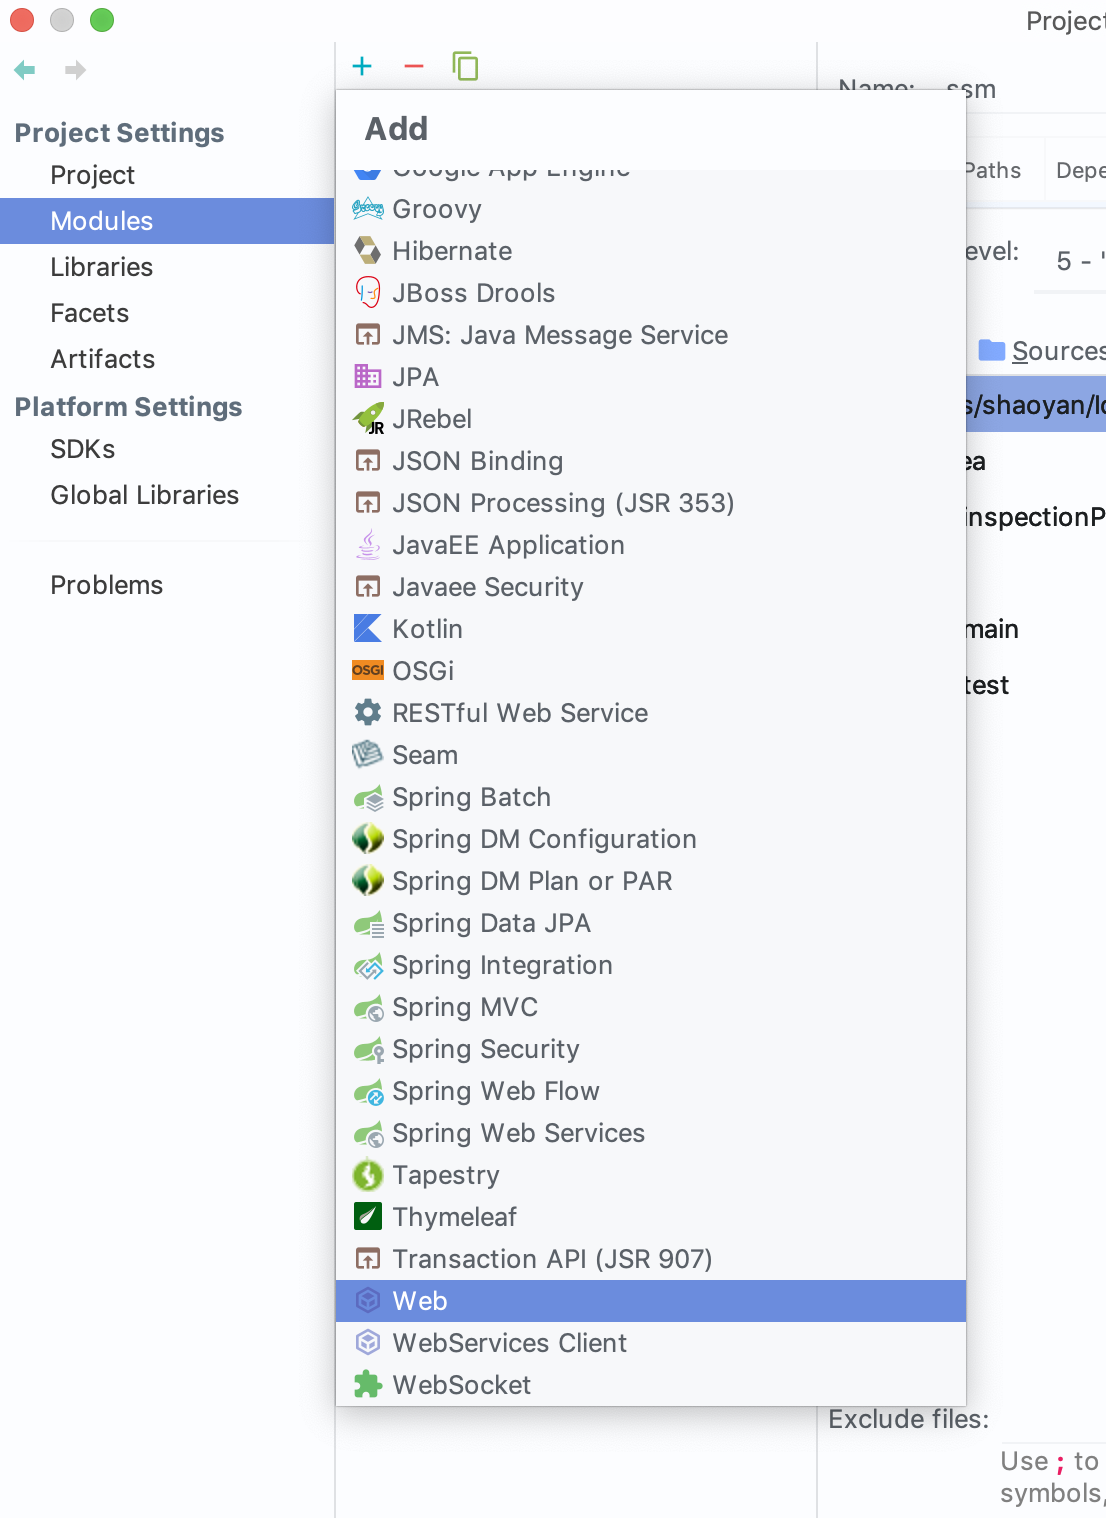
Click Modules and select Add Web Modules
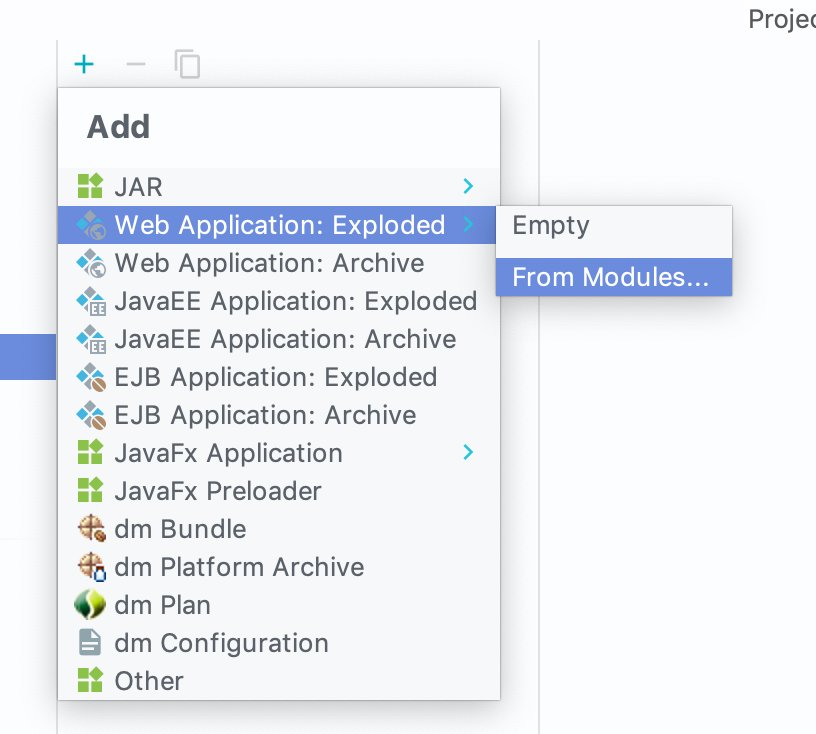
Next, we will mention the lack of Artifact. Click CREATE ARTIFACT to create it.
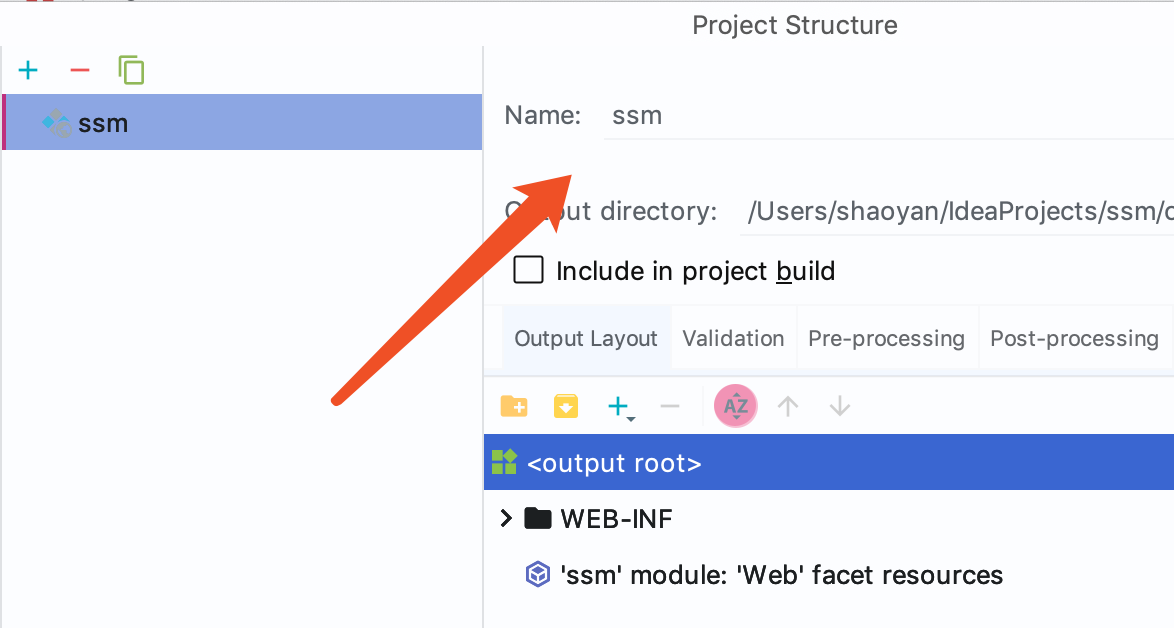
By the way, change the nauseous name of automatic production

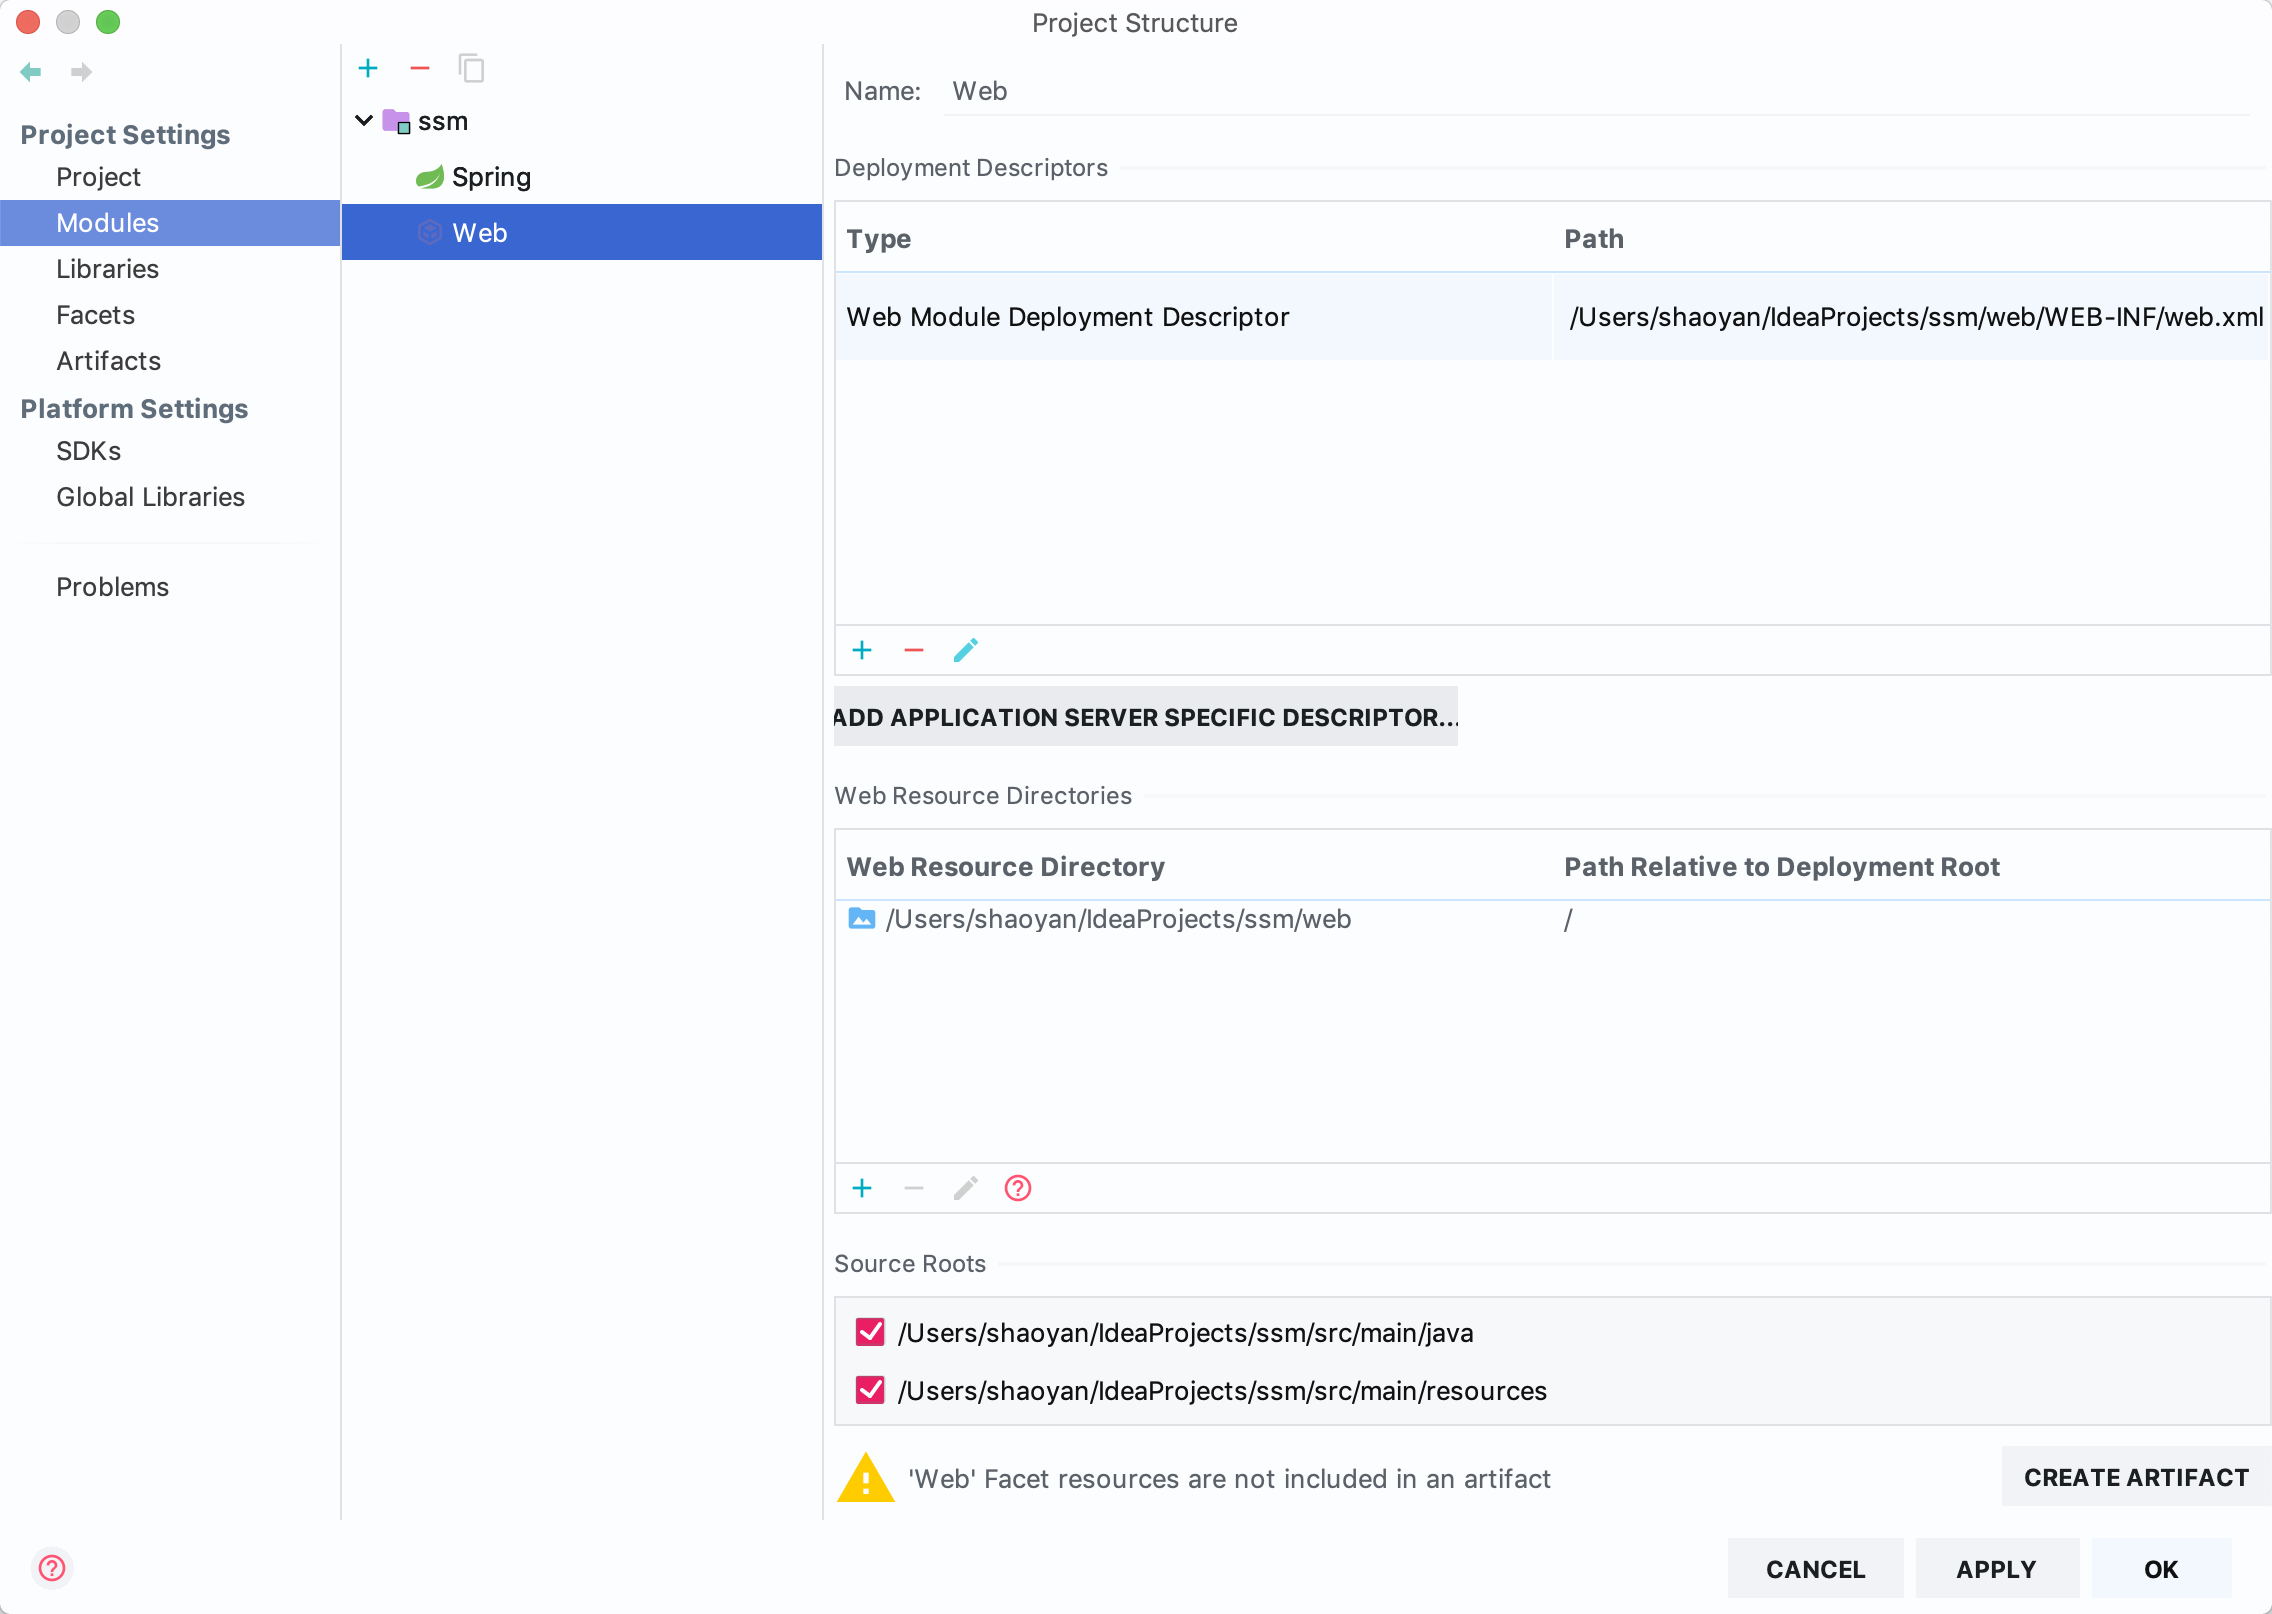
Click OK to add the Web module successfully, and the directory will automatically generate the webapp directory
Next, add spring MVC and servlet dependencies to pom.xml
<!--servlet-->
<dependency>
<groupId>javax.servlet</groupId>
<artifactId>javax.servlet-api</artifactId>
<version>3.1.0</version>
<scope>provided</scope>
</dependency>
<!--mvc-->
<dependency>
<groupId>org.springframework</groupId>
<artifactId>spring-webmvc</artifactId>
<version>4.3.17.RELEASE</version>
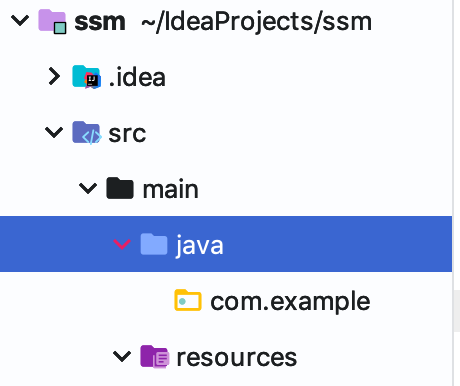
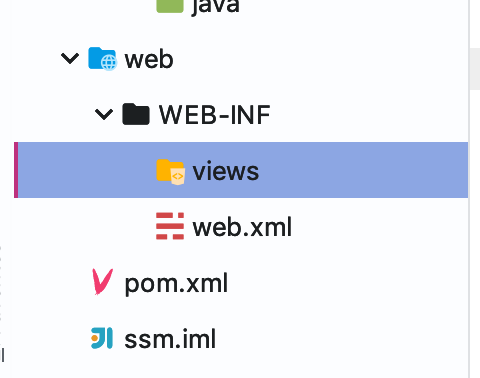
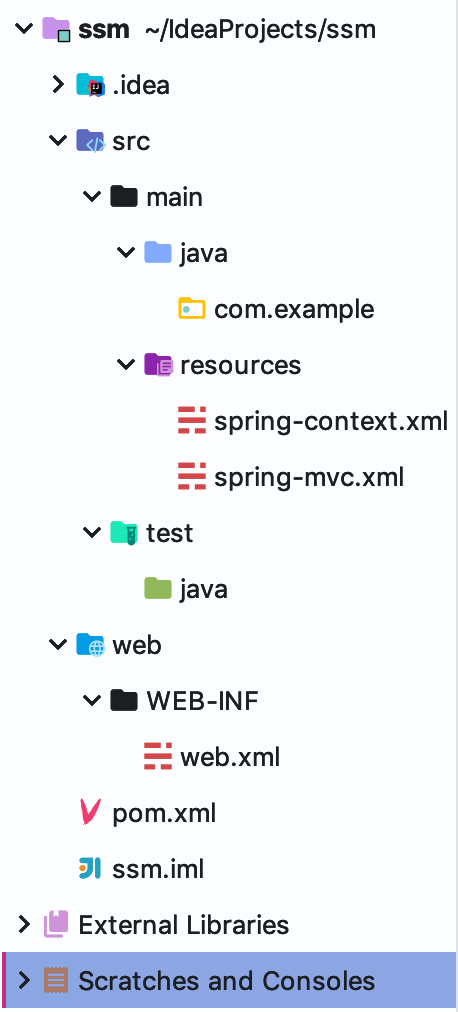
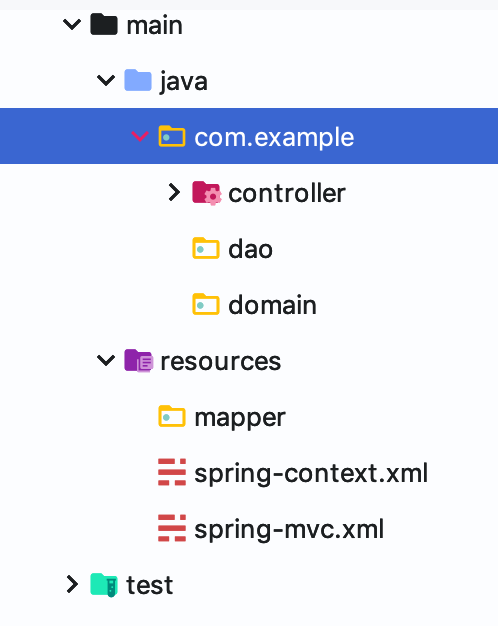
</dependency>Then add a new package of com.example to the file of / main/java to prepare the package for scanning; create the views folder under the directory of webapp/WEB-INF to store the page files
Next, under the resources folder, the bedstead spring-context.xml and spring-mvc.xml
The spring-context.xml file is as follows:
<?xml version="1.0" encoding="UTF-8"?>
<beans xmlns="http://www.springframework.org/schema/beans"
       xmlns:xsi="http://www.w3.org/2001/XMLSchema-instance"
       xmlns:context="http://www.springframework.org/schema/context"
       xsi:schemaLocation="http://www.springframework.org/schema/beans http://www.springframework.org/schema/beans/spring-beans.xsd http://www.springframework.org/schema/context http://www.springframework.org/schema/context/spring-context.xsd">

    <!-- Use Annotation automatic logon Bean,Not scanned in main container @Controller Annotations, in SpringMVC Scanning only in the middle @Controller Annotations.-->
    <context:component-scan base-package="com.example">
        <context:exclude-filter type="annotation" expression="org.springframework.stereotype.Controller"/>
    </context:component-scan>
</beans>
The spring-mvc.xml file is as follows:
<?xml version="1.0" encoding="UTF-8"?>
<beans xmlns="http://www.springframework.org/schema/beans" xmlns:xsi="http://www.w3.org/2001/XMLSchema-instance"
       xmlns:context="http://www.springframework.org/schema/context"
       xmlns:mvc="http://www.springframework.org/schema/mvc"
       xsi:schemaLocation="http://www.springframework.org/schema/beans http://www.springframework.org/schema/beans/spring-beans.xsd
        http://www.springframework.org/schema/context http://www.springframework.org/schema/context/spring-context.xsd
        http://www.springframework.org/schema/mvc http://www.springframework.org/schema/mvc/spring-mvc.xsd">

    <description>Spring MVC Configuration</description>
    <!-- Default annotation mapping support -->
    <mvc:annotation-driven />

    <!-- Use Annotation automatic logon Bean,Scanning only @Controller -->
    <context:component-scan base-package="com.example" use-default-filters="false">
        <context:include-filter type="annotation" expression="org.springframework.stereotype.Controller"/>
    </context:component-scan>

    <!-- Define View File Resolution -->
    <bean class="org.springframework.web.servlet.view.InternalResourceViewResolver">
        <property name="prefix" value="/WEB-INF/views/"/>
        <property name="suffix" value=".jsp"/>
    </bean>
</beans>
Then, configure the web.xml file. First, modify the version under the web-app tag in the web.xml file. Tomcat 9 is required for automatic production of 4.0, because Tomcat 8 is used and needs to be modified to 3.1.

    <context-param>
        <param-name>contextConfigLocation</param-name>
        <param-value>classpath:spring-context*.xml</param-value>
    </context-param>
    <listener>
        <listener-class>org.springframework.web.context.ContextLoaderListener</listener-class>
    </listener>
<!--    CharacterEncodingFilter Configure Character Set Filter to Solve Chinese Coding Problem-->
    <filter>
        <filter-name>encodingFilter</filter-name>
        <filter-class>org.springframework.web.filter.CharacterEncodingFilter</filter-class>
        <init-param>
            <param-name>encoding</param-name>
            <param-value>UTF-8</param-value>
        </init-param>
        <init-param>
            <param-name>forceEncoding</param-name>
            <param-value>true</param-value>
        </init-param>
    </filter>
    <filter-mapping>
        <filter-name>encodingFilter</filter-name>
        <url-pattern>/*</url-pattern>
    </filter-mapping>
<!--    DispatcherServlet To configure Spring Of Servlet The distributor handles all HTTP Request and response-->
    <servlet>
        <servlet-name>springServlet</servlet-name>
        <servlet-class>org.springframework.web.servlet.DispatcherServlet</servlet-class>
        <init-param>
            <param-name>contextConfigLocation</param-name>
            <param-value>classpath*:/spring-mvc*.xml</param-value>
        </init-param>
        <load-on-startup>1</load-on-startup>
    </servlet>
    <servlet-mapping>
        <servlet-name>springServlet</servlet-name>
        <url-pattern>/</url-pattern>
    </servlet-mapping>
Then, create a controller package under the com.example package and a HelloController class under the controller package.

Create a simple index.jsp page under the webapp/WEB-INF/views folder

Next, you need to add the tomcat configuration, click Add as shown below
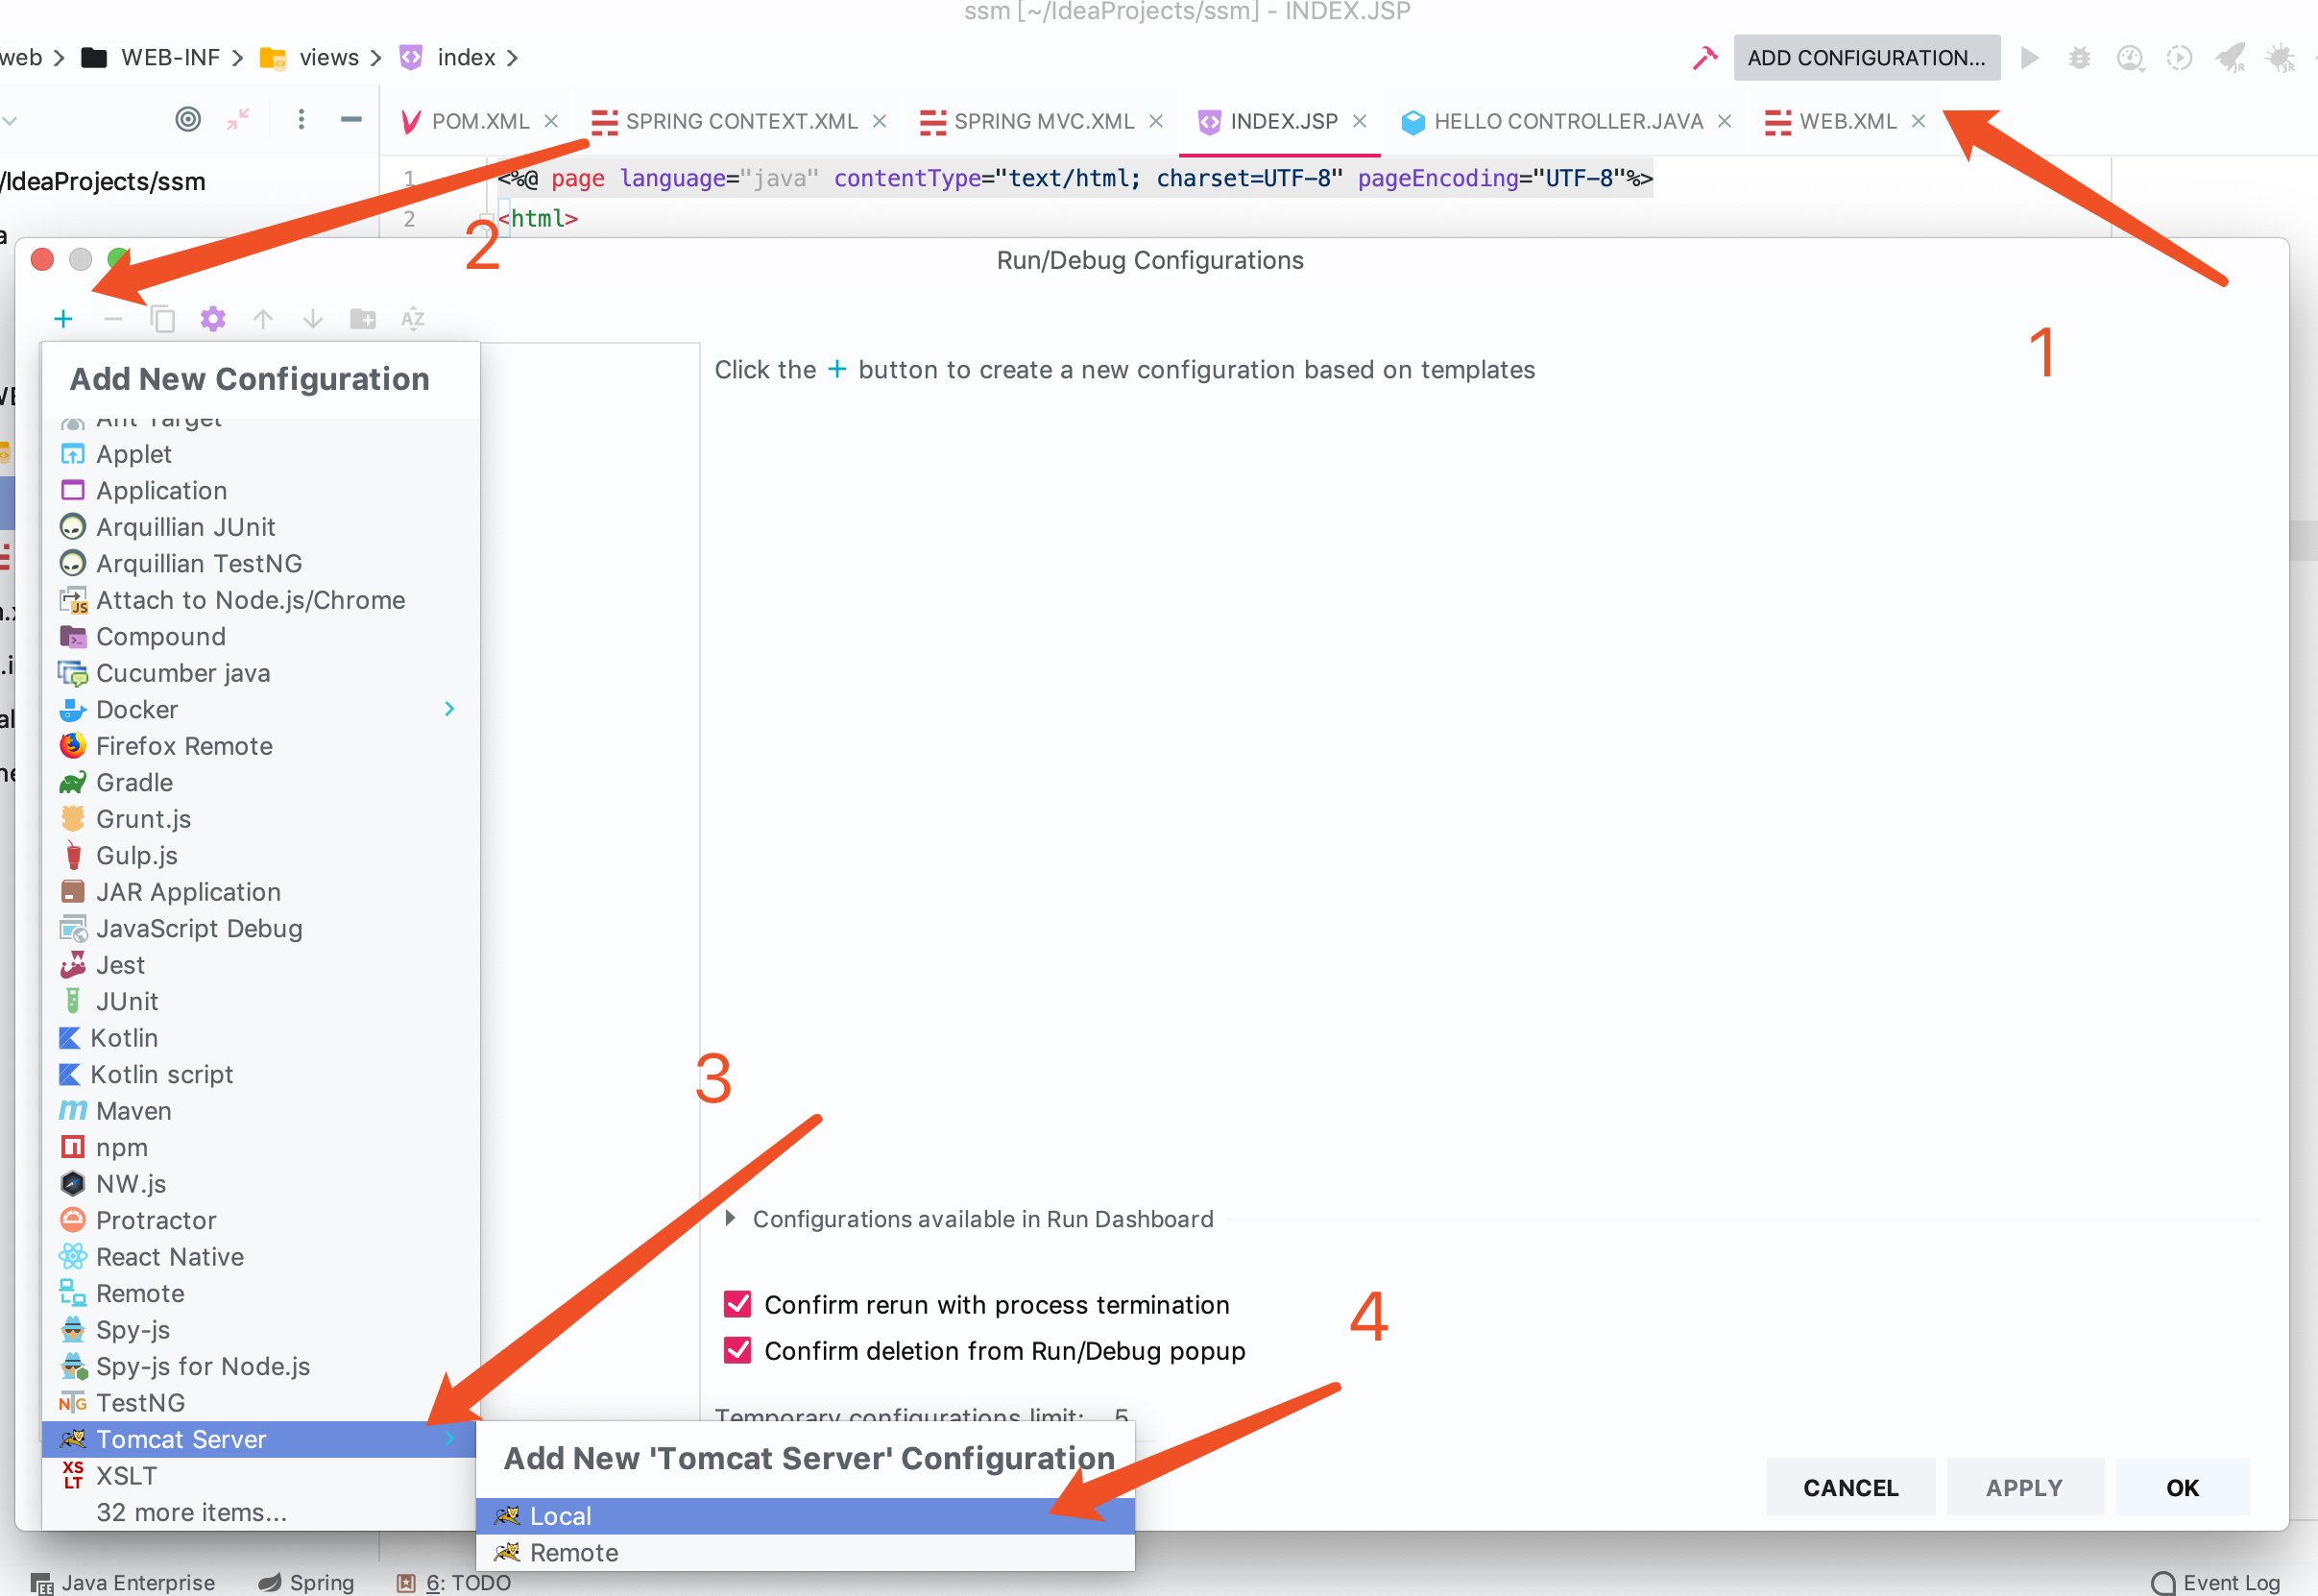
Next, you need to select Tomcat 8 (not Tomcat 7), then click FIX to add artifact.
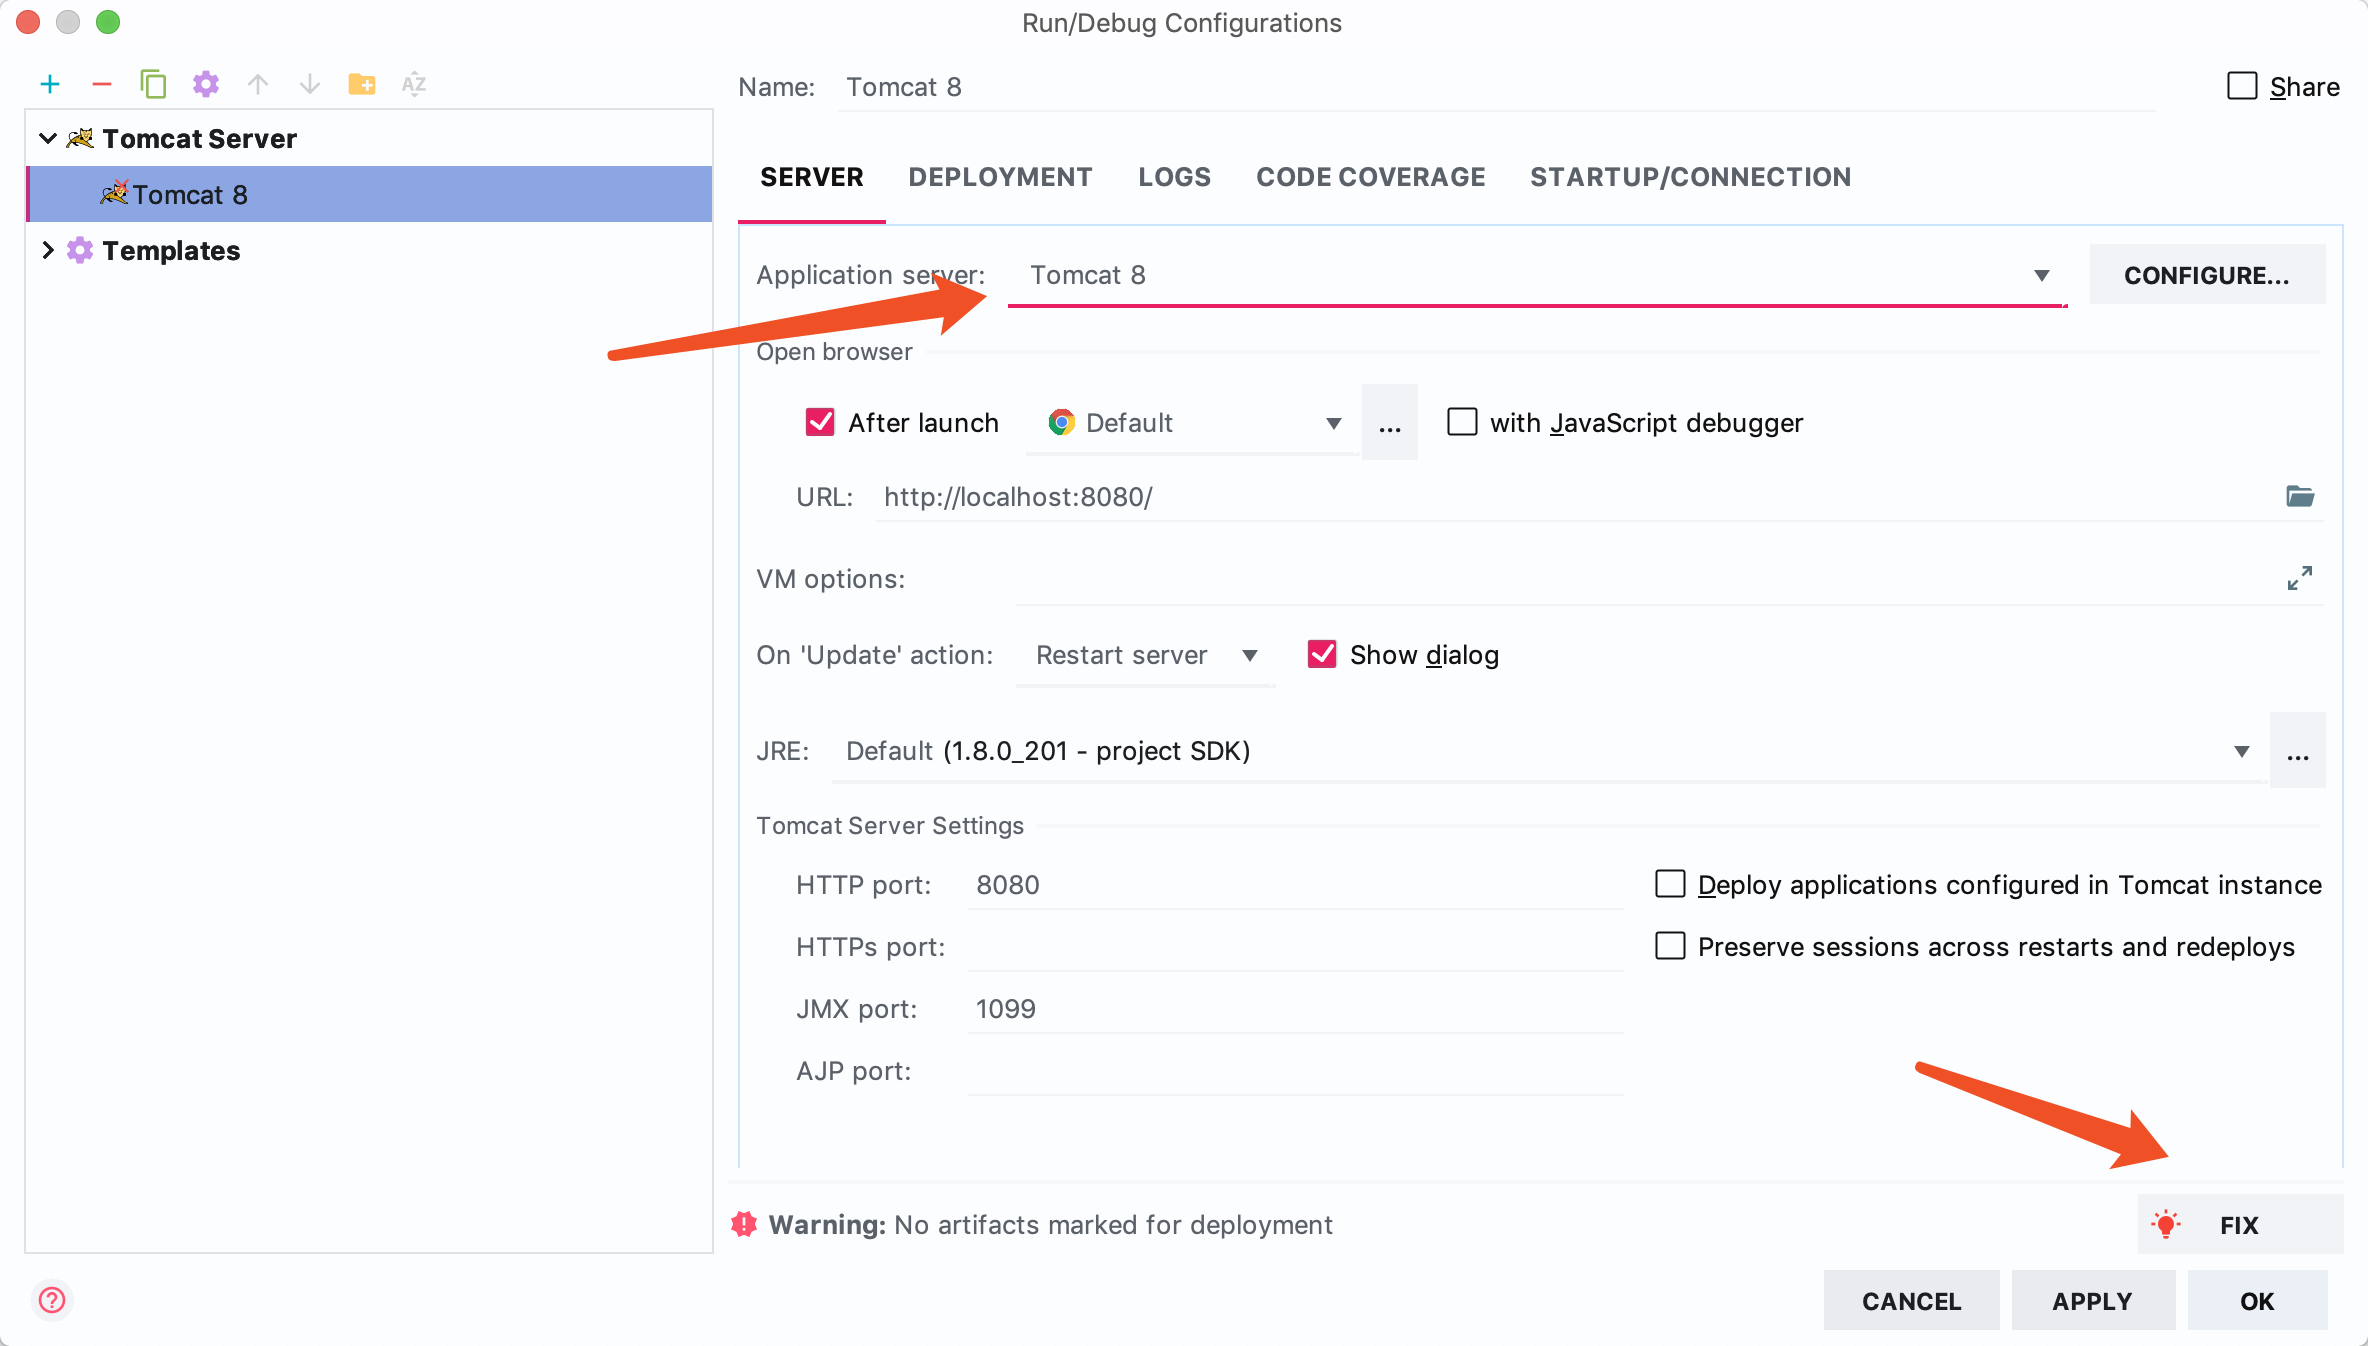
The system will automatically add the new artifact we created when we created the web module
Click OK to complete the creation of tomcat.
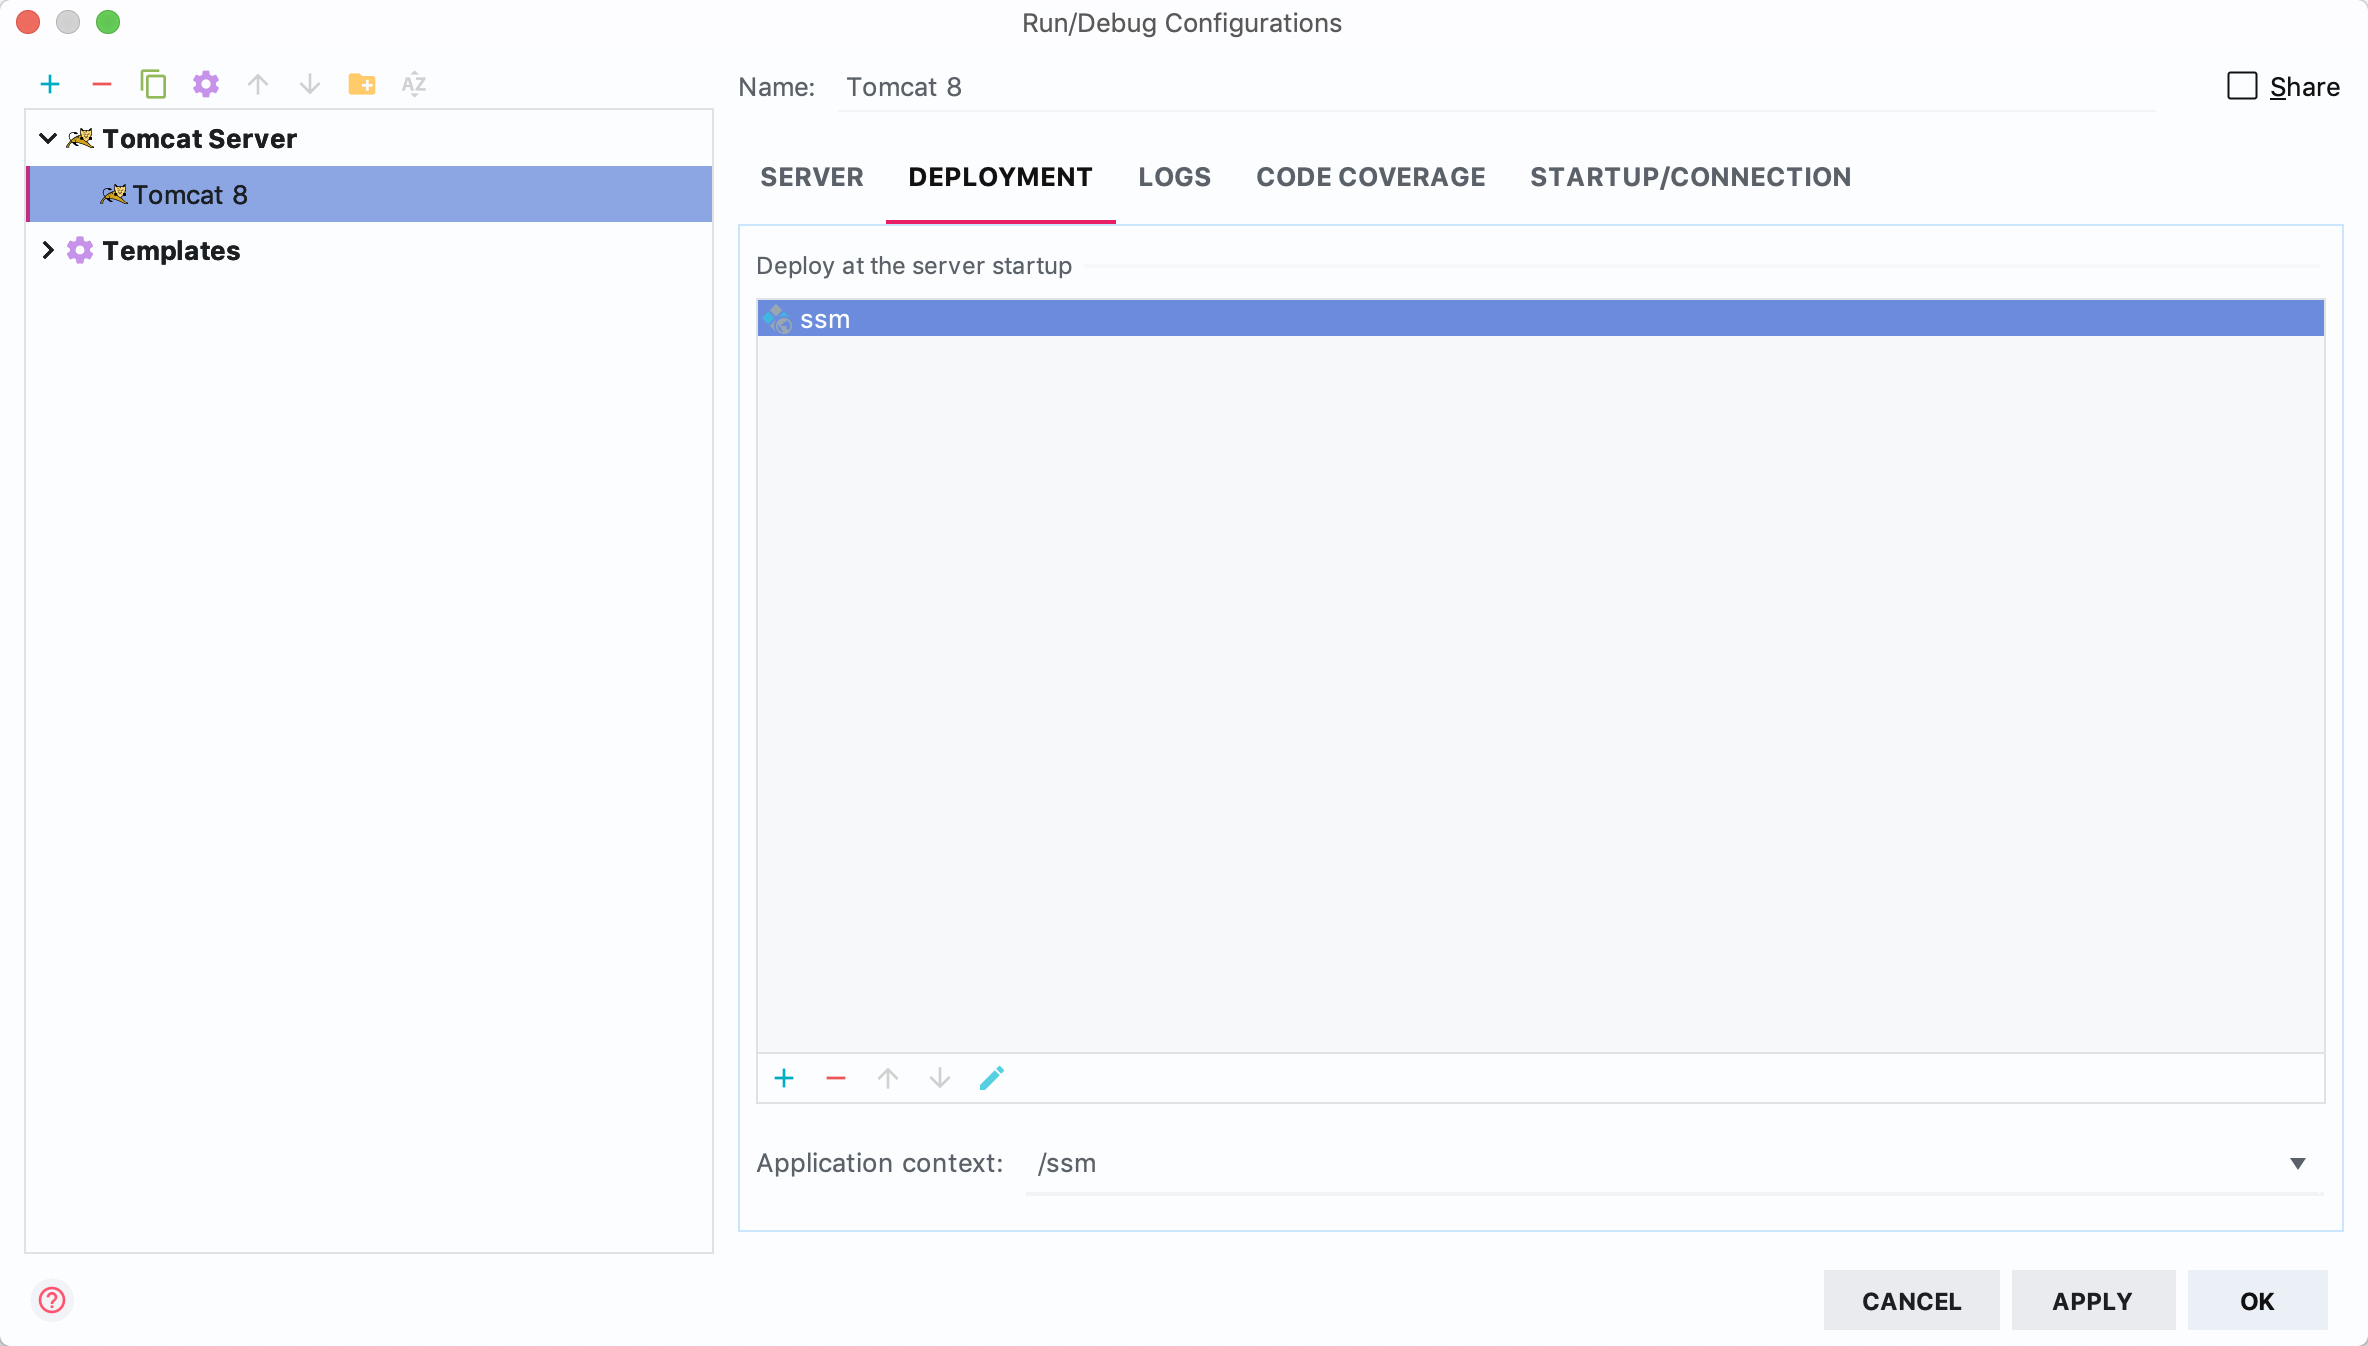
Click to start tomcat, which will cause an error. You need to open File-Project Stucture and delete the ssm that was originally generated.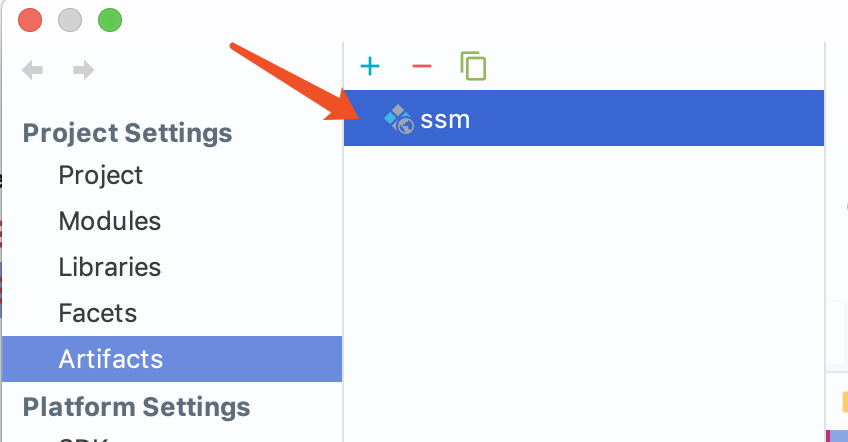
Then regenerate one, and keep the name the same as it used to be.
Select the current ssm

Change the name to be consistent
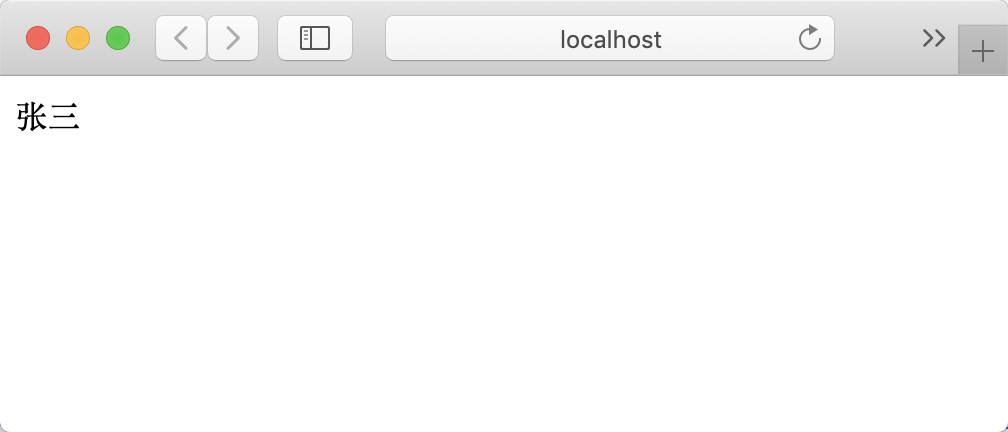
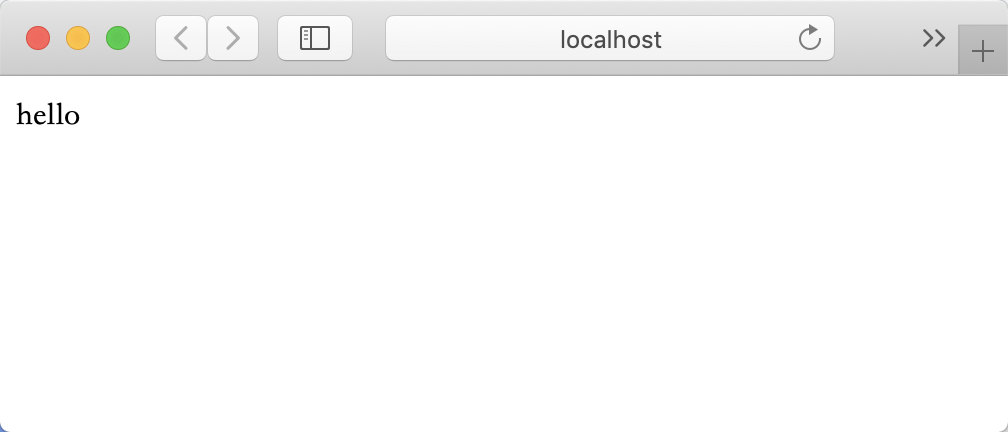
Finally, click tomcat to run and the following page will be displayed successfully.
At this point, spring MVC integration is completed.
2.3 Integration of mybatis
First, add a pom dependency
<!--mysql-->
<dependency>
<groupId>mysql</groupId>
<artifactId>mysql-connector-java</artifactId>
<version>5.1.46</version>
</dependency>
<!--mybatis-->
<dependency>
<groupId>org.mybatis</groupId>
<artifactId>mybatis</artifactId>
<version>3.2.8</version>
</dependency>
<!--spring and mybatis Integration-->
<dependency>
<groupId>org.mybatis</groupId>
<artifactId>mybatis-spring</artifactId>
<version>1.3.1</version>
</dependency>
<!--spring and jdbc Integration-->
<dependency>
<groupId>org.springframework</groupId>
<artifactId>spring-jdbc</artifactId>
<version>4.3.17.RELEASE</version>
</dependency>
<!--Database connection pool-->
<dependency>
<groupId>commons-dbcp</groupId>
<artifactId>commons-dbcp</artifactId>
<version>1.4</version>
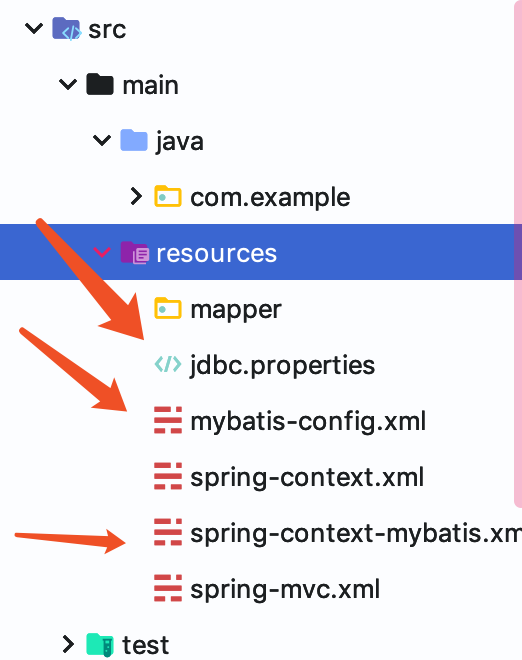
</dependency>Then create a dao package under the com.example package to store dao and domain to store mapping entities; create a mapper directory under the resources folder
Then add jdbc. properties, mybatis. xml, spring-context-mybatis. XML file
The contents of each document are as follows:
jdbc.properties
# JDBC
# MySQL 8.x: com.mysql.cj.jdbc.Driver
jdbc.driverClass=com.mysql.jdbc.Driver
#jdbc.driverClass=com.mysql.cj.jdbc.Driver
jdbc.connectionURL=jdbc:mysql://127.0.0.1:3306/test?useUnicode=true&characterEncoding=utf-8&useSSL=false
jdbc.username=root
jdbc.password=123456

# JDBC Pool
jdbc.pool.init=1
jdbc.pool.minIdle=3
jdbc.pool.maxActive=20
mybatis-config.xml
<?xml version="1.0" encoding="UTF-8"?>
<!DOCTYPE configuration PUBLIC "-//mybatis.org//DTD Config 3.0//EN" "http://mybatis.org/dtd/mybatis-3-config.dtd">
<configuration>
    <! - Global parameters - >
    <settings>
        <! - Print SQL statements - >.
        <setting name="logImpl" value="STDOUT_LOGGING" />

        <! -- Enables or disables caching for global mappers. >
        <setting name="cacheEnabled" value="false"/>

        <! - Enables or disables lazy loading globally. When disabled, all associated objects are loaded immediately. >
        <setting name="lazyLoadingEnabled" value="true"/>

        <! -- When enabled, objects with delayed loading properties will load arbitrary properties completely when called. Otherwise, each attribute will be loaded as needed. >
        <setting name="aggressiveLazyLoading" value="true"/>

        <! -- Whether a single SQL is allowed to return multiple data sets (depending on driver compatibility) default: true - >
        <setting name="multipleResultSetsEnabled" value="true"/>

        <! -- Whether column aliases can be used (depending on driver compatibility) defau lt: true - >
        <setting name="useColumnLabel" value="true"/>

        <! -- Allows JDBC to generate primary keys. Driver support is required. If set to true, this setting forces the generated primary key to be used, and some drives are incompatible but still executable. Defau lt: false - >
        <setting name="useGeneratedKeys" value="false"/>

        <! - Specifies how MyBatis automatically maps the column NONE of the data base table: not PARTIAL: partial FULL: all - >.
        <setting name="autoMappingBehavior" value="PARTIAL"/>

        <! -- This is the defau lt execution type (SIMPLE: Simple; REUSE: Executors may reuse prepared statements; BATCH: Executors can repeat execution statements and batch updates)-->
        <setting name="defaultExecutorType" value="SIMPLE"/>

        <! -- Convert fields using hump nomenclature. >
        <setting name="mapUnderscoreToCamelCase" value="true"/>

        <! -- Setting the local cache range session: there will be a shared statement for data: statement range (so there will be no data sharing). defalut: session - >
        <setting name="localCacheScope" value="SESSION"/>

        <! -- When setting JDBC type to null, some drivers need to specify a value, defau lt: OTHER, and no type is required when inserting null value-->
        <setting name="jdbcTypeForNull" value="NULL"/>
    </settings>
</configuration>
spring-context-mybatis.xml
<?xml version="1.0" encoding="UTF-8"?>
<beans xmlns="http://www.springframework.org/schema/beans" xmlns:xsi="http://www.w3.org/2001/XMLSchema-instance"
       xmlns:context="http://www.springframework.org/schema/context"
       xsi:schemaLocation="http://www.springframework.org/schema/beans http://www.springframework.org/schema/beans/spring-beans.xsd http://www.springframework.org/schema/tx http://www.springframework.org/schema/tx/spring-tx.xsd http://www.springframework.org/schema/context http://www.springframework.org/schema/context/spring-context.xsd">

    <!-- Load the configuration properties file -->
    <context:property-placeholder ignore-unresolvable="true" location="classpath:jdbc.properties"/>

    <!-- Data source configuration, Database connection pool -->
    <bean id="dataSource" class="org.apache.commons.dbcp.BasicDataSource" destroy-method="close">
        <!-- The data source driver class is not written. Druidc The default will automatically be based on URL Distinguish DriverClass -->
        <property name="driverClassName" value="${jdbc.driverClass}"/>

        <!-- Basic attributes url,user,password -->
        <property name="url" value="${jdbc.connectionURL}"/>
        <property name="username" value="${jdbc.username}"/>
        <property name="password" value="${jdbc.password}"/>

        <!-- Configuration initialization size, minimum, maximum -->
        <property name="initialSize" value="${jdbc.pool.init}"/>
        <property name="minIdle" value="${jdbc.pool.minIdle}"/>
        <property name="maxActive" value="${jdbc.pool.maxActive}"/>

        <!-- Configuration to get the connection waiting timeout time -->
        <property name="maxWait" value="60000"/>

        <!-- How often is the configuration interval detected to detect idle connections that need to be closed in milliseconds? -->
        <property name="timeBetweenEvictionRunsMillis" value="60000"/>

        <!-- Configure the minimum lifetime of a connection in the pool in milliseconds -->
        <property name="minEvictableIdleTimeMillis" value="300000"/>
    </bean>

    <!-- To configure SqlSession -->
    <bean id="sqlSessionFactory" class="org.mybatis.spring.SqlSessionFactoryBean">
        <property name="dataSource" ref="dataSource"/>
        <!-- Used to configure the package where the corresponding entity class is located, multiple package Between can be used ',' Number Division -->
        <property name="typeAliasesPackage" value="com.example.domain"/>
        <!-- The directory used to configure the object-relational mapping configuration file -->
        <property name="mapperLocations" value="classpath:/mapper/*.xml"/>
        <!--mybatis To configure-->
        <property name="configLocation" value="classpath:/mybatis-config.xml"/>
    </bean>

    <!-- scanning Mapper -->
    <bean class="org.mybatis.spring.mapper.MapperScannerConfigurer">
        <property name="basePackage" value="com.example.dao" />
    </bean>
</beans>
Finally, do the mapping between database and entity
Create the UserDao interface under the dao package
package com.example.dao;

import com.example.domain.User;
import org.springframework.stereotype.Repository;

import java.util.List;

@Repository
public interface UserDao {

    /**
     * Query all user information
     * @return
     */
    public List<User> selectAll();

}
Create User classes under the domain package
package com.example.domain;

import java.io.Serializable;

public class User implements Serializable {
    private Long id;
    private String username;
    private String password;

    public Long getId() {
        return id;
    }

    public void setId(Long id) {
        this.id = id;
    }

    public String getUsername() {
        return username;
    }

    public void setUsername(String username) {
        this.username = username;
    }

    public String getPassword() {
        return password;
    }

    public void setPassword(String password) {
        this.password = password;
    }
}
Create UserMapper.xml in the mapper directory
<?xml version="1.0" encoding="UTF-8" ?>
<!DOCTYPE mapper PUBLIC "-//mybatis.org//DTD Mapper 3.0//EN" "http://mybatis.org/dtd/mybatis-3-mapper.dtd">
<mapper namespace="com.example.dao.UserDao">
    <select id="selectAll" resultType="User">
        SELECT
          a.id,
          a.username,
          a.password
        FROM
          user AS a
    </select>
</mapper>
So far, mybatis has been completed, and the next step is to use mybatis.
First, modify HelloController
package com.example.controller;

import com.example.dao.UserDao;
import org.springframework.beans.factory.annotation.Autowired;
import org.springframework.stereotype.Controller;
import org.springframework.ui.Model;
import org.springframework.web.bind.annotation.RequestMapping;

@Controller
public class HelloController {

    @Autowired
    UserDao userDao;

    @RequestMapping("")
    public String index(Model model){
        String username = userDao.selectAll().get(0).getUsername();
        model.addAttribute("name",username);
        return "index";
    }

}
Next, modify the index.jsp file
<%@ page language="java" contentType="text/html; charset=UTF-8" pageEncoding="UTF-8"%>
<html>
<head>
    <meta charset=utf-8">
    <title>First JSP program</title>
</head>
<body>
${name}
</body>
</html>
Finally, run tomcat to display the following page successfully