Aim: To simulate cluster building on a computer
To make the cluster work properly, we need at least three master nodes. Here we need to create six redis nodes, three of which are master nodes and three are slave nodes. The corresponding ip and port relationships of redis nodes are as follows.
127.0.0.1:7000
127.0.0.1:7001
127.0.0.1:7002
127.0.0.1:7003
127.0.0.1:7004
127.0.0.1:7005
1. Pre-installation and configuration work
[root@localhost src]# cd /tmp
[root@localhost tmp]# wget https://github.com/antirez/redis/archive/3.0.0-rc2.tar.gz

[root@localhost tmp]# tar -zxvf 3.0.0-rc2.tar.gz redis3
[root@localhost tmp]# mv redis3 /usr/local/
[root@localhost tmp]# cd /usr/local/redis3

[root@localhost redis3]# mkdir ../cluster
[root@localhost redis3]# cd ../cluster
[root@localhost cluster]# mkdir 7000 7001 7002 7003 7004 7005
[root@localhost cluster]# cp ../redis3/redis.conf ./7000
[root@localhost cluster]# cp ../redis3/redis.conf ./7001
[root@localhost cluster]# cp ../redis3/redis.conf ./7002
[root@localhost cluster]# cp ../redis3/redis.conf ./7003
[root@localhost cluster]# cp ../redis3/redis.conf ./7004
[root@localhost cluster]# cp ../redis3/redis.conf ./7005

[root@localhost cluster]# cd 7000
[root@localhost 7000]# vim redis.conf

#Modify the following options in turn
port 7000  #Corresponding port number
daemonize yes  #Running in the background
cluster-enabled yes
cluster-config-file nodes-Corresponding port number.conf #It is recommended that host address 127.0.0.1 be bound to the actual IP or LAN address of the host.
appendonly yes
bing 127.0.0.1
2. Because cluster cluster cluster management scripts rely on ruby, install them first
[root@localhost 7000]# cd /usr/local/redis3/src
[root@localhost src]# yum install ruby #(Used to execute redis-trib.rb scripts to create clusters)
[root@localhost src]# yum install rubygems  #rubygems (used to install redis) Installation here does not require re-downloading redis

[root@localhost src]# gem install redis

[root@localhost src]# ./redis-trib.rb  create --replicas 1 127.0.0.1:7000127.0.0.1:7001 127.0.0.1:7002 127.0.0.1:7003 127.0.0.1:7004 127.0.0.1:7005
The default is that the first three are dominant and the last three are subordinate.
By default, data cannot be read from slaves, but once a connection is established, the slaves can read the data by executing the command READONLY once.
3. Entering the Cluster Environment
[root@localhost src]# redis-cli -c -p 7000
4. Cluster operation
Add node
# Suppose I create another 7006 port node

[root@localhost src]# ./redis-trib.rb add-node 127.0.0.1:7006 127.0.0.1:7000

#Note that when adding nodes in this place, there are two nodes behind, new nodes ahead, and existing nodes behind.


#View the newly added nodes
[root@localhost src]#redis-cli -c -p 7000 cluster nodes

#View node information
[root@localhost src]#redis-cli -c -p 7000 cluster info
#perhaps
[root@localhost src]#redis-cli -c -p 7000
127.0.0.1:7000> cluster info


#4.1 Turn this node into a master node, and use redis-trib program to move some hash slots in the cluster into the new node. The new node becomes the real master node.


#Execute the following command to move the hash slot in the cluster
[root@localhost src]#./redis-trib.rb reshard 127.0.0.1:7000
The system will tell us how many hash slots we need to move, 1000 here.

Then you need to specify which node to transfer these hash slots to.
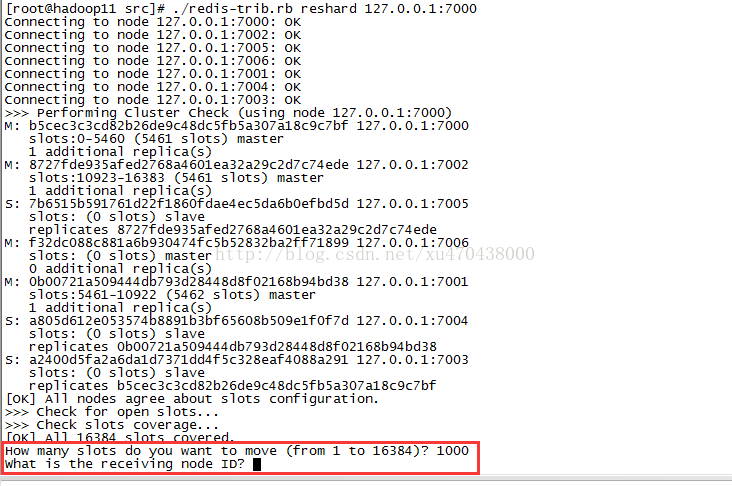
Enter the ID of the node we just added
f32dc088c881a6b930474fc5b52832ba2ff71899
Then we need to specify which hash slots to transfer.
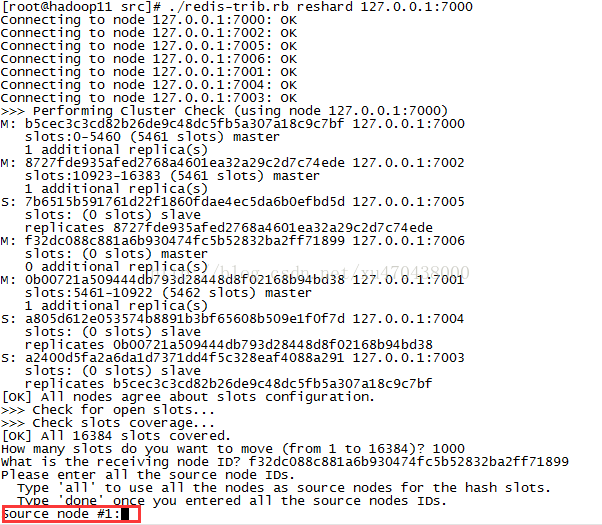
Input all means random transfer from all primary nodes to 1,000 hash slots
Then enter yes, and the redis cluster begins to allocate hash slots.
At this point, a new master node is added, and the command is executed to see the status of the nodes in the current cluster.
| redis-cli -c -p 7000 cluster nodes |

Turn a node into a slave node
[root@localhost src]# redis-cli -c -p 7006 cluster replicate 0b00721a509444db793d28448d8f02168b94bd38
Delete node
1: If the deleted node is the primary node, here we delete 127.0.0.1:7006 nodes, which have 1000 hash slots.
First, move the hash slot in the node to another node, and execute the following command
[root@localhost src]# cd /usr/local/redis3.0/src

[root@localhost src]# ./redis-trib.rb reshard 127.0.0.1:7006
The system will prompt us how many hash slots we need to move. We will move 1000 hash slots here because 127.0.0.1:7006 nodes have 1000 hash slots.
The system then prompts us to enter the ID of the node to receive these hash slots, using the node ID of 127.0.0.1:7001 here.
Then we have to choose which nodes to transfer out of the hash slot. Here we must enter the ID of the node 127.0.0.1:7006, and finally enter done to indicate that the input is complete.
Finally, delete the node using the following command
[root@localhost src]# cd /usr/local/redis3.0/src/
[root@localhost src]# ./redis-trib.rb del-node 127.0.0.1:7006 127.0.0.1:7006
2. If it is a slave node, just delete it directly.
[root@localhost src]# cd /usr/local/redis3.0/src/
[root@localhost src]# ./redis-trib.rb del-node 127.0.0.1:7006 127.0.0.1:7006