1 Introduction
I am a px4 Xiaobai. I don't know a lot about programming. I am a researcher. I am engaged in the theory of flight mechanics and control direction deviation. But my tutor is engaged in the development direction of px4. I don't have to set up a px4 development environment and learn the code during my vacation. I have never contacted linux system before. I checked many blogs and finally installed Ubuntu 16.04 system with vmware virtual machine.
2 necessary knowledge
1) First of all, you need to have a certain understanding of linux system. If you just copy what you don't know from each blogger, it is recommended that you look at the relevant books of linux basic knowledge and learn terminal shell statements.
2) If you are a new ubuntu system, there are two main speeds that determine your git and download. One is the network speed, and the other is the source of the software. Alibaba cloud and Tsinghua are recommended by the source. The network speed depends on your own situation. It is better to use a ladder when git is slow.
3 configuration development environment
3.1 authority setting
sudo usermod -a -G dialout $USER
3.2 installation tool chain and dependency package
All bloggers have explained this, but I always make mistakes in various places, and finally I succeeded in the way of official website.
gedit ubuntu_sim_nuttx.sh
Then copy the following code to a file and save it.
#!/bin/bash

## Bash script for setting up a PX4 development environment on Ubuntu LTS (16.04).
## It can be used for installing simulators (only) or for installing the preconditions for Snapdragon Flight or Raspberry Pi.
##
## Installs:
## - Common dependencies and tools for all targets (including: Ninja build system, Qt Creator, pyulog)
## - FastRTPS and FastCDR
## - jMAVSim simulator dependencies
## - PX4/Firmware source (to ~/src/Firmware/)

# Preventing sudo timeout https://serverfault.com/a/833888
trap "exit" INT TERM; trap "kill 0" EXIT; sudo -v || exit $?; sleep 1; while true; do sleep 60; sudo -nv; done 2>/dev/null &

# Ubuntu Config
echo "We must first remove modemmanager"
sudo apt-get remove modemmanager -y


# Common dependencies
echo "Installing common dependencies"
sudo apt-get update -y
sudo apt-get install git zip qtcreator cmake build-essential genromfs ninja-build exiftool -y
# Required python packages
sudo apt-get install python-argparse python-empy python-toml python-numpy python-dev python-pip -y
sudo -H pip install --upgrade pip
sudo -H pip install pandas jinja2 pyserial pyyaml
# optional python tools
sudo -H pip install pyulog

# Install FastRTPS 1.5.0 and FastCDR-1.0.7
fastrtps_dir=$HOME/eProsima_FastRTPS-1.5.0-Linux
echo "Installing FastRTPS to: $fastrtps_dir"
if [ -d "$fastrtps_dir" ]
then
    echo " FastRTPS already installed."
else
    pushd .
    cd ~
    wget http://www.eprosima.com/index.php/component/ars/repository/eprosima-fast-rtps/eprosima-fast-rtps-1-5-0/eprosima_fastrtps-1-5-0-linux-tar-gz -O eprosima_fastrtps-1-5-0-linux.tar.gz
    tar -xzf eprosima_fastrtps-1-5-0-linux.tar.gz eProsima_FastRTPS-1.5.0-Linux/
    tar -xzf eprosima_fastrtps-1-5-0-linux.tar.gz requiredcomponents
    tar -xzf requiredcomponents/eProsima_FastCDR-1.0.7-Linux.tar.gz
    cpucores=$(( $(lscpu | grep Core.*per.*socket | awk -F: '{print $2}') * $(lscpu | grep Socket\(s\) | awk -F: '{print $2}') ))
    cd eProsima_FastCDR-1.0.7-Linux; ./configure --libdir=/usr/lib; make -j$cpucores; sudo make install
    cd ..
    cd eProsima_FastRTPS-1.5.0-Linux; ./configure --libdir=/usr/lib; make -j$cpucores; sudo make install
    cd ..
    rm -rf requiredcomponents eprosima_fastrtps-1-5-0-linux.tar.gz
    popd
fi

# jMAVSim simulator dependencies
echo "Installing jMAVSim simulator dependencies"
sudo apt-get install ant openjdk-8-jdk openjdk-8-jre -y

# Clone PX4/Firmware
clone_dir=~/src
echo "Cloning PX4 to: $clone_dir."
if [ -d "$clone_dir" ]
then
    echo " Firmware already cloned."
else
    mkdir -p $clone_dir
    cd $clone_dir
    git clone https://github.com/PX4/Firmware.git
fi
Then run it in the terminal
source ubuntu_sim_common_deps.sh
So that all the tools are installed.
4 compile source code
4.1 source code download
mkdir -p ~/src
cd ~/src
git clone https://github.com/PX4/Firmware.git
Note: here, mkdir-p ~ / src is to create a new src folder. The last command of the code in the tool chain is to jump into src/Firmware. If the folder is not established in advance, an error may be reported at last, but the result will not be affected. The source code download and the download of the dependent tool chain are not in the same order.
4.2 hardware board compilation based on NuttX / Pixhawk
pixhawk can be operated as follows
cd Firmware
make px4fmu-v2_default
Various versions can be compiled here:
The following list shows the build commands for common boards:
Pixhawk 4: make px4fmu-v5_default
Pixracer: make px4fmu-v4_default
Pixhawk 3 Pro: make px4fmu-v4pro_default
Pixhawk Mini: make px4fmu-v3_default
Pixhawk 2: make px4fmu-v3_default
mRo Pixhawk: (make px4fmu-v3 [default supports 2MB flash memory)
HKPilot32: make px4fmu-v2_default
Pixfalcon: make px4fmu-v2_default
Dropix's: make px4fmu-v2 "default
MindPX / MindRacer: make mindpx-v2_default
mRo X-2.1: make auav-x21_default
Crazyflie 2.0: make crazyflie_default
Intel & amp; 174; aeroprepare to fly drones: make aerofc-v1 [u default]
Fairy Eagle 1: make px4fmu-v2 "default
Attachment:
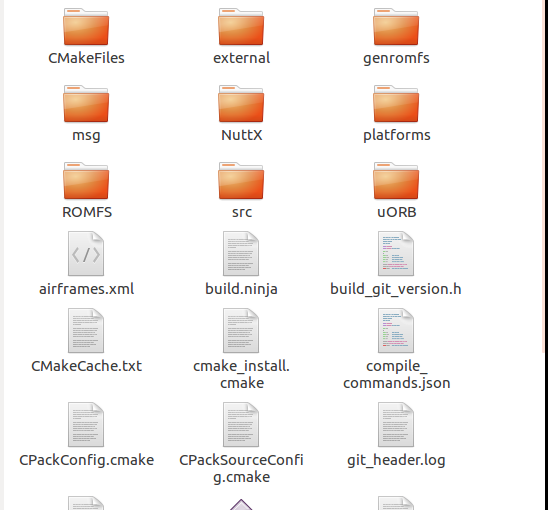
After compiling successfully, a build folder will appear, nuttx ﹣ px4fmu-v5 ﹣ default. After opening:
This is the compilation success.

