For a detailed description of the basic configuration of LVS, please refer to the blog: https://blog.51cto.com/14227204/2436891
Case environment: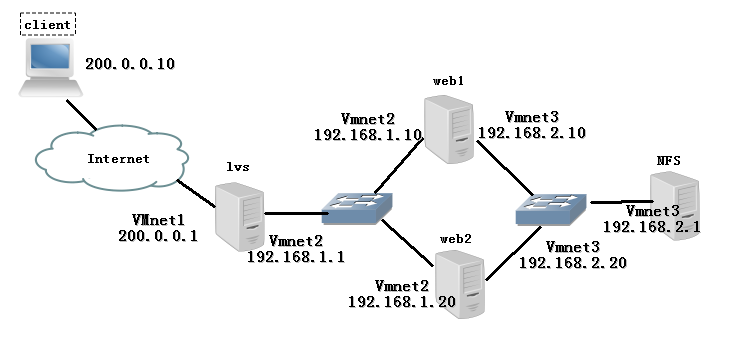
The results are as follows:
- Using the cluster technology of NAT mode, LVS load dispatcher is the gateway server for all nodes to access the Internet, and its 200.0.0.1 is also the VIP address of the whole cluster.
- Use polling (rr) scheduling algorithm.
- Web 1 and web2 first build web services, prepare different web files for client access, in order to determine that client access LVS server 200.0.0.1, can access two wbe servers.
- After the client test is successful, web1 and web2 can mount the shared directory provided by the NFS server to provide the same web page file for the client.
I. Prepare:
1. First debug the network to interoperability
2. Prepare system mirroring and related software packages to build httpd services and install related tools. For convenience, the installation package in the system image is directly used to build the httpd service.
3. Configuring the firewall policy to release traffic (figure is convenient, I stopped the firewall directly here)
2. Configure the load dispatcher:
Turn on routing forwarding:[root@localhost /]# vim /etc/sysctl.conf ................... // Ellipsis net.ipv4.ip_forward = 1 [root@localhost /]# sysctl -p net.ipv4.ip_forward = 1
Configure the load allocation policy:
[root@localhost /]# modprobe ip_vs                   # Loading ip_vs module
[root@localhost /]# cat /proc/net/ip_vs             # View version information and pop up the following to show that the module has been started
IP Virtual Server version 1.2.1 (size=4096)
Prot LocalAddress:Port Scheduler Flags
-> RemoteAddress:Port Forward Weight ActiveConn InActConn
ipvsadm is a LVS cluster management tool used in load dispatcher. It adds and deletes server nodes by calling ip_vs module, and checks the running status of the cluster (manual installation is required).
[root@localhost /]# yum -y install ipvsadm              # Install ipvsadm
[root@localhost /]# ipvsadm -v                       # View version information
ipvsadm v1.27 2008/5/15 (compiled with popt and IPVS v1.2.1)
[root@localhost /]# ipvsadm -C                 # Clean up the original strategy
[root@localhost /]# ipvsadm -A -t 200.0.0.1:80 -s rr
[root@localhost /]# ipvsadm -a -t 200.0.0.1:80 -r 192.168.1.10:80 -m -w 1
[root@localhost /]# ipvsadm -a -t 200.0.0.1:80 -r 192.168.1.20:80 -m -w 1
[root@localhost /]# ipvsadm-save            # Preservation strategy
-A -t localhost.localdomain:http -s rr
-a -t localhost.localdomain:http -r 192.168.1.10:http -m -w 1
-a -t localhost.localdomain:http -r 192.168.1.20:http -m -w 1
[root@localhost /]# systemctl enable ipvsadm.service            # Set to Boot-Up Self-Start
Configure Node Server:
web1 configuration:[root@localhost /]# yum -y install httpd # Install http services [root@localhost /]# echo test1.com > /var/www/html/index.html # Prepare to test web pages [root@localhost /]# systemctl start httpd # Open Services [root@localhost /]# systemctl enable httpd # Start-Up Self-Start
web2 configuration:
[root@localhost /]# yum -y install httpd              # Install http services
[root@localhost /]# echo test2.com > /var/www/html/index.html             # Prepare to test web pages
[root@localhost /]# systemctl start httpd
[root@localhost /]# systemctl enable httpd
Of course, in the actual production environment, the content of the web page is the same. In order to distinguish whether the experiment is successful or not, I wrote two test files with different contents.
Test whether LVS is working: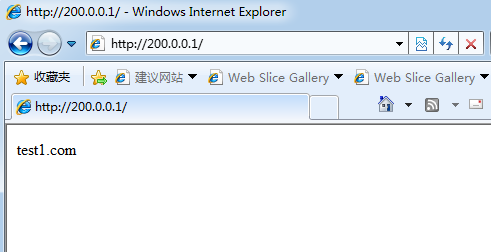
Refresh the page:
3. NFS Shared Storage Service:
Building NFS sharing enables two web servers to mount directories shared by the same NFS server to provide the same web page files.
Install nfs-utils, rpcbind packages:[root@localhost /]# yum -y install nfs-utils rpcbind # Installation package [root@localhost /]# systemctl enable nfs # Set to Boot-Up Self-Start [root@localhost /]# systemctl enable rpcbind
These two software packages I use rpm-qa to check on Centos 7 are there, specifically here I am not very clear whether the system is installed when the self-contained, so when doing, still knock this order, in case, if the big man knows, but also bother to inform younger brother. (Thank you)
Set the shared directory:[root@localhost /]# mkdir -p /opt/wwwroot # Create shared directories [root@localhost /]# vim /etc/exports # Modify NFS master configuration file /opt/wwwroot 192.168.2.0/24(rw,sync,no_root_squash) --rw: Read and write are allowed. ro read-only --sync: Represents synchronous writing --no_root_squash: When the client uses root Localized when accessing identity root Permissions (default is root_squash,Will act as nfsnobody Reduction of user rights) [root@localhost wwwroot]# echo nfs.test.com > index.html # Preparing test files
[root@localhost /]# systemctl restart rpcbind             # Restart service to make configuration effective
[root@localhost /]# systemctl restart nfs
[root@localhost /]# showmount -e                        # View shared directories published locally
Export list for localhost.localdomain:
/opt/wwwroot 192.168.2.0/24
Mount NFS shared directory on two web hosts and configure it to boot automatically
[root@localhost /]# mount 192.168.2.1:/opt/wwwroot /var/www/html/            # Do this on both web hosts
[root@localhost /]# df -hT /var/www/html/                  # Check to see if the mount was successful
Filesystem               Type  Size  Used Avail Use% Mounted on
192.168.2.1:/opt/wwwroot nfs4   50G  4.0G   47G   8% /var/www/html
[root@localhost /]# vim /etc/fstab                          # Set it as boot-up automatic mounting
192.168.2.1:/opt/wwwroot        /var/www/html   nfs     defaults,_netdev 0 0
Test verification:
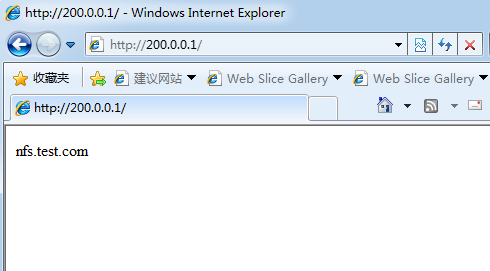
.
We see that the test files written on NFS have been accessed successfully, but they will not change no matter how they are refreshed, which means that LVS load balancing is also successful.
When the LVS server is restarted, the LVS rules will be lost, so backup is used. It should be noted that the host name of backup and recovery must be the same, and the priority of network card should be paid attention to. Otherwise, after recovery, VIP (cluster virtual IP) will be found to be another IP address of LVS server.
[root@localhost /]# ipvsadm-save > /etc/sysconfig/ipvsadm.bak            # Back up one point first
[root@localhost /]# ipvsadm -ln    #    See
IP Virtual Server version 1.2.1 (size=4096)
Prot LocalAddress:Port Scheduler Flags
  -> RemoteAddress:Port           Forward Weight ActiveConn InActConn
[root@localhost /]# ipvsadm-restore <  /etc/sysconfig/ipvsadm.bak            # Recovery strategy
[root@localhost /]# ipvsadm -ln
IP Virtual Server version 1.2.1 (size=4096)
Prot LocalAddress:Port Scheduler Flags
  -> RemoteAddress:Port           Forward Weight ActiveConn InActConn
TCP  200.0.0.1:80 rr                                          # Notice if this is still the original VIP.
  -> 192.168.1.10:80              Masq    1      0          0
  -> 192.168.1.20:80              Masq    1      0          0