1. Environmental preparation
On a linux machine, install the hadoop running environment. For the installation method, see: Establishment of HADOOP operation environment
2. Start HDFS and run MapReduce
2.1. Configure cluster
1. Configuration: hadoop-env.sh
Get the installation path of JDK in Linux system:
[root@ hadoop101 ~]# echo $JAVA_HOME
/opt/module/jdk1.8.0_144
Edit hadoop-env.sh, and modify the JAVA_HOME path in hadoop-env.sh:
export JAVA_HOME=/opt/module/jdk1.8.0_144
2. Configuration: core-site.xml
First of all, the access directory of files cannot stay locally. To use files on HDFS, you need to configure the address of the NameNode of HDFS. So you need to add the following configuration in core-site.xml
<!-- Appoint HDFS in NameNode Address -->
<property>
<name>fs.defaultFS</name>
 <value>hdfs://hadoop101:9000</value>
</property>
<!-- Appoint Hadoop Storage directory where files are generated at run time -->
<property>
 <name>hadoop.tmp.dir</name>
 <value>/opt/module/hadoop-2.7.2/data/tmp</value>
</property>
Note: Hadoop 101 in the address needs to be changed to the IP address or host name of local linux hadoop.tmp.dir can be unconfigured, and HDFS files will be stored in / tmp directory by default
3. Configuration: hdfs-site.xml
Because pseudo distribution has only one node, you need to change the number of HDFS replicas to 1 (the default is 3). You need to add the following configuration in hdfs-site.xm:
<!-- Appoint HDFS Number of copies -->
<property>
 <name>dfs.replication</name>
 <value>1</value>
</property>
2.2 start cluster
1. Format NameNode (format at the first startup, do not always format later)
[root@hadoop101 hadoop-2.7.2]$ bin/hdfs namenode -format
2. Start NameNode
[root@hadoop101 hadoop-2.7.2]# sbin/hadoop-daemon.sh start namenode
starting namenode, logging to /opt/module/hadoop-2.7.2/logs/hadoop-root-namenode-hadoop101.out
[root@hadoop101 hadoop-2.7.2]#
2. Start DataNode
[root@hadoop101 hadoop-2.7.2]# sbin/hadoop-daemon.sh start datanode
starting datanode, logging to /opt/module/hadoop-2.7.2/logs/hadoop-root-datanode-hadoop101.out
[root@hadoop101 hadoop-2.7.2]#
2.3 validation cluster
1. Check whether the startup is successful
Execute the command jps, the result is as shown in the figure below, which indicates that both nameNode and dataNode have been started successfully
[root@hadoop101 hadoop-2.7.2]# jps
5584 DataNode
5671 Jps
5496 NameNode
[root@hadoop101 hadoop-2.7.2]#
2. View the NameNode interface on the webpage
Enter web address in browser: http://hadoop101:50070/, you can log in to the NameNode interface and view the running status and files of the HDFS cluster. Note: the domain name should be changed to your own linux machine domain name or machine IP address. If you can't access it, the firewall may not be off
2.4 operation cluster
After the cluster is started successfully, HDFS can be operated, including creating directory, uploading files, deleting files, and performing MR tasks. Let's test the effect of Mr task on HDFS.
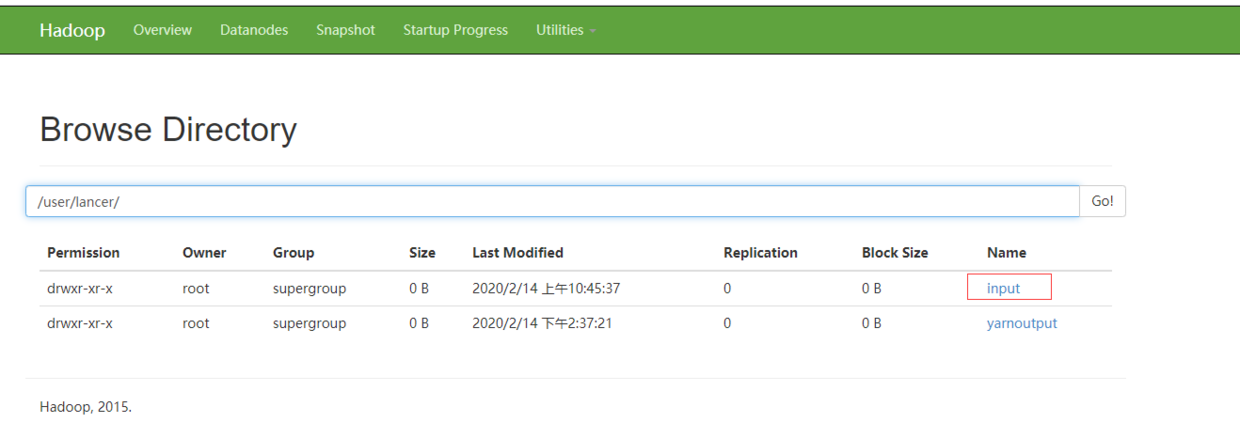
1. Create folder / user/lancer/input on HDFS
[root@hadoop101 hadoop-2.7.2]$ bin/hdfs dfs -mkdir -p /user/lancer/input
Operation result:
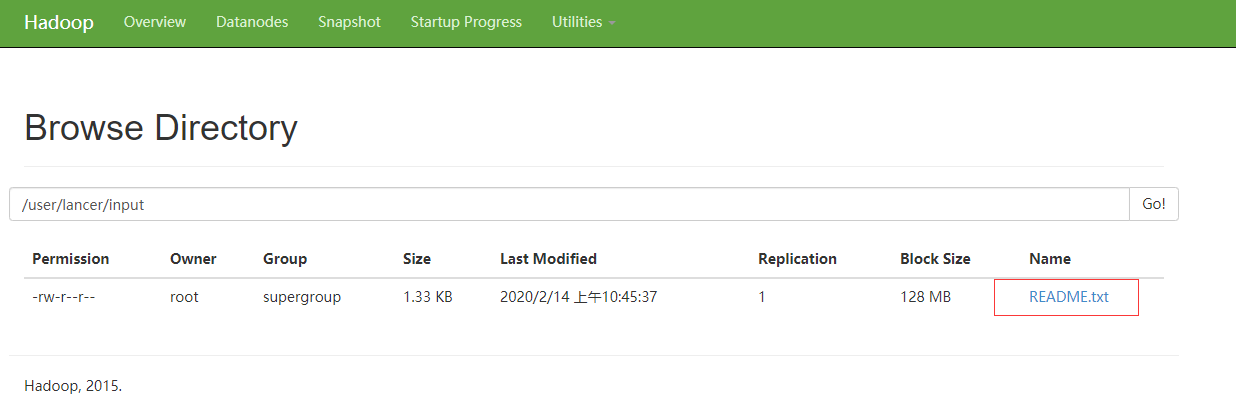
2. Upload the test file to the cluster. Here, you can directly use the README.txt file of Hadoop
[atguigu@hadoop101 hadoop-2.7.2]$bin/hdfs dfs -put README.txt /user/atguigu/input/
Operation result:
3. Run MapReduce program
[root@hadoop101 hadoop-2.7.2]# bin/hadoop jar share/hadoop/mapreduce/hadoop-mapreduce-examples-2.7.2.jar wordcount /user/lancer/input/ /user/lancer/output
The operation results are as follows:
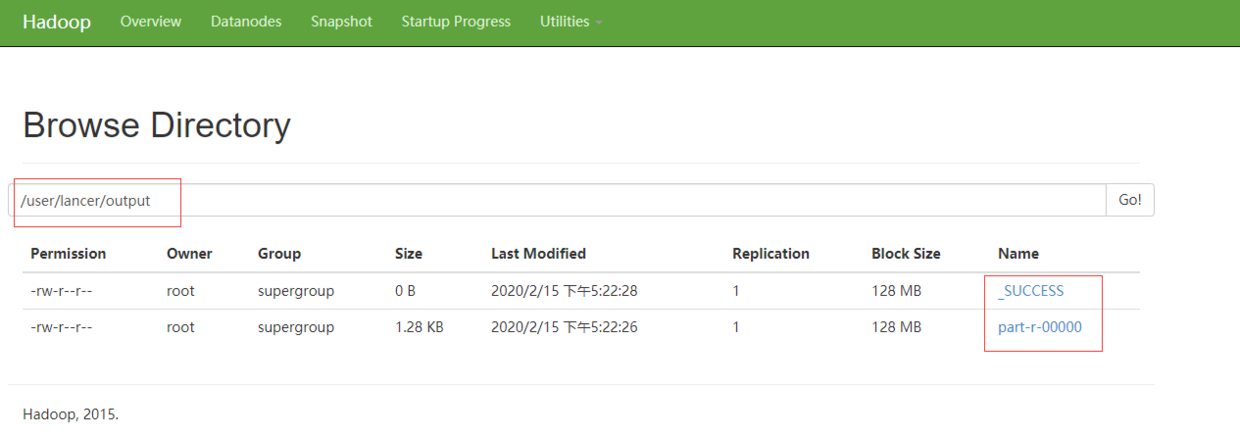
You can download the output file in the browser to view the word count results.
3. Start YARN and run MapReduce program
3.1 configuration cluster
1. Configure yarn env.sh and mapred env.sh
In both files, JAVA_HOME is changed to the path of jdk8. In some files, export JAVA_HOME has been commented out and needs to be uncommented
export JAVA_HOME=/opt/module/jdk1.8.0_144
2. Configure yarn-site.xml
Edit yarn-size.xml and add the following configuration items:
<!-- Reducer How to get data -->
<property>
 		<name>yarn.nodemanager.aux-services</name>
 		<value>mapreduce_shuffle</value>
</property>
<!-- Appoint YARN Of ResourceManager Address -->
<property>
        <name>yarn.resourcemanager.hostname</name>
        <value>hadoop101</value>
</property>
3. Configure mapred-site.xml (you need to rename mapred-site.xml.template to mapred-site.xml)
First rename mapred-site.xml.template to mapred-site.xml
[root@hadoop101 hadoop]$ mv mapred-site.xml.template mapred-site.xml
Then add the following configuration items to mapred-site.xml:
<!-- Appoint MR Run in YARN upper -->
<property>
 <name>mapreduce.framework.name</name>
 <value>yarn</value>
</property>
3.2 start yarn
1. Ensure that NameNode and DataNode have been started before starting
2. Start ResourceManager
[root@hadoop101 hadoop-2.7.2]$ sbin/yarn-daemon.sh start resourcemanager
3. Start NodeManager
[root@hadoop101 hadoop-2.7.2]$ sbin/yarn-daemon.sh start nodemanager
3.3 validation cluster
1. Verify startup success
Execute jps. If the result is as follows, the startup is successful.
[root@hadoop101 hadoop-2.7.2]# jps
5584 DataNode
6913 Jps
6071 ResourceManager
5496 NameNode
6318 NodeManager
[root@hadoop101 hadoop-2.7.2]#
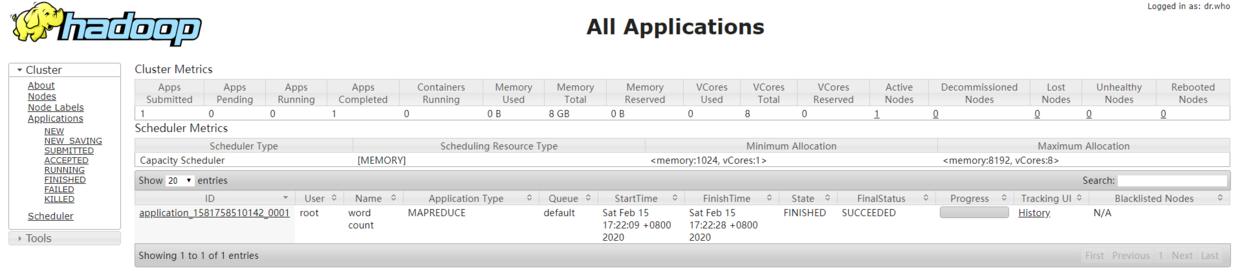
2. View yarn page
Enter web address in browser: http://hadoop101:8088/ , you can log in to the Yarn interface and view the running status of the task.
Note: the domain name should be changed to your own linux machine domain name or machine IP address. If you can't access it, the firewall may not be off
The page is shown as follows:
3.4 cluster operation
- Execute MapReduce program (the method is the same as above)
[root@hadoop101 hadoop-2.7.2]# bin/hadoop jar share/hadoop/mapreduce/hadoop-mapreduce-examples-2.7.2.jar wordcount /user/lancer/input/ /user/lancer/output2
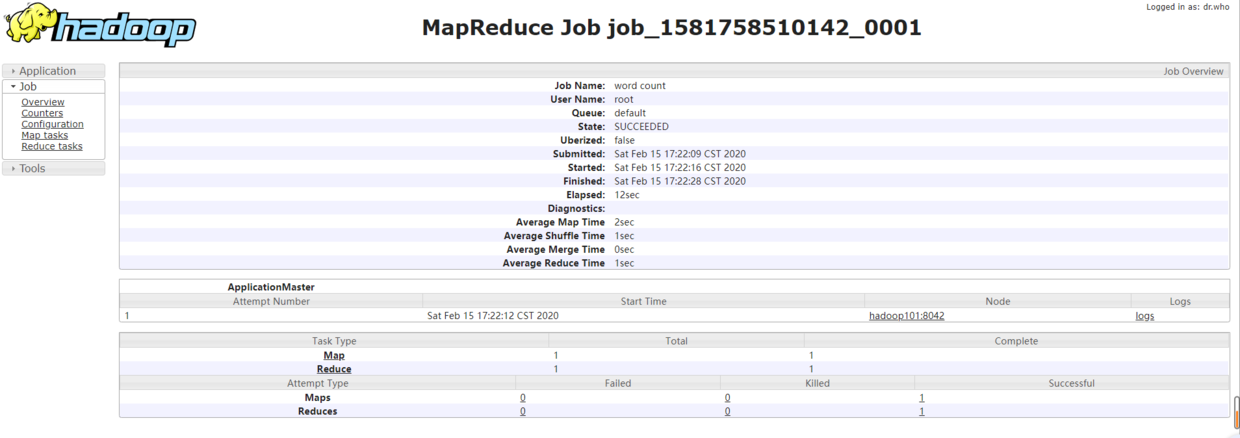
MR program is also executed, but this time it is uniformly deployed by yarn. You can see the task execution progress and task details on the yarn interface, as shown in the following figure:

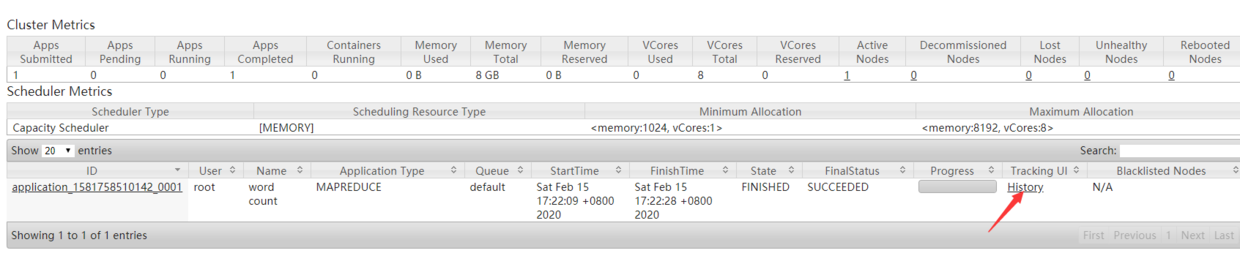
3.5 configure history server
Although you can see the execution status of the task, now when you click the history button, the web page cannot be opened because the history information viewing service has not been started.
1. Configure yarn-site.xml
Add the following configuration items:
<!-- Historical server address -->
<property>
<name>mapreduce.jobhistory.address</name>
<value>hadoop101:10020</value>
</property>
<!-- History server web End address -->
<property>
 <name>mapreduce.jobhistory.webapp.address</name>
 <value>hadoop101:19888</value>
</property>
2. Start the history server
[root@hadoop101 hadoop-2.7.2]$ sbin/mr-jobhistory-daemon.sh start historyserver
3. Check whether the startup is successful
Execute jps. If JobHistoryServer appears, it indicates that the startup is successful
[root@hadoop101 hadoop-2.7.2]# jps
5584 DataNode
7107 JobHistoryServer
6071 ResourceManager
5496 NameNode
7145 Jps
6318 NodeManager
[root@hadoop101 hadoop-2.7.2]#
4. View MR task details